3. Task Groups
The following section will go into detail on how to manage and view Task Groups from a user perspective. It will also explain the other features that are available on the Task Group page.
The Task Group page can be accessed in two ways. As shown in figure 3-1, it is accessible through the View Details link on the main page. The other way is to access it through the View Menu button shown in figure 3-2 and 3-3.
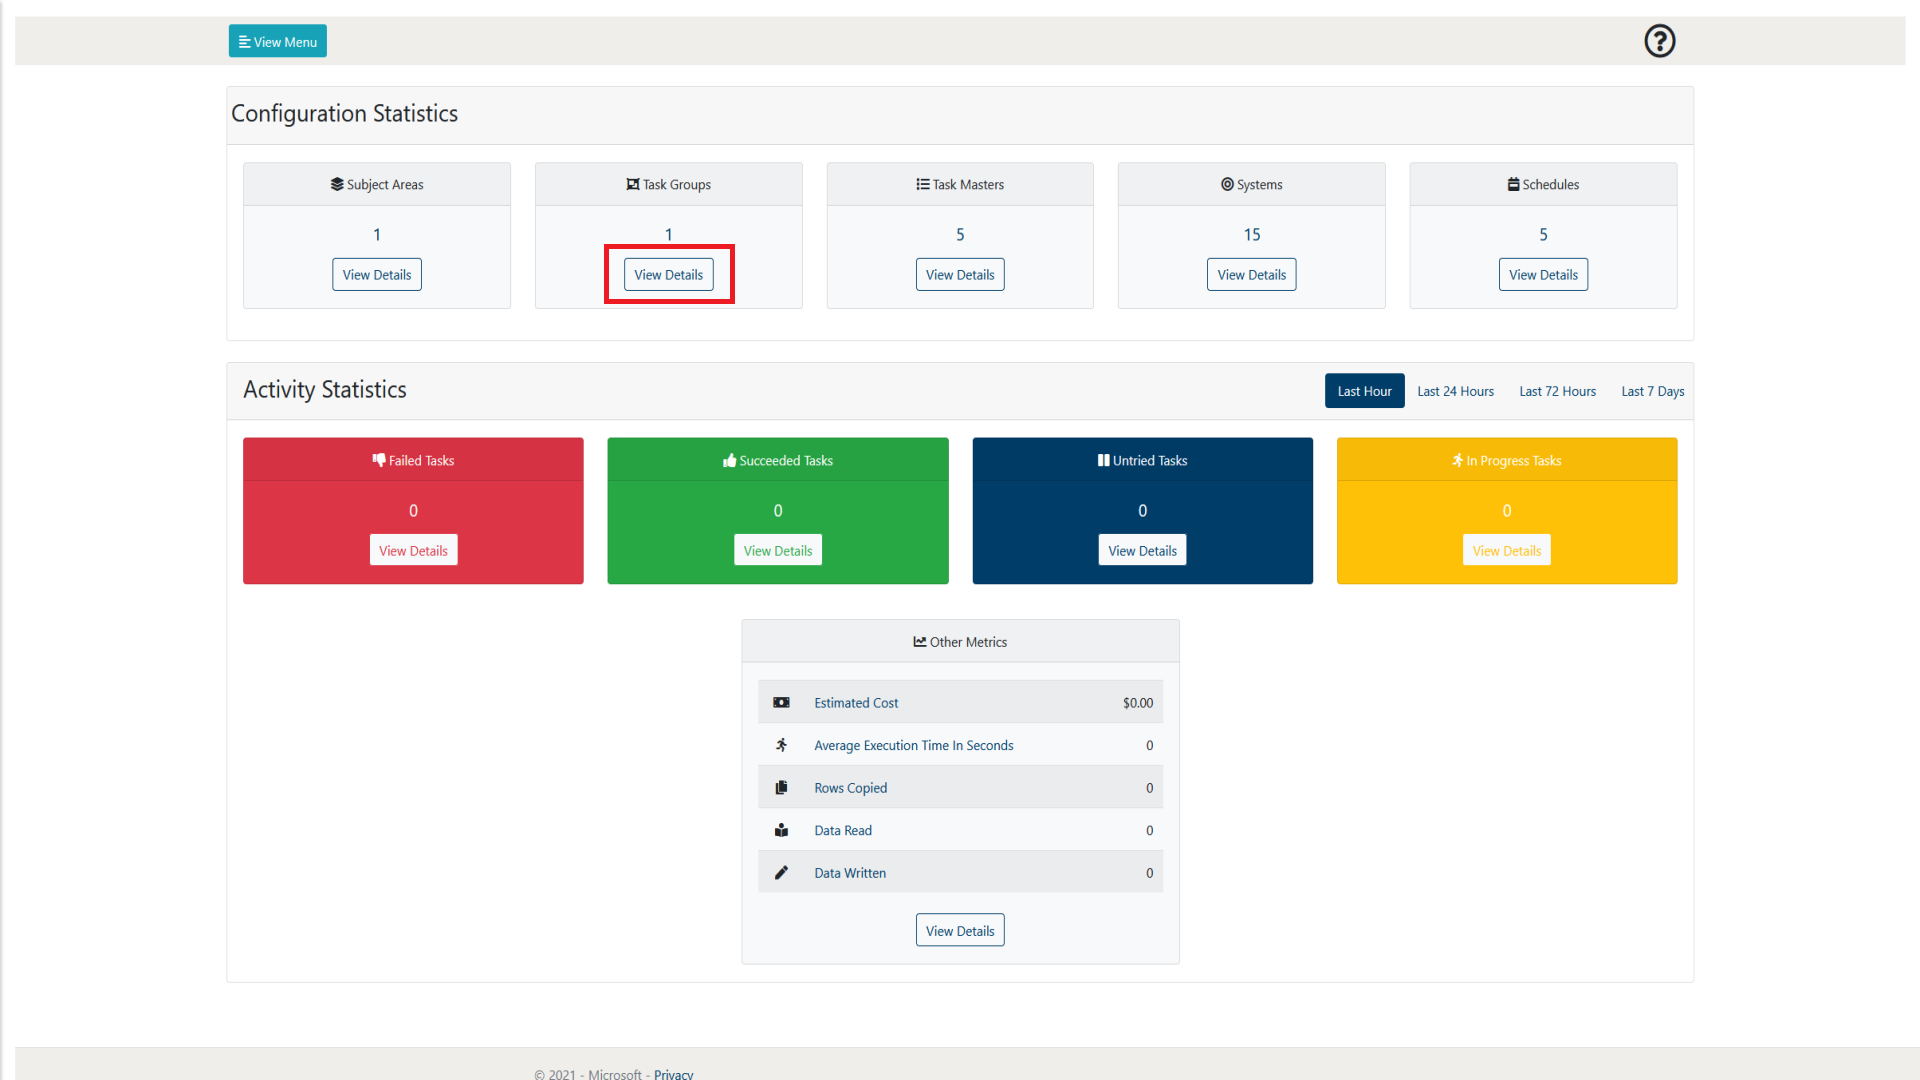
Figure 3-1: LockBox Main Page Task Groups View Details selection

Figure 3-2: LockBox Main Page View Menu selection
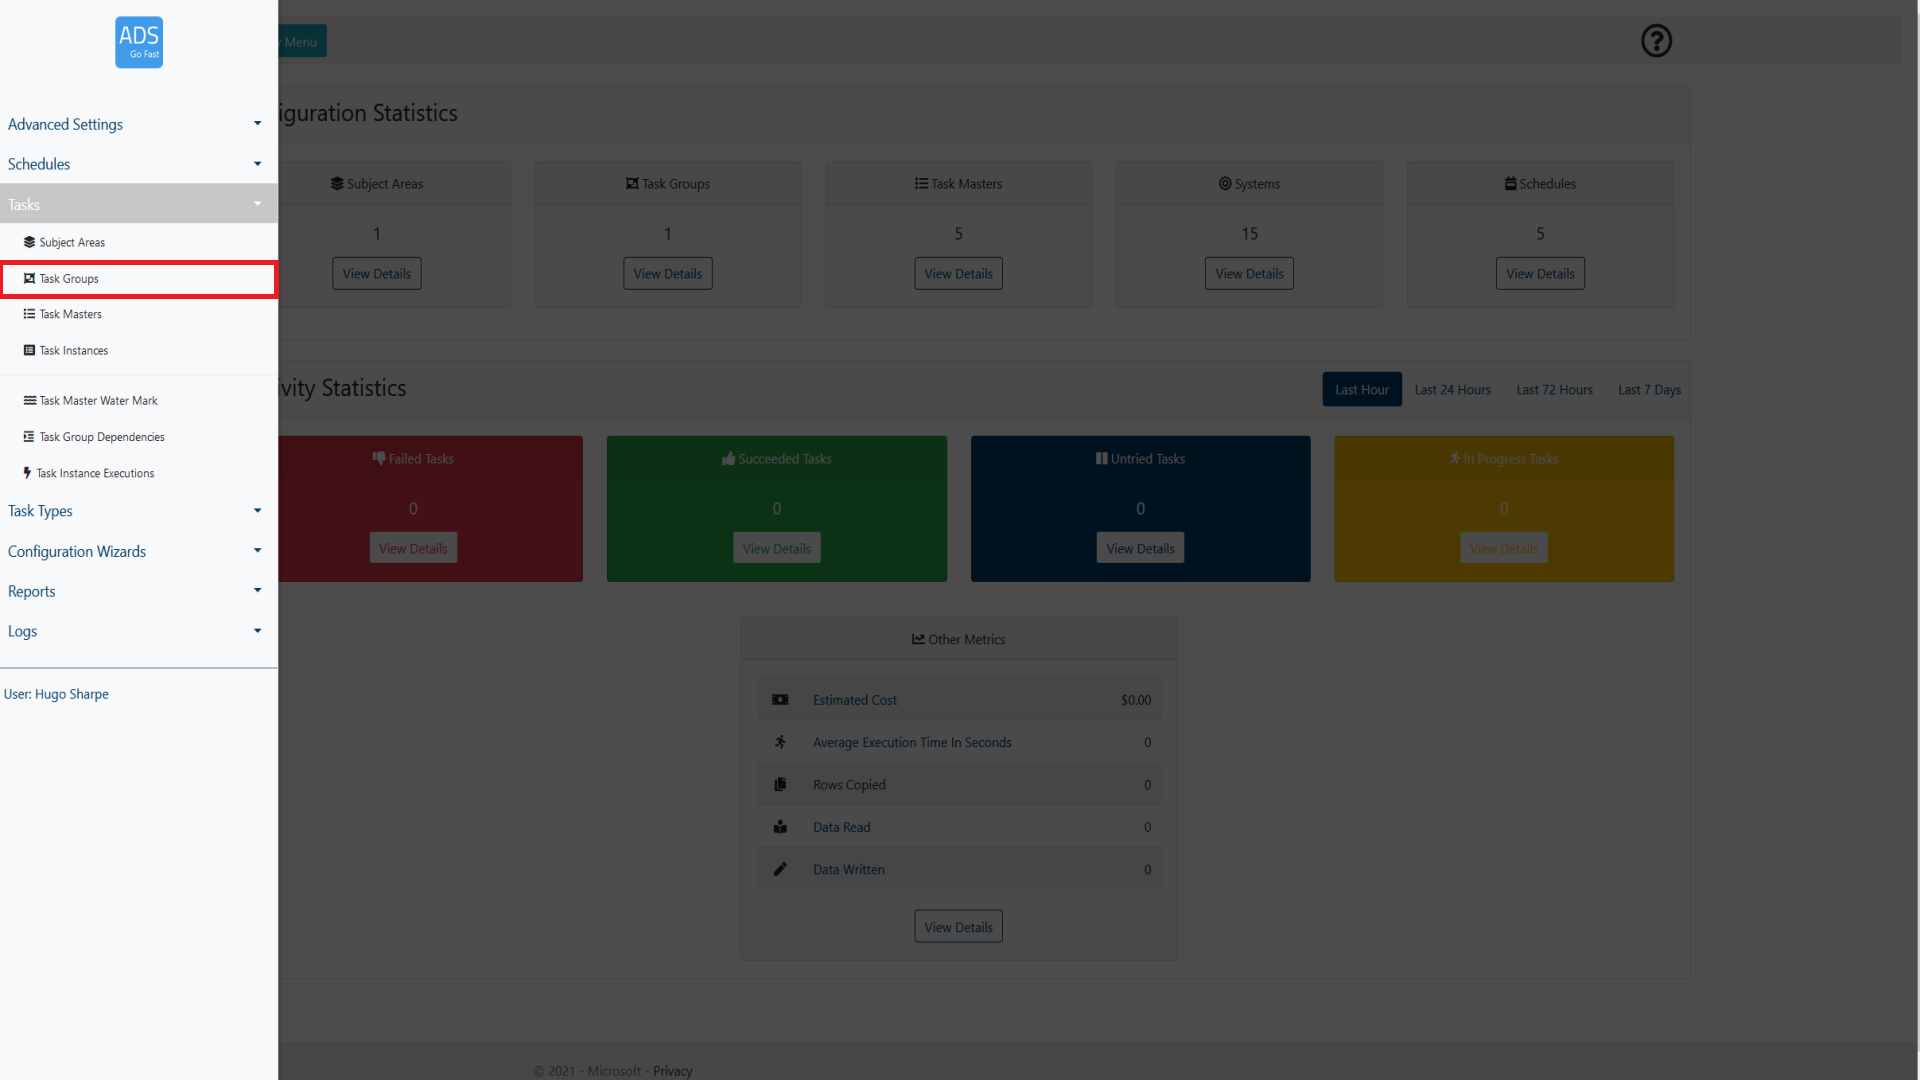
Figure 3-3: ADSGoFast Main Page Task Groups selection
What is a Task Group?
A Task Group can be thought of as a ‘bag' or group of Task Masters. When creating a Task Master, you can assign it to a Task Group. This will allow you to assign overarching properties to every Task Master within that group. For example, a Task Group can be assigned a priority, which will also give a priority to every Task Master within that group.
3.1 Page overview
When browsing the Task Group page, a layout similar to figure 3.1-1 will be shown to you. Following the figure some more details will be provided on what each of these items represent.
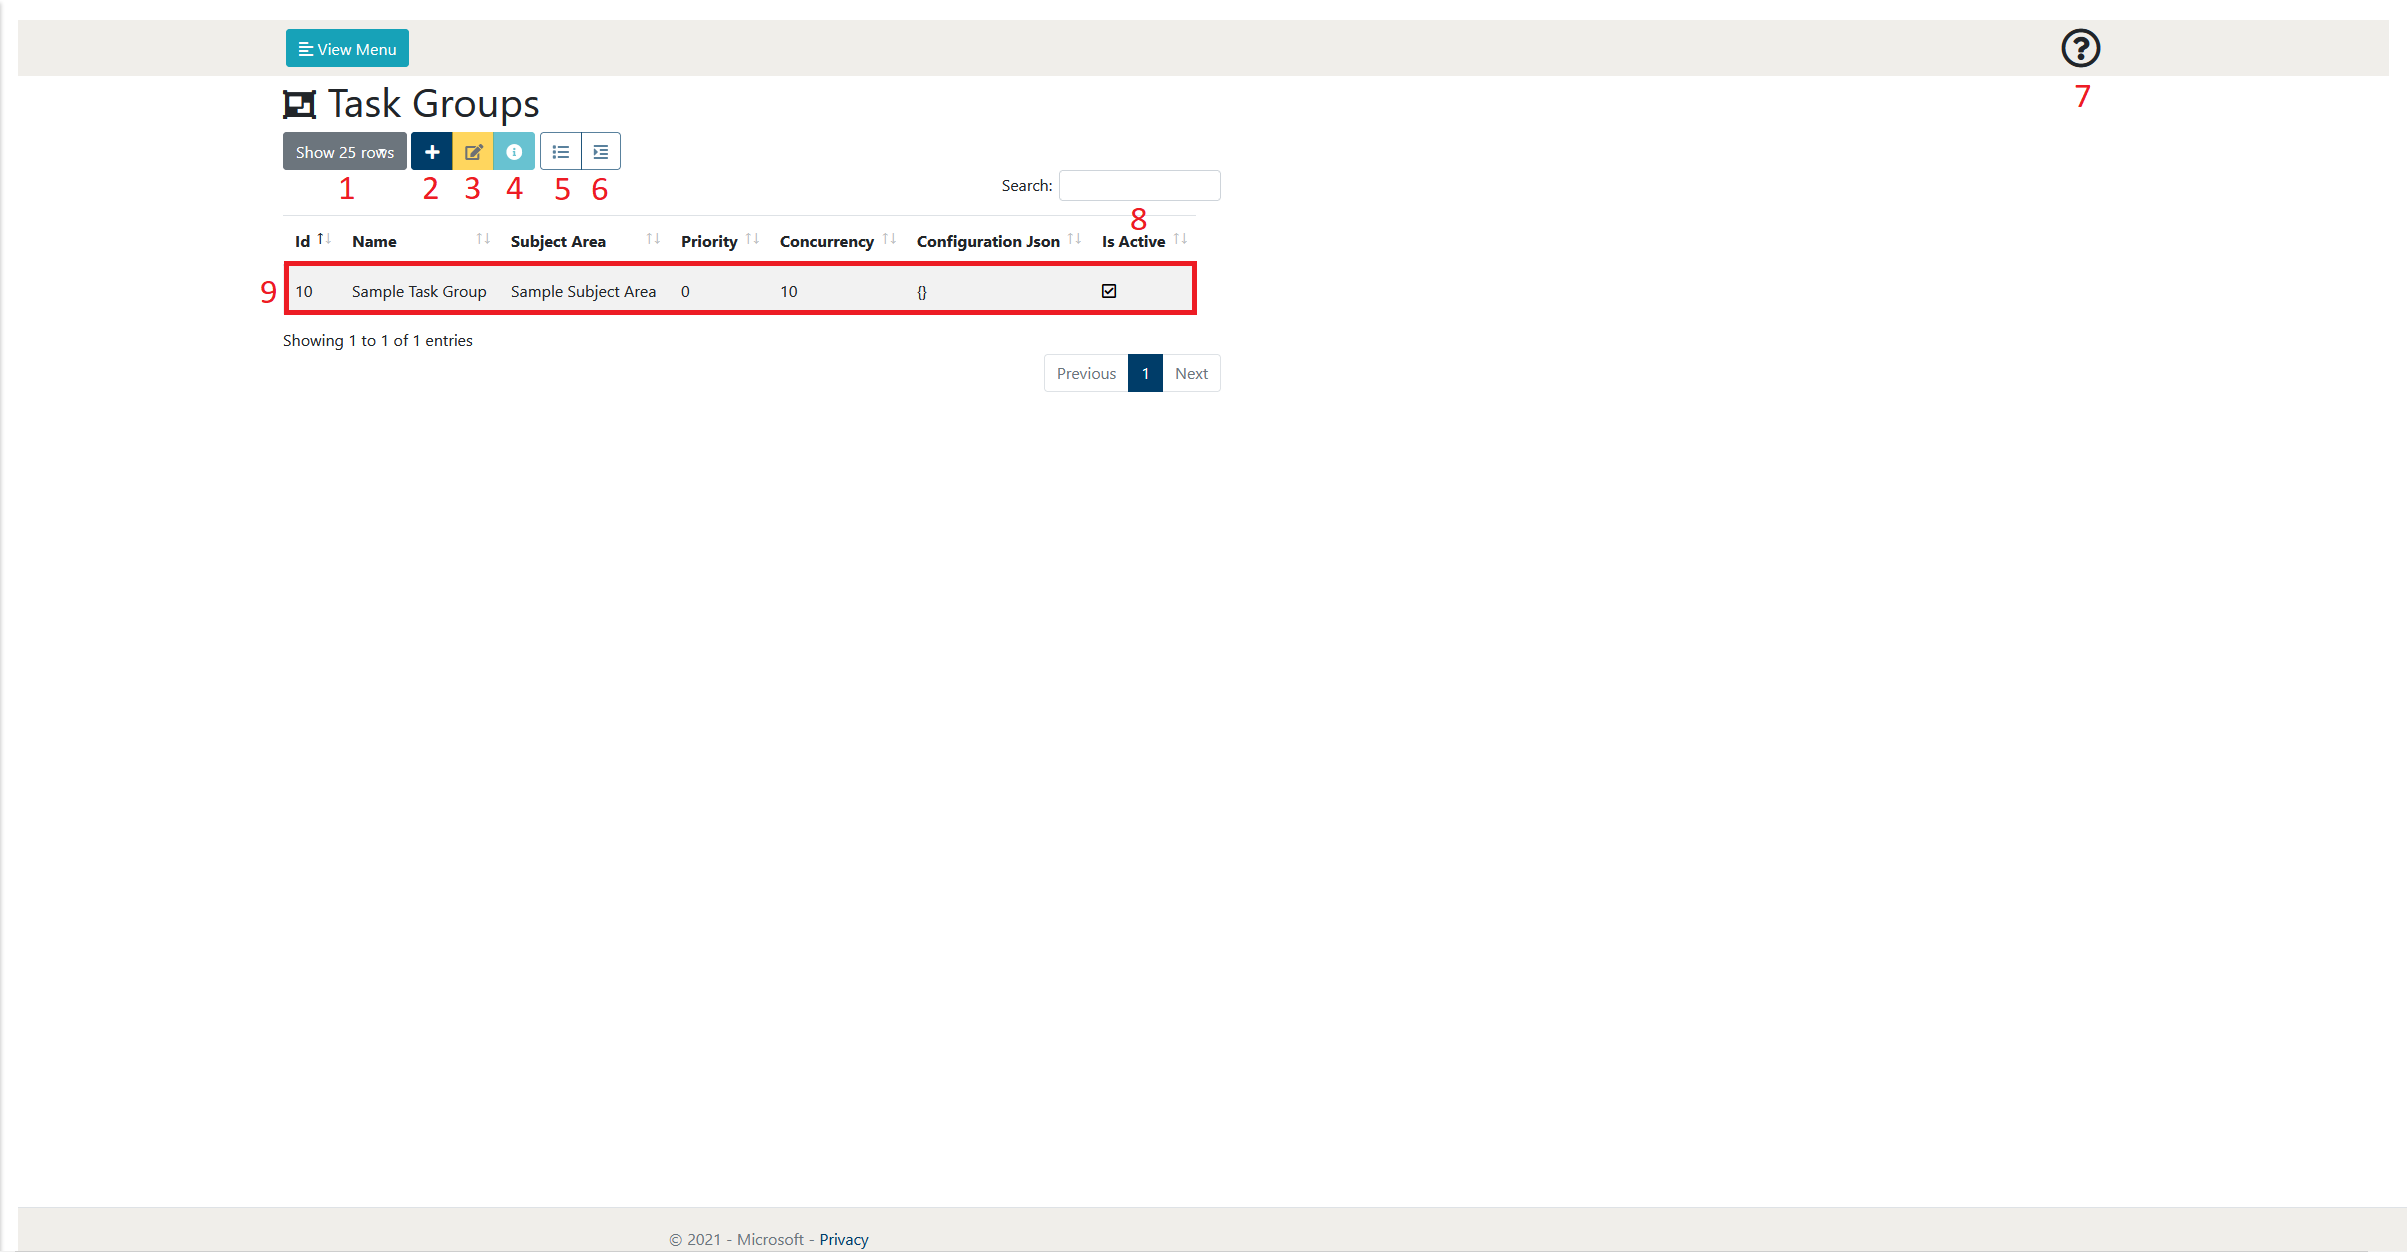
Figure 3.1-1: Task Group page overview
| Number | Object Name | Description |
|---|---|---|
| 1 | Show rows selection | This allows the user to define how many rows of Task Groups they wish to view per page. At the time of writing, the selections available are 10, 25, 50 and 100. As can be seen in figure 3.1-1 at the bottom right of the page there is also a page selection to be able to browse through pages of created Task Groups |
| 2 | Add Item | This allows the user to create a new Task Group. More details of the Task Group creation process can be found in section 3.2.
|
| 3 | Edit Item | This allows the user to edit the currently selected Task Group. This will take them to a new page which holds a form that is prefilled with the details of the selected Task Group. More details of the Task Group creation process can be found in section 3.2. |
| 4 | View Details | This allows the user to view the details of the Task Group in a single page format. This may be preferable if the Task Group Json is detailed.
|
| 5 | View Task Masters | This allows the user to view the Task Masters that are assigned to the selected Task Group.
|
| 6 | View Dependencies | This allows the user mark the Task Instance as complete. This means that no further executions will be attempted and it is viewed as successfully completing its task. It will be noted in the comment of the Task Instance that this was manually updated by the user. |
| 7 | Help | This allows the user to display some help text that gives a summary of the current web page. |
| 8 | Search | This allows the user to search for a Task Groups by name. The Task Groups displayed will only be related to the search term input by the user. |
| 9 | Task Group | This is an example of a created Task Group. A Task group allows the user to assign multiple Task Masters to a single entity. This entity can then be disabled, enabled, given a priority or dependency. More details on Task Groups can be found in section 3.2 and more details on Task Group Dependencies can be found in section 3.3. |
3.2 Creating a Task Group
This section will provide the user with an overview of the Task Group creation process. It will step through each property of the Task Group creation page and give details on what each of the properties do.
To initiate the creation process, we need add a new Task Group, this is done by selecting the ‘Add Item' button. This will then take the user to a new page with a form listing the required parameters to create a new Task Group. This is shown in Figure 3.2-1.
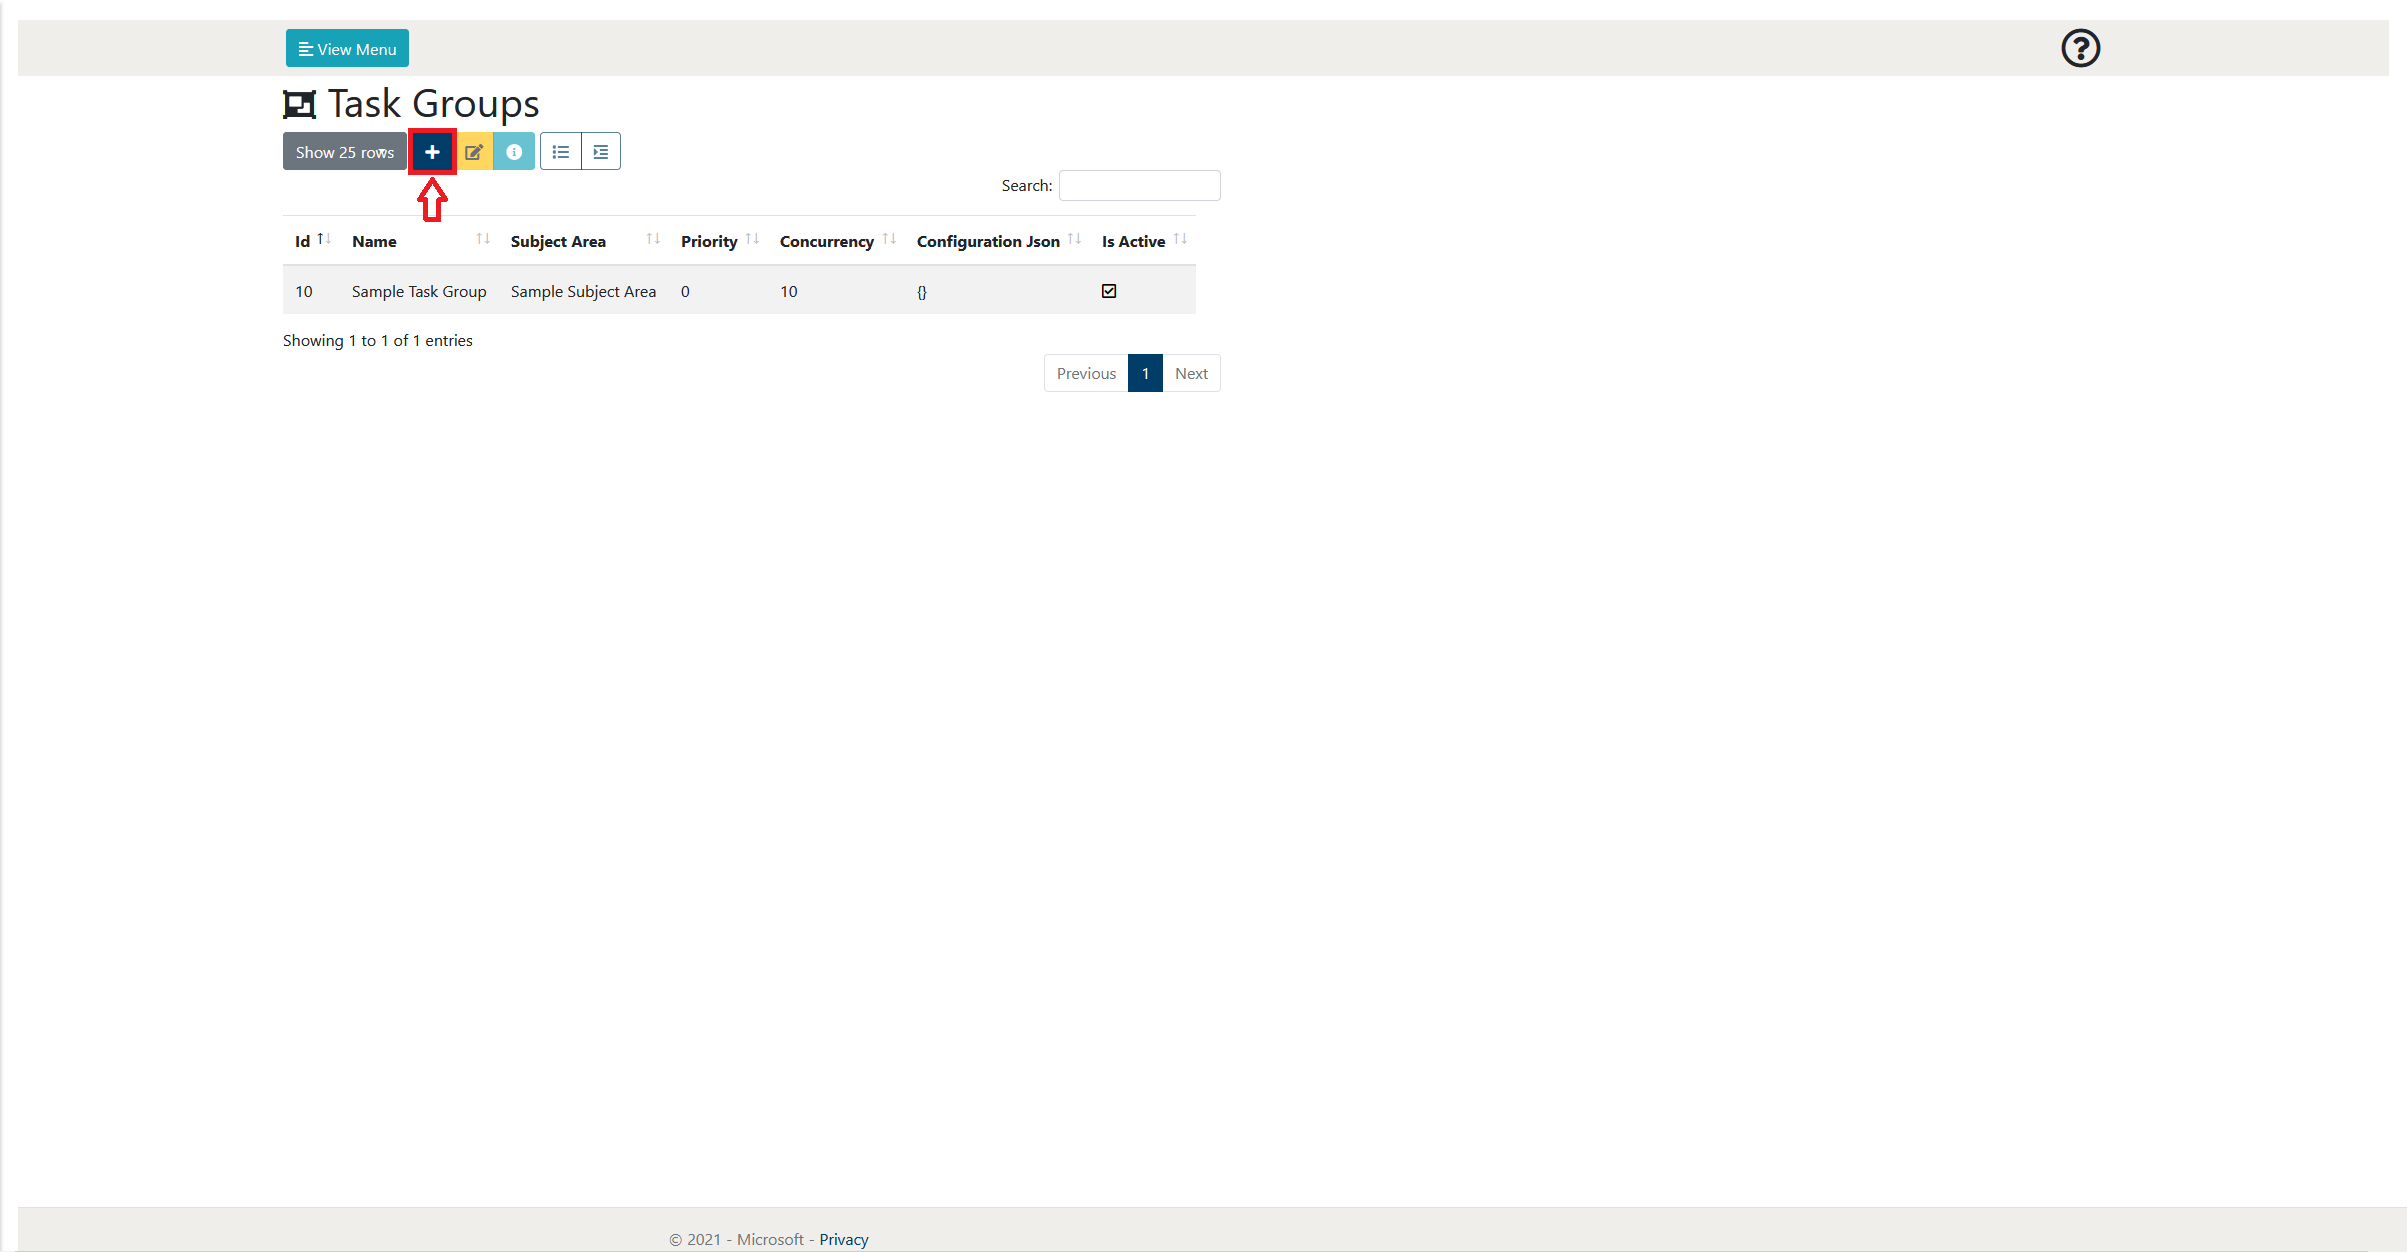
Figure 3.2-1: Task Group page ‘Add Item' button
After doing this, an image similar to Figure 3.2-2 will be visible to the user. Following this figure a table will explain what each of the properties are in detail.
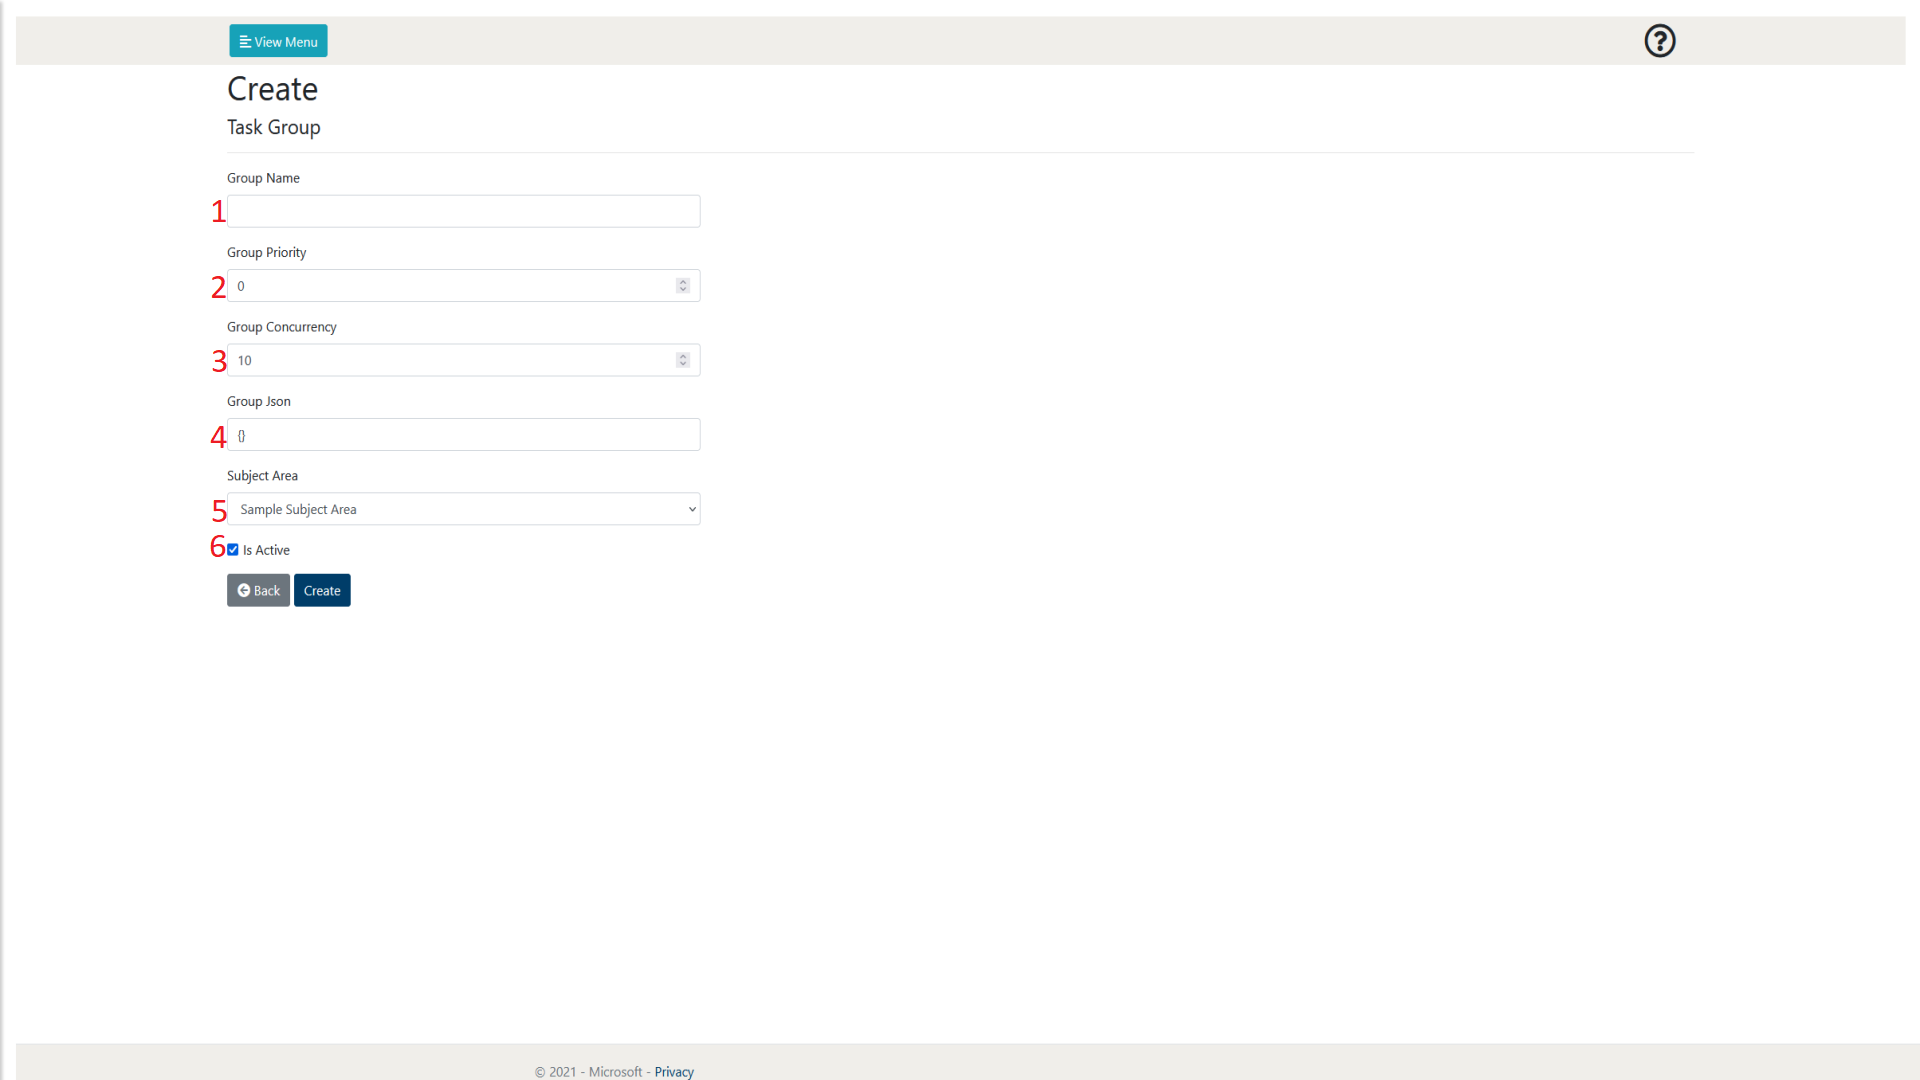
Figure 3.2-2: Task Group Create Page
| Number | Object Name | Input Type | Description |
|---|---|---|---|
| 1 | Group Name | Text | This allows the user to enter the name of the Task Group to be created. |
| 2 | Group Priority | Integer | This allows the user to assign a priority to the Task Group. A lower integer will give the group a higher priority. |
| 3 | Group Concurrency | Integer | This allows the user to assign a Concurrency to the group. More details to be added.
|
| 4 | Group Json | JSON | This is a configuration file alongside the group. If not required, just enter ‘{}'. |
| 5 | Subject Area | Dropdown | This allows the user to assign a Subject Area to the Task Group, allowing for more control over several Task Groups. |
| 8 | Is Active | Checkbox | This allows the user to decide whether the Group will be initially active when it is created. If a Task Group is inactive, all of its subsequent Task Masters will not be active regardless of their individual state. |
After you have filled out the form with the values you are comfortable with, select the ‘Create' button and you will be taken back to the Task Group page with your new Task Group being available to now use.