Events
Once you have configured the resources, you can use the same resources for multiple events. This guide will walk you through the process of setting up events.
Setting up events
From the AI Proxy Admin portal, you can create and manage events. An event is a time bound access to the AI Proxy service.
- Sign into the AI Proxy Admin portal and authenticate using your organization's Entra credentials.
-
Select the
Eventstab, then add a new event.
-
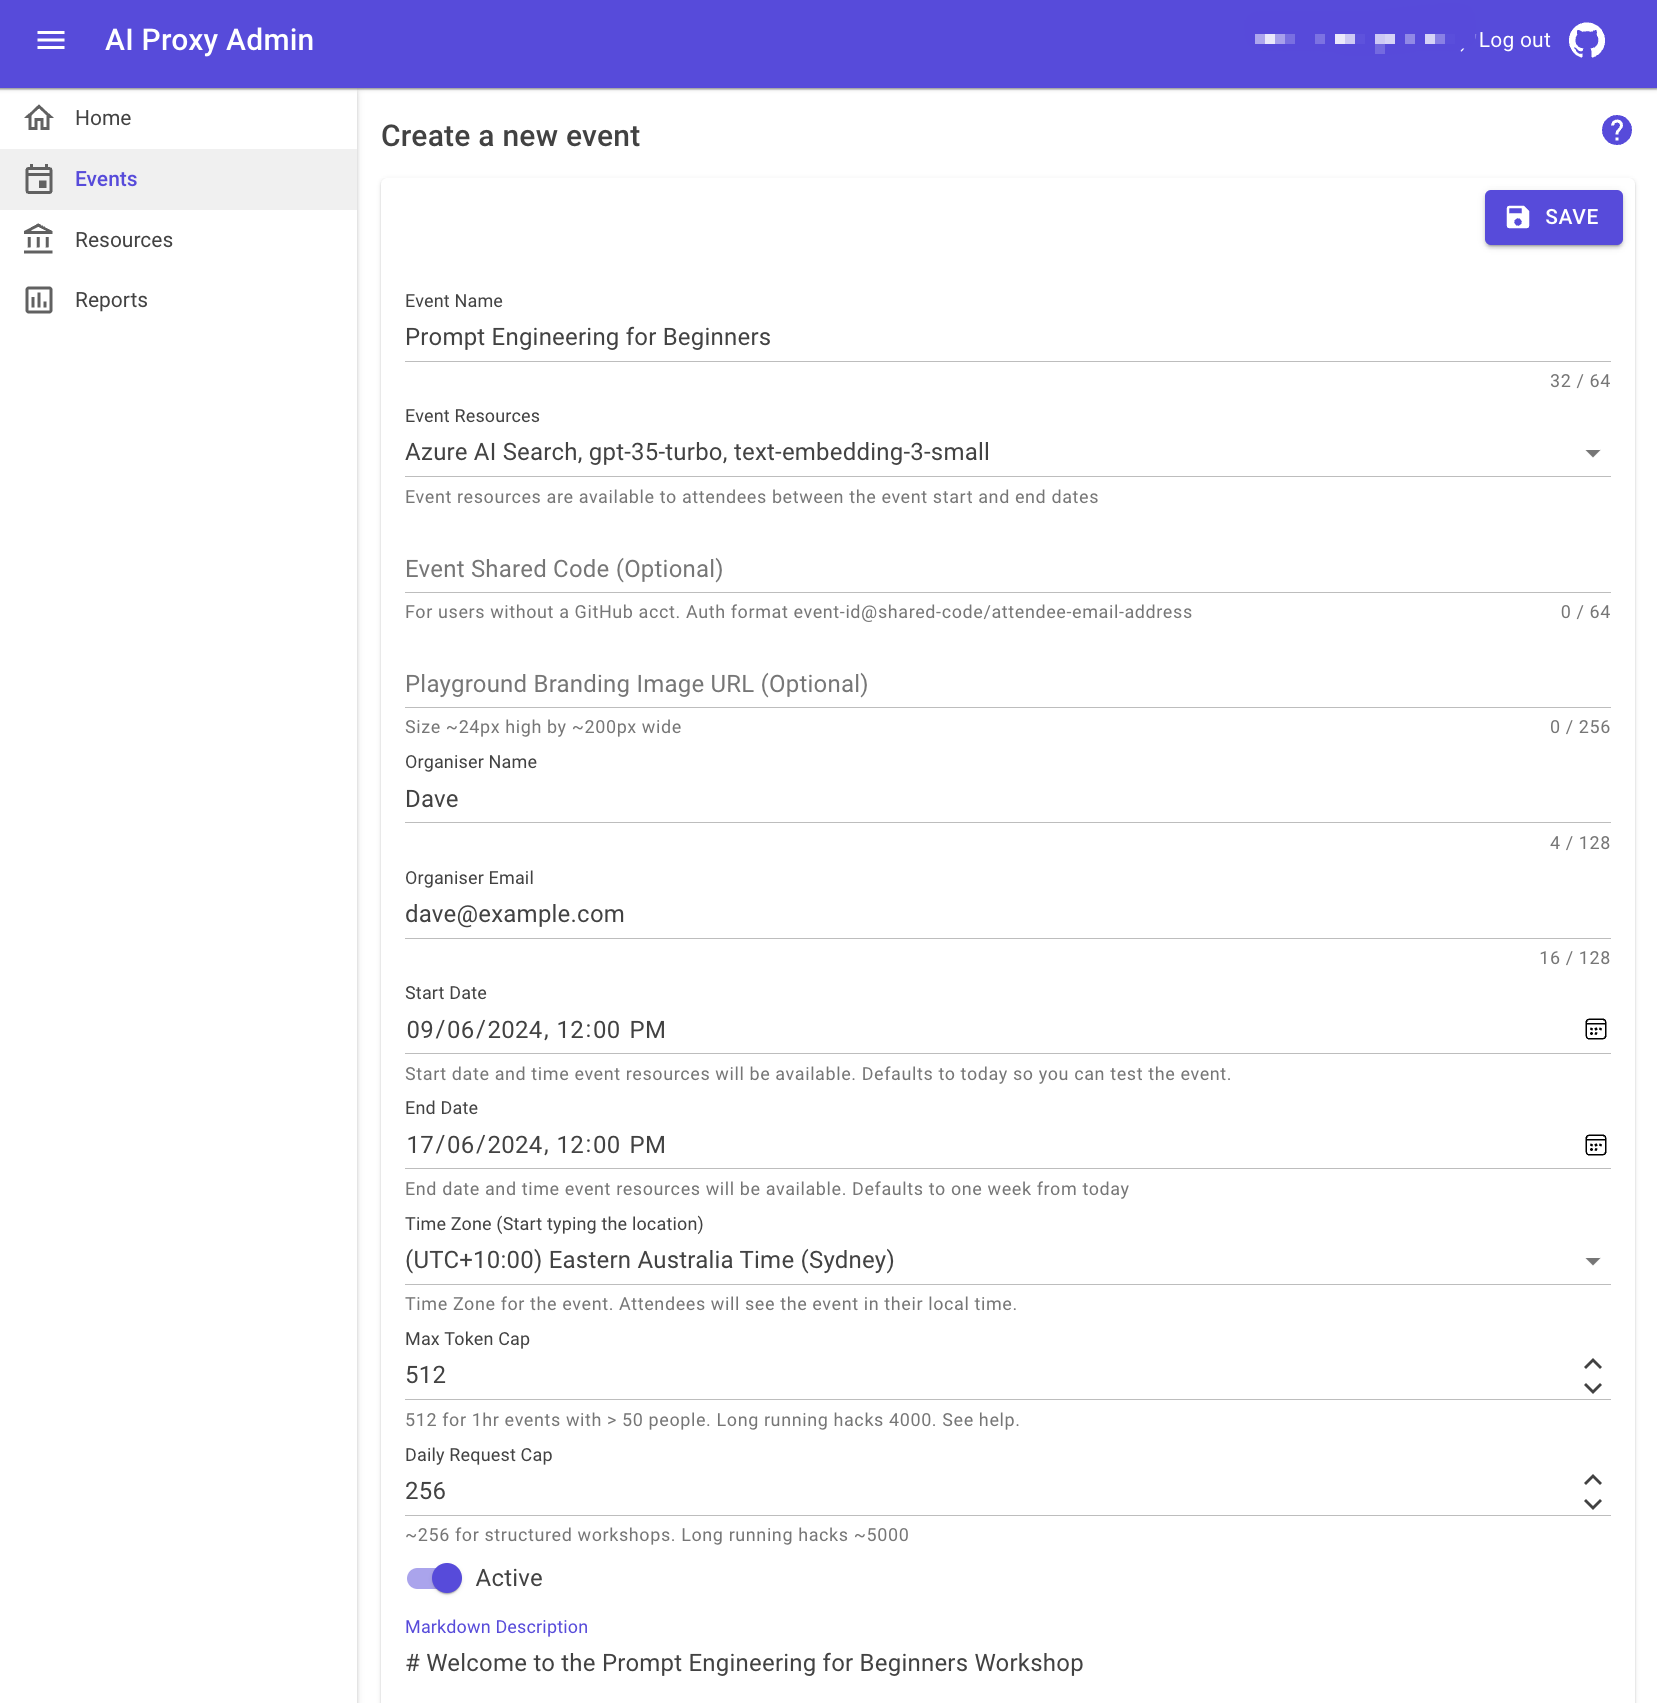
Add the event details, including the event name, start and end date.
-
Event Name: The name of the event.
- Event Resources: You can select multiple resources for an event. The resources are the model and indexes that you configured in Resources.
- Organizer Name: The name of the event organizer.
- Organizer Email: The email of the event organizer.
- Start Date: The start date/time of the event. You can set the date/time using the date picker or by typing the date/time in the format
YYYY-MM-DDTHH:MM:SS. - End Date: The end date/time of the event. You can set the date/time using the date picker or by typing the date/time in the format
YYYY-MM-DDTHH:MM:SS. - Max Token Cap: The maximum number of tokens needed for a prompt to complete successfully. For a short 1 hour event, set the
Max Token Capto 512. For a longer multi day event, and depending on the models deployed, set theMax Token Capto a larger number like 4000. See the Capacity planning section for more information. - Daily Request Cap: The maximum number of requests that can be made by a user to the Azure OpenAI resources per day. The goal of the Daily Request Cap is to prevent runaway usage and abuse of the model. The
Daily Request Capresets at midnight UTC. - Description: The
Markdowndescription of the event. This description is displayed when an event attendee registers for a time bound API Key to access the AI Proxy service. - Select
Saveto create the event. -
Event Shared Code: In most cases, you can leave this field blank.
-
The
Event Shared Codeis used where attendees may not have a GitHub account or for various reasons are unable to authenticate using their existing GitHub account. The shared code should only be used for short (eg 1hr) workshops at in-person events or online events, it's not recommended for longer running hacks. -
The API KEY authentication format is
event-id@shared-code/email-address. For example, if the Event Shared Code isBUILD2024, and the event-id is1111-1111, then the API Key for the event will be1111-1111@BUILD2024/attendee@mail.com. -
The
event-idis a unique identifier for and event, its generated by the system and can be found in the URL of the eventATTENDEEpage. -
Note, no PII is stored, the API KEY is one way hashed (sha256) and stored in the database for per user usage tracking.
-
-
Event Image URL: In most cases, you can leave this field blank.
- The URL of the event image used to provide some branding for the event on the AI Playground. The image should be rectangular, approximately 24 pixels high, and approximately 200 pixels wide. If the image bigger or smaller, it will be resized to fit the space in the top left hand side of the Playground.
Note
Remember, if you are load balancing across multiple models, ensure the model deployments names are the same, and add each deployment to the event. For more information about load balancing, see the Capacity planning section.