Image Layers#
What is an Image Layer?#
An image layer is the object upon which labeling, training, and predictions are performed. An image layer can be a single TIFF file, or multiple TIFF files for the same geographical Area of Interest.
If you have multiple satellite image files for a geographical area of interest, you can upload them all together and HASTE will combine them into a single mosaic.
Sources#
There are multiple providers of satellite imagery for damage assessment, including but not limited to the following:
Planet Disaster Data — https://source.coop/planet/disasterdata
Vantor Open Data Program — https://vantor.com/company/open-data-program//
Formats#
At the moment, HASTE only accepts TIFF (.tif) files as valid imagery formats.
Sample data to try HASTE#
Want to try HASTE without sourcing your own imagery first? The Microsoft AI for Good Lab hosts a few public post-disaster samples you can drop straight into an image layer.
Dataset |
File |
Use as |
Best for |
|---|---|---|---|
Black River (Planet) |
Post-event imagery |
Either workflow |
|
Black River (Planet) |
Custom building footprints |
Rapid Building Assessment |
|
Lahaina, Maui — Vantor, 12 Aug 2023 |
Post-event imagery |
Damage Mapping (train a model) |
How to use them
Imagery — on the Create Image Layer form, paste the
.tifURL into the post-event imagery URL field, or download it and upload the file. (These samples are post-event only; pre-event imagery is optional in both workflows.)Footprints — download the
.gpkgand upload it under Custom Building Footprints (the URL option requires Azure Blob Storage or S3 hosting). Footprints are only needed for the Building workflow; the Standard workflow doesn’t require them.
Note
The Black River post-event image (black-river_visual_mosaic_cog.tif) is a mosaic of all
the individual visual assets in
Planet’s Hurricane Melissa 2025 Black River disaster data.
This set pairs post-event imagery with matching building footprints, so it’s a
complete example for Rapid Building Assessment. The
Lahaina scene is imagery only — a good fit for Damage Mapping,
where footprints are pulled automatically from Overture Maps.
Create a New Image Layer#
To create an Image Layer, you must first create a project. Once this is done, select the desired project from the list of projects. The project details will be displayed, which includes a button called Create Image Layer. Clicking this will take you to the Image Layer creation form.
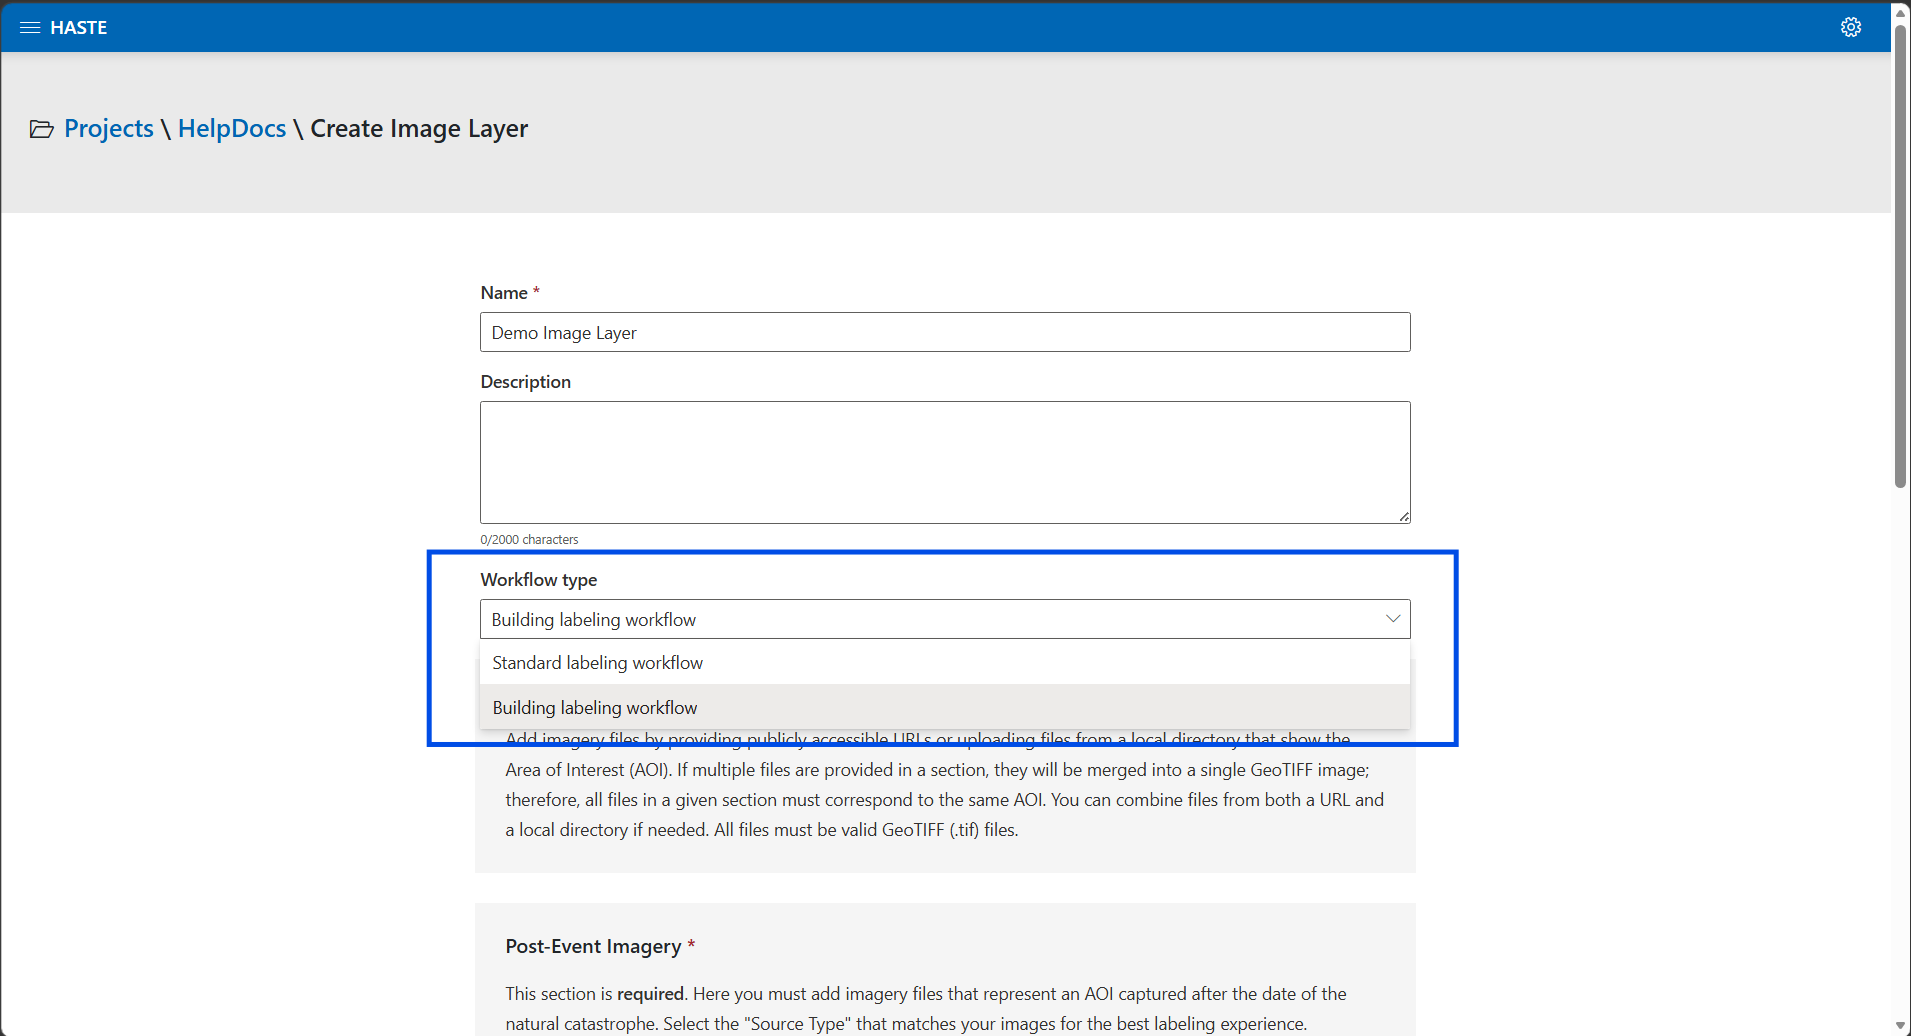
Choose a workflow
The creation form has a workflow selector that determines what you can do with the layer:
Standard — draw labels and train a model for a wall-to-wall damage map (Damage Mapping).
Building — embed building footprints and label them interactively (Rapid Building Assessment).
Browse the Open Data Catalog#
The Open Data Catalog is the fastest way to add public disaster imagery without finding and copying source URLs manually. On the Create Image Layer form, select Browse Open Data Catalog, then:
Select a disaster event.
Filter scenes by provider (Vantor or Planet) and phase (Pre or Post).
Select a scene to preview its footprint and imagery on the map. The scene details include capture time, sensor, ground sample distance (GSD), cloud cover, off-nadir angle, sun elevation, and file size when the provider supplies them.
Optionally select Set clip area and draw a box on the map. HASTE applies this area to both pre- and post-event mosaics during processing. You can also filter the catalog to scenes that overlap the clip area. If you skip this step, HASTE processes the full scene. For large scenes, selecting a smaller area can reduce processing time and output size.
Select + Pre-event or + Post-event to add the scene to the corresponding imagery section.
Adding a catalog scene also fills in that section’s imagery capture date and source type when the catalog provides them. Review the populated values before creating the layer, especially when combining multiple scenes.
The catalog currently browses the Vantor Open Data Program (formerly Maxar) and Planet Disaster Data. You can still add imagery manually by URL or file upload when the scene you need is not available in the catalog.
Add imagery files by providing publicly accessible URLs or uploading files from a local
directory that show the Area of Interest (AOI). You can also combine files from both a
URL and a local directory. If multiple files are provided in a section, they will be
merged into a single GeoTIFF image; therefore, all files in each section must correspond
to the same AOI. All files must be valid GeoTIFF (.tif) files.
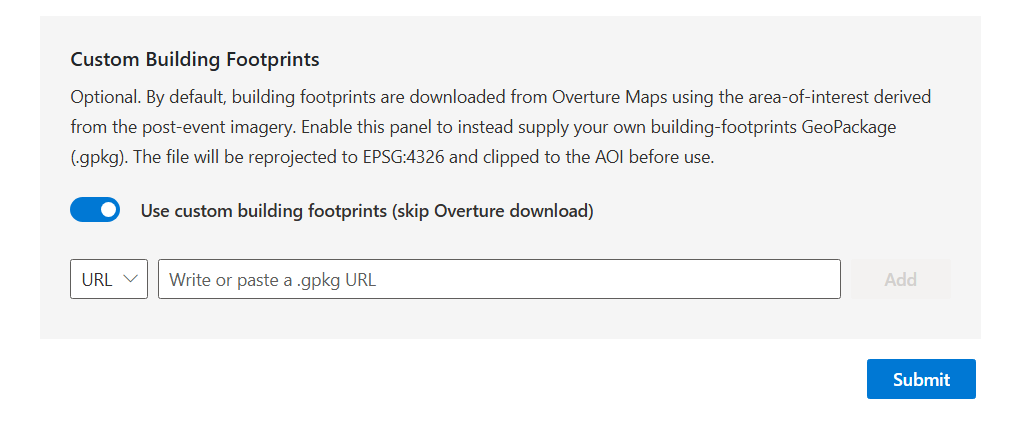
Custom building footprints (optional)#
By default, HASTE downloads building footprints automatically from Overture Maps for the
area covered by your post-event imagery. If you’d rather use your own, expand the Custom
Building Footprints panel on the create form, turn on Use custom building footprints
(skip Overture download), and supply a single GeoPackage (.gpkg) — either a publicly
accessible URL or a file upload (one or the other).
HASTE reprojects the file to EPSG:4326 and clips it to the imagery area before use. The Overture and custom paths produce the same kind of footprint layer, so the rest of the workflow is identical either way.
Note
A custom footprints file must be:
Format — a GeoPackage (
.gpkg), one file per layer, up to 500 MB.Projected — it must have a coordinate reference system embedded (any CRS works; it’s reprojected to EPSG:4326).
Polygons — Polygon / MultiPolygon features only (other geometry types are dropped).
Hosted (URL option) — the URL must point to Azure Blob Storage or AWS S3.
Footprints are set when the layer is created and can’t be changed afterward.
Download layer data#
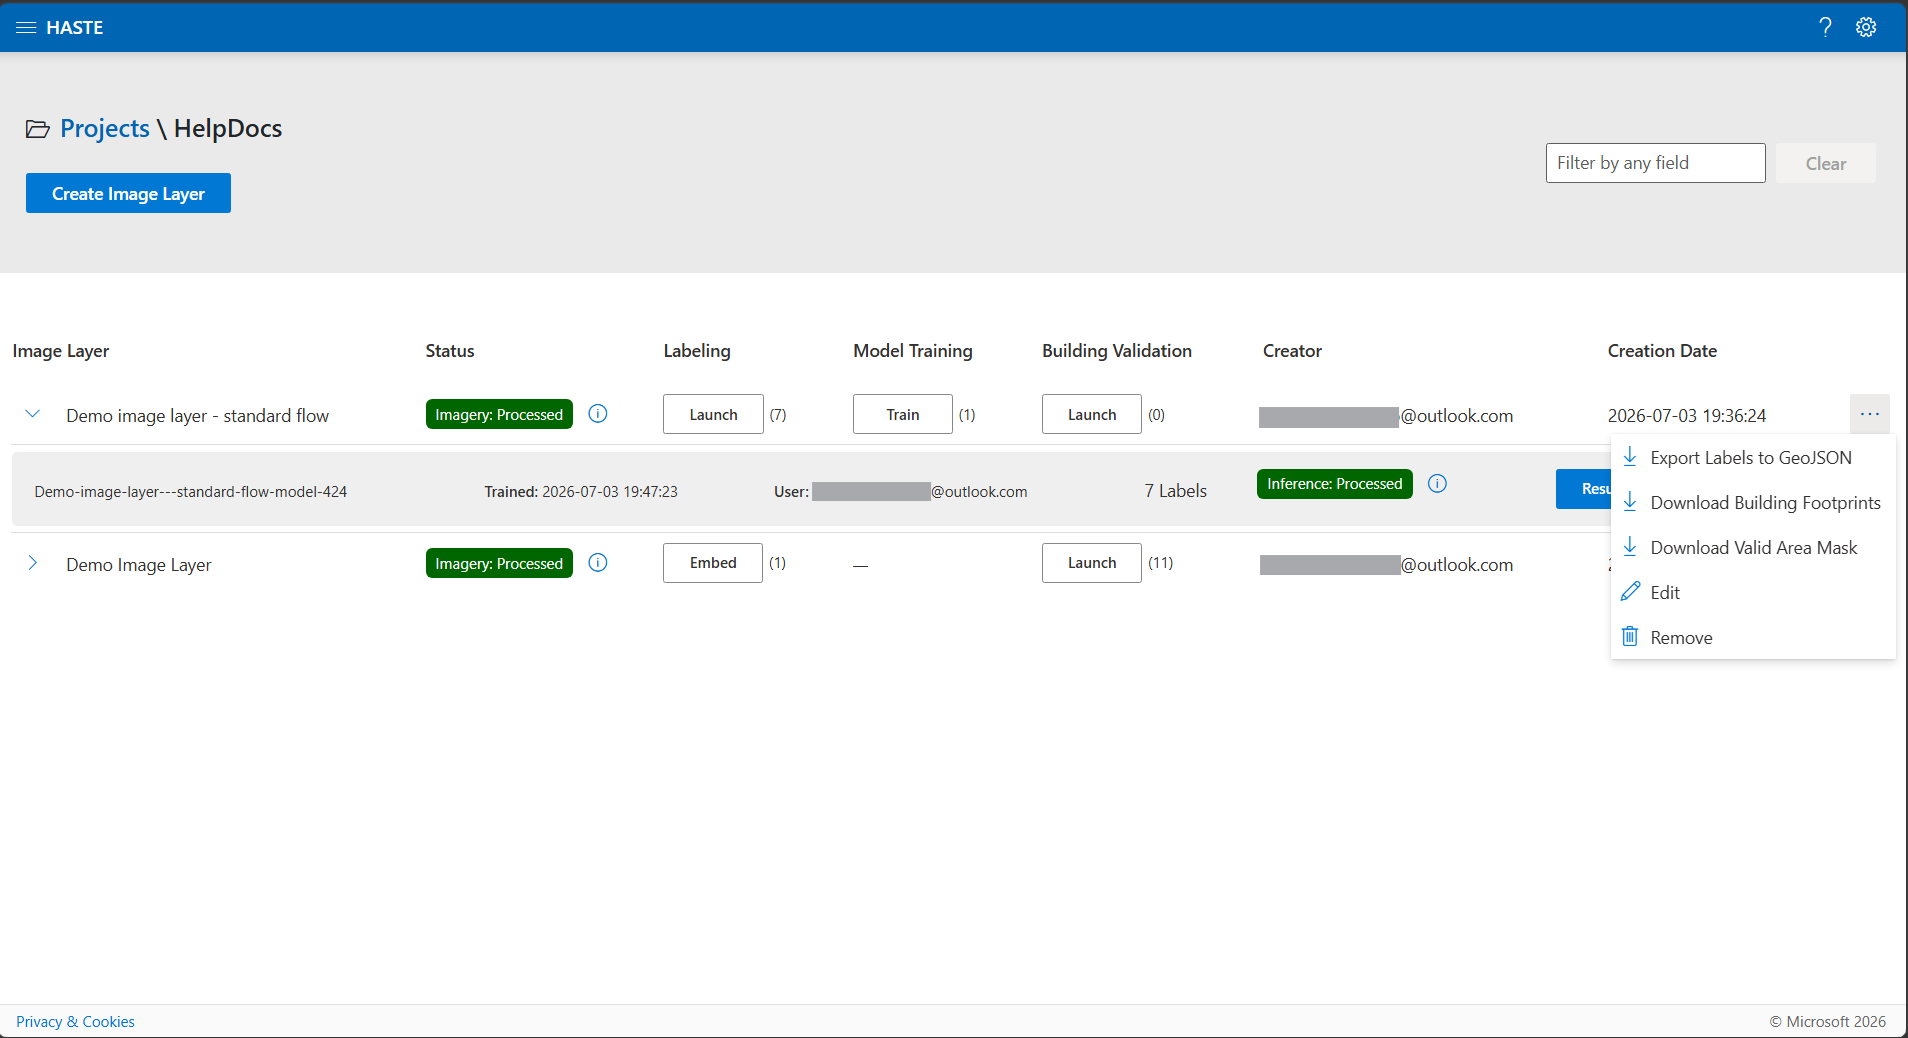
An image layer’s ⋯ (more actions) menu offers exports that don’t depend on any model:
Export Labels to GeoJSON — the labels drawn on the layer.
Download Building Footprints — the footprints used for the layer (Overture or your own).
Download Valid Area Mask — the area actually covered by the imagery.
Edit an Image Layer#
You can update the name and description for an image layer after it was created from the Projects page.
Delete an Image Layer#
You can delete an image layer using the ellipsis menu on the Projects page.
Deleting an image layer also deletes all its artifacts such as labels, model training checkpoints, and predictions.