Building LLMs Orchestration Flows
Learn how to build prompt flow orchestrations for your LLM App.
Prerequisites
An Azure subscription where you can create an AI Hub Resource and a AI Search service.
Setup
If you are running this Lab after lesson 1, you don’t need to worry about this step. Otherwise, follow Setup from Lesson 1 to create a project and its associated resources in Azure AI Studio, as well as to deploy the GPT-4 model.
Lab Steps
During this lab, we will cover the following steps:
1) Create a standard classification flow. 2) Create a conversational RAG flow.
1) Create a standard classification flow
Open your web browser and navigate to: https://ai.azure.com
Select the AI project that you created during the setup. Then, in the Build menu, select the Prompt flow option and click on the blue Create button.
We will create a Standard flow for classifying websites on the internet.
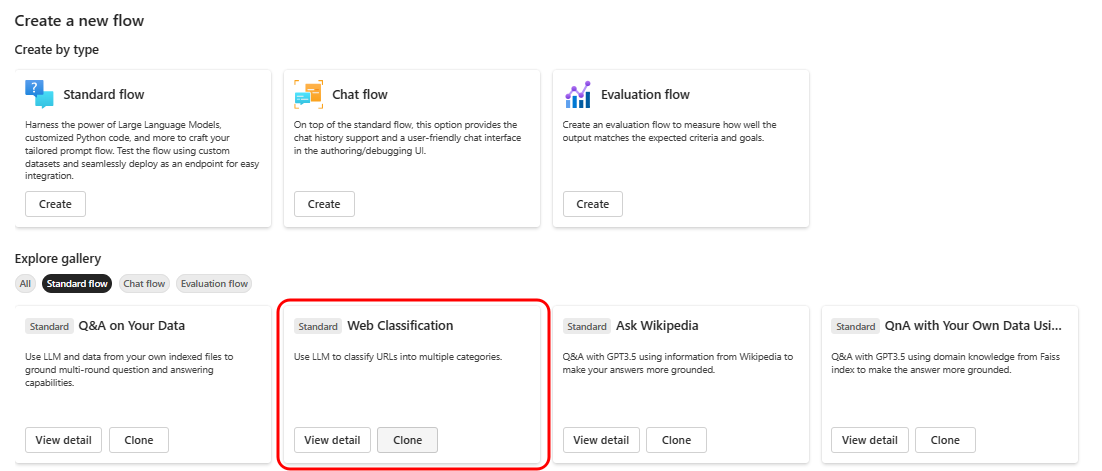
In the flow creation window, select the Standard flow filter in the Explore gallery section.
Then, click on the Clone button in the Web Classification box.
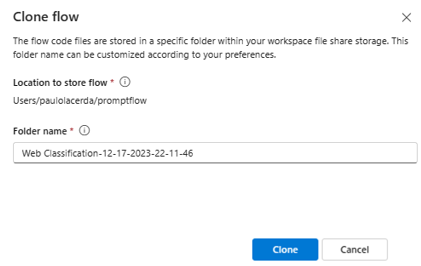
Use the default name for the flow, or if you prefer, define a name of your preference and click on Clone.
A Standard flow will be created with the following structure:
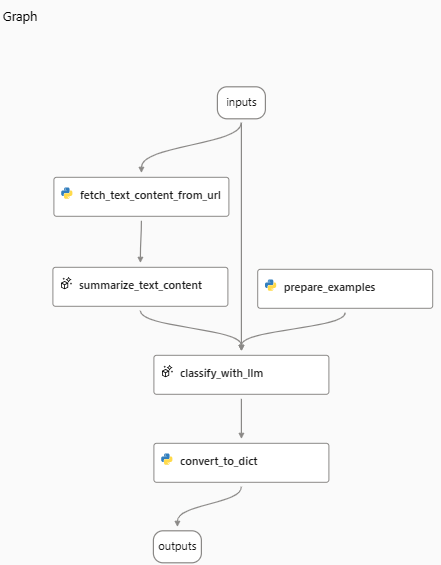
Notice that the flow has five nodes, the first fetch_text_content_from_url is a python node to extract the text from a Web page.
Then the content obtained by the extraction serves as input for an LLM node summarize_text_content to summarize the content.
The summarization, combined with the classification examples generated by a python node prepare_examples is the input for another LLM node classify_with_llm where the classification is performed.
At the end, we have a Python node convert_to_dict responsible for formatting the output of the flow in a python dictionary format.
Now that the flow has been created, we need a runtime to execute it in the Prompt Flow.
Select Start in the runtime dropdown to start a runtime to run your flow:

After starting the Runtime, we need to define the Connection with the LLM for each LLM step. In our case, these are summarize_text_content and classify_with_llm.
We will use the Default_AzureOpenAI Connection, which connects to the Azure OpenAI resource that was created when the Azure AI project was set up.
Select gpt-4 in the deployment_name. This deployment was created during Setup.

Associate the same Connection for the classify_with_llm step:

Note: you can leave the
response_formatfield in blank or select the{"type":"text"}.
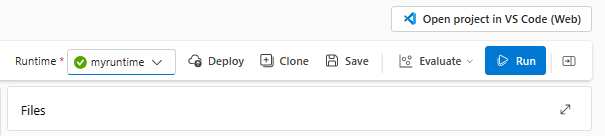
Once the Runtime is selected and the Connections are configured, you can start the flow by clicking the Run button at the top of the page.
The input required for the flow execution is specified in its input section.

After finishing the execution you will see that the flow is complete with all steps.
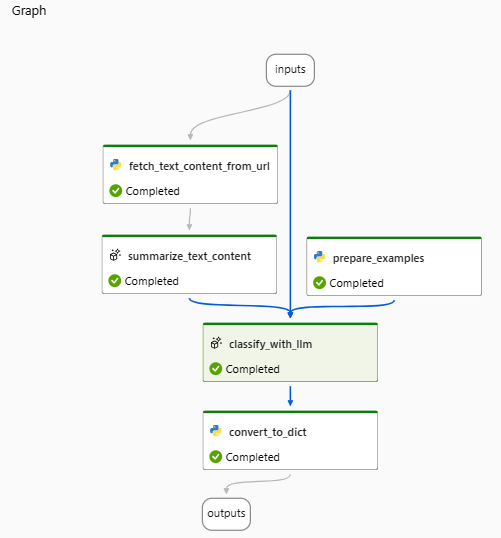
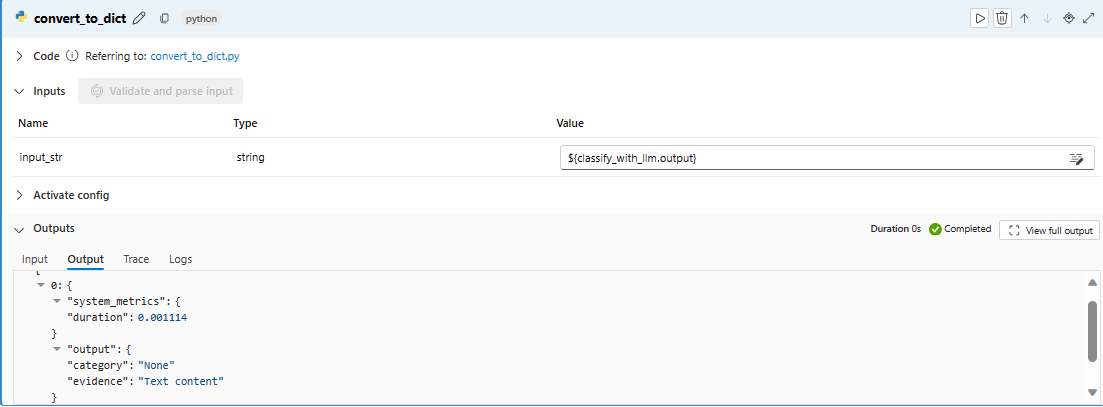
You can view the result of the processing by clicking the last node.
2) Create a conversational RAG flow
Now you will create a conversational flow using the RAG pattern, start by creating a new flow in the Prompt Flow item in the Tools section within the Build tab.
Select the Multi-Round Q&A on Your Data template after clicking the Create button.
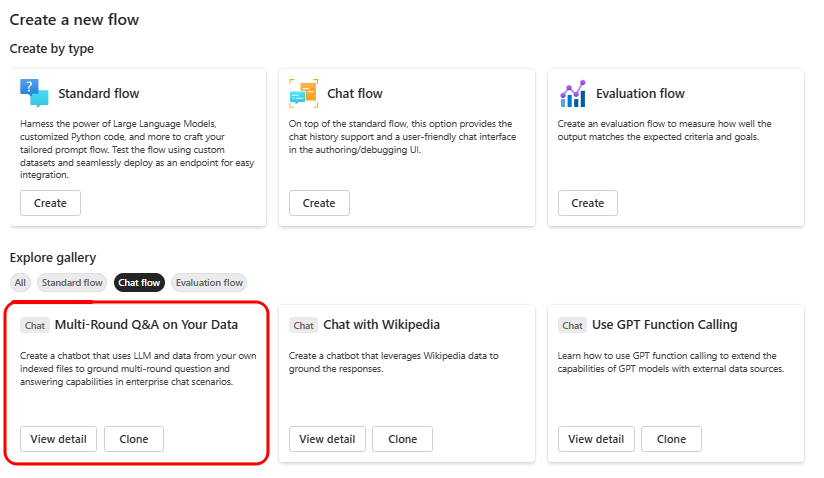
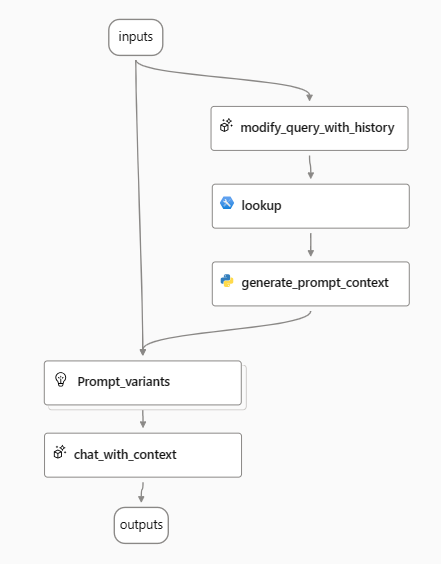
Click on the Clone button. A flow with the following structure will be created.
Start the automatic runtime by selecting Start in the Runtime drop down. The runtime will be useful for you to work with the flow moving forward.

Click the Save button to save your flow.

2.1) Flow overview
The first node, modify_query_with_history, produces a search query using the user’s question and their previous interactions. Next, in the lookup node, the flow uses the vector index to conduct a search within a vector store, which is where the RAG pattern retrieval step takes place. Following the search process, the generate_prompt_context node consolidates the results into a string. This string then serves as input for the Prompt_variants node, which formulates various prompts. Finally, these prompts are used to generate the user’s answer in the chat_with_context node.
2.2) Search index
Before you can start running your flow, a crucial step is to establish the search index for the Retrieval stage. This search index will be provided by the Azure AI Search service.
The AI Search service was originally created in the Setup section of this lab. If you have not yet created the Search service, you will need to set one up as explained below. With the search service created, you can now proceed to create the index.
In our case, we will create a Vector index. To do this, you just need to go back to the project in the AI Studio, select the Indexes option, and then click on the New index button.
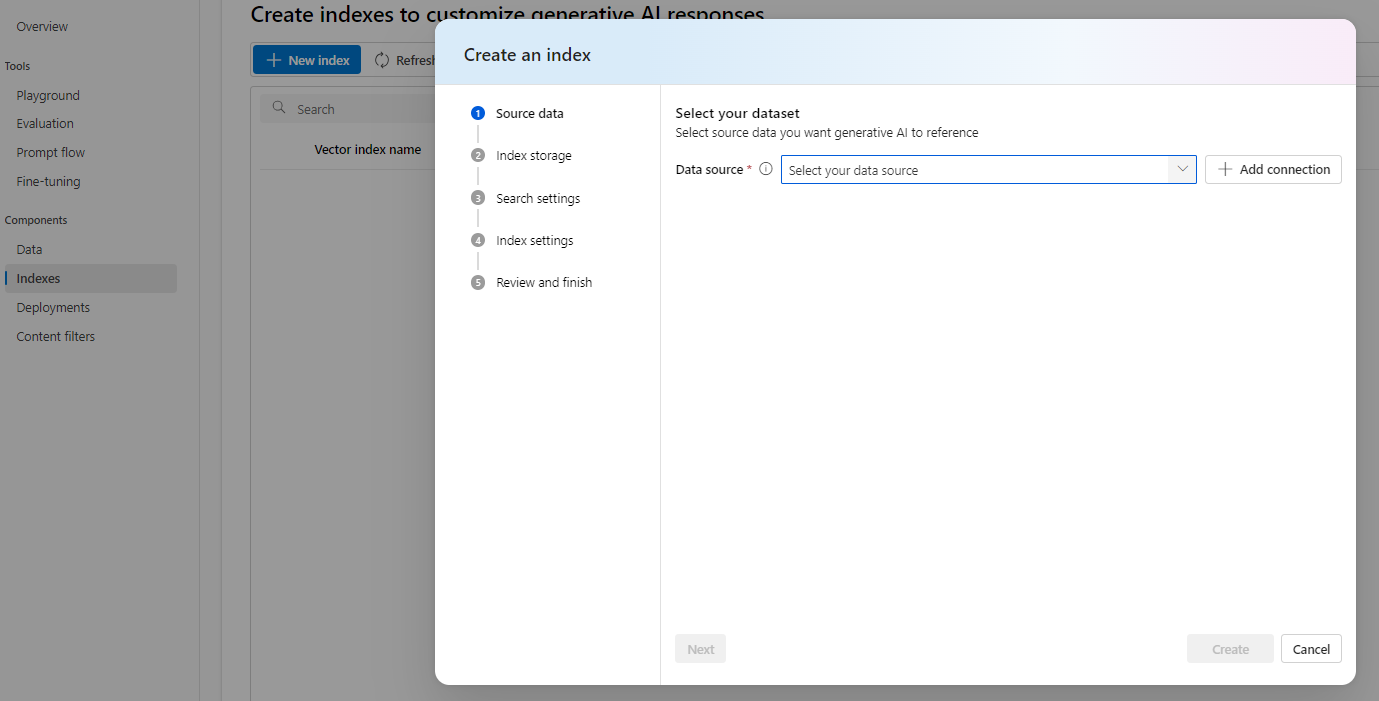
At the Source data stage, select the Upload files/folders option and upload the PDF files/surface-pro-4-user-guide-EN.pdf to the data folder of this lab, as shown in the next screen.

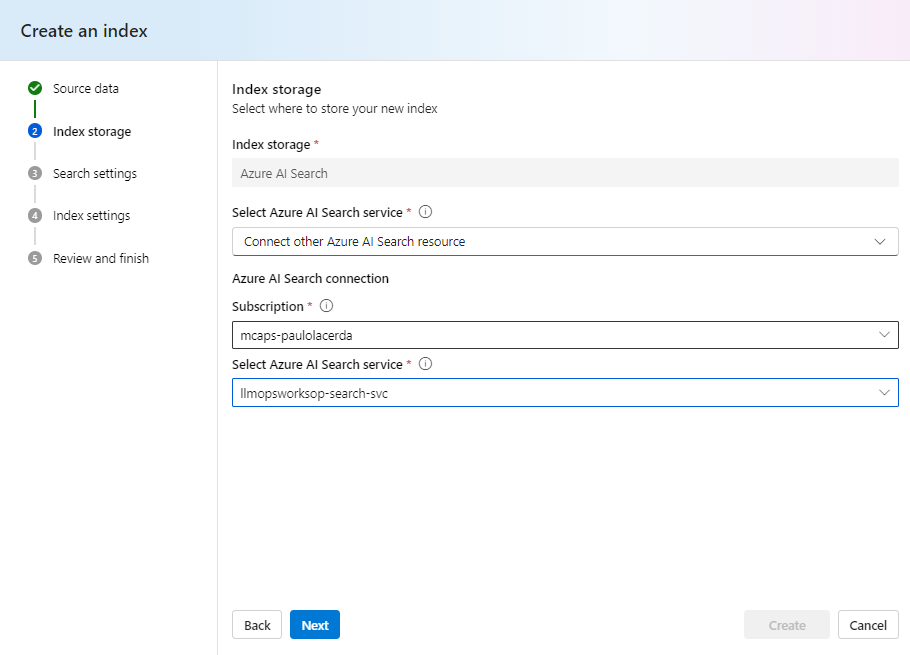
In Index storage, select the Search Service you created earlier.
If someone has created the AI Search service for you, you can also use it to create the index. Simply select it in the Select Azure AI Search service option.
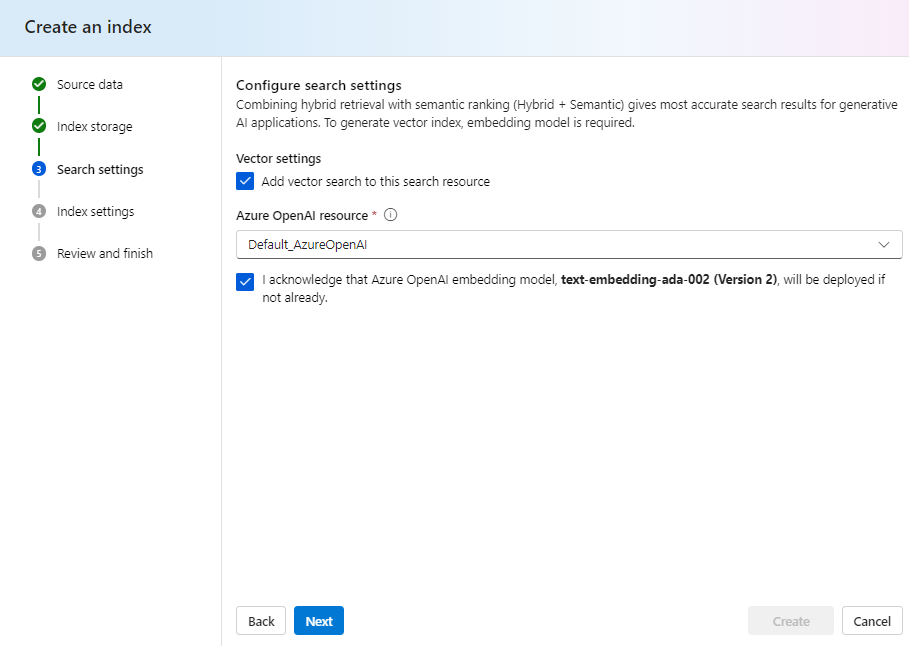
Under Search settings, select Add vector search to this … as indicated in the following image.
In Index settings, keep the default options as indicated below.
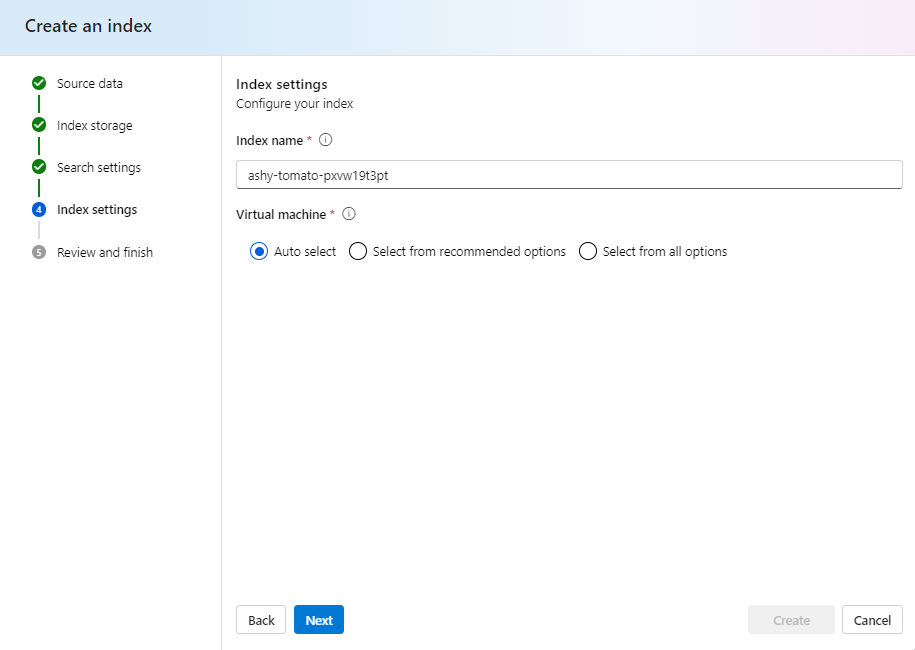
Note: If you want to select a virtual machine configuration, click on the Select from recommended options. If you don’t select, the default configuration will use serverless processing.
Great, now just click on the Create button at the Review and finish stage.
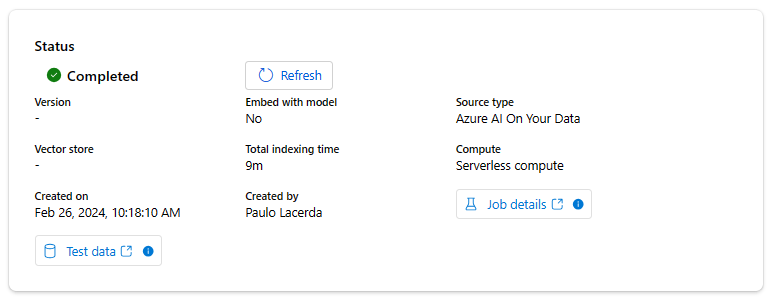
The indexing job will be created and submitted for execution, so please wait a while for it to complete.
It may take about 10 minutes from the time it enters the execution queue until it starts.
Wait until the index status is Completed as in the next image, before proceeding with the next steps.
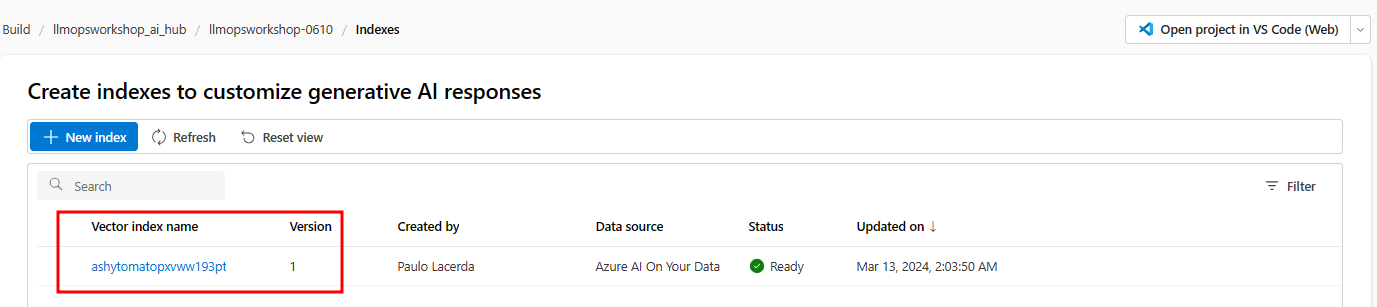
Done! You have created the index, as can be seen in the Indexes item of the Components section.
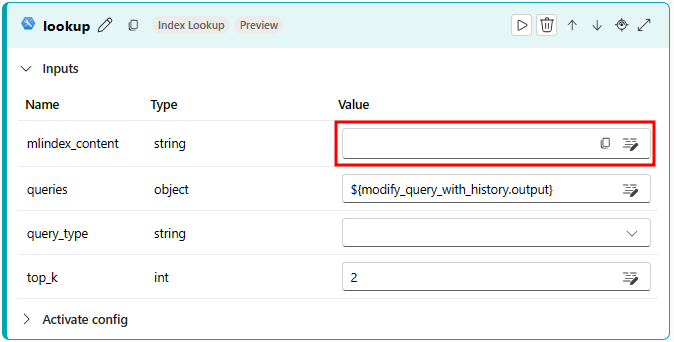
Now return to the RAG flow created in Prompt flow to configure the lookup node.
After selecting the lookup node, click on mlindex_content.
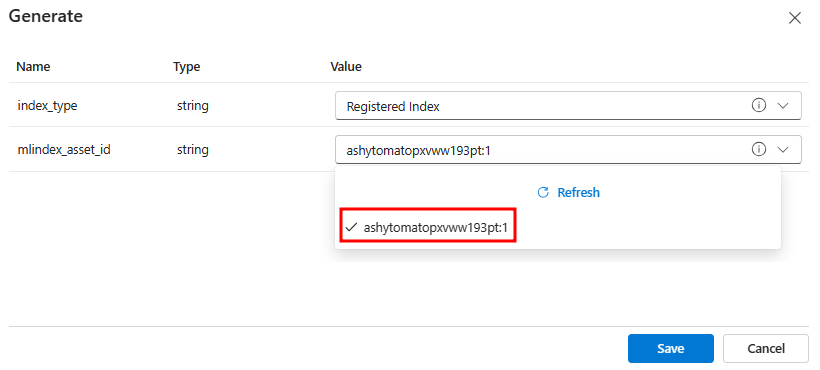
A Generate window will appear. In this window, select the Registered Index option from the index_type field. Then, choose version 1 of the index you just created, as shown in the following image. After making these selections, click on Save.
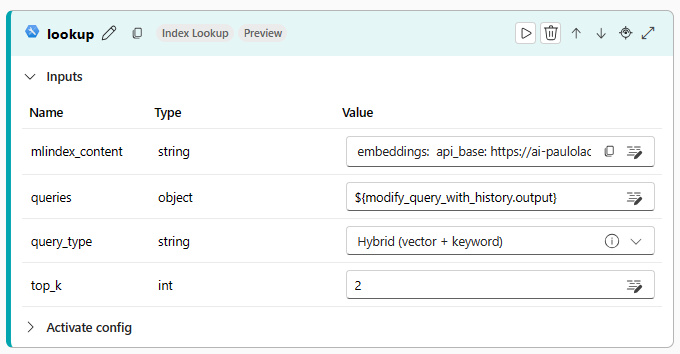
Now, let’s go back to the lookup node. Select the Hybrid (vector + keyword) option from the query_type field, as shown in the subsequent image.
2.3) Updating connection information
Now you will need to update the Connections of the nodes that link with LLM models.
Starting with the Connection in the modify_query_with_history node with the gpt-4 deployment, as indicated below:

And the Connection for the chat_with_context node with the gpt-4 deployment, as indicated below:

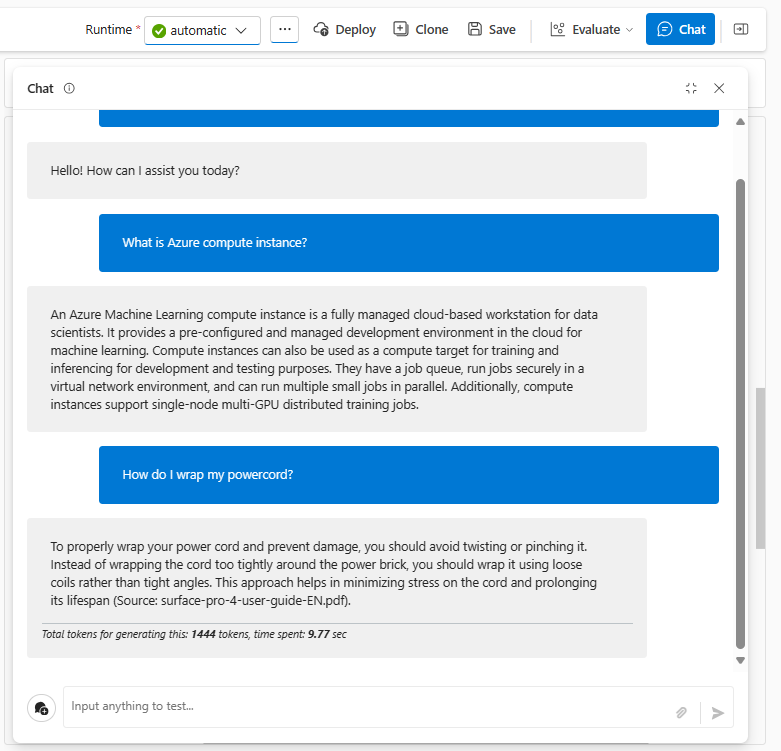
2.4) Testing your RAG flow
Everything is now set up for you to initiate your chat flow. Simply click on the blue Chat button located at the top right corner of your page to begin interacting with the flow.