Building a Custom Human-in-the-Loop Experience for Copilot Studio Workflows
Classic agents
When every workflow approval is another email in someone's inbox, something has gone wrong. A custom connector pattern that lets Copilot Studio workflows pause for human input and resume through any UI you want.

Workflows in Copilot Studio often need to pause and wait for a human: an approval, a review, a clarification. The built-in options (email via Human Review, Teams adaptive cards) work, but at scale they create noise. Dozens of requests a day across multiple workflows, all landing in the same inbox or chat, with no way to prioritize or batch them. And then the human builds an agent to triage the requests, which sends even more requests that need human input, and… you see where this is going.
We built a custom connector sample that lets you plug in any UI for human responses. The sample includes a web console, but the pattern works for a custom app, a Slack integration (yes, I said Slack!), or anything that can call a REST endpoint.
 The sample web console. All pending requests in one place, organized by time, with Pending/Completed/All tabs.
The Problem With the Built-in Options
The out-of-the-box connectors that support “pause and wait for a human” each have the same limitation: they own the delivery channel.
- Human Review sends an email. Every request is another email in someone’s inbox, mixed in with everything else.
- Post adaptive card and wait for a response (Teams connector) sends a Teams card. Better than email, but still a stream of individual cards with no way to see what’s pending across workflows.
Both work fine for occasional, high-signal requests. But when workflows scale, when you have dozens of runs a day each needing human input, these channels turn into noise. The human can’t prioritize, can’t see what’s waiting across different workflows, and can’t batch their responses.
What we wanted was to keep the same pause-and-resume behavior, but plug in our own UI. That means building a custom connector. But how do you build a connector action that pauses a flow?
The Discovery: Webhook Actions
The Teams connector’s “Post adaptive card and wait for a response” action uses a little-known pattern that also works in custom connectors: a webhook action. Unlike a webhook trigger (which starts a new flow run), a webhook action pauses the current flow and resumes it when the backend calls back. The flow dehydrates completely, consuming no resources while waiting.
The OpenAPI Pattern
Three things in the connector’s OpenAPI definition make this work:
-
x-ms-notification-url: trueon thenotificationUrlparameter tells the platform to generate a callback URL and inject it -
x-ms-notification-contentat the path level defines the schema of the callback payload (what the flow receives when it resumes) -
No
x-ms-triggeris the critical difference. Without it, the platform treats this as an action that pauses, not a trigger that starts
The connector also needs a DELETE endpoint for webhook unsubscribe (called when a flow is cancelled).
Full OpenAPI definition
paths:
  /api/requests/$subscriptions:
    x-ms-notification-content:
      description: Human's response
      schema:
        type: object
        properties:
          responseText:
            type: string
            description: The primary response text
          response:
            type: object
            description: All response fields
          respondedAt:
            type: string
            description: When the human responded
    post:
      operationId: RequestHumanInput
      summary: Request human input and wait for a response
      # No x-ms-trigger — this makes it an ACTION, not a trigger
      parameters:
        - name: body
          in: body
          required: true
          schema:
            type: object
            required:
              - notificationUrl
              - body
            properties:
              notificationUrl:
                type: string
                x-ms-notification-url: true
                x-ms-visibility: internal
              body:
                type: object
                required:
                  - title
                properties:
                  title:
                    type: string
                    description: Title shown to the human
                  message:
                    type: string
                    description: Instructions for the human
      responses:
        '201':
          description: Created — waiting for response
  /api/requests/{id}:
    delete:
      operationId: DeleteRequest
      x-ms-visibility: internal
      # Webhook unsubscribe — called when flow is cancelled
How It Works End-to-End
sequenceDiagram
    participant Agent as Copilot Studio Workflow
    participant Backend as HITL Backend
    participant Human as Human (Browser)

    Agent->>Backend: POST /api/requests/$subscriptions
    Backend-->>Agent: 201 Created
    Note over Agent: Flow pauses (dehydrated)

    Backend->>Human: Shows form in web console
    Human->>Backend: Fills in form, clicks Submit
    Backend->>Agent: POST to notificationUrl
    Note over Agent: Flow resumes with response
The flow doesn’t poll. It dehydrates completely, no resources consumed while waiting. It can wait for minutes, hours, or days. When the backend POSTs to the notificationUrl, Power Platform rehydrates the flow and continues with the response data.
What Your Backend Needs to Implement
Your backend needs to implement two endpoints for the connector:
| Endpoint | Purpose |
|---|---|
POST /api/requests/$subscriptions |
Receive the request from the connector, store it (including the notificationUrl), return 201 |
DELETE /api/requests/:id |
Webhook unsubscribe. The platform calls this when a flow is cancelled |
When the human responds, your app needs to POST the response to the stored notificationUrl, matching the schema defined in x-ms-notification-content. That’s what resumes the flow. Everything else is up to you: how you present pending requests, how humans submit responses, what the UI looks like. The sample includes a Node.js/Express implementation (~190 lines) with a simple web console, but you could build any UI on top of these two endpoints.
Setting It Up
The sample is designed to run in under 5 minutes.
1. Clone the repo and start the backend:
1
2

cd extensibility/human-in-the-loop
node setup.js
This installs dependencies, creates a dev tunnel (public HTTPS URL), starts the server, and prints the tunnel host URL.
2. Import the solution:
Go to make.powerapps.com → Solutions → Import → upload solution/customHIL_1_0_0_3.zip. When prompted, set HitlHostUrl to the tunnel host URL from step 1.
3. Use the connector:
In Copilot Studio, add “Human-in-the-Loop” as a connector action in a workflow. Set the title, message, and optionally assign it to a specific person. The workflow pauses until the human responds.
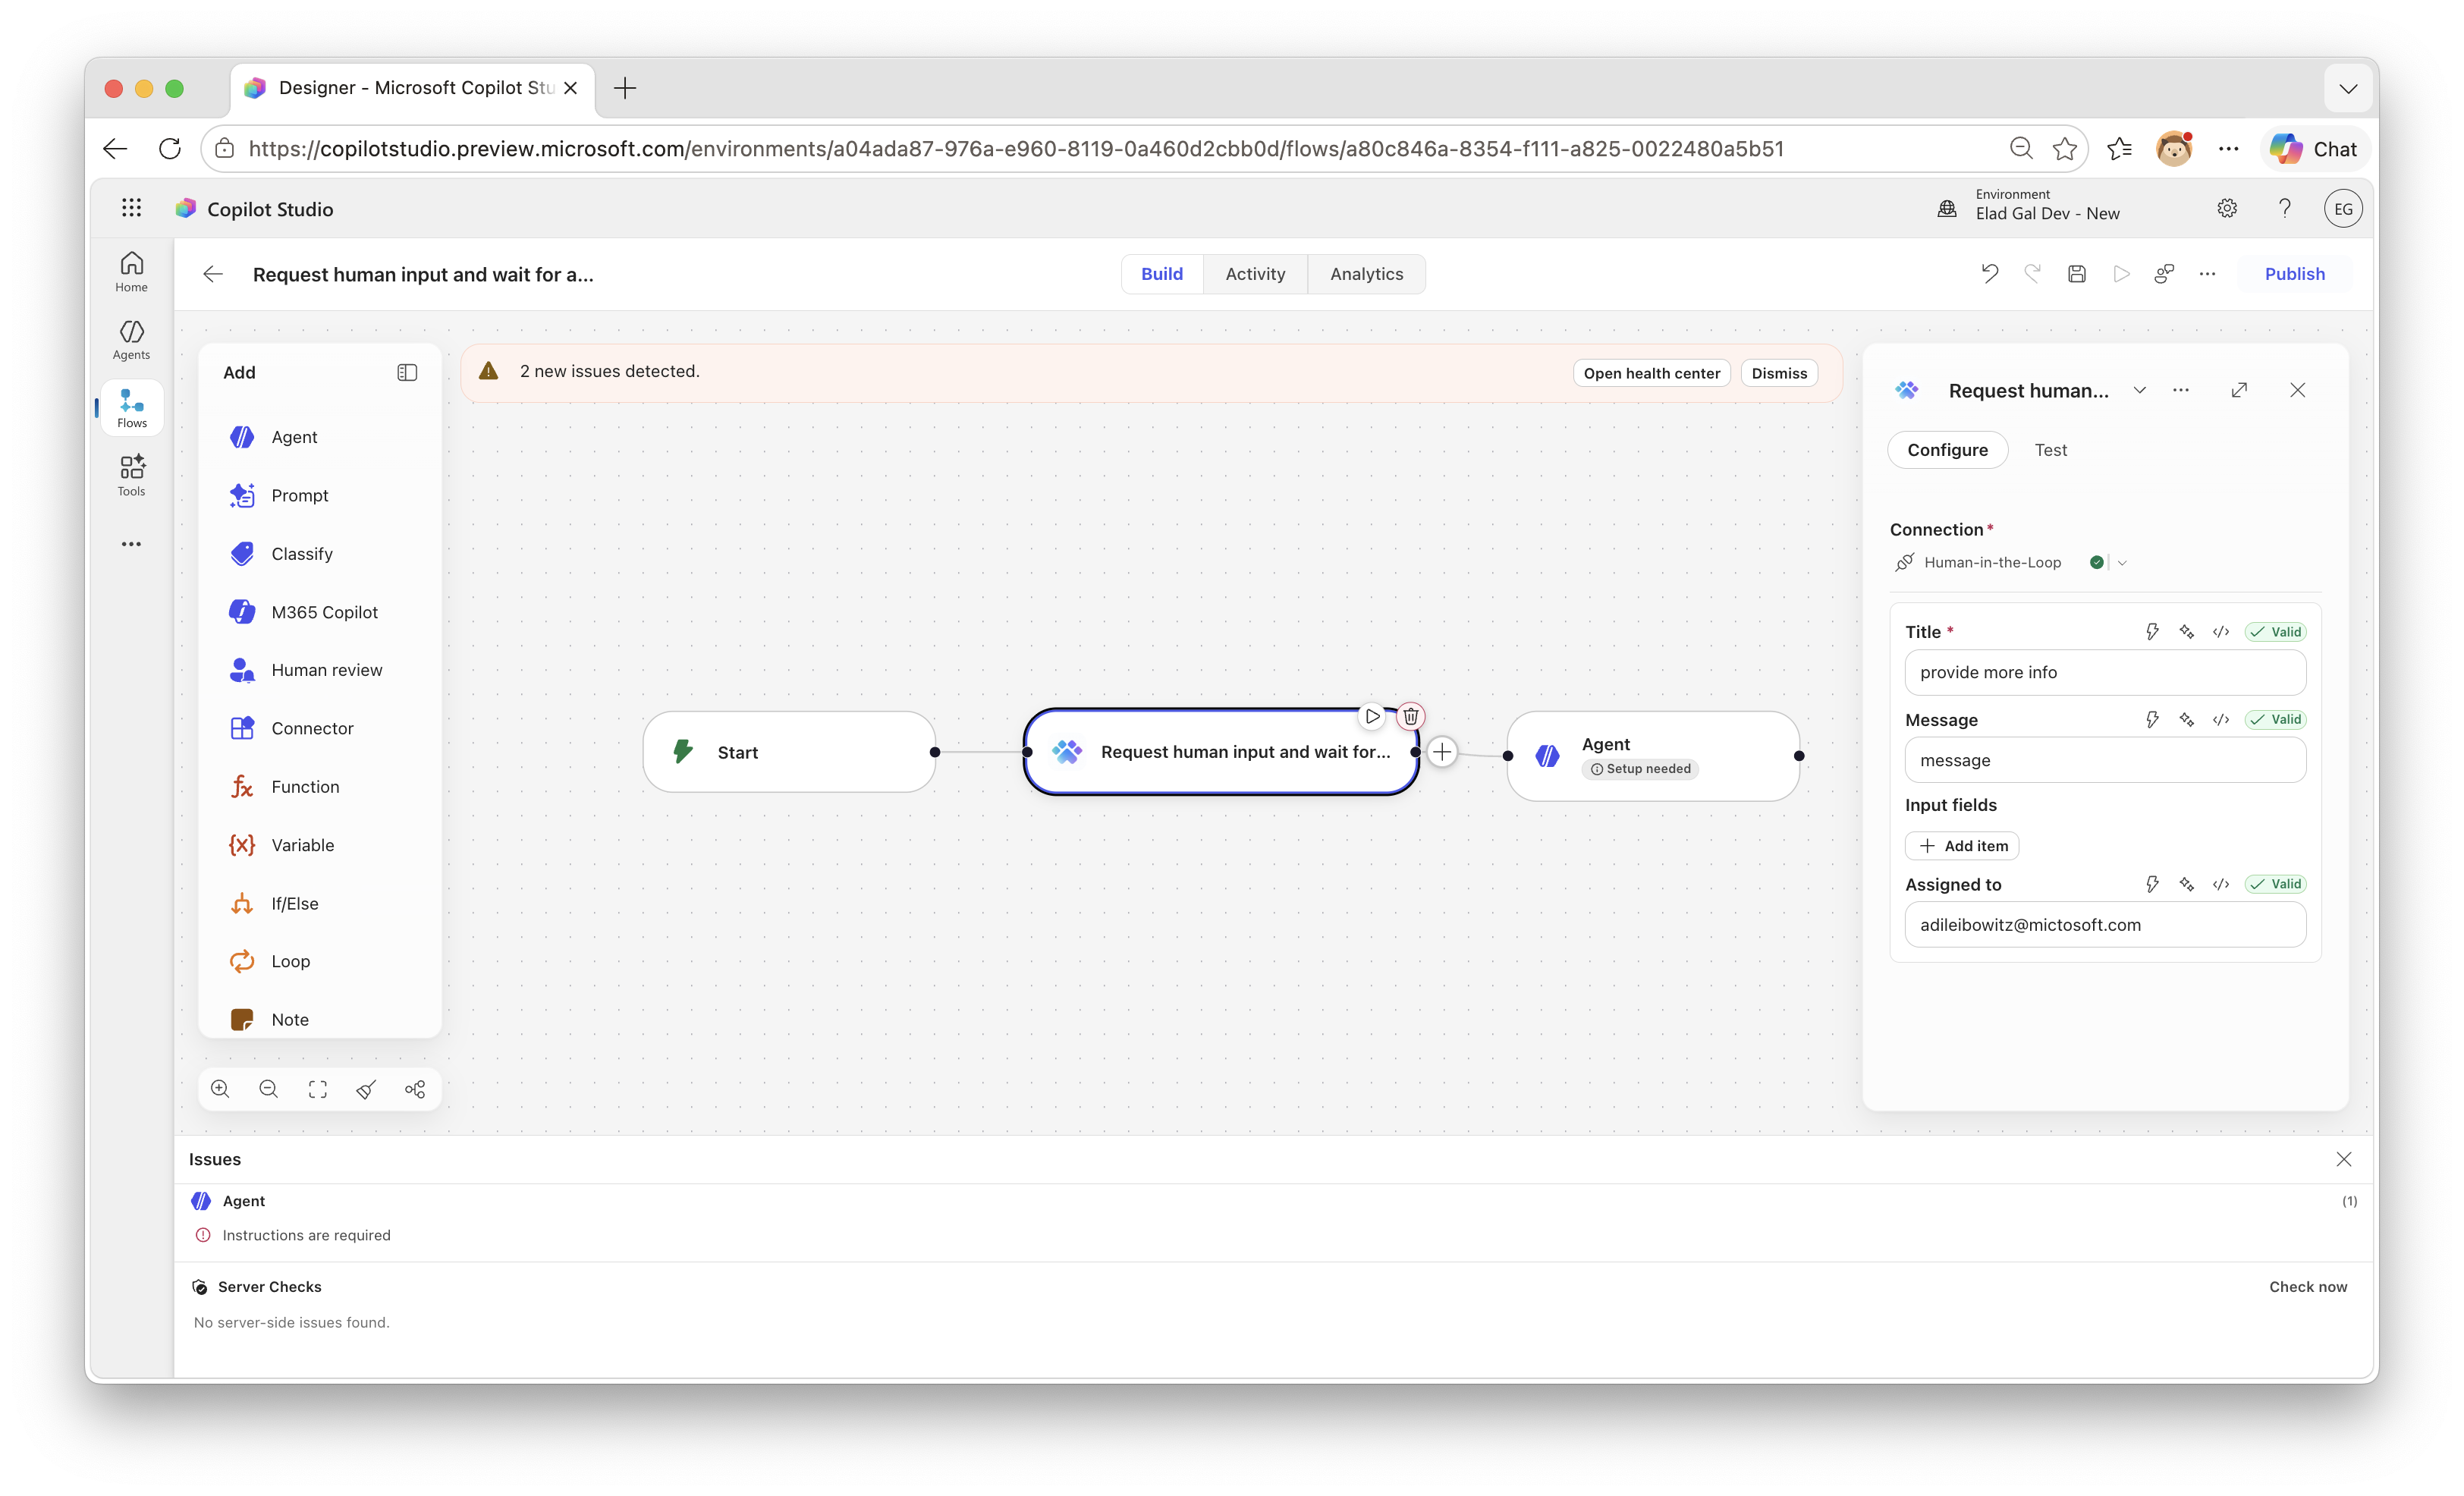 The connector action in a Copilot Studio workflow. The workflow pauses at this step until a human responds.
4. Respond:
Open the local or tunnel URL in a browser. Pending requests appear in the web console. Fill in the form, click Submit, and the workflow resumes with the response data.
Production Considerations
The sample uses in-memory storage and dev tunnels, which is fine for demos. For production, consider:
- Persistent storage (database instead of in-memory map)
- OAuth authentication on the backend
- User authorization (validate who can respond to which requests)
- Push notifications (instead of polling the web console)
- HTTPS hosting on Azure App Service, Azure Functions, or similar
-
Protect the callback URL. The
notificationUrlis SAS-signed by Power Platform but doesn’t require authentication. Anyone with the URL can resume the flow. Keep it server-side only, never expose it to the browser or end users.
The full sample is available at CopilotStudioSamples/extensibility/human-in-the-loop. It includes the complete OpenAPI definition, Node.js backend, importable Power Platform solution, and a local test harness.
What scenarios would you use a custom HITL connector for? Have you hit the same wall with the built-in approval channels? Let us know in the comments.