
Welcome to Day 09 of #30DaysOfLowCode!
It's Integrations Week! So far, we've talked about Power Platform Connectors - from built-in options to serverless computing solutions with automated workflows triggered by connectors. But what if prebuilt connectors don't support your requirements? That's where custom connectors come in. Join us today for a 2-part tutorial as we take you step-by-step through the process of building, testing, and using a custom connector!
Join us Feb 15 at the #PowerfulDevs conference where Daniel and Nitya will walk through the steps of building the connector and application - and more! Register Here
What We'll Cover
- Motivation - Why are custom connectors needed?
- Scenario - Let's build a dev.to Connector!
- Process - Building from an OpenAPI specification
- Testing - Validate it works!
- Exercise: Training: Build custom connectors for Power Automate
- Resources: Explore the Low Code February Collection
Why Custom Connectors?
From the earlier post we know Connectors are wrappers around APIs that make it easier for low-code developers to take actions and trigger workflows based on API-supported operations. And we know there are 900+ pre-built connectors for Power Platform.
So why would I want to build a custom connector? We can think of three reasons:
- The API exists, but connector does not - and you need to work with the API!
- The connector exists, but it's not perfect - you need a more customized or complete version.
- The API is being built by you - and you want to build a connector in parallel, to drive usage.
As a JavaScript Cloud Advocate, this was exactly the situation I faced when I wanted to explore the low-code ecosystem from a pro-developer perspective. I had a specific scenario I wanted to implement and the API existed but the connector did not!
So I reached out to my colleague Daniel (Power Platform Cloud Advocate) and his response was immediate: Let's build a custom connector!!. Alright then!
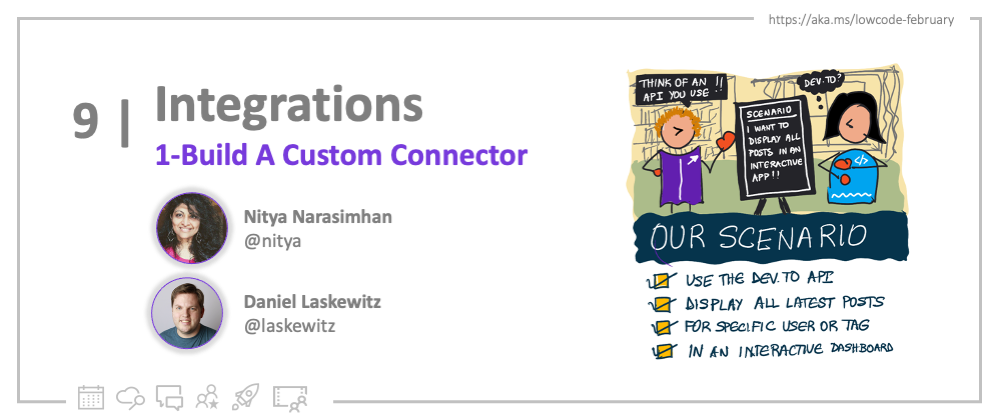
Our Target Scenario
You might know that there is an Azure publication on dev.to, a community-driven content portal where cloud advocates publish tutorials, tips and best practices for developers. We have 100+ contributors on that publication, and each post can have up to 4 tags. We wanted to view the content in different ways, but the default dev.to dashboard only shows us a chronological view. So here's our scenario:
As a user, I want to see a list of articles from dev.to
- for the Azure organization
- for a specific user
- for a specific tag
where each item should provide {publication date, author, tags, description, link}.
The good news? The dev.to site is built on a platform called Forem - which has an API that provides exactly the kinds of operations (e.g., /articles) that can help us build this dashboard scenario. But there is no prebuilt connector for this API, so it was time to build one!
The Build Lifecycle
The Power Platform documentation describes this 5-step process for building a custom connector:
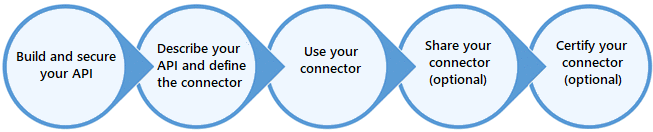
- Build & Secure it - applicable only if you are building the API itself. We are not, so we can skip it.
- Define it - this is where you describe the methods and metadata in the API. You can hand-craft this or use standardized options (OpenAPI file or Postman collection) to build from.
- Use it - create a connection to your Connector from a client, and validate it works!
- Share it - make the connector available to people within your organization to use.
- Certify it - submit it for Microsoft certification if you want this available to all users.
Let's Build the Connector!
We'll follow the guidelines in this tutorial.
1. Pre-Requisites
To get started, you will need the following:
- Subscription - to Azure (if using Azure Logic Apps), Power Automate, or Power Apps.
- Familiarity - with core concepts of Logic Apps, Power Automate flows, or Power Apps.
- API Key - to the Forem API, if using authenticated endpoints
Note that currently Power Plaform supports only OpenAPI v2.0 - and the dev.to API uses OpenAPI 3.x. We can work around this in two ways:
- Use a converter that downgrades API to v2.0 (knowing you may lose some functionality)
- Manually re-create API in Custom Connector wizard (using OpenAPI spec as reference)
We'll talk briefly about the first option in this post, and encourage you to join us for our PowerfulDevs Session where Daniel will walk through the steps for the second option!
2. Get The DevPlan
Don't have a Power Apps or Power Automate subscription (see pre-requisites)? Just sign up for the Power Apps Developer Plan and get a free development environment that will work for this purpose. Anyone with a work or school email address (backed by Azure AD) can sign up. Read our earlier post on DevTools and Onboarding options to get yourself set up with a sandbox subscription and test tenant.
3. Connector Wizard
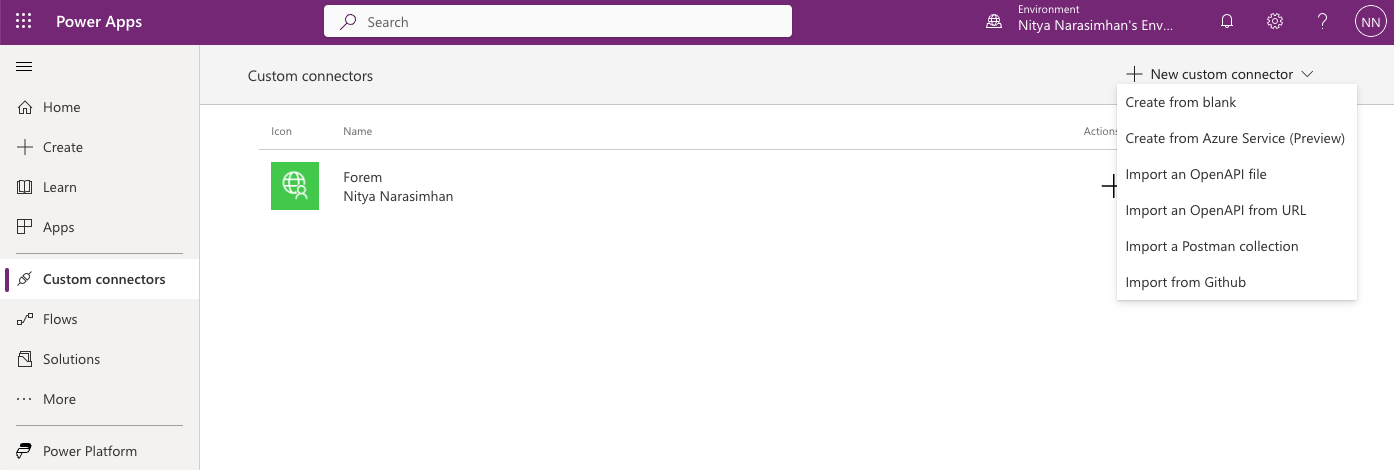
Visit the Power Apps portal and sign in. You should see something like this:
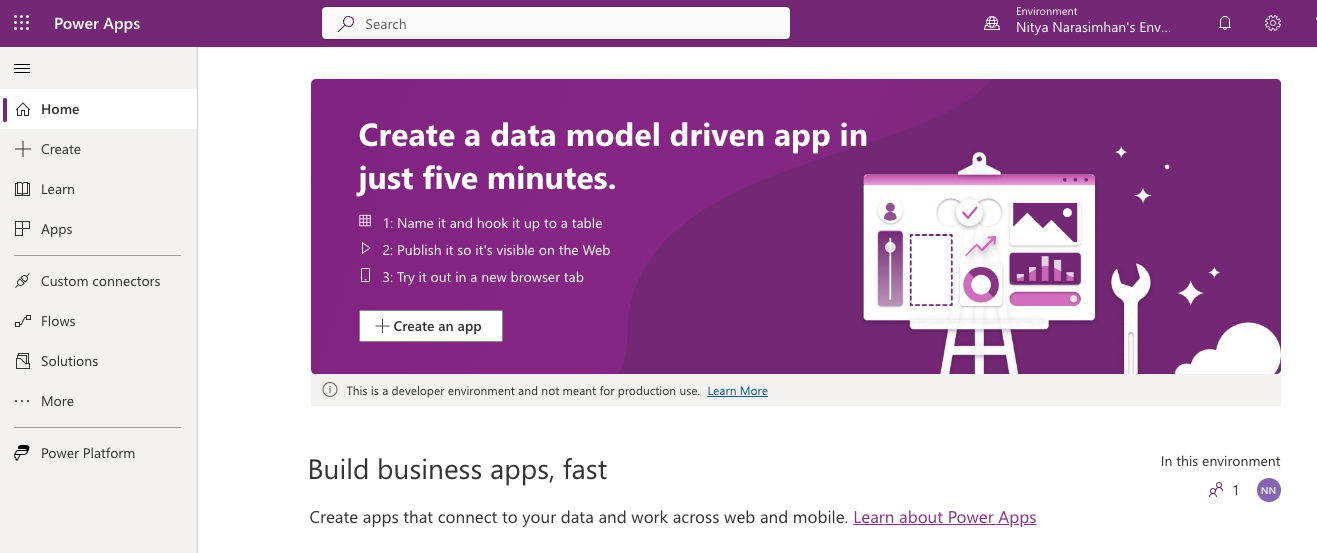
Select Data > Custom Connectors to enter the Custom Connector Wizard. Click the New custom connector drop-down to see the different starting options as shown below. Use the Create from blank option to build the custom connector manually. We walk through this approach in our PowerfulDevs Session on Feb 15 so don't miss it!
4. OpenAPI Converter
For completeness, let's also see what happens if we were to try using the Import an OpenAPI file option. First download the dev.to OpenAPI file to your local drive. Then use the Import option in the wizard to upload this file to the portal. (Note: in my case I used a converter tool to convert the OpenAPI YAML to a JSON file before this step).
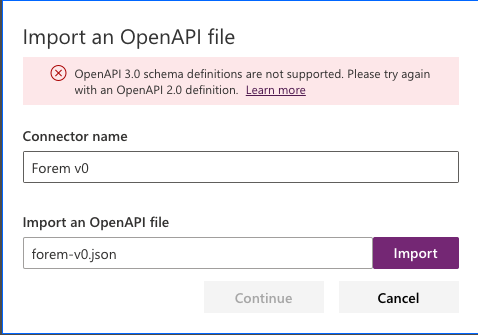
Not surprisingly, we get this error message indicating that the dev.to OpenAPI file uses the v3 specification which is not yet supported. What do we do now?
If you're a JavaScript developer, you'll likely check npm for a handy converter. And guess what? You'd find one! that does exactly what you need. You can even use this directly on the YAML file downloaded from the dev.to API site!
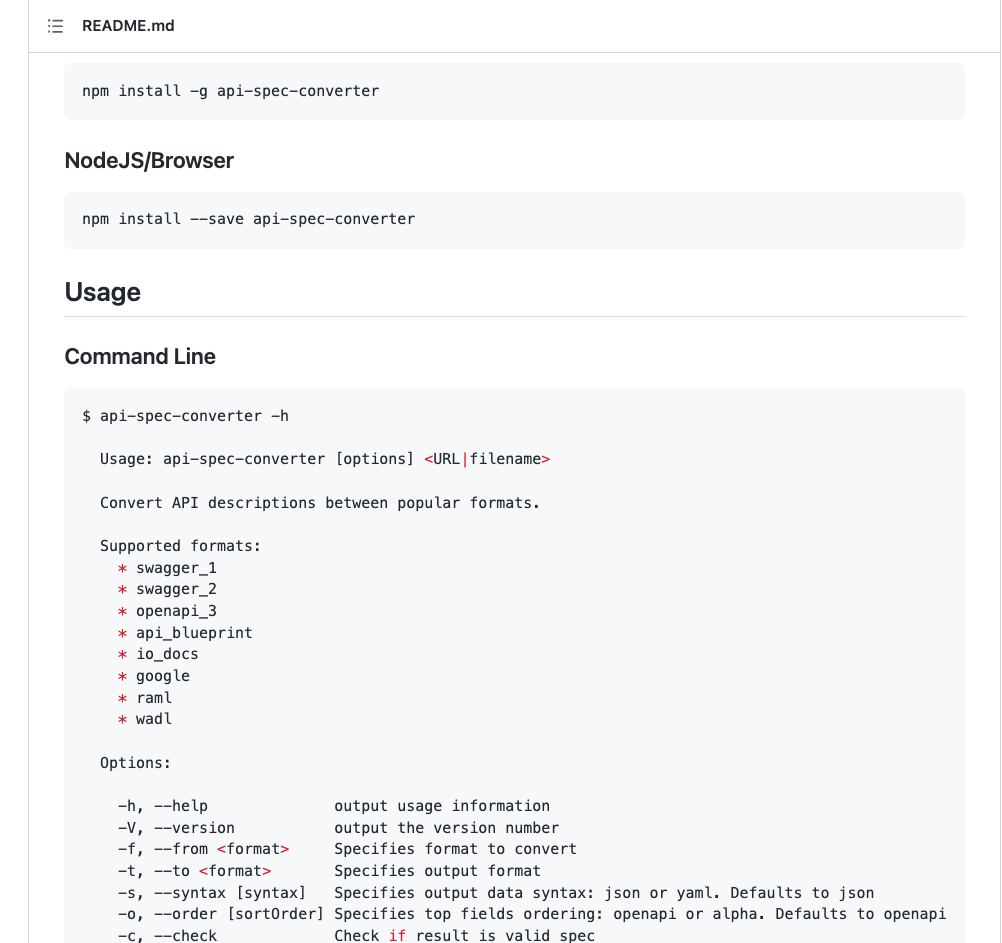
Now use the Import option again but with the converted file and - SUCCESS! 🎉 You should be taken into the first step of the Custom Connector creation workflow.
5. Creation Workflow
The wizard walks you through the 5 key steps of the workflow (see tabs):
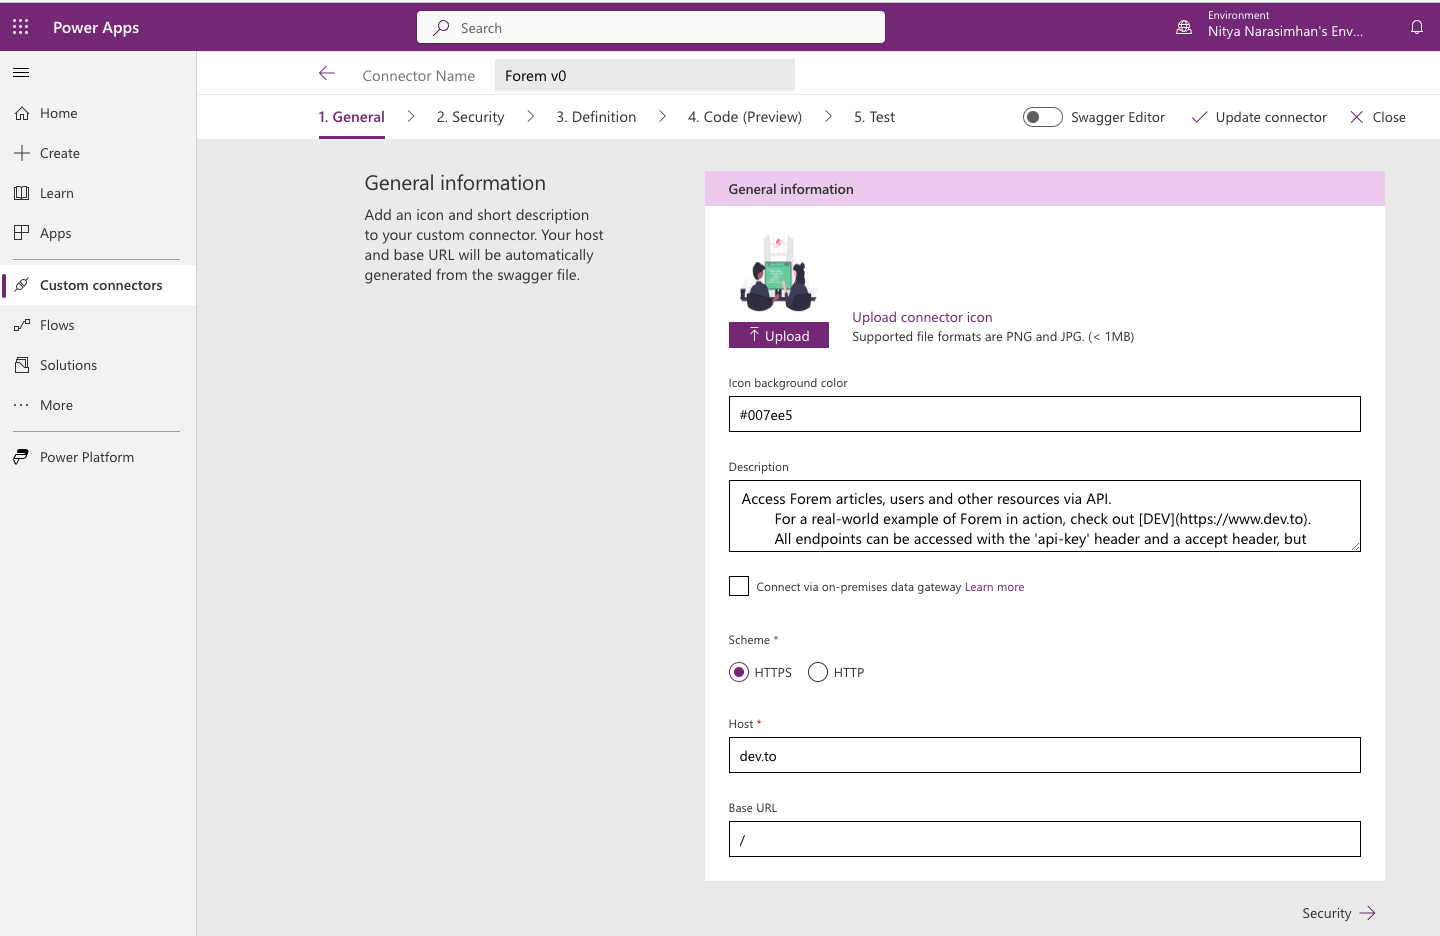
- General - defines the metadata for the Connector. Pay attention to the
HostandBase URLfields. These will need to be corrected to align with the API definition. However, importing the file should have filled in details like theDescription. Customize this by adding your own icon and background color preferences. Then move to next tab. - Security - is the panel where you enter credentials (e.g., API key) required to access the API
- Definition - is the main tab defining the API. We'll look at this in the next section.
- Code - The connector can act as a proxy between API and low-code clients. This section allows you to define code that transforms requests or responses in custom ways.
- Test - This pane helps validate your definition with simple in-wizard tests as we see later.
For our current purpose, let's dive into the Definition tab for more detail.
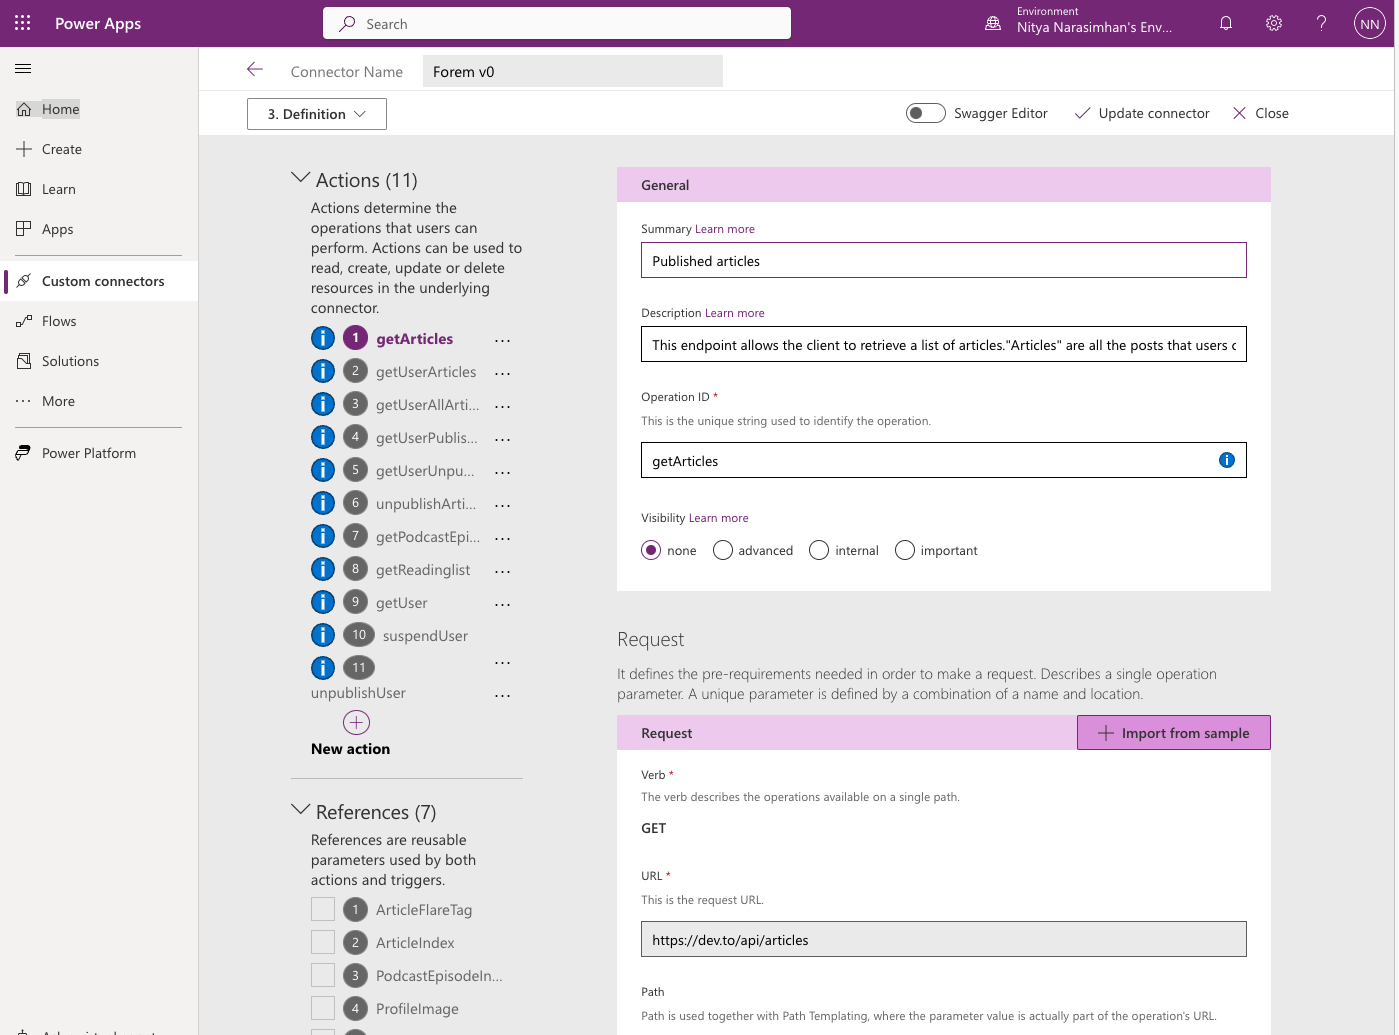
6. Edit Definition
The good news is that importing an OpenAPI file will fill in most of the definition details for you. Here, Actions are the requests you can make on API (endpoints) - we can see that the default dev.to API endpoints are already defined. Because we downgraded to OpenAPI v2, you may find certain actions throwing error flags.
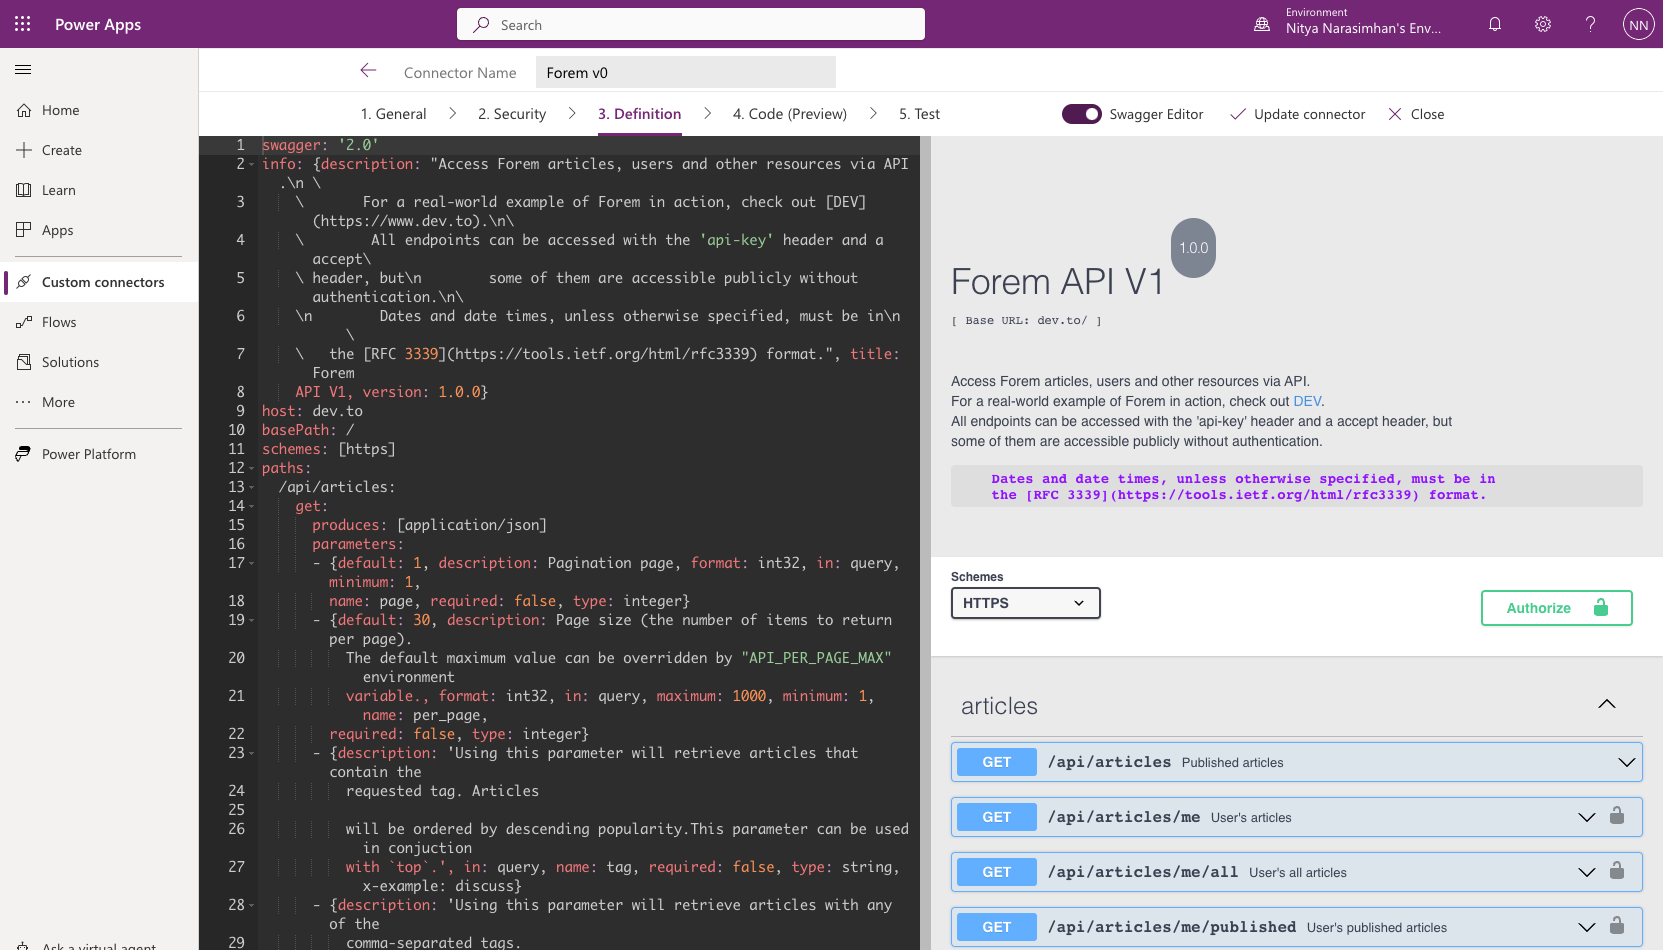
You can use your judgement to delete or edit them manually, till the complete definition is error-free. As a pro-developer, I was particularly happy to see the option to switch to a Swagger editor as shown below. Changes in this editor are kept in sync with the definition, so you can easily move between the wizard UI or this editor, without losing context. The editor view lets you see the raw details of the OpenAPI spec, and the swagger-ui rendered version (at right) for easy debugging.
Once you've completed the definition to your satisfaction, take a minute to click Update connector to make sure the changes are saved to the environment. We aren't doing any code transformations, so let's skip that step and go directly to testing!
Let's Test the Connector!
At this point, we've come to the Step 5: Test the connector step of the tutorial. Testing is currently available only in Power Automate and Power Apps.
1. Create Connection
The connector is just the wrapper around the API. Before we can use it, we need to associate this with a Connection that provides the required credentials (e.g., API key) required to actually use the deployed API endpoint.
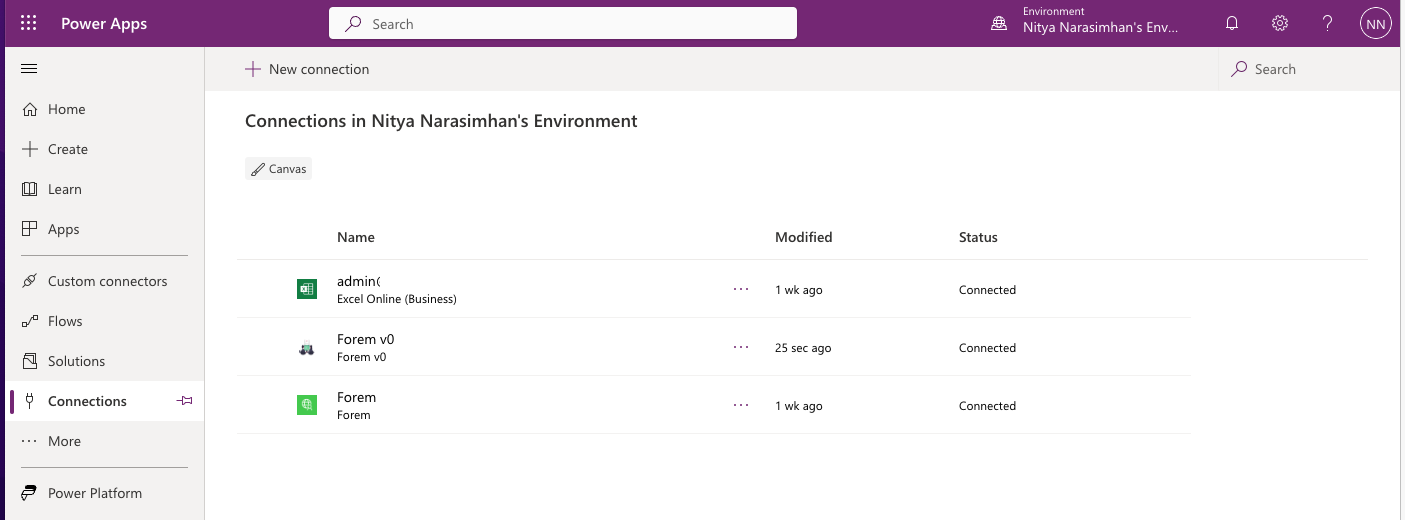
You can create a new connection either from the Connections page (see sidebar) or from the Test tab of the wizard itself. Once the Connection is created, you should be taken to the Connections page to verify that it was created correctly. Now we're ready to test!
2. Test Connector
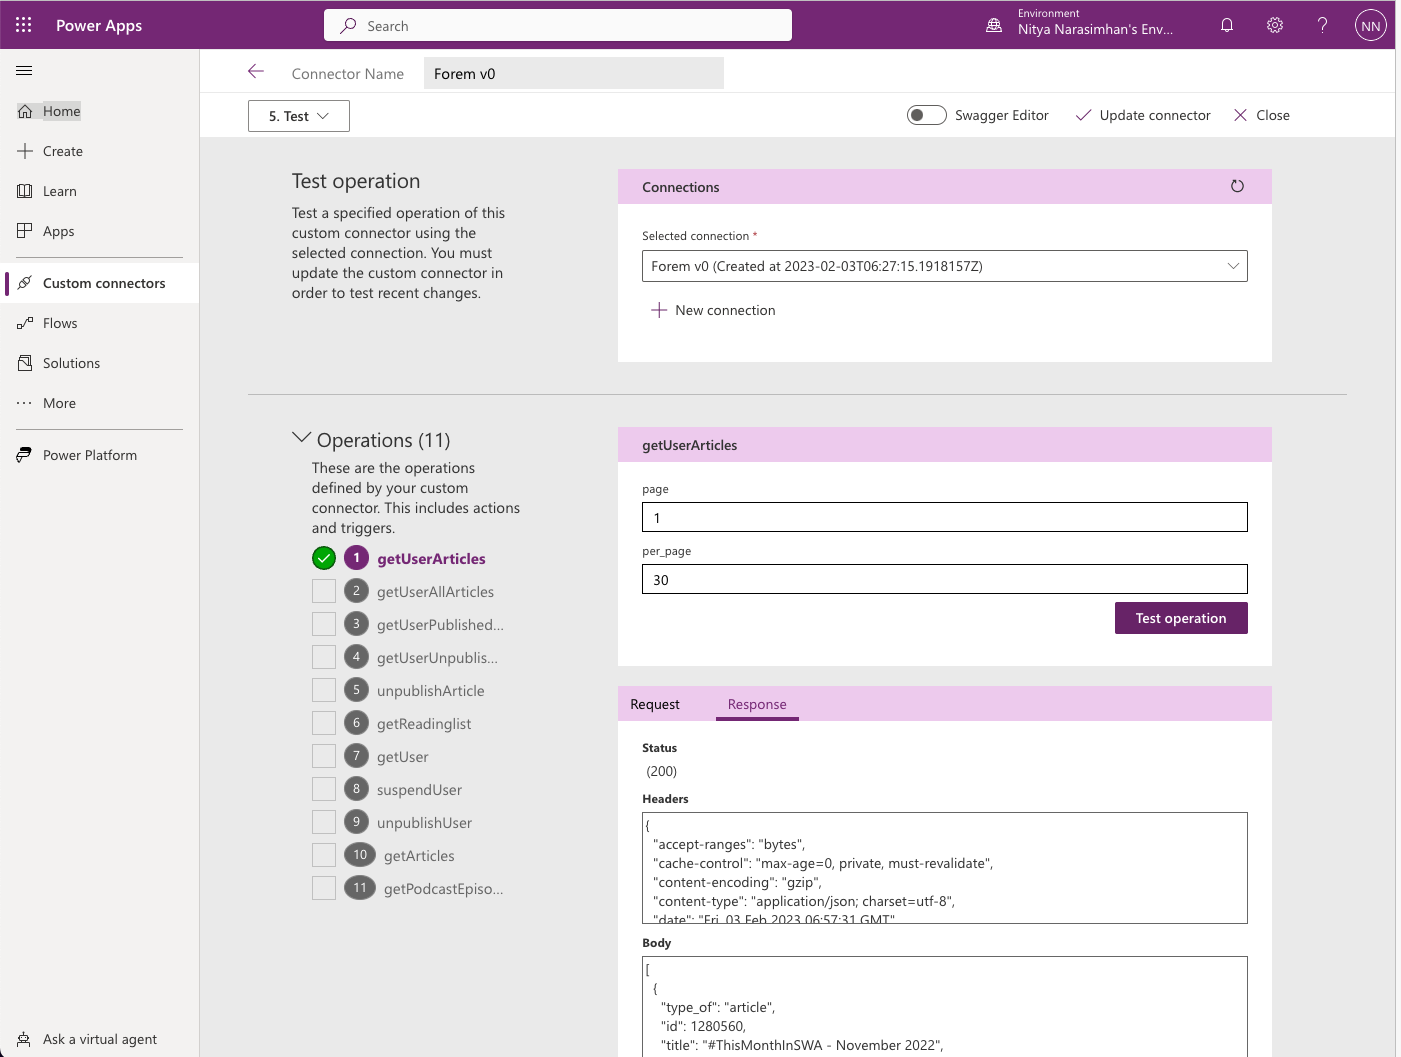
Switch back to the Custom Connectors page, select the connector you were working on, and move to the Test tab. You should see something like this - where you can now select the newly created connector as the default Connection for the test.
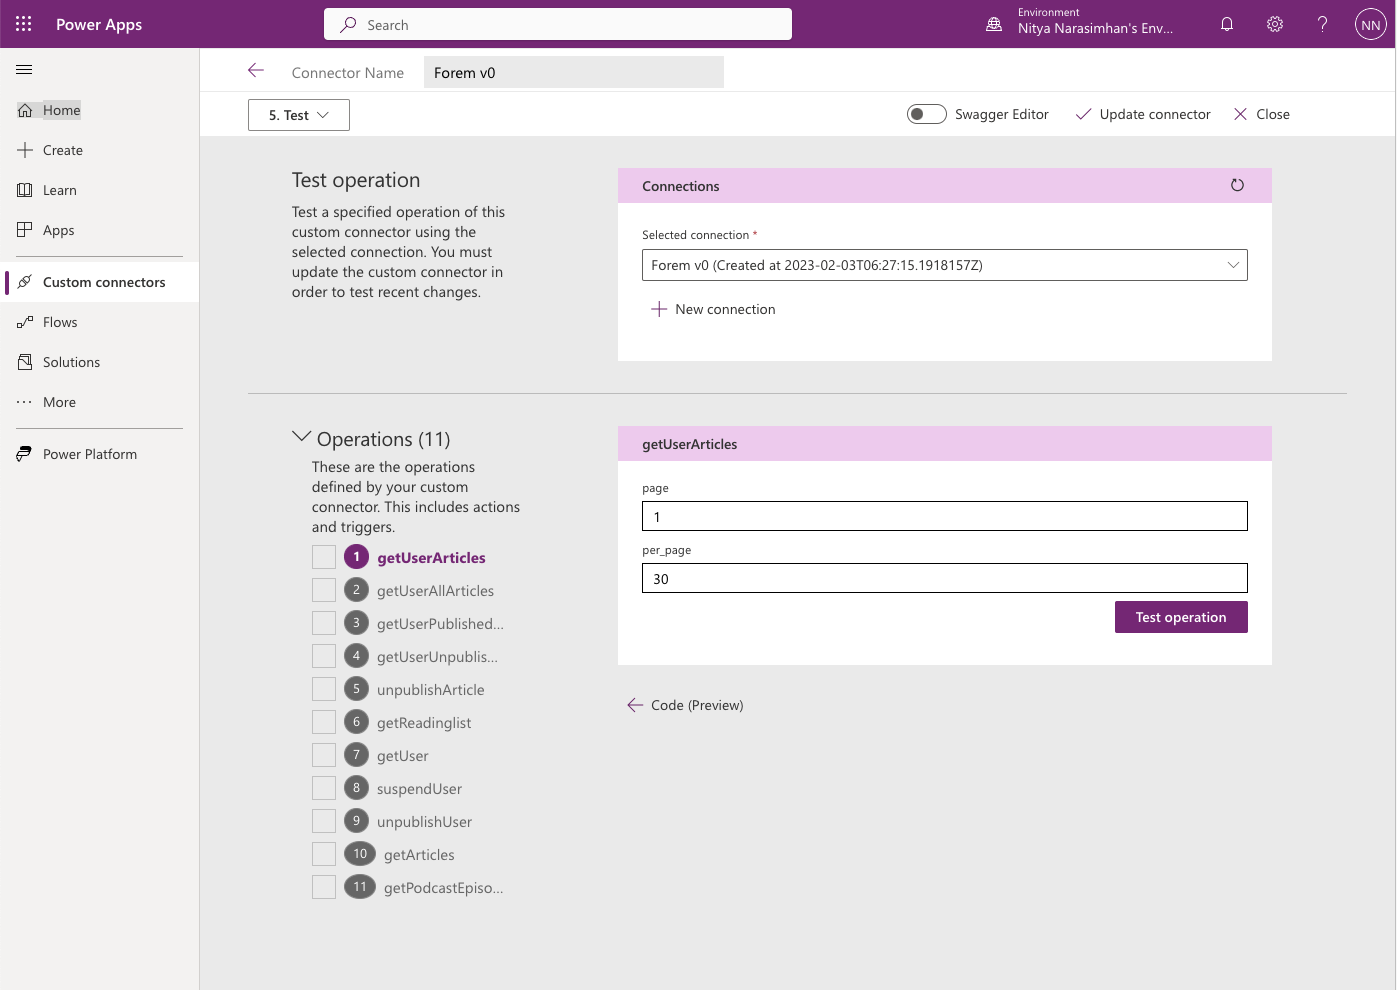
At this point, you can simply select the Action (request), provide any necessary parameters, and click Test operation to see if you get the correct response. For example, in the screenshot below, you can see the default response for getUserArticles returns the last article I published on dev.to!
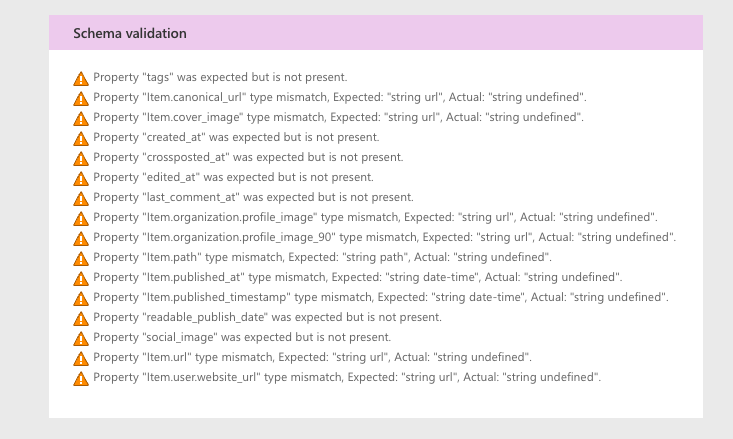
This test tab also provides helpful feedback - for instance schema validation - that can help you further debug and fix any issues in the definition, before you share the connector with others.
You just built and tested your first custom connector using the dev.to API!
Note that testing within the wizard helps with improving the definition but it can be laborious to test everything that your intended application will use. Instead, you might be able to test the connector from an application by using the connector in a Power Apps or Power Automate implementation.
Next: Use The Connector!
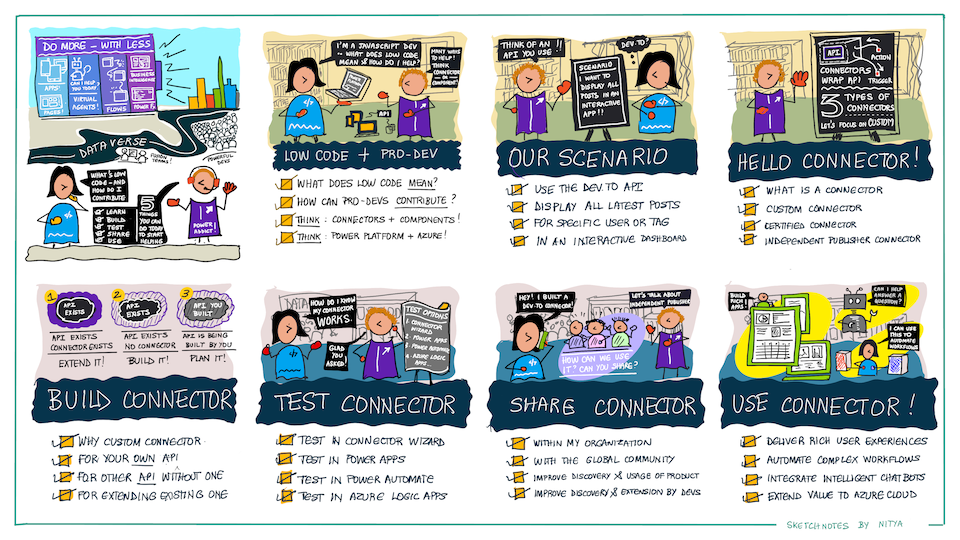
Wow - we covered a lot today! Here's a helpful visual recap for your convenience. We defined our scenario, built our connector, tested it within the Custom Connector wizard, and learned about options for sharing it widely. What's next? Using the connector in a real-world context, to deliver the rich interactive experience we described in our scenario. Read Part-2 to see how we used the connector within Power Apps!.
Exercise
Try building a custom connector yourself, either for the same dev.to API, or for any other OpenAPI-compliant API that you might want to use. And don't forget to join us Feb 15 for the PowerfulDevs Conference where we walk through the process and demo in under 30 mins!
Resources
- Training: Build custom connectors for Power Automate - also in our Cloud Skills Challenge
- Documentation: Custom Connectors - on Microsoft Learn
- Examples: Custom Connectors - GitHub Repository
- PowerfulDevs Session: Enable millions of low code devs by building custom connectors
- Learn Collection LowCode February