2. Add Custom Code
Working as part of the PrioritZ fusion team you will be configuring a custom connector for an existing API. The team would like to add badging to the PrioritZ application to give credit to users when they have completed ranking an item. The team identified an existing API, but it doesn't have a Power Platform connector.
When you review the API, you see that it has four operations and uses API key authentication.
In Exercise 2 you will add a new operation to only return the current badge name and image URL. You will do this by using the custom code feature to reshape the response from the API.
If you already have the custom connector open, skip to step 4
2.1 Add code from resource folder
Navigate to Power Automate
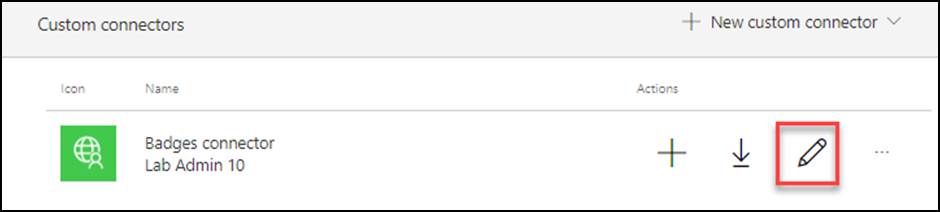
Expand Data and select Custom connectors.
Click the Edit button of the custom connector you created.
- Select the Definition tab and click New action.
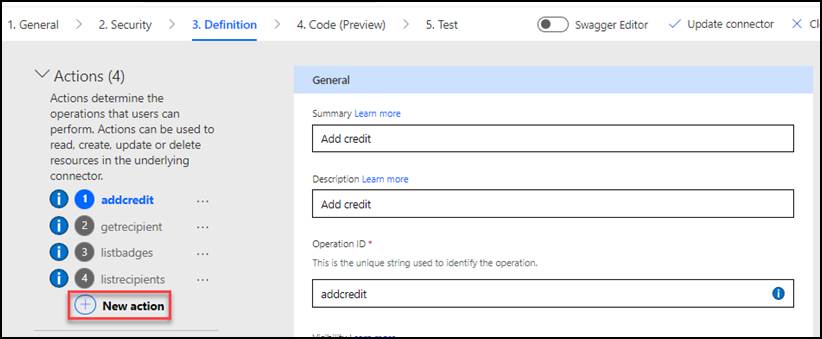
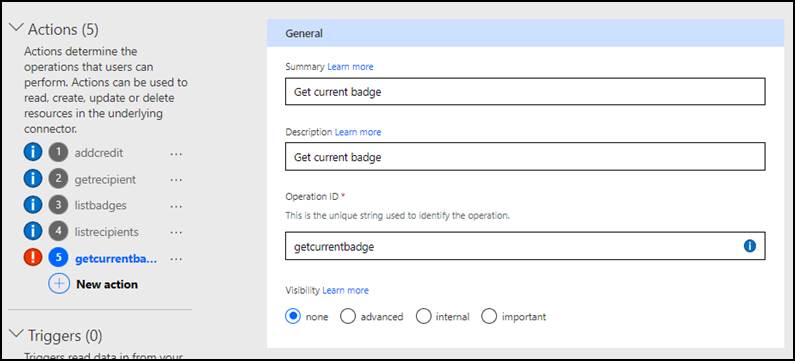
- Enter Get current badge for Summary, Get current badge for Description, and getcurrentbadge for Operation ID.
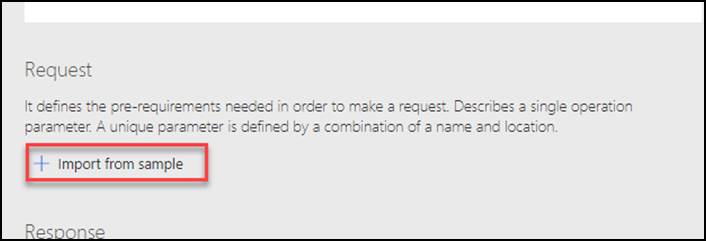
- Scroll down to the Request section and click + Import from sample.
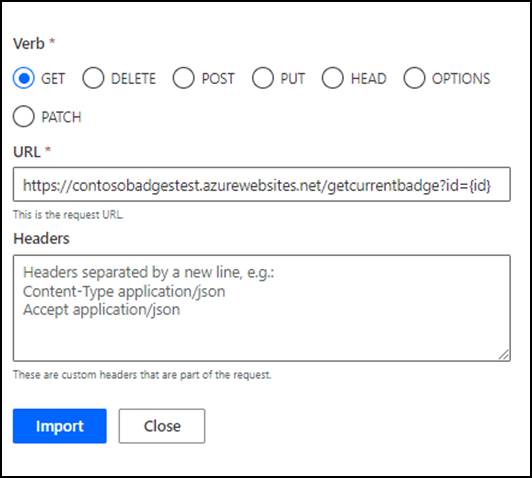
- Select Get for Verb, enter
https://contosobadgestest.azurewebsites.net/getcurrentbadge?id={id}for URL, and click Import.
Click Update connector and wait for the connector to be updated.
Select the Code tab.
Enable Code and click Upload.
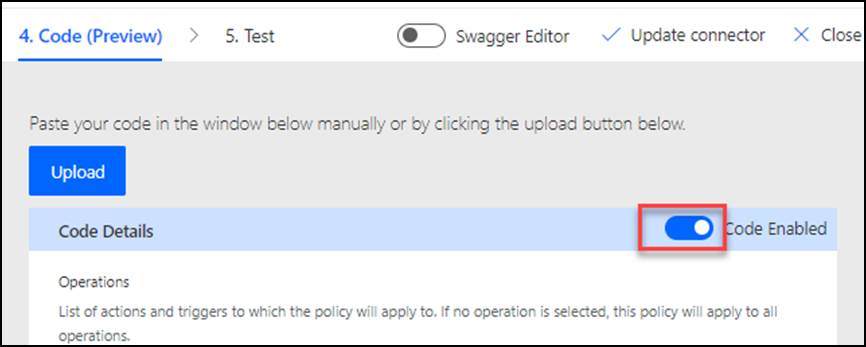
Select the CustomConnectorCode.csx file located in the lab resources folder and click Open.
Select the getcurrentbadge action.

Review the code you just added.
- Click Update connector and wait for the connector to be updated.
- Advance to Test.
- Select the getcurrentbadge action.
- Provide your email address as id and click Test operation.

The test should succeed, and you should get current badge for the user you created.
2.2 Update Connector
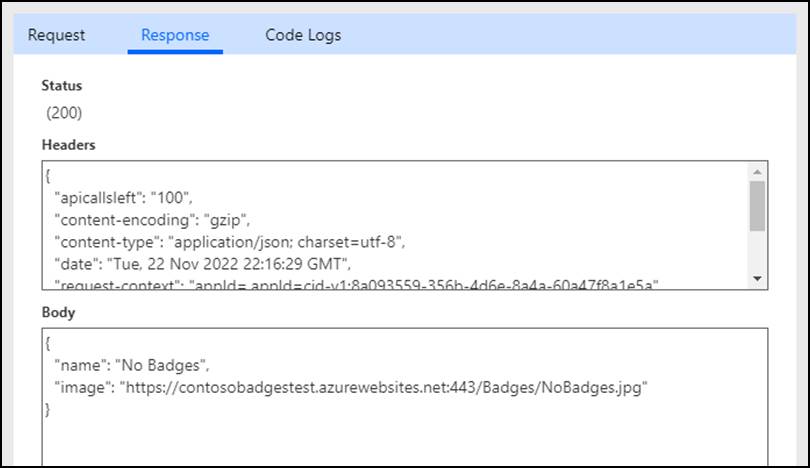
Copy the Response Body JSON.
Select the Definition tab.
Select the getcurrentbadge action.

- Scroll down to the Response section and click + Add default response.
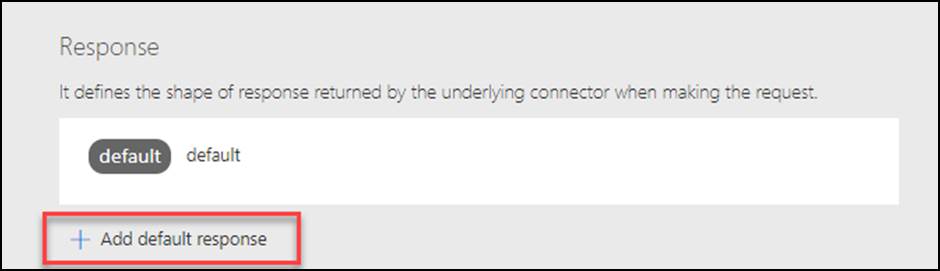
- Paste the JSON you copied in the Body and click Import.

- Click Update connector and wait for the connector to be updated.
Do not navigate away from this page.
2.3 Test custom code
- Select the Test tab.
- Select the connection you created earlier.
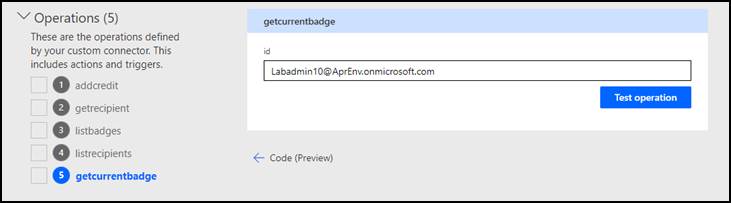
- Go to the Operations section and select the getcurrentbadge operation.
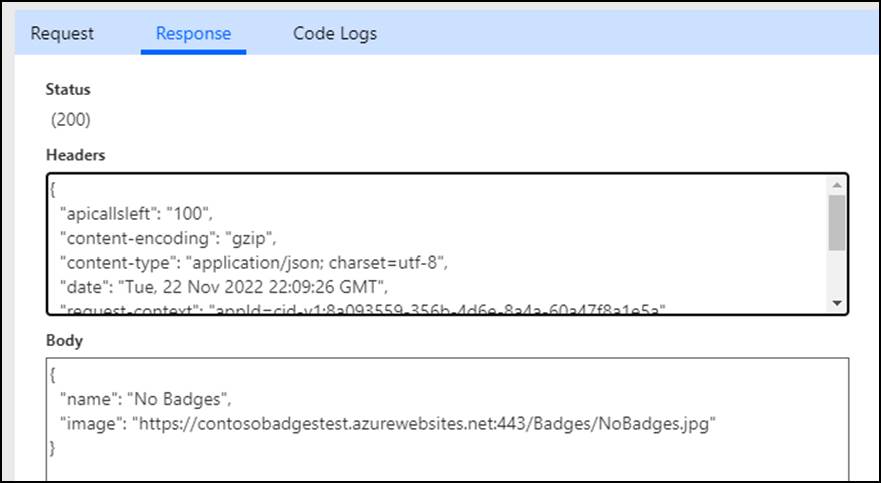
- Provide your email as id and click Test operation.
The operation should succeed, and the response Body should look like the image below.