Task 01 - Create Azure Database for PostgreSQL
Description
In this task, you will create a new PostgreSQL database that will be the target for the database migration.
Success Criteria
- Create a new database hosted in Azure Database for PostgreSQL - Flexible Server that will be the target for the database migration.
Solution
Expand this section to view the solution
-
Sign in to the Azure Portal. Ensure that you’re using a subscription associated with the same resources you created during the Lab setup.
-
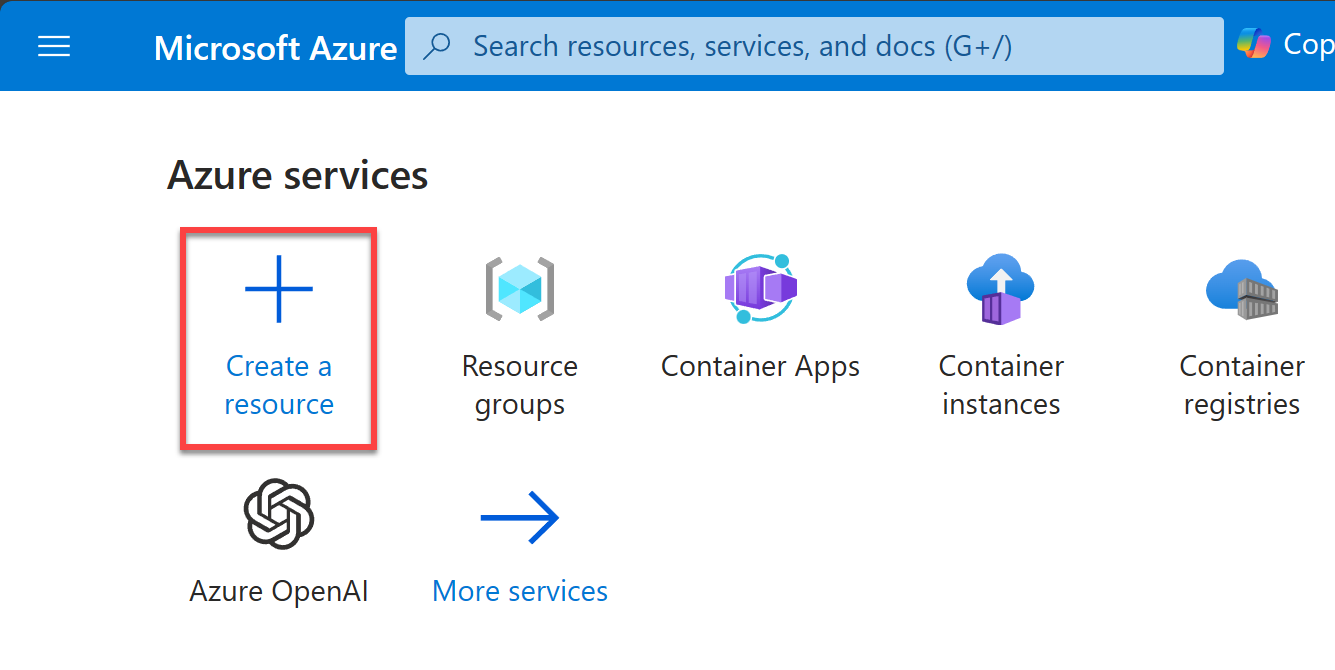
On the Home page within the Azure Portal, towards the top, select Create a resource.
-
Within the Search services and marketplace field, type
PostgreSQL flexible, press Enter, then select Azure Database for PostgreSQL Flexible Server in the search results.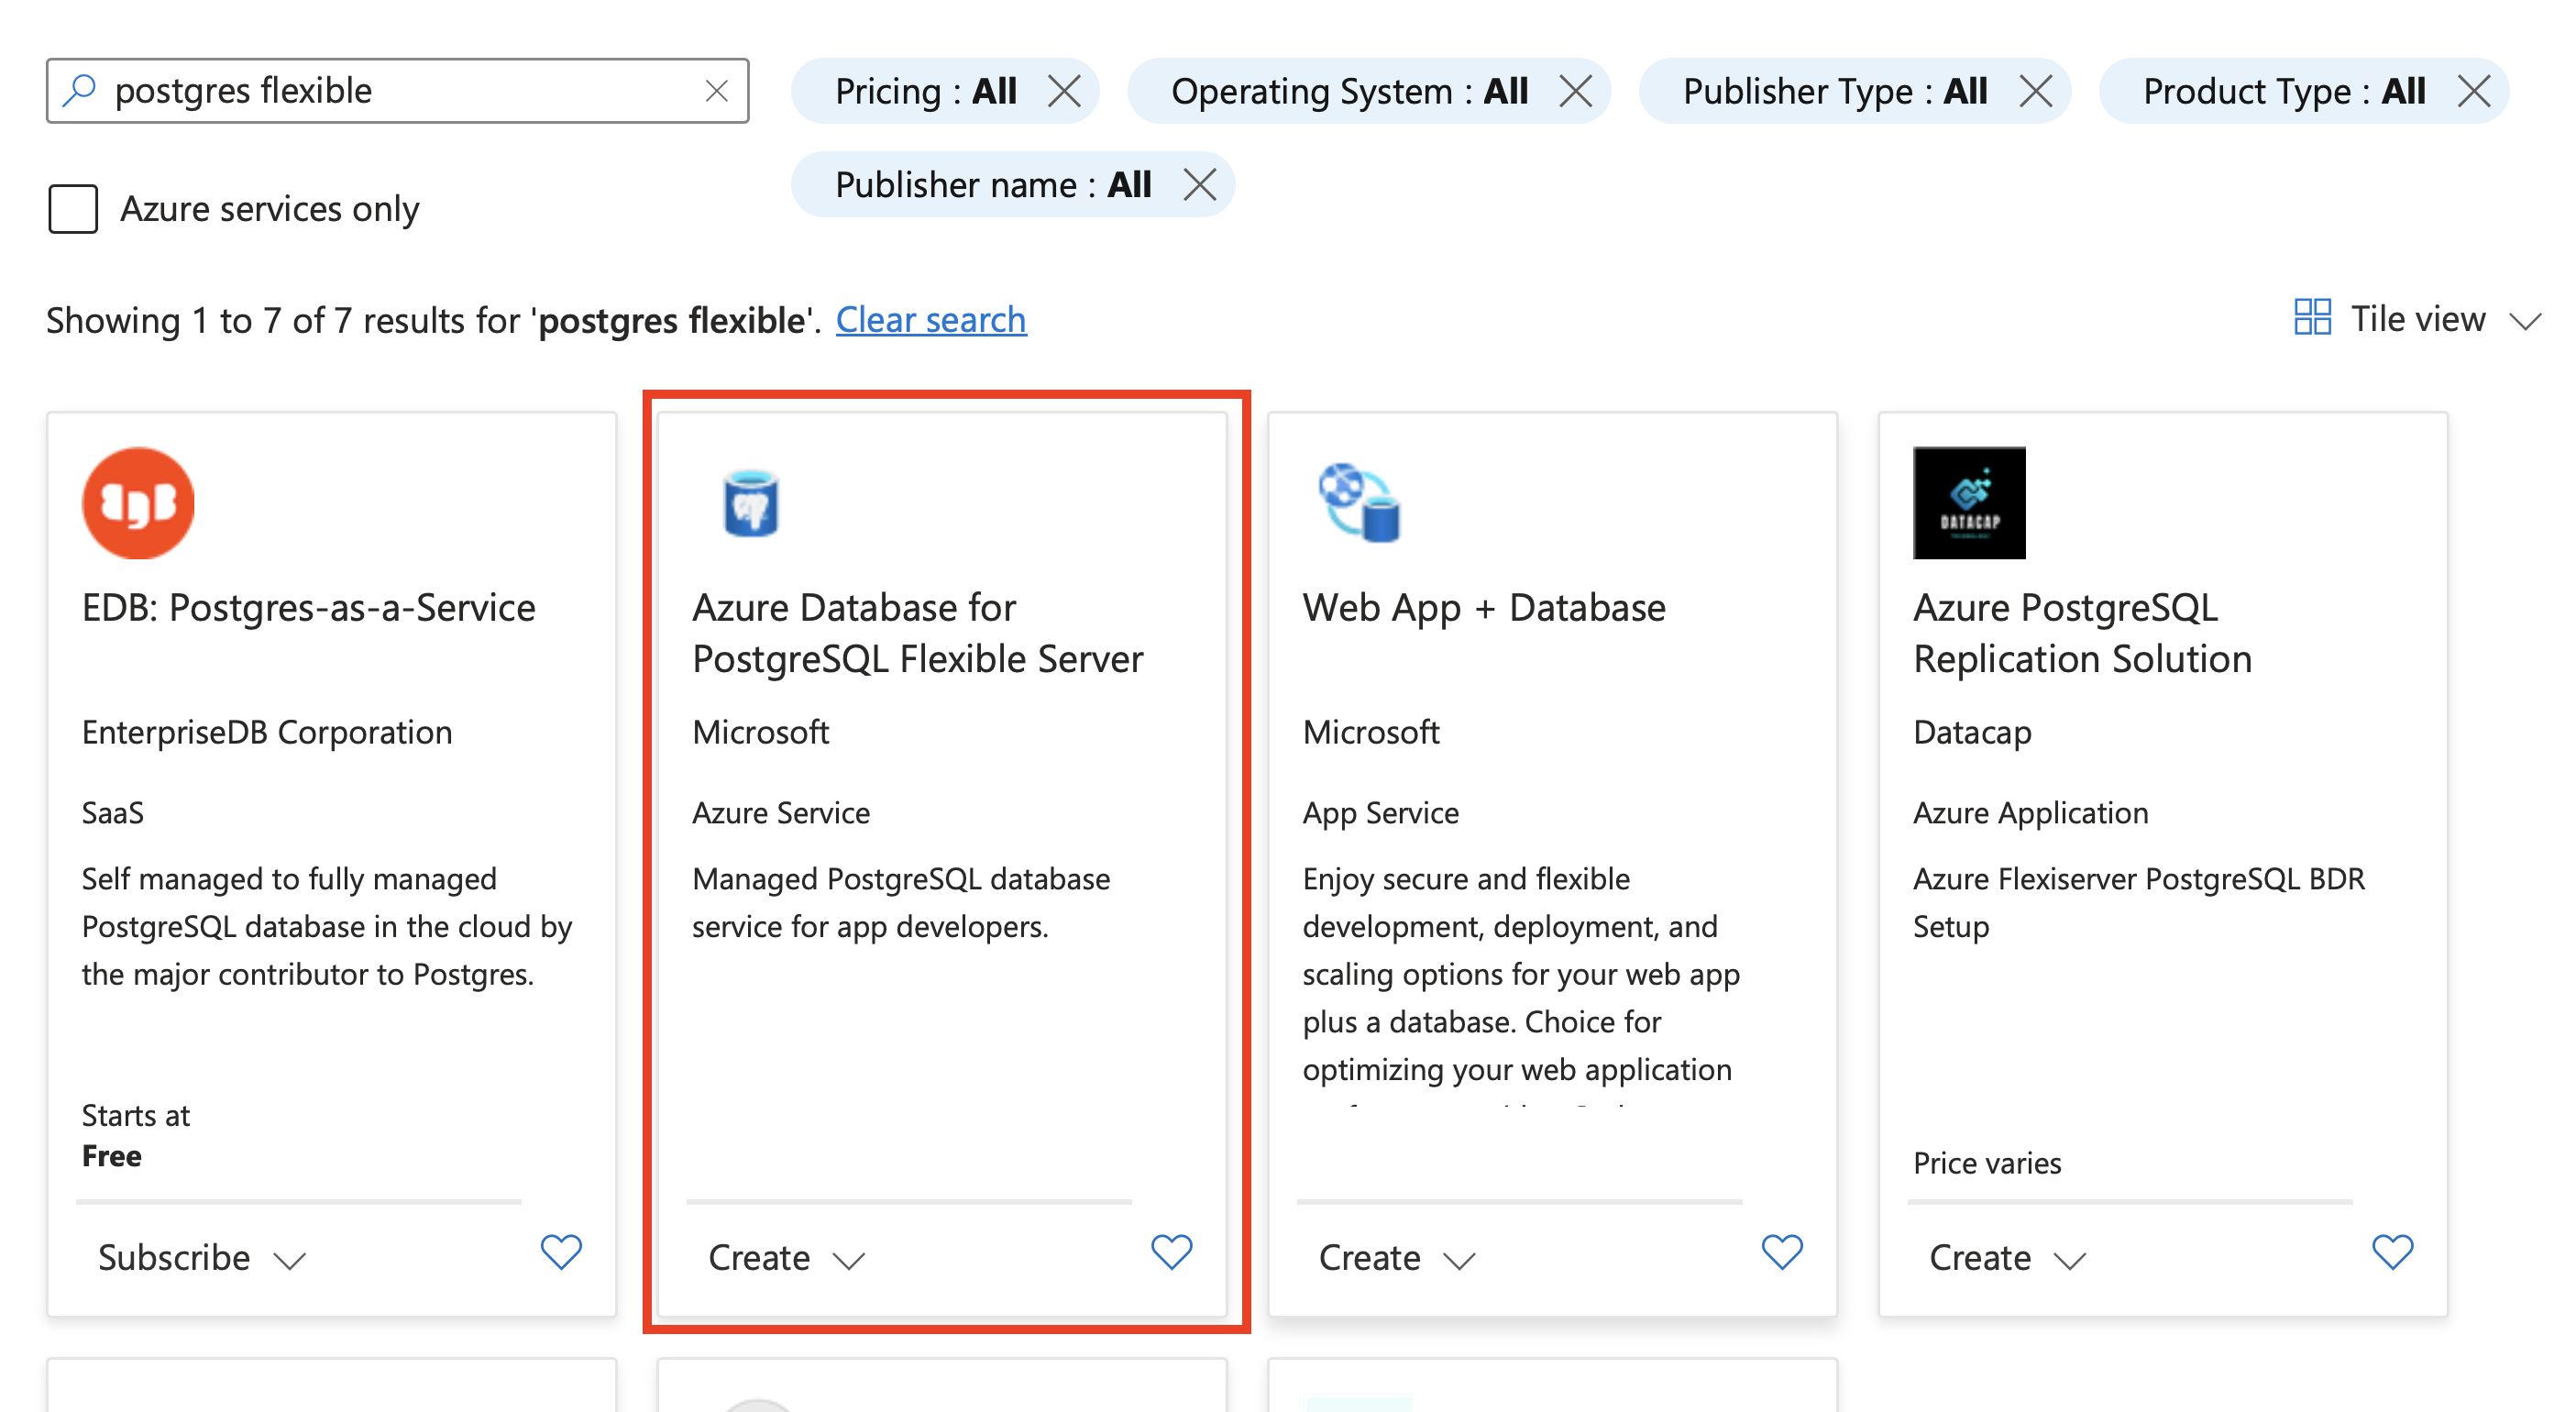
-
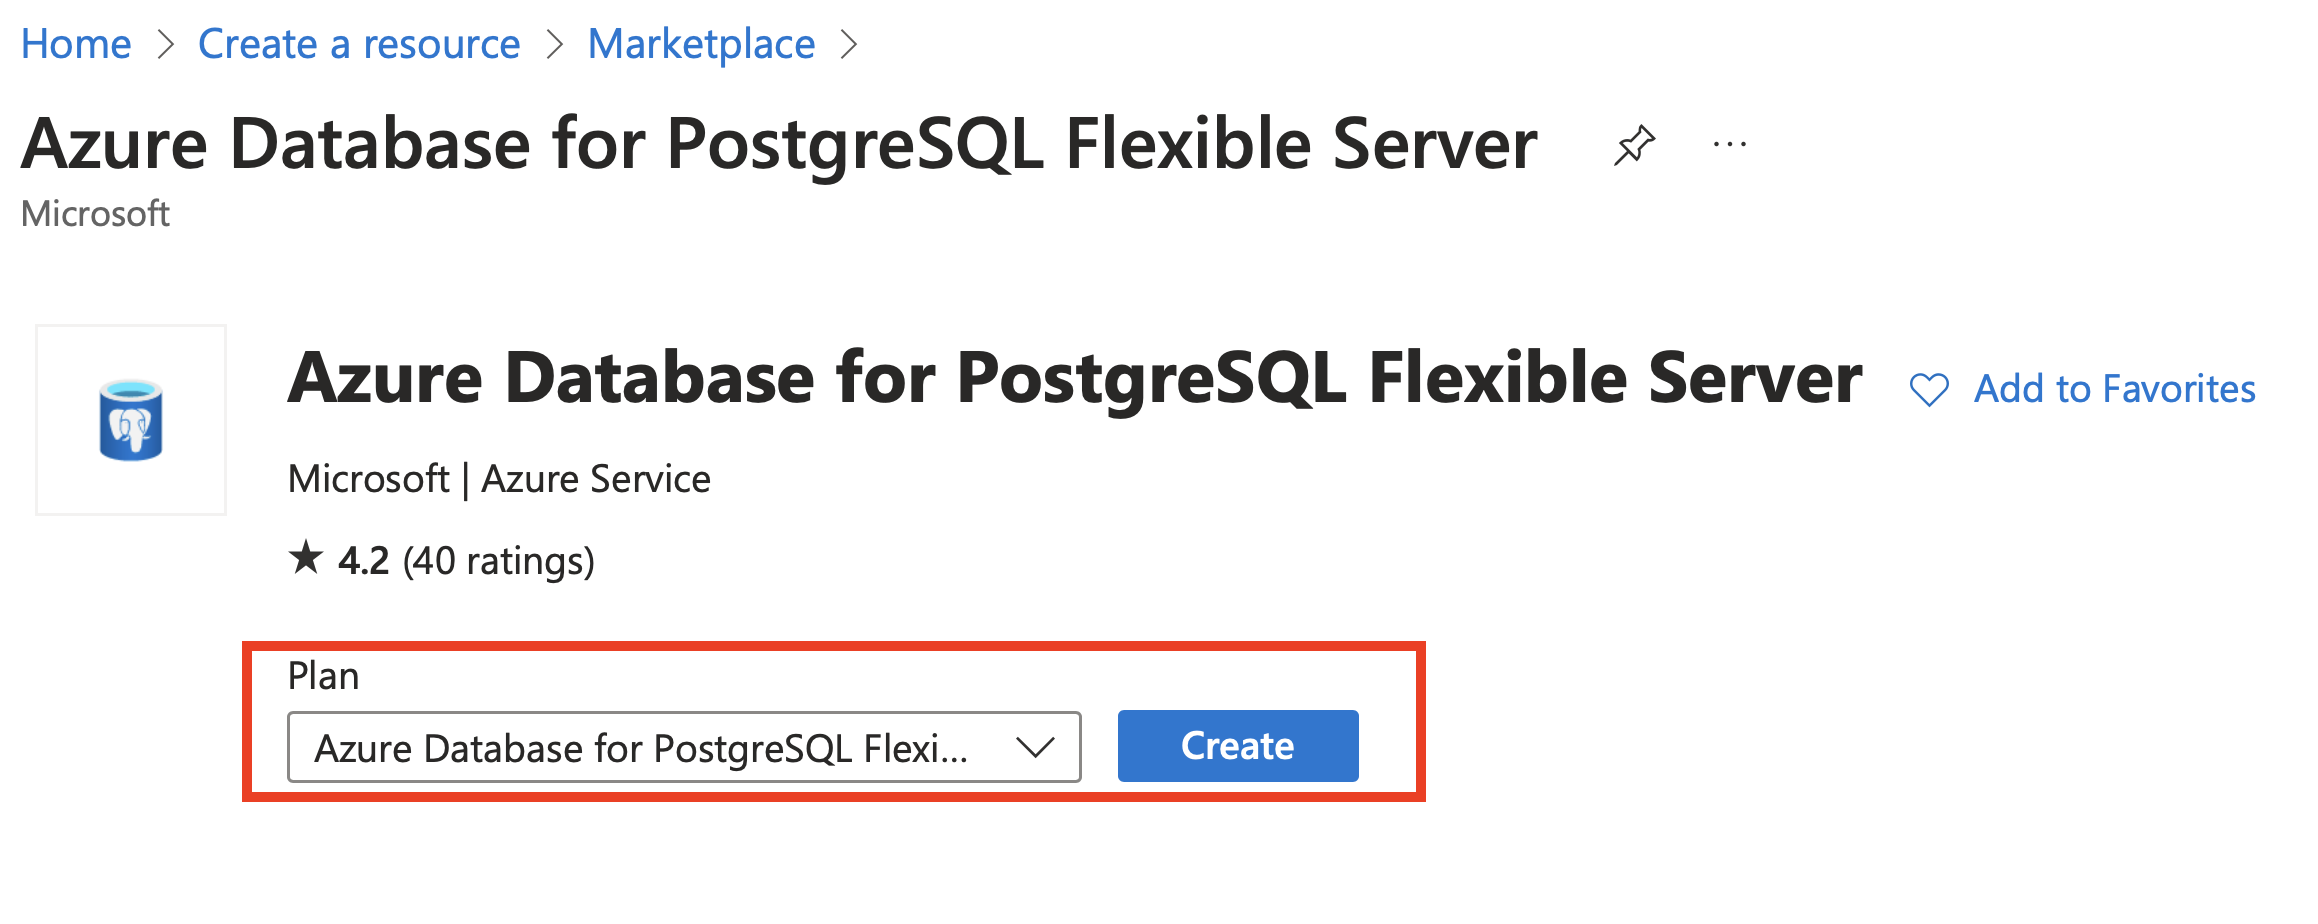
Select Create.
-
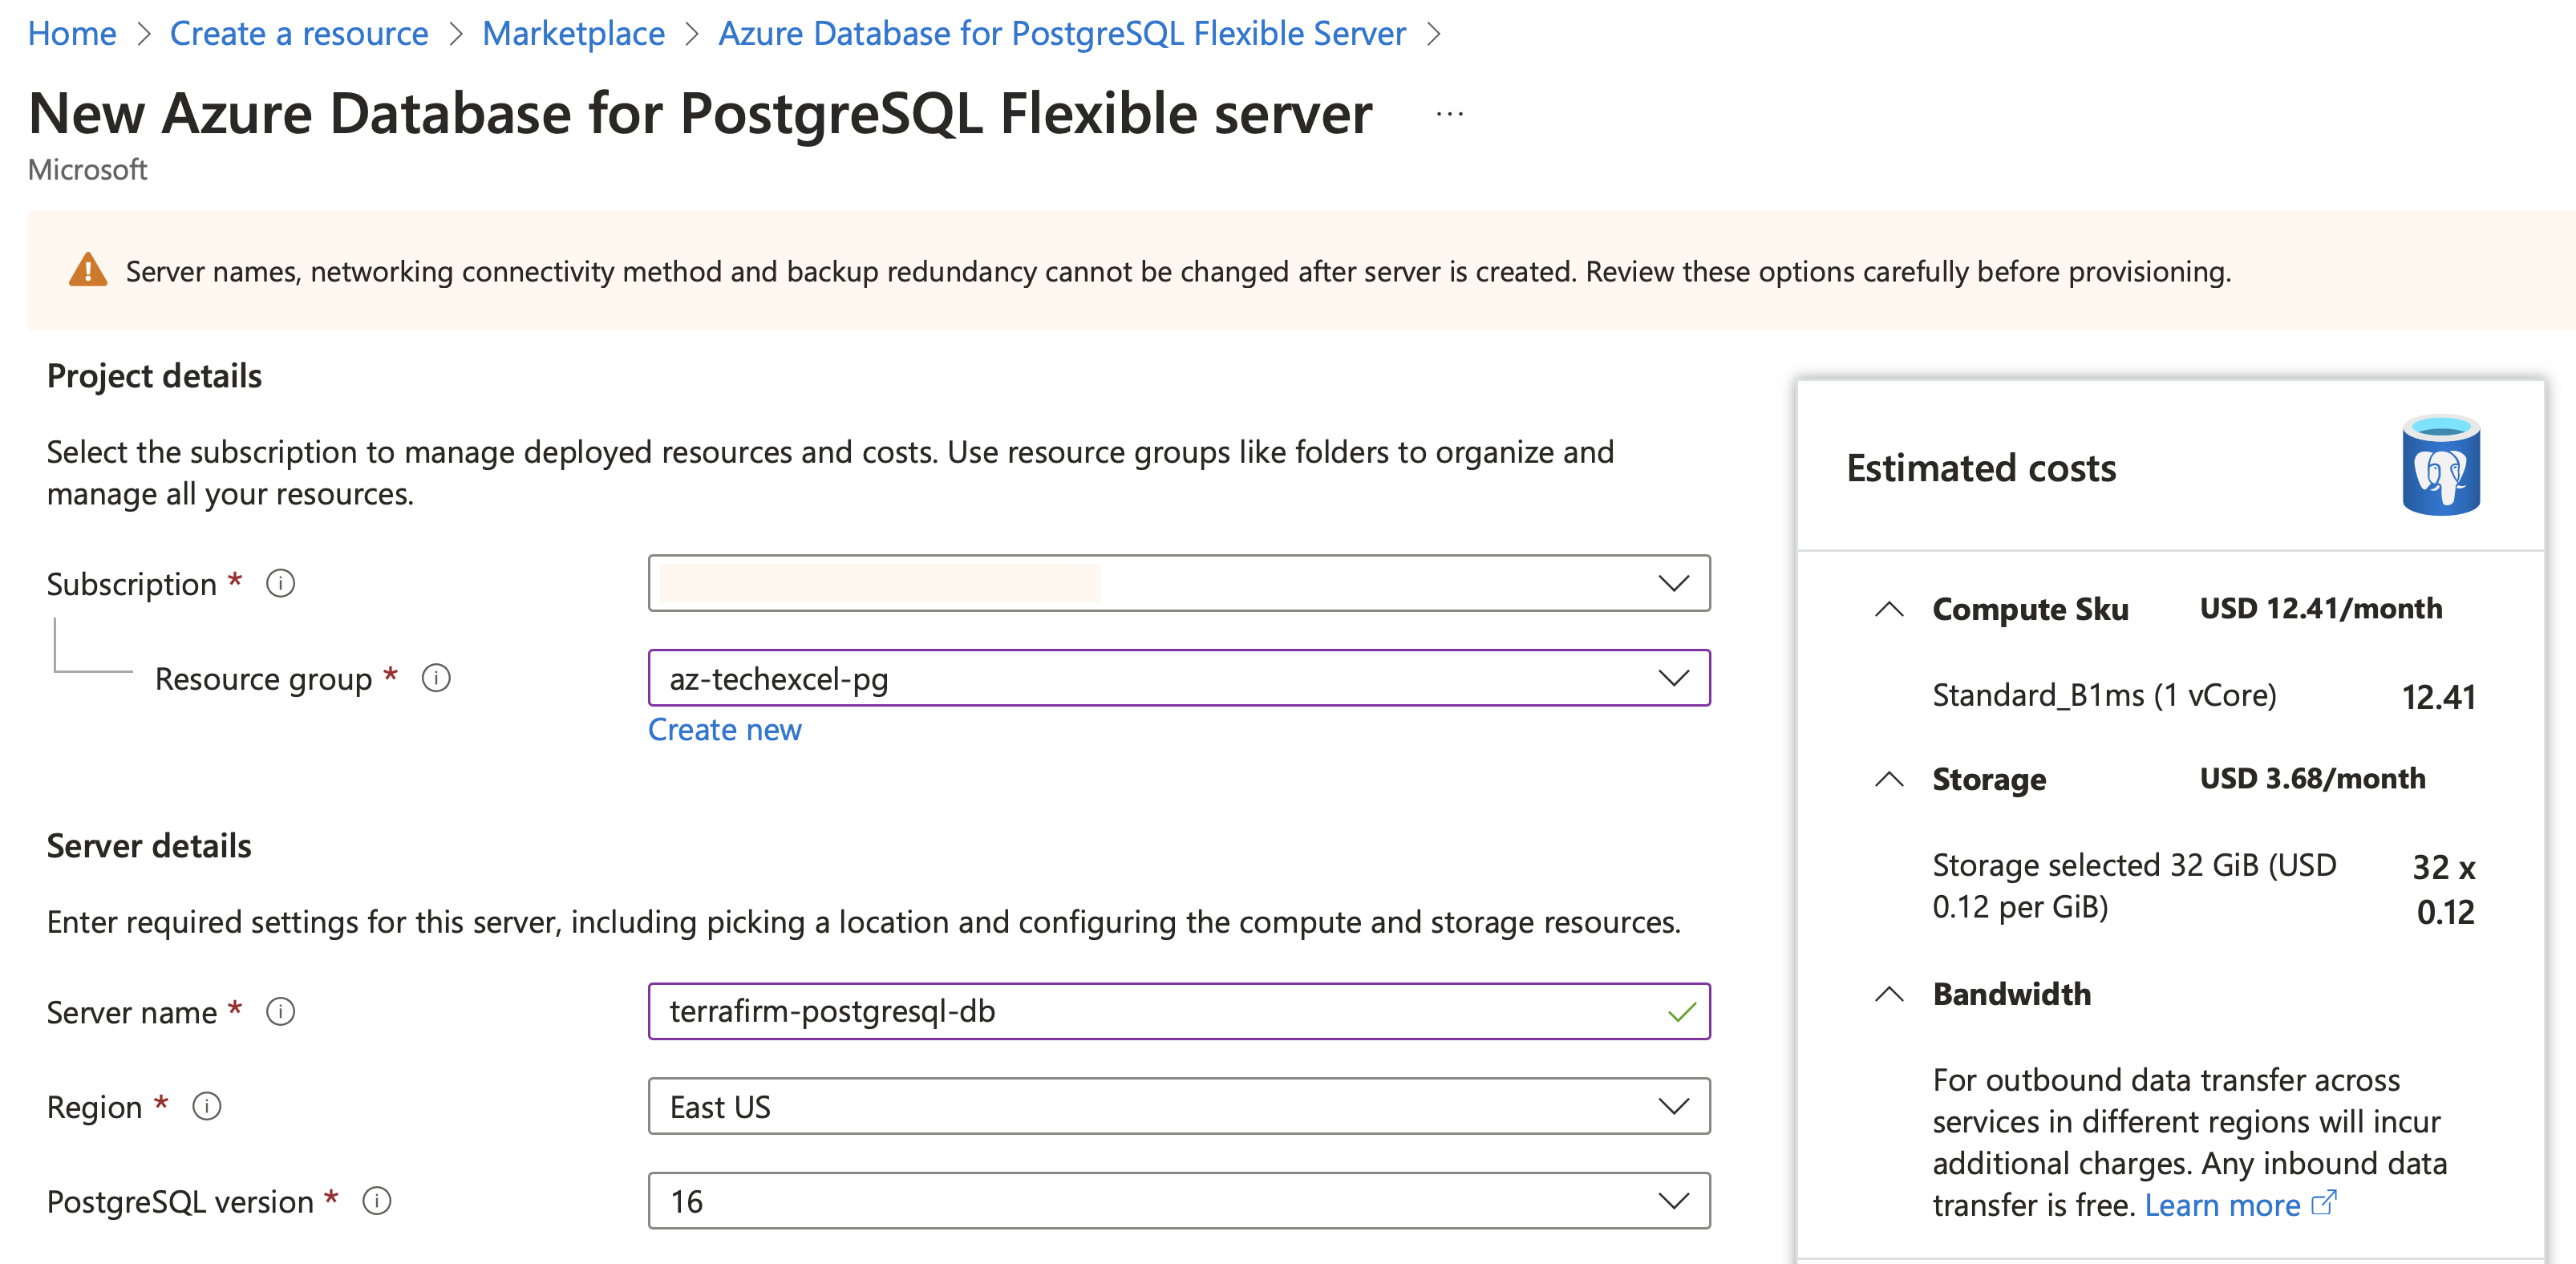
On the Flexible Server pane, select the following values:
- Resource group: Select the resource group that you created for this lab. Such as
terrafirm-rg. - Server name: Enter a unique name, such as
terrafirm-postgresql-db. - Region: Select the Azure Region that was used to create the resource group.
- PostgreSQL version:
16.0 - Workload Type:Development
- Resource group: Select the resource group that you created for this lab. Such as
- Under Compute + storage click Configure server and on the resultant pane choose
- General Purpose (2-96 vCores) - Balanced configuration for most common workloads**
- In Compute Processor Choose Intel
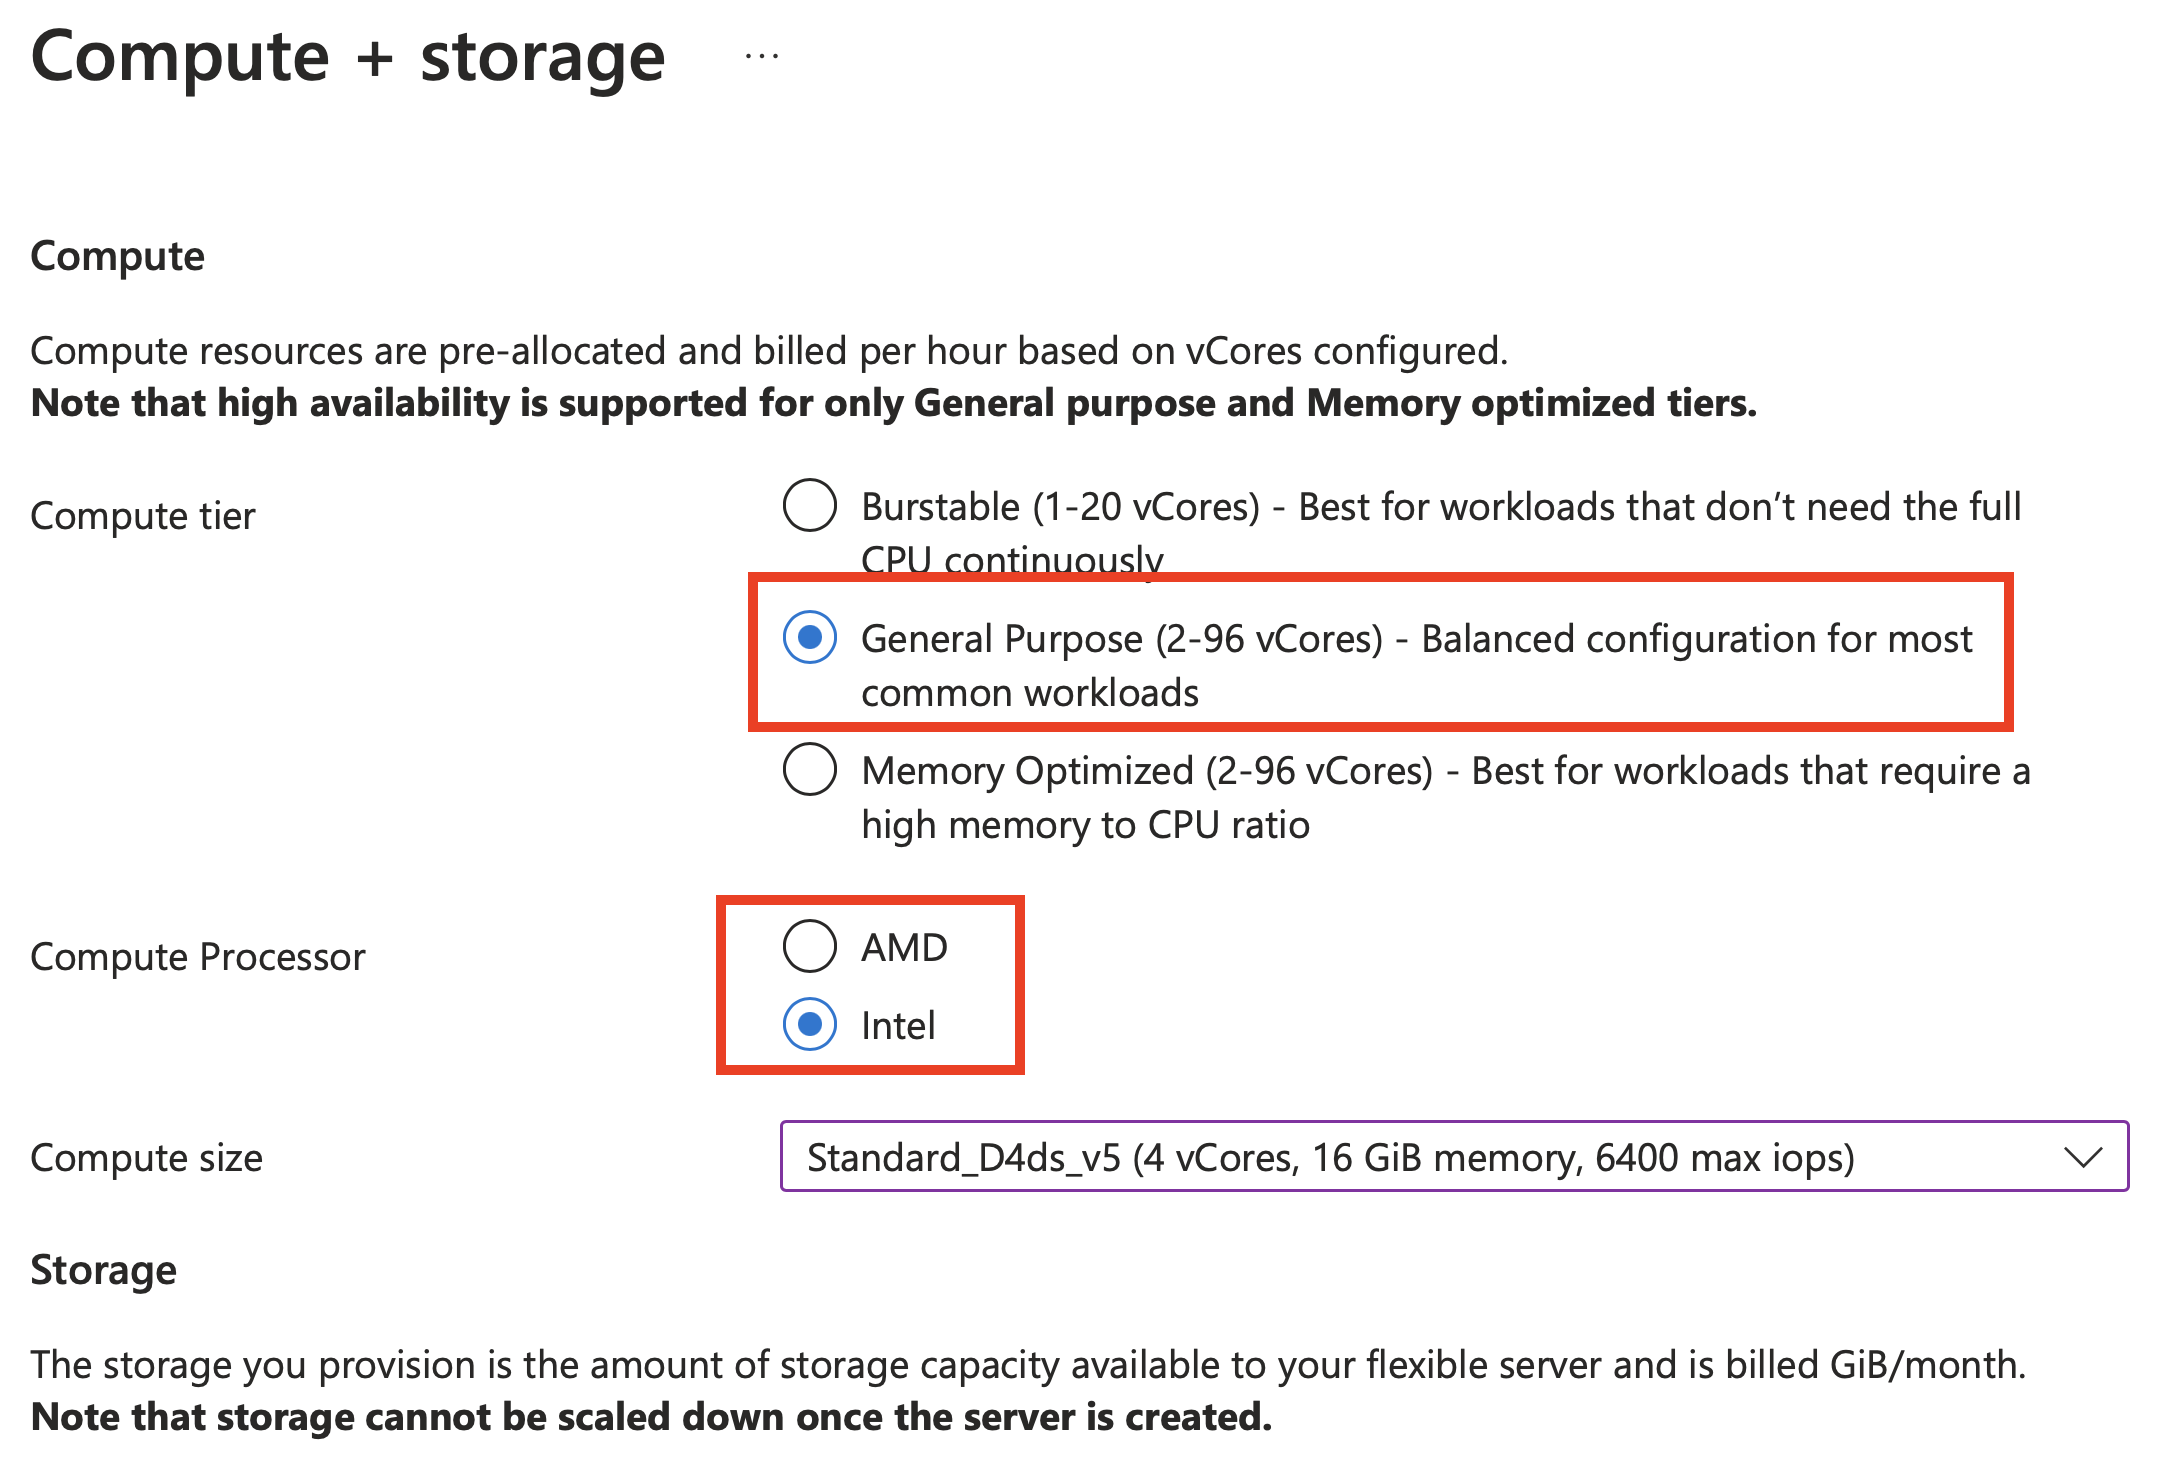
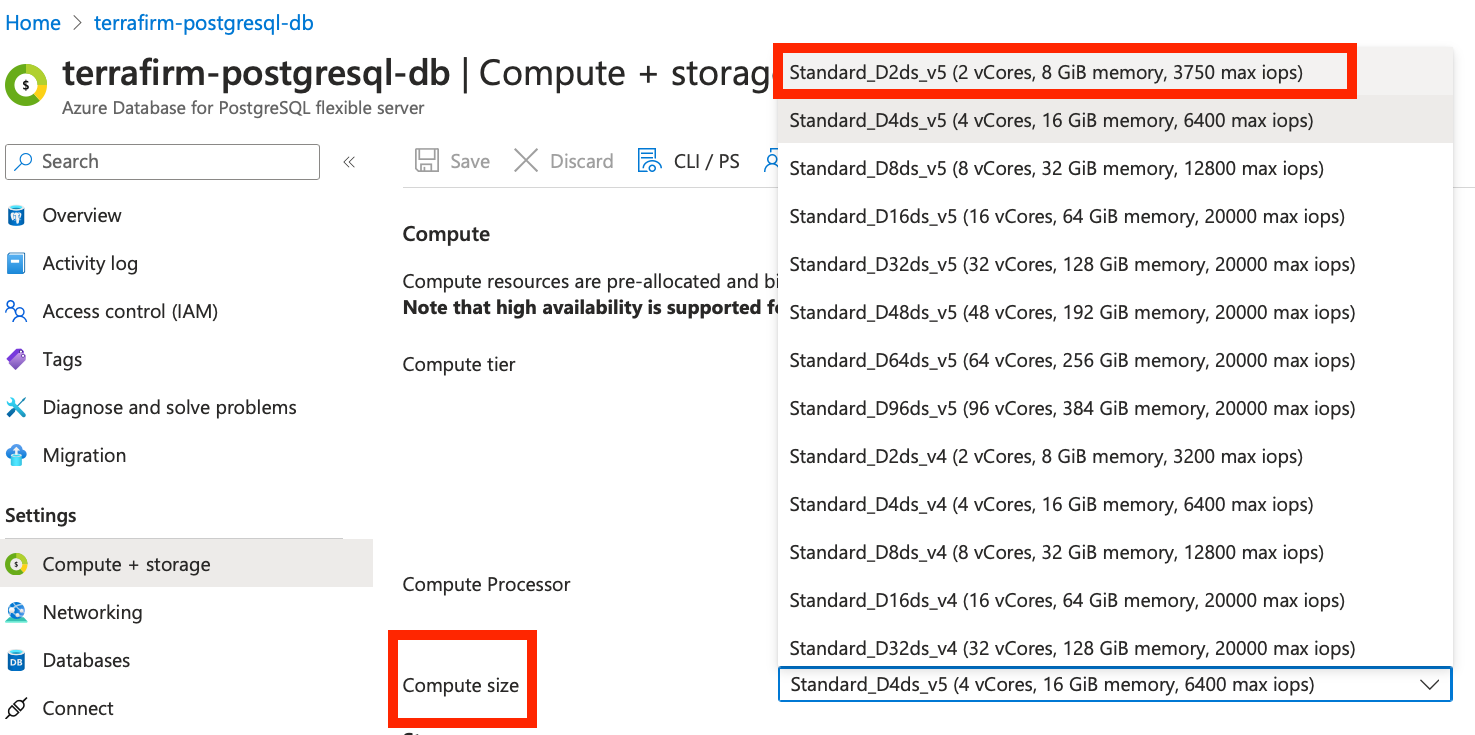
- In Compute size choose the lowest compute size to save costs for the lab exercises. Currently this is
Standard_D2ds_v5 (2 vCores, 8GiB memory, 3750 max iops)
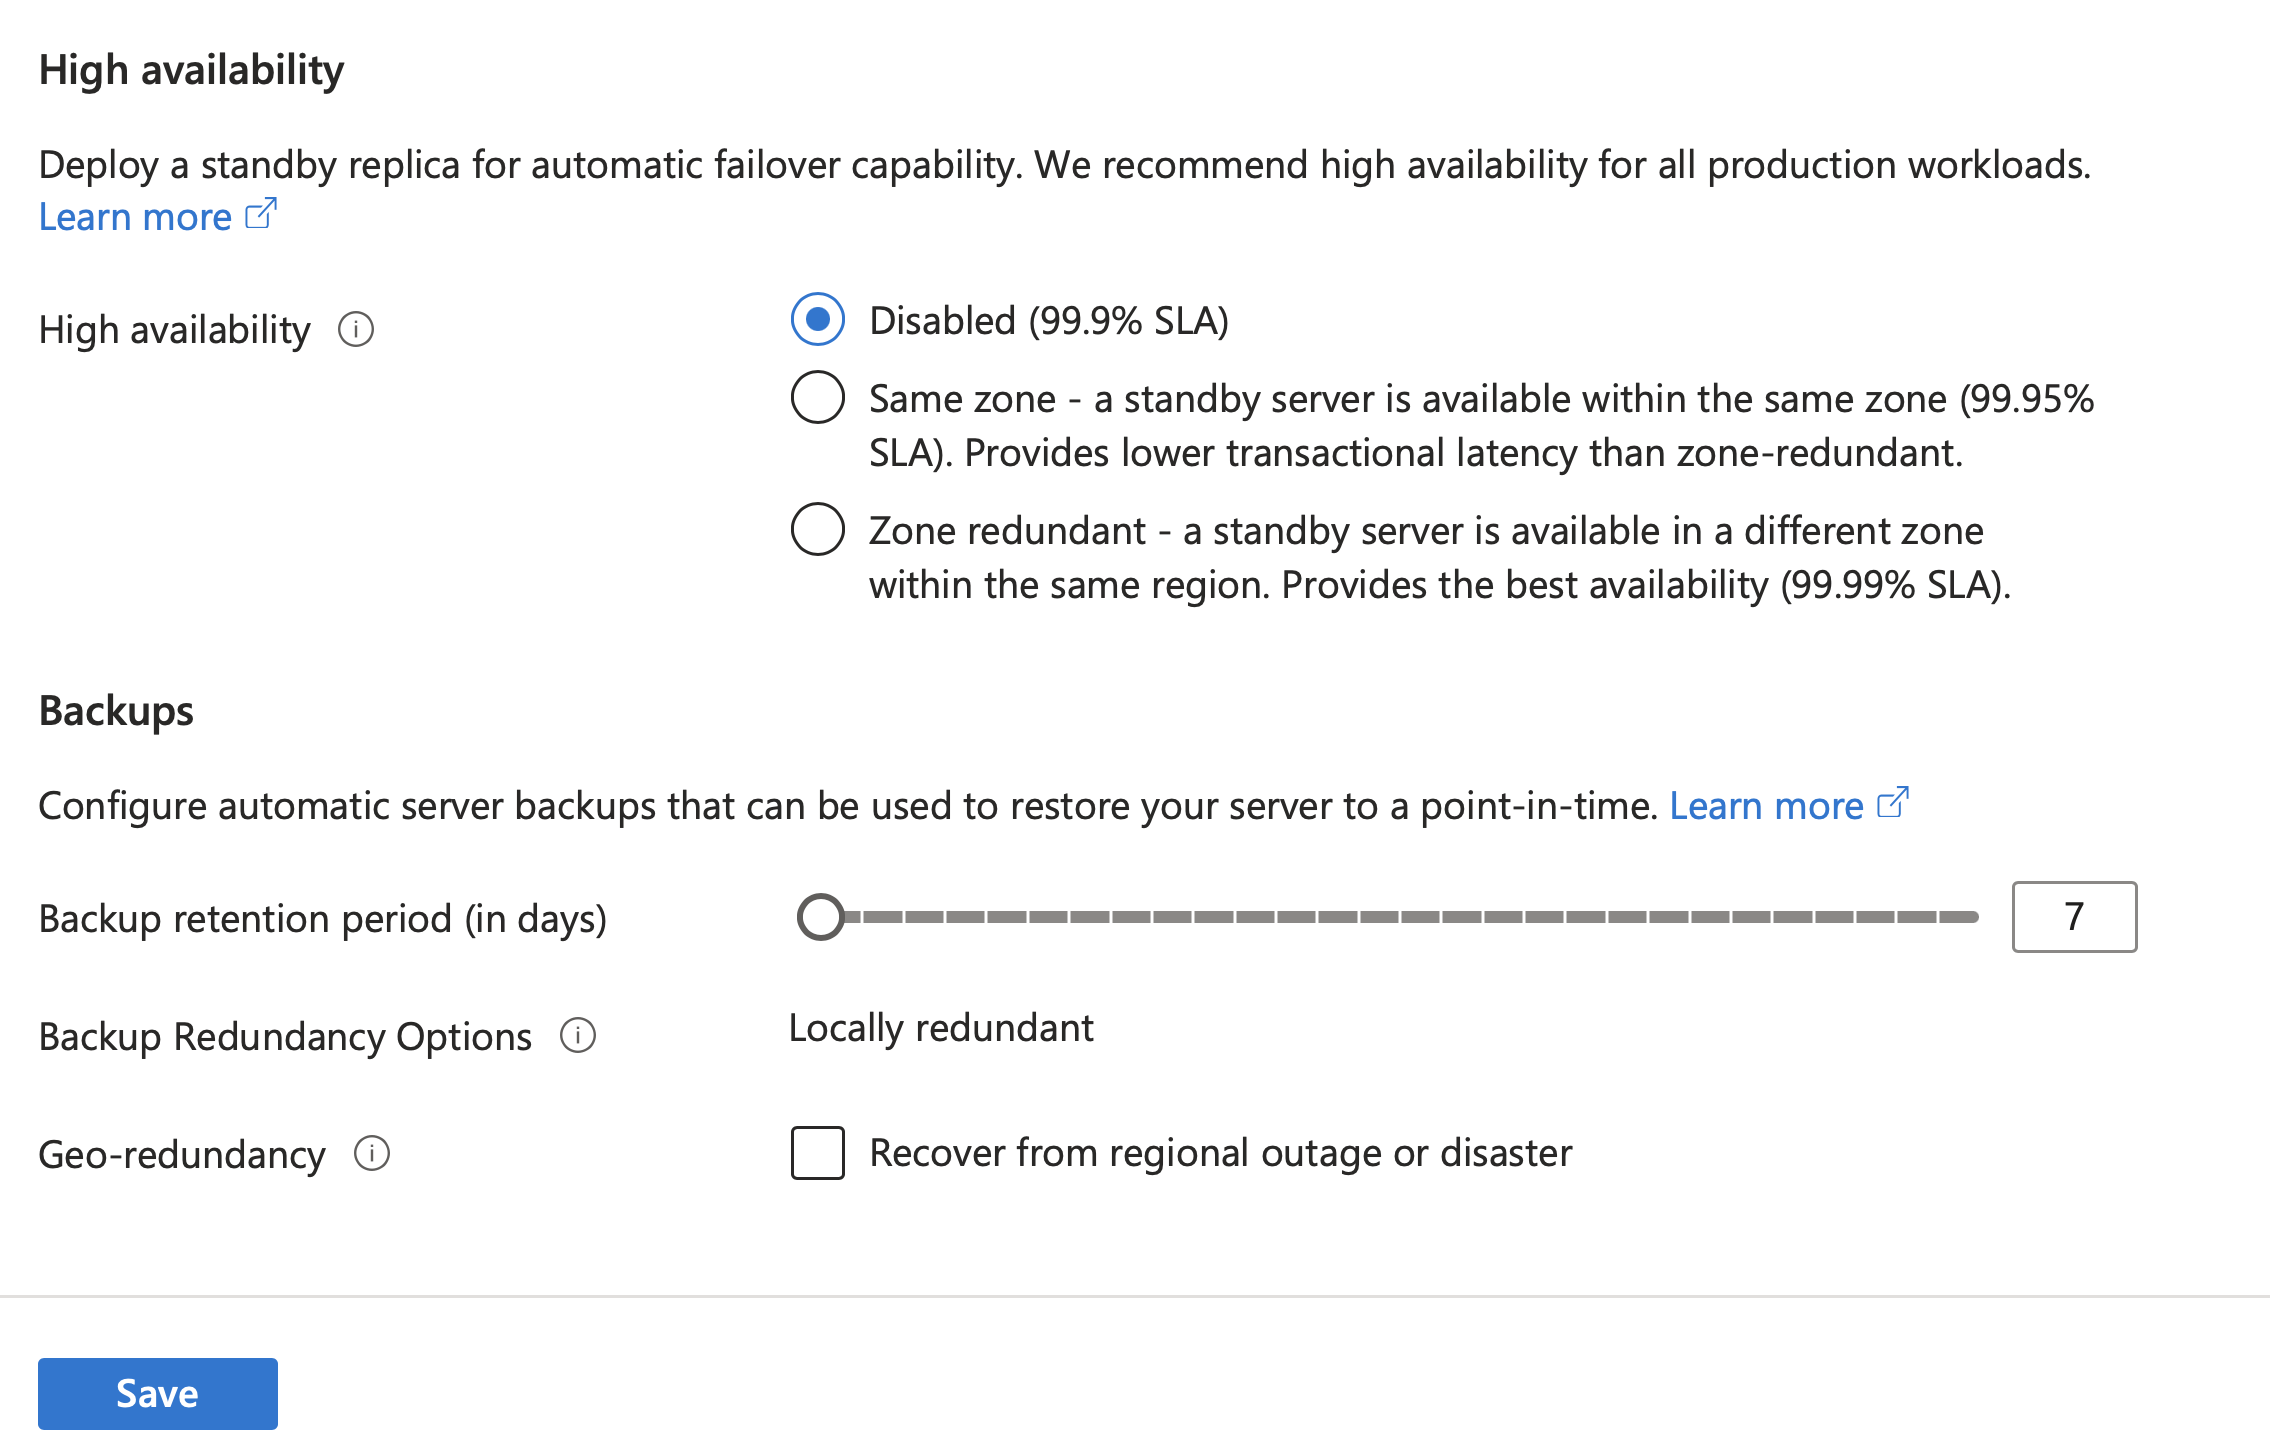
- In High availability Choose Disabled (99.9% SLA)
- Click Save
-
On the resultant page, under Authentication, set the Authentication method to PostgreSQL authentication only, set the Admin username and Password for the PostgreSQL admin account.
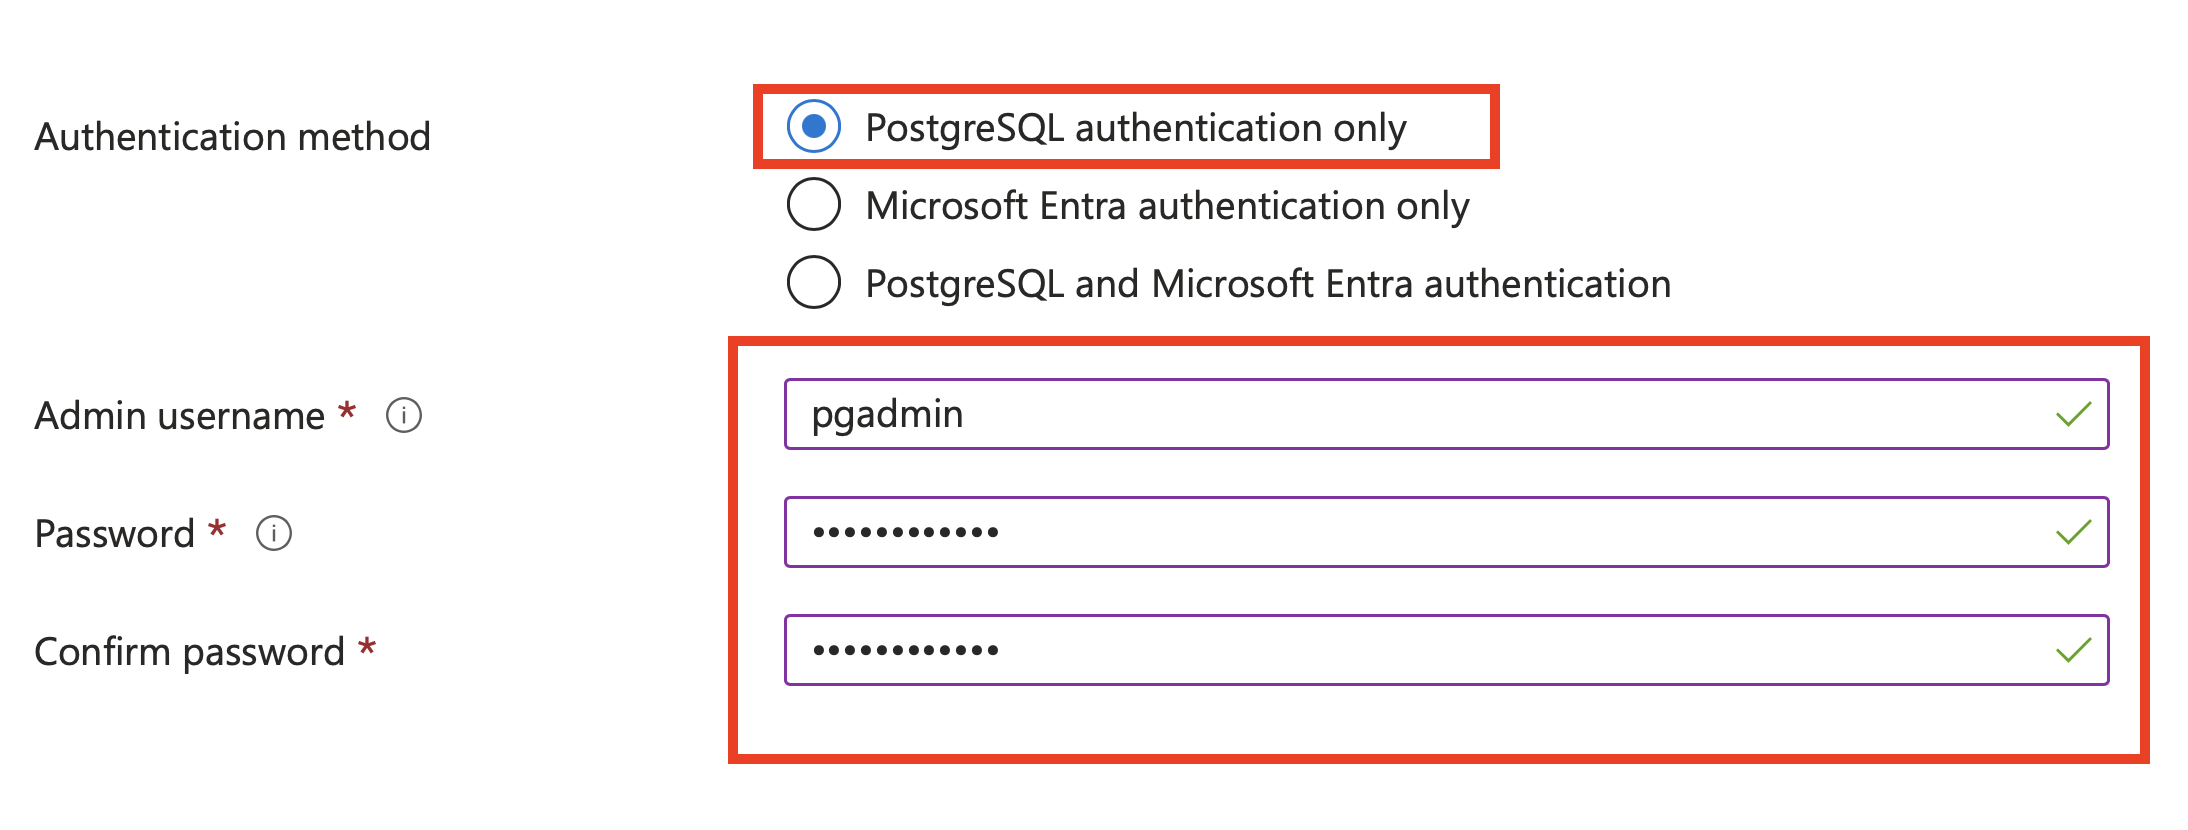
Note: Be sure to save the Admin username and Password, so it can be used later. A recommendation for an easy to remember Username is
pgadminand it is recommended you use a secure password. Important For your password use at least 12 characters, combine uppercase and lowercase letters, numbers, and special characters. Avoid common words and personal information. - Select Next: Networking »

-
Go to Firewall rules to configure access to allow the web application on the terrafirm-onprem-app-vm virtual machine to connect to the database.
-
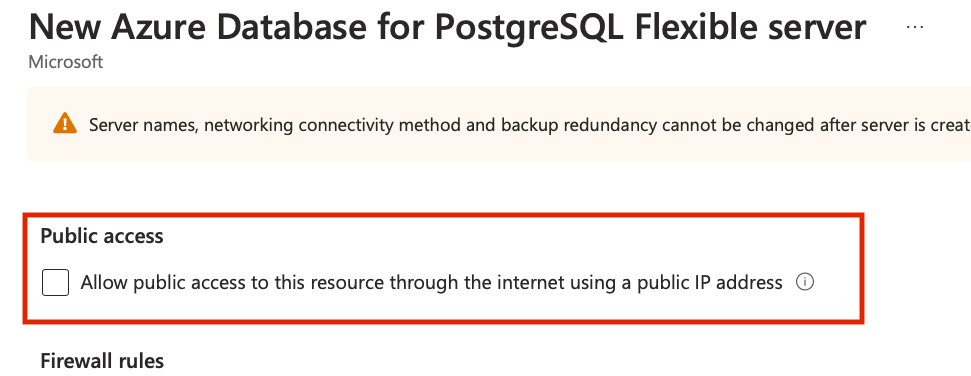
Remove the Public access to the Flexible Server
-
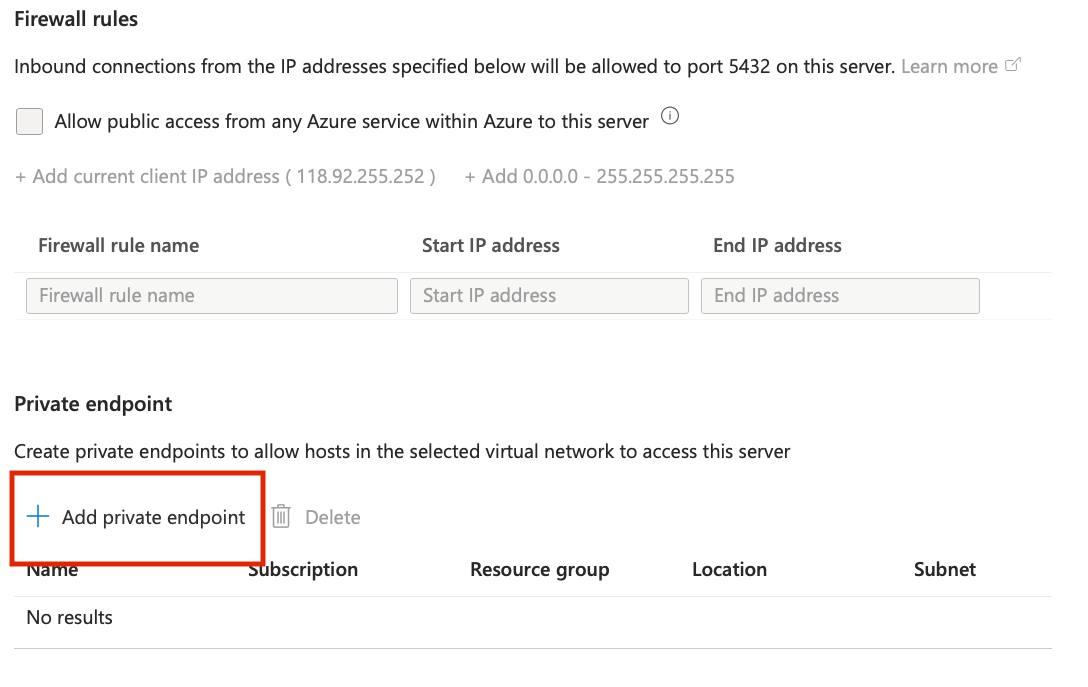
Add a new Private endpoint to the Flexible Server for internal and secure access from the VMs by cliking on Add private endpoint:
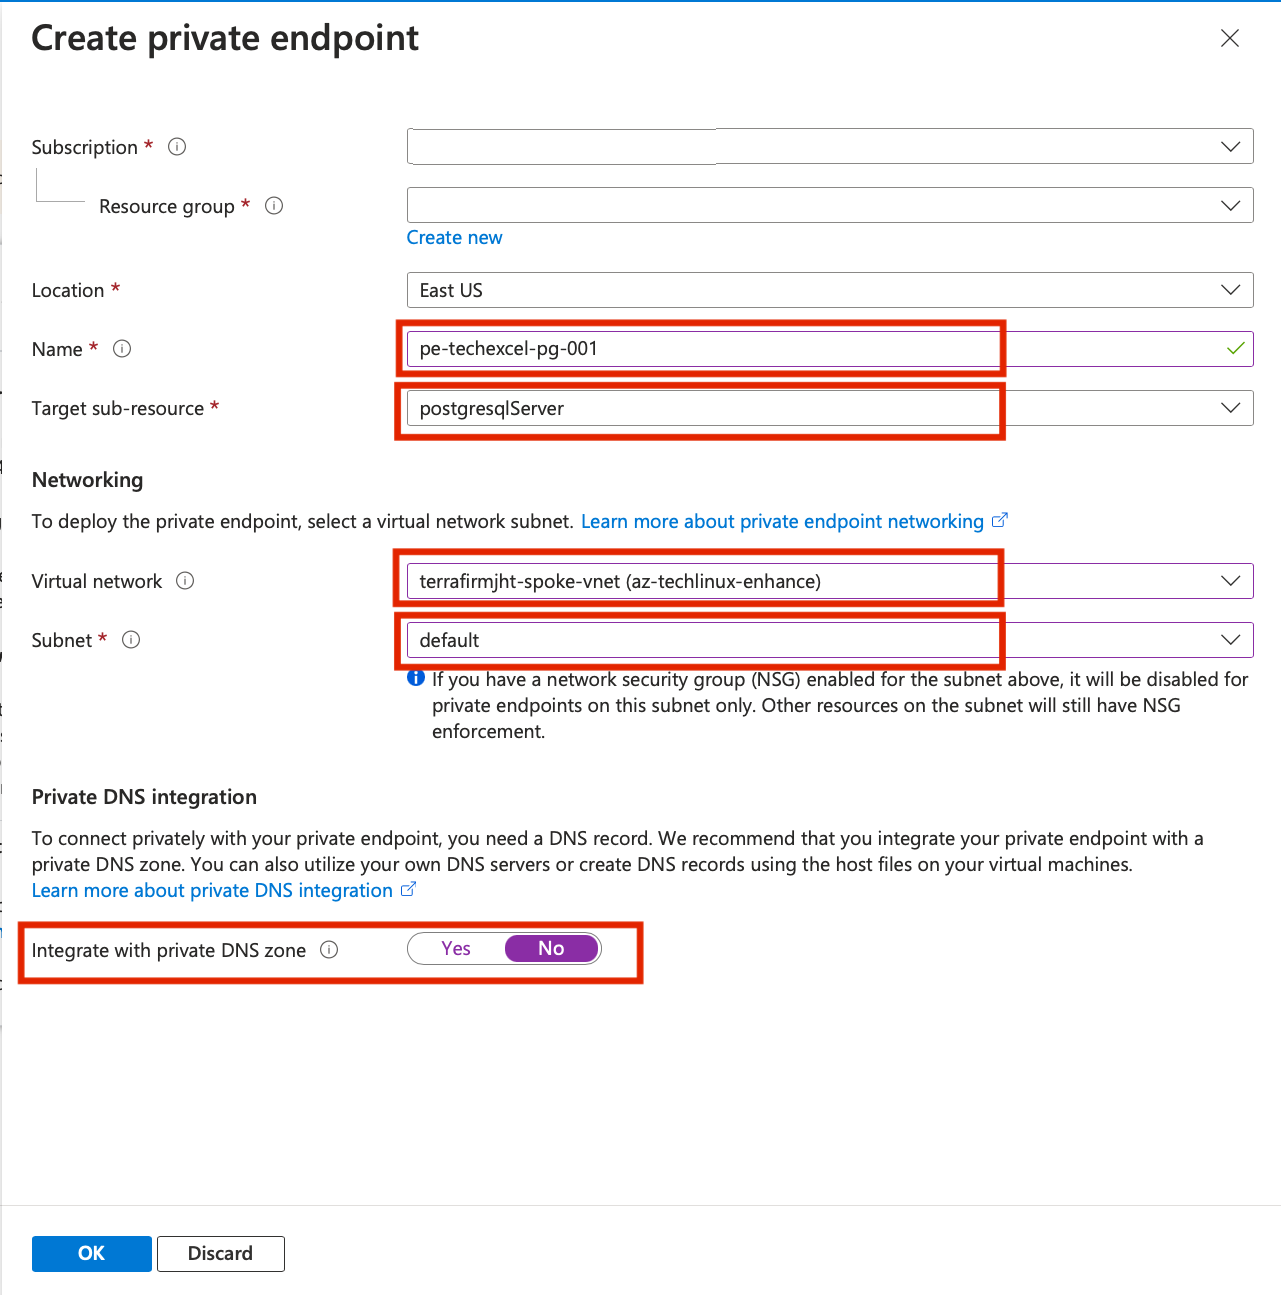
- Location:
Same Region as your other resources - Name:
Enter a name like the example given - Virtual network: Choose the SPOKE network
- Subnet: Choose the subnet called default which is 10.2.0.0/24
- Do not integrate with Private DNS - setting up Private DNS is beyond the scope of this training, you will use an IP address rather than a DNS entry when connecting.
- Location:
Click OK.
-
Select Review + create.

-
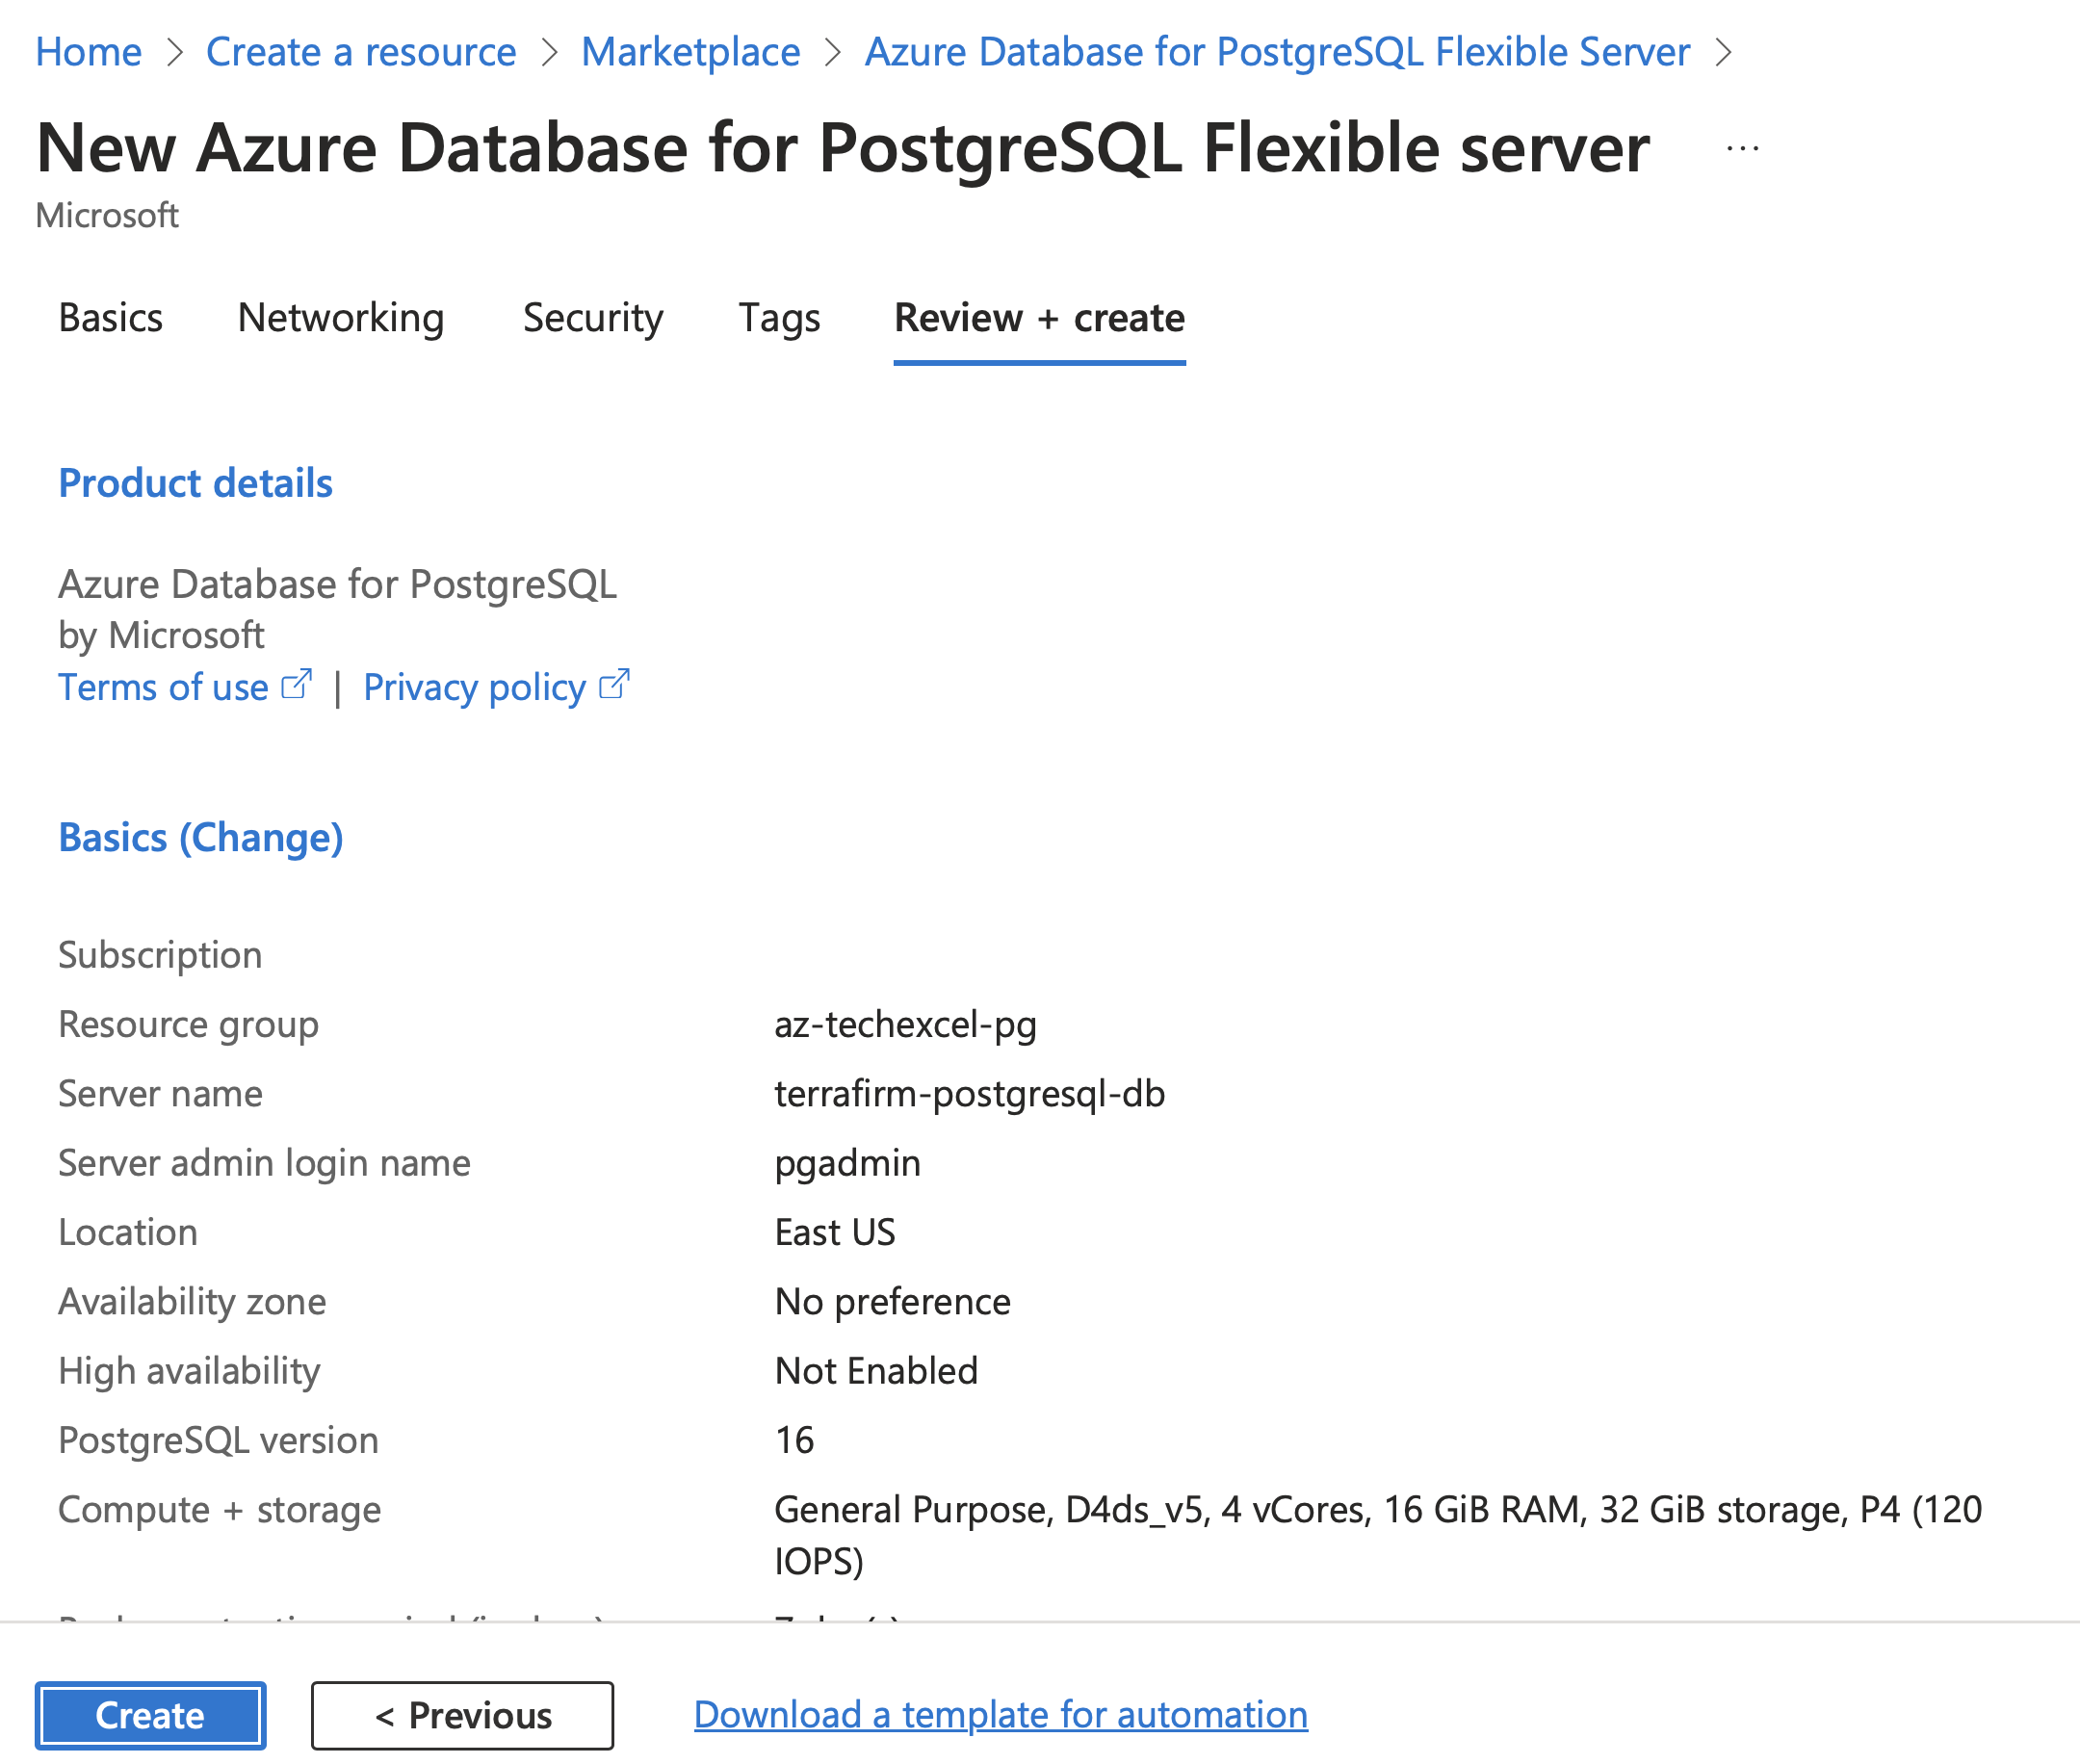
Select Create to provision the service.
-
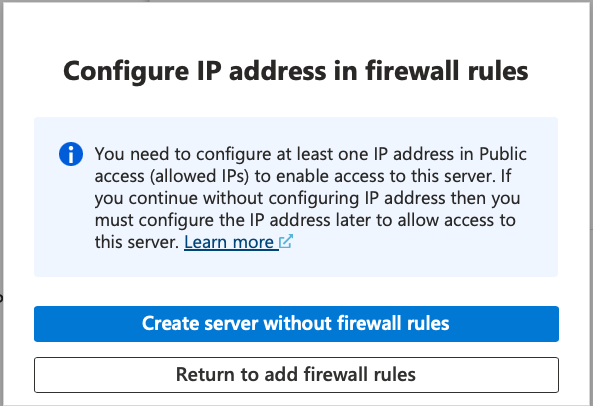
Click Create server without firewall rules - as we will use the private endpoint for access
-
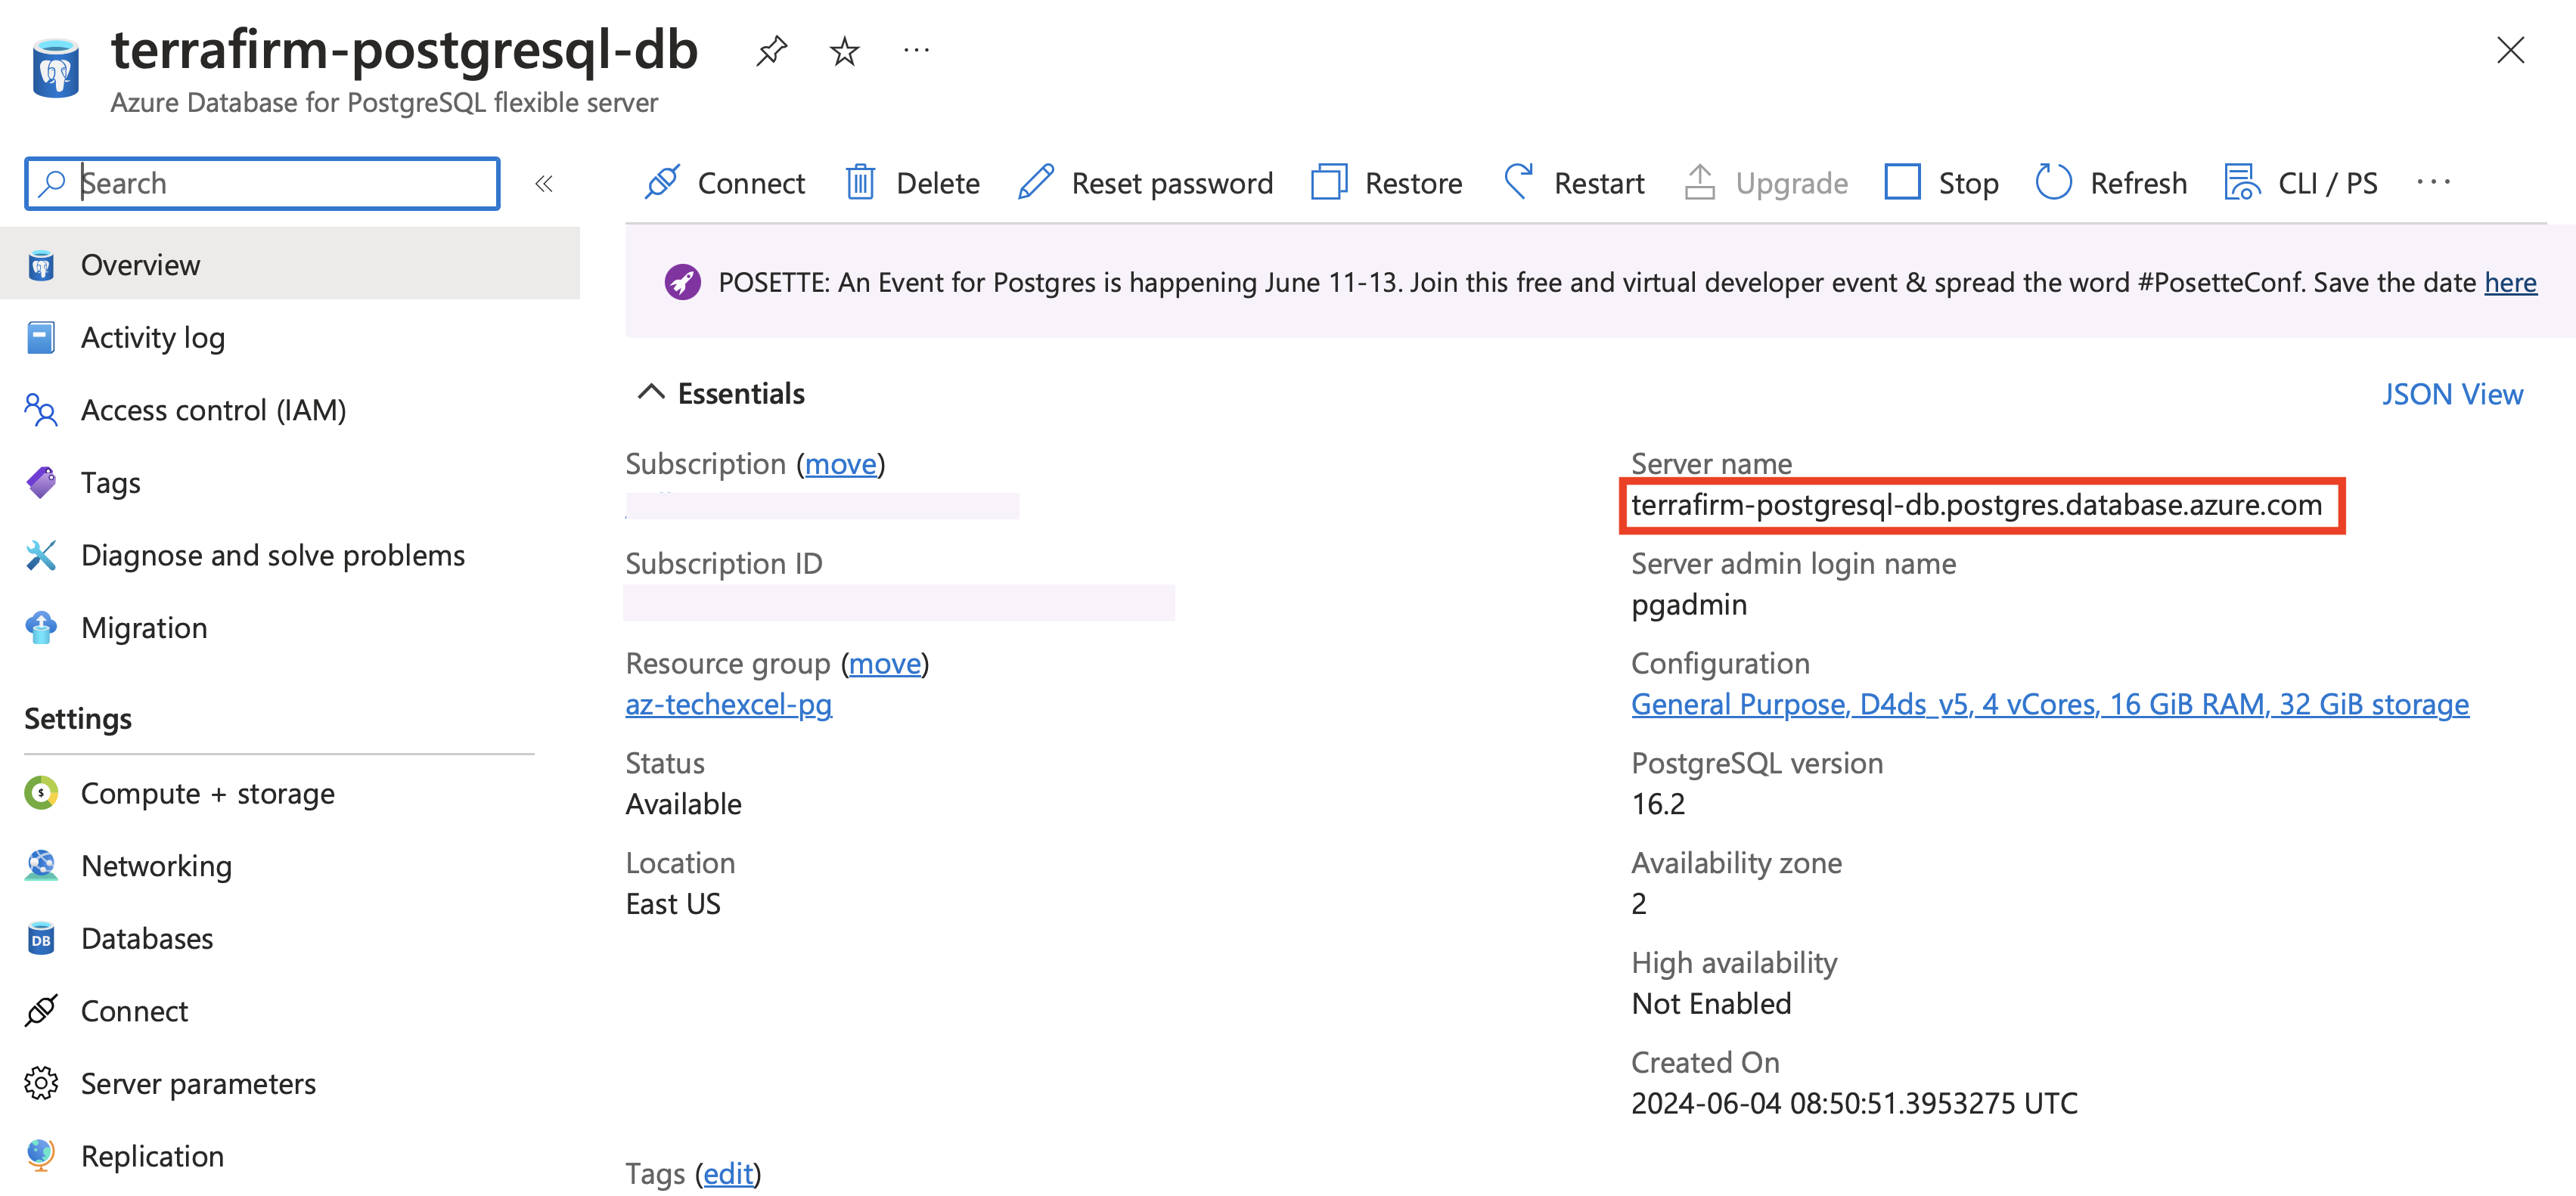
Once provisioning has completed navigate to the Azure Database for PostgreSQL resource that was just created, copy and save the Server name for use later.
-
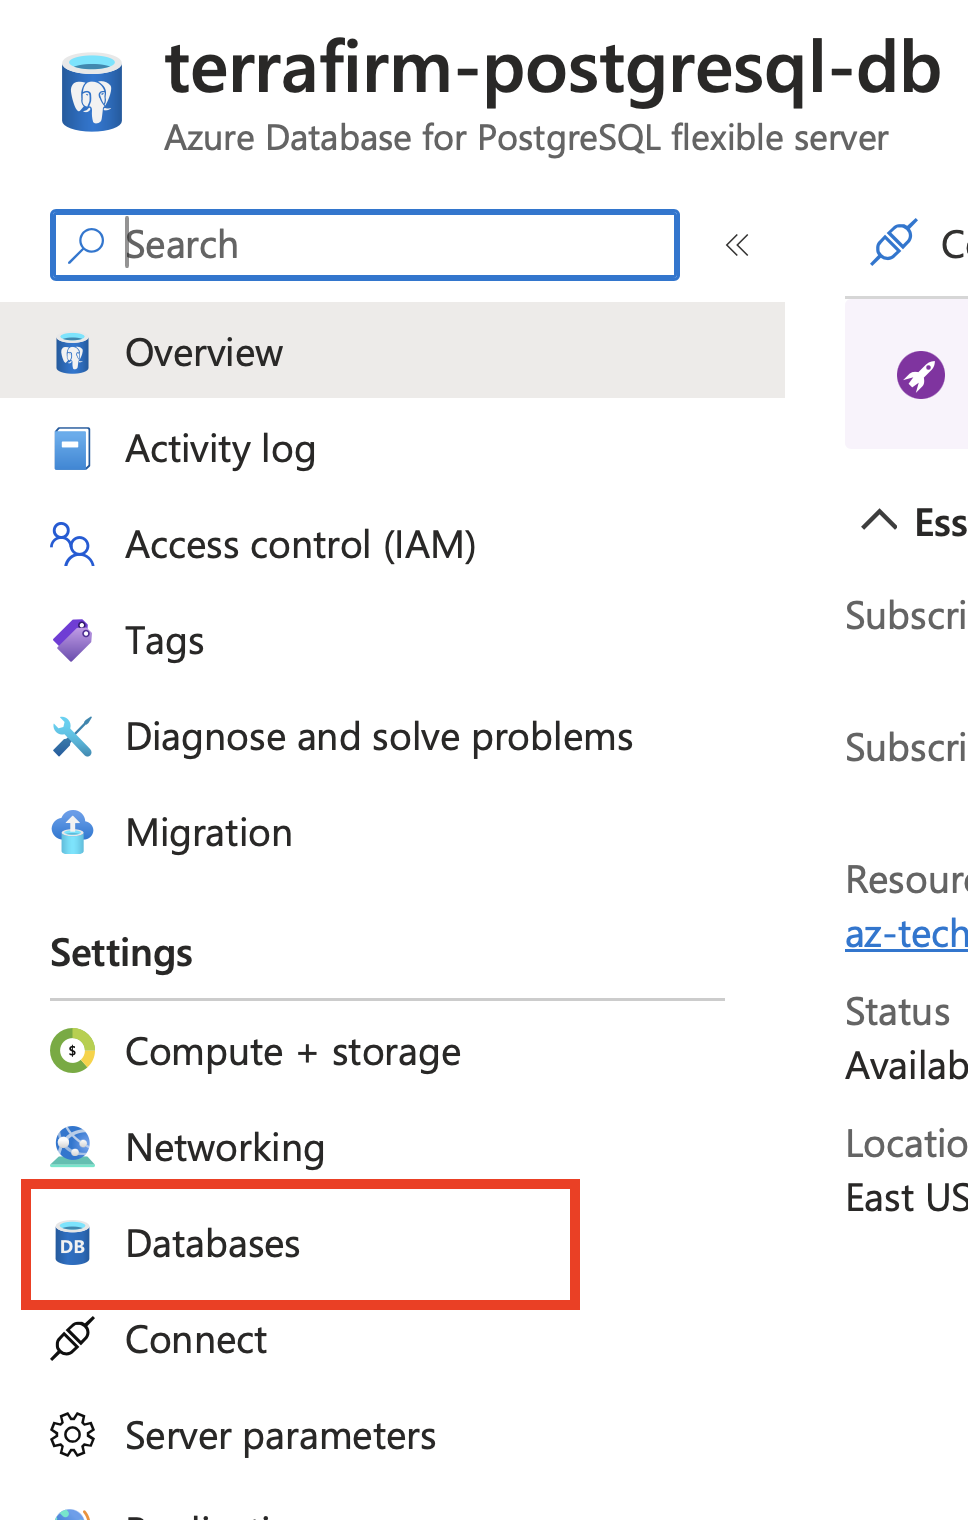
On the left menu pane, under Settings select Databases.
-
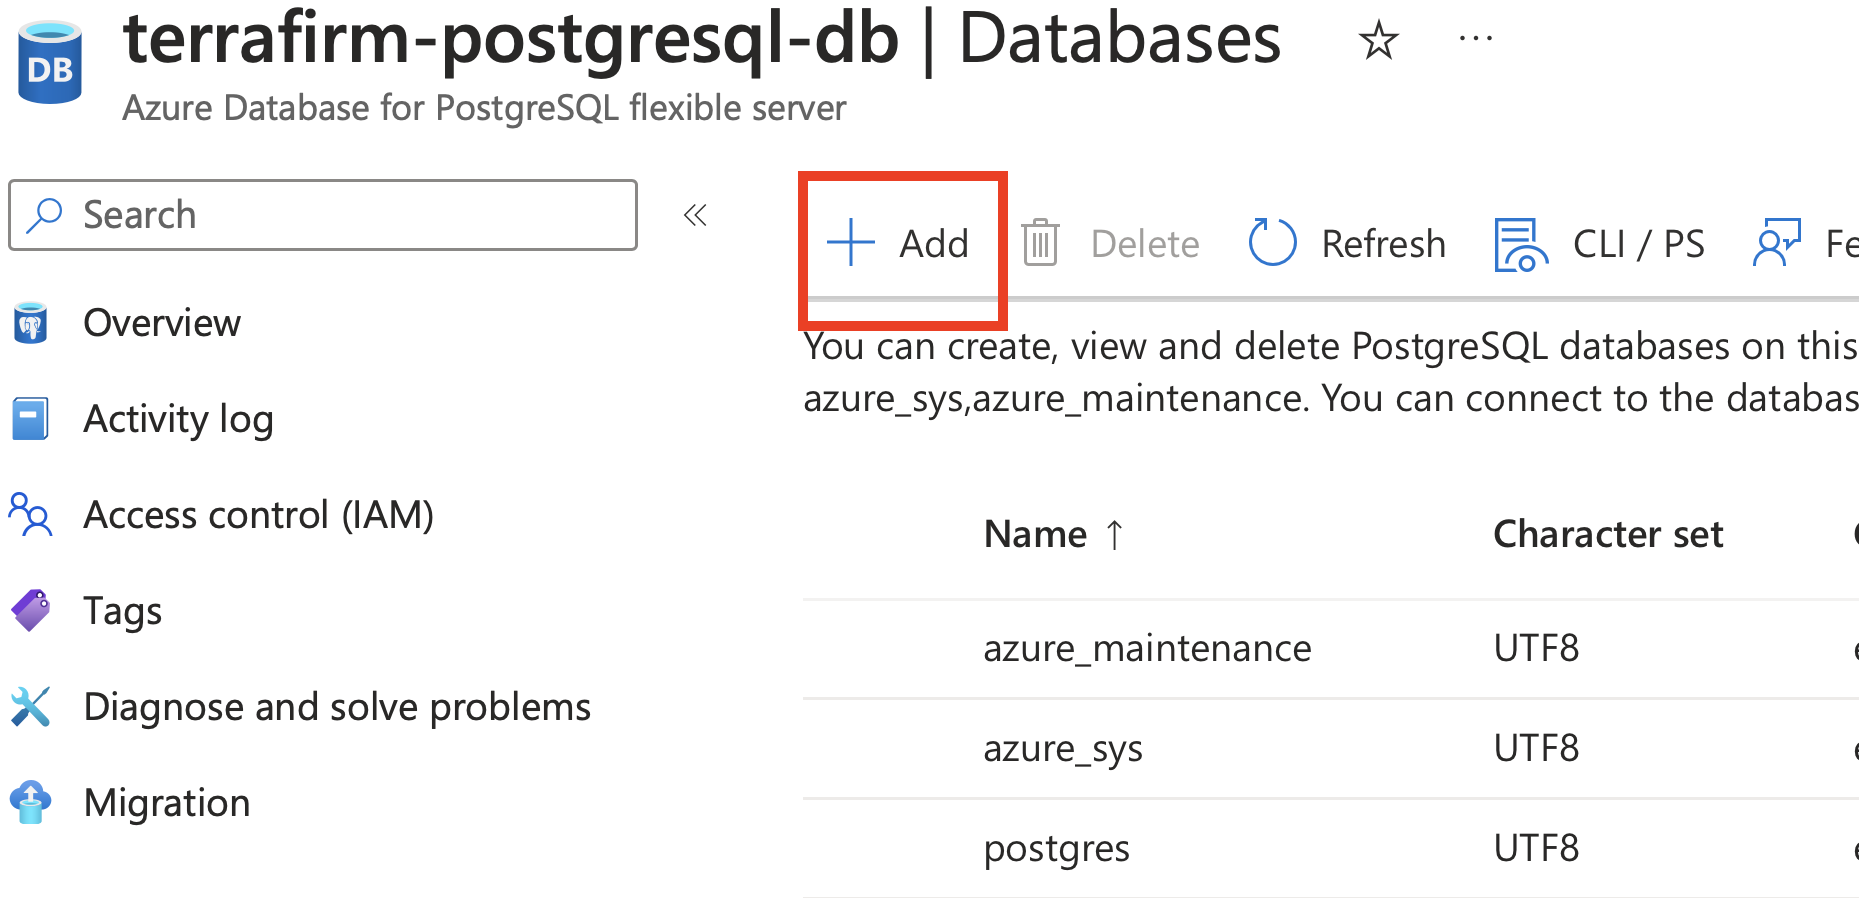
Select + Add to create a new database.
-
On the Create Database pane, enter
northwindin the Name field, then select Save. This will create a new PostgreSQL database that will be the target for the database migration.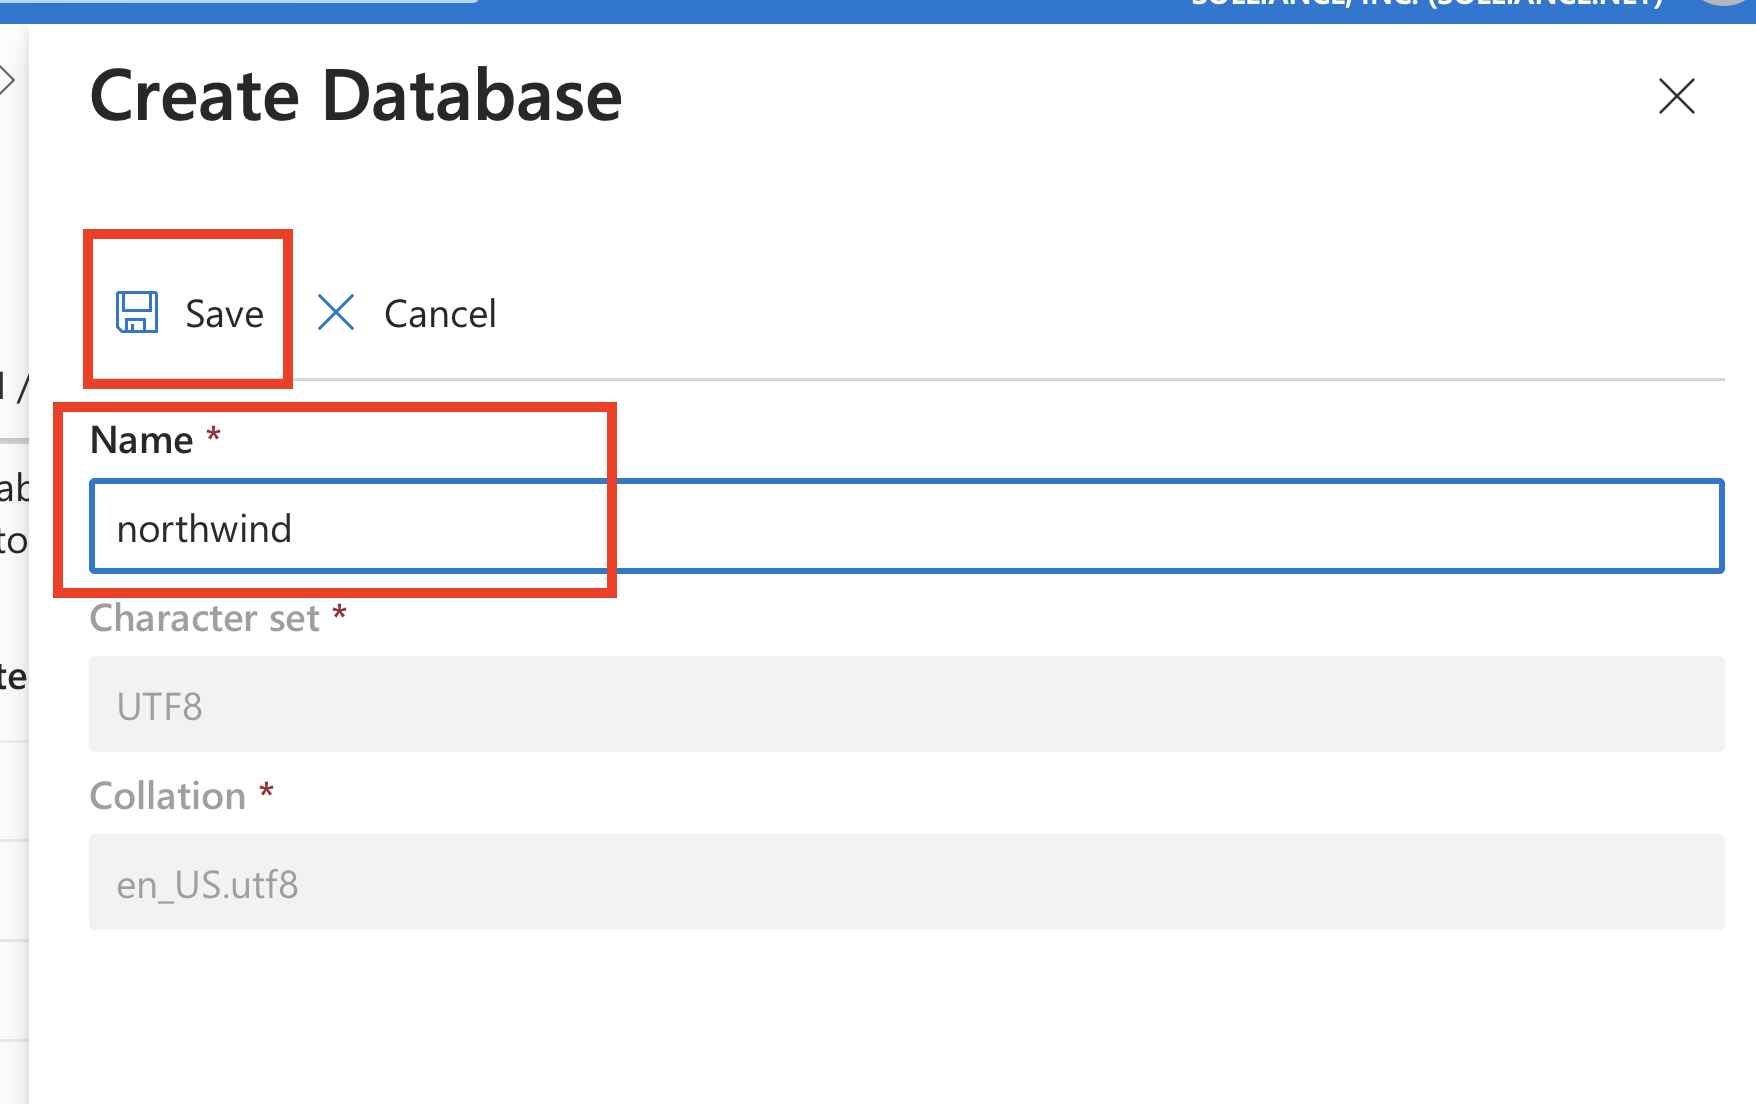
You are now ready to begin the migration task of this lab.