Task 05 - Deploy and configure Azure Firewall
Introduction
Terra Firm Laboratories is migrating their on-premises Linux workloads to Microsoft Azure. In this task, you will implement an Azure Firewall to protect network traffic. You will use the on-premises workload server to simulate a situation where a server has been migrated to Azure and it needs outgoing internet access cut to it.
Description
In this task, you will implement an Azure Firewall to protect network traffic.
The key tasks are as follows:
- Test network traffic from the Virtual Machine to the Internet. You should have access to bing.com.
- Deploy Azure Firewall.
- Configure rules to block access to bing.com.
- Test network traffic from the Virtual Machine to the Internet. Access to bing.com is now blocked.
Success Criteria
- Azure Firewall is deployed and fully working.
Solution
Expand this section to view the solution
-
Sign-in to the Azure portal
https://portal.azure.com/. -
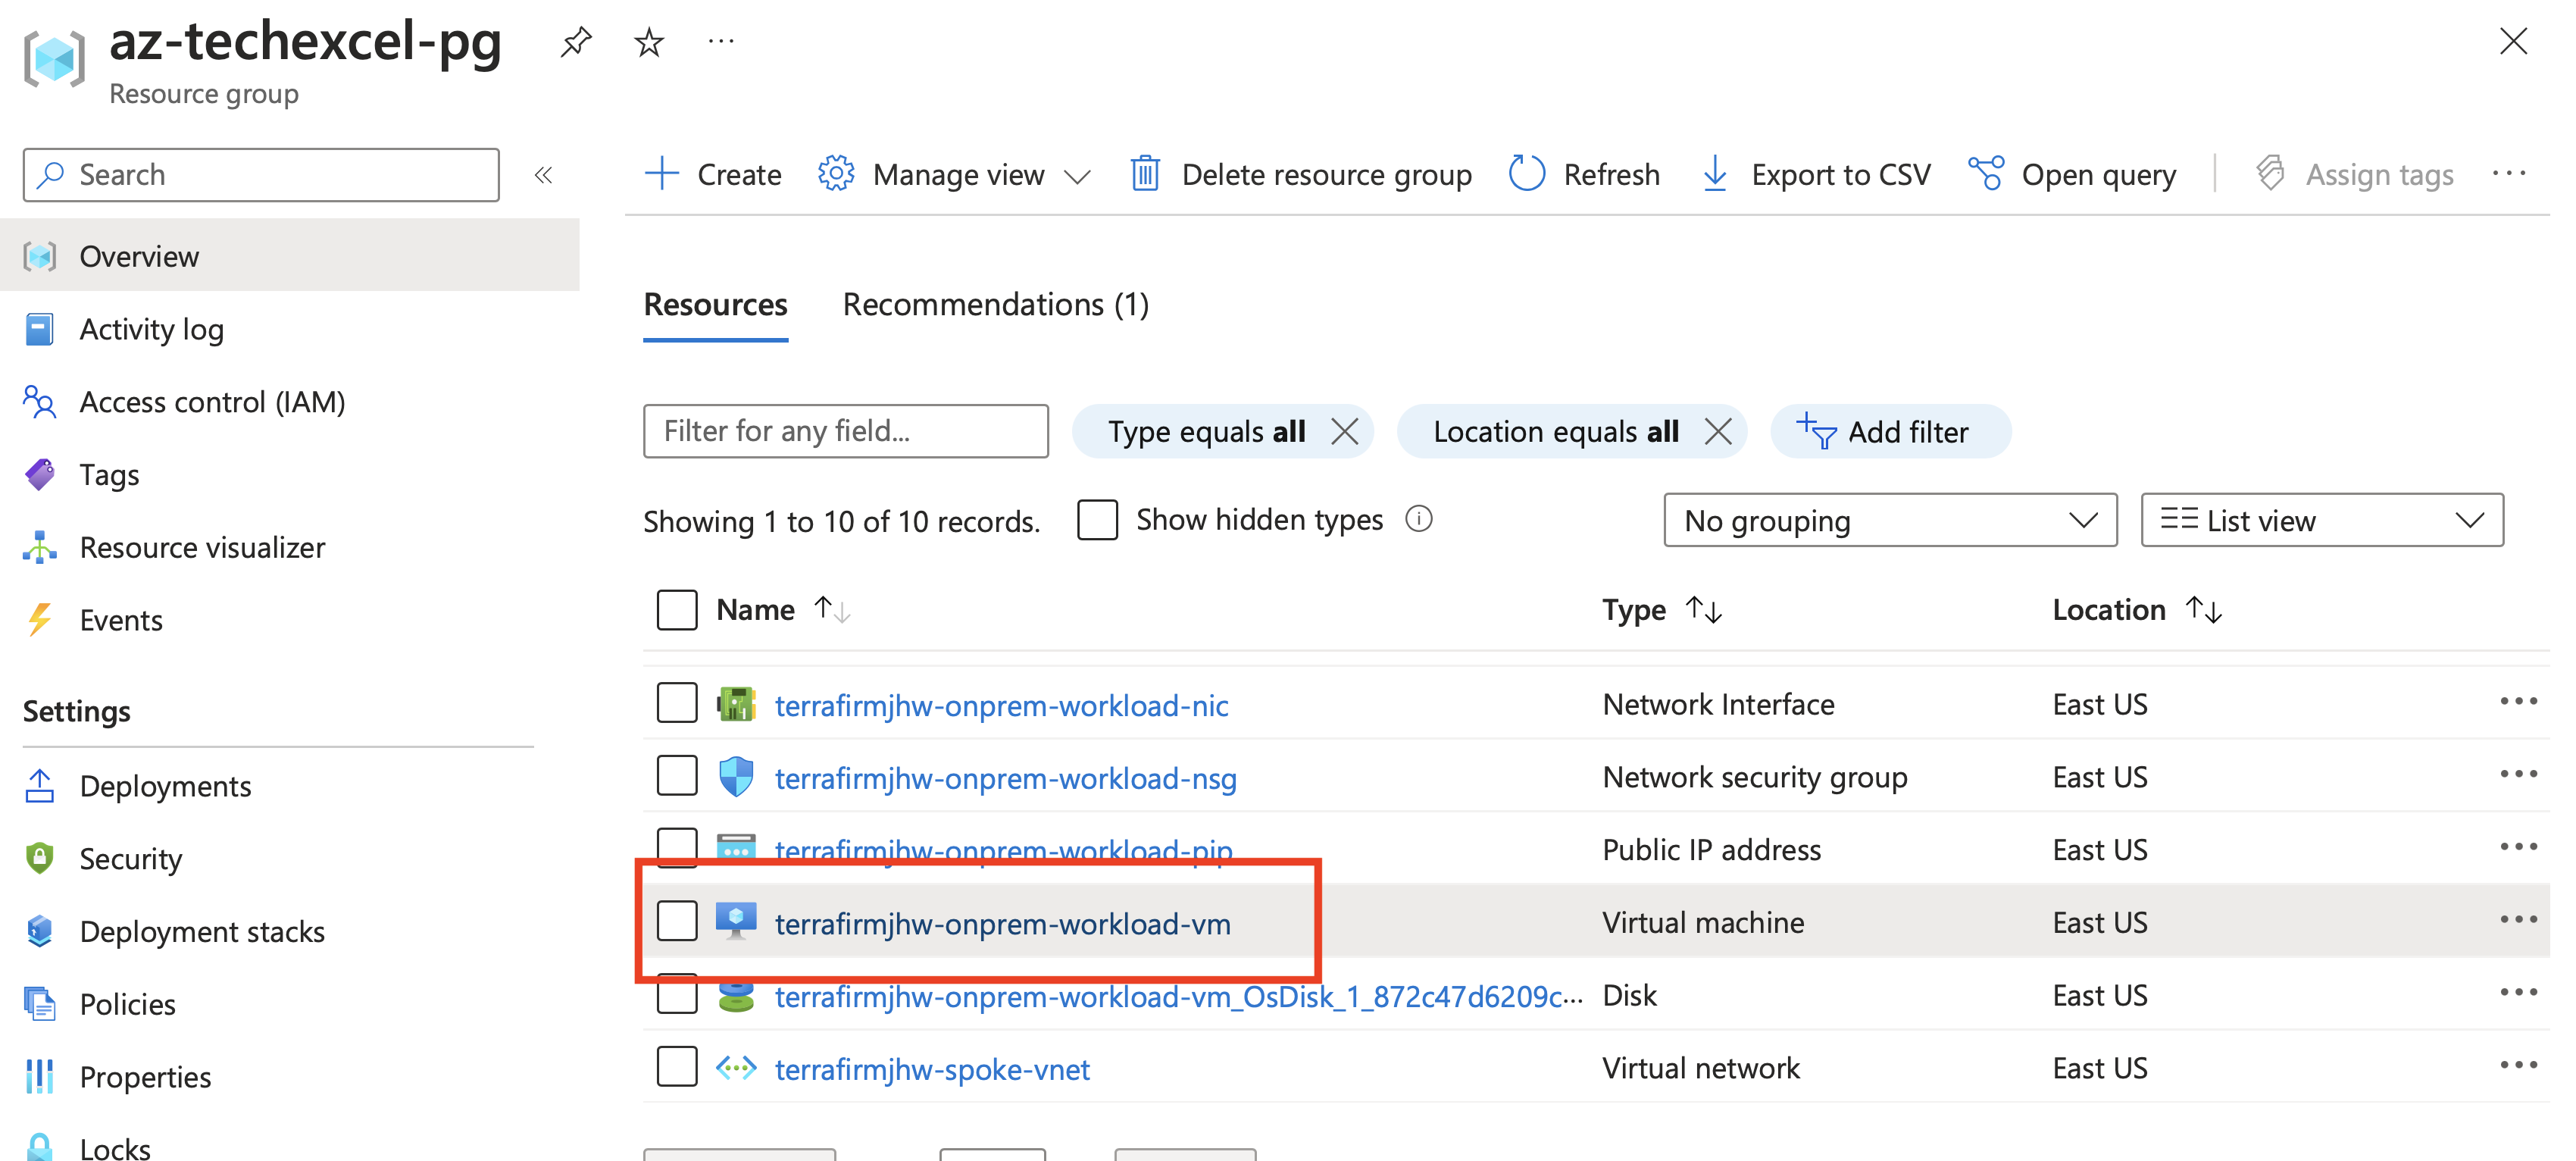
In the Azure Portal, navigate to the Resource Group that you created for this lab, then select the On-premises Workload VM named similar to
terrafirm-onprem-workload-vm.
-
Click Start as in a previous exercise you stopped it.
-
In the Azure portal, in the Search resources, services, and docs text box at the top of the Azure portal page, type Network Watcher and press the Enter key.
-
Under Network diagnostic tools, select Connection troubleshoot
-
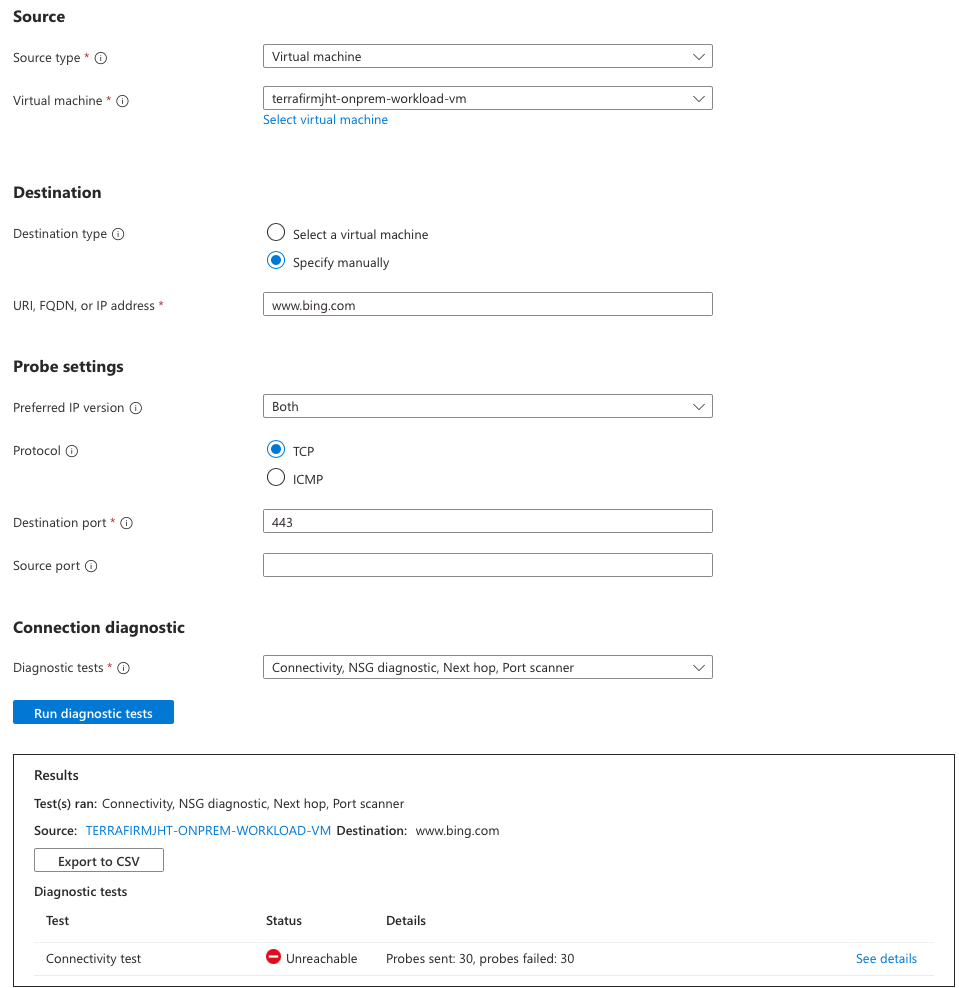
On the **Network Watcher Connection troubleshoot** window, specify the following values: Setting Value Source type Virtual Machine Virtual Machine Select the terrafirm-onprem-workload-vm Destination type Select Specify manually URI, FQDN, or IP address https://www.bing.com Preferred IP Version Both Protocol Select TCP Destination port 443 Source port Diagnostic tests Connectivity, NSG diagnostics, Next hop, Port scanner Note: Connection should be sucessfull.
-
In the Azure portal, in the Search resources, services, and docs text box at the top of the Azure portal page, type terrafirm-onprem-vnet and press the Enter key.
-
Under Settings, select Subnets.
-
Select +Subnet and add a subnet with the Subnet purpose of Azure Firewall and the Starting address 10.0.100.0
-
In the Azure portal, in the Search resources, services, and docs text box at the top of the Azure portal page, type Firewalls and press the Enter key.
-
On the Firewalls blade, select + Create.
-
On the Basics tab of the Create a firewall blade, specify the following settings (leave others with their default values):
Setting Value Resource group YOUR RESOURCE GROUP Name afw-onprem-001 Region Your Region Firewall SKU Standard Firewall management Use a Firewall Policy to manage this firewall Firewall policy Select Add new
Name: afwp-onprem-001
Region: your regionChoose a virtual network select the Use existing option and, in the drop-down list, select terrafirm-onprem-vnet Public IP address click Add new and type the name pip-afw-onprem-001 and select OK -
Select Review + create and then select Create.
Note: Wait for the deployment to complete. This should take about 5 minutes.
-
In the Azure portal, in the Search resources, services, and docs text box at the top of the Azure portal page, type Resource groups and press the Enter key.
-
On the Resource groups blade, in the list of resource groups, select YOUR RESOURCE GROUP entry.
-
In the list of resources, select the entry representing the afw-onprem-001 firewall.
-
On the afw-onprem-001 blade, identify the Private IP address that was assigned to the firewall.
-
In the Azure portal, in the Search resources, services, and docs text box at the top of the Azure portal page, type Route tables and press the Enter key.
-
On the Route tables blade, click + Create.
-
On the Create route table blade, specify the following settings:
Setting Value Resource group YOUR RESOURCE GROUP Region Your Region Name rt-onprem-001 -
Click Review + create, then click Create, and wait for the provisioning to complete.
-
On the Route tables blade, click Refresh, and, in the list of route tables, click the rt-onprem-001 entry.
-
On the rt-onprem-001 blade, in the Settings section, click Subnets and then, on the rt-onprem-001 | Subnets blade, click + Associate.
-
On the Associate subnet blade, specify the following settings:
Setting Value Virtual network terrafirm-onprem-vnet Subnet default Note: Ensure the default subnet is selected for this route, otherwise the firewall won’t work correctly.
-
Click OK to associate the firewall to the virtual network subnet.
-
Back on the rt-onprem-001 blade, in the Settings section, click Routes and then click + Add.
-
On the Add route blade, specify the following settings:
Setting Value Route name route-fw-001 Destination type IP Address Destination IP addresses/CIDR ranges 0.0.0.0/0 Next hop type Virtual appliance Next hop address the private IP address of the firewall that you identified in the previous when creating the Azure Firewall Note: Azure Firewall is actually a managed service, but virtual appliance works in this situation.
-
Click Add to add the route.
-
In the Azure portal, navigate back to the afw-onprem-001 firewall.
-
On the afw-onprem-001 blade, in the Firewall policy section, select afwp-onprem-001.
-
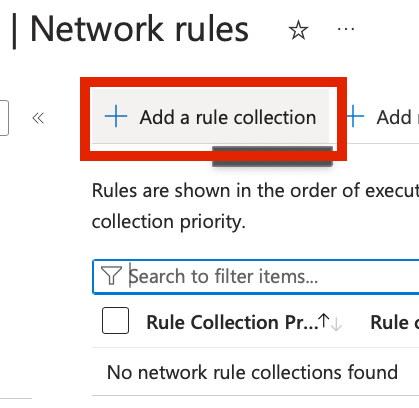
On the afwp-onprem-001 Firewall Policy blade, select Network rules, and then click + Add a rule collection.

-
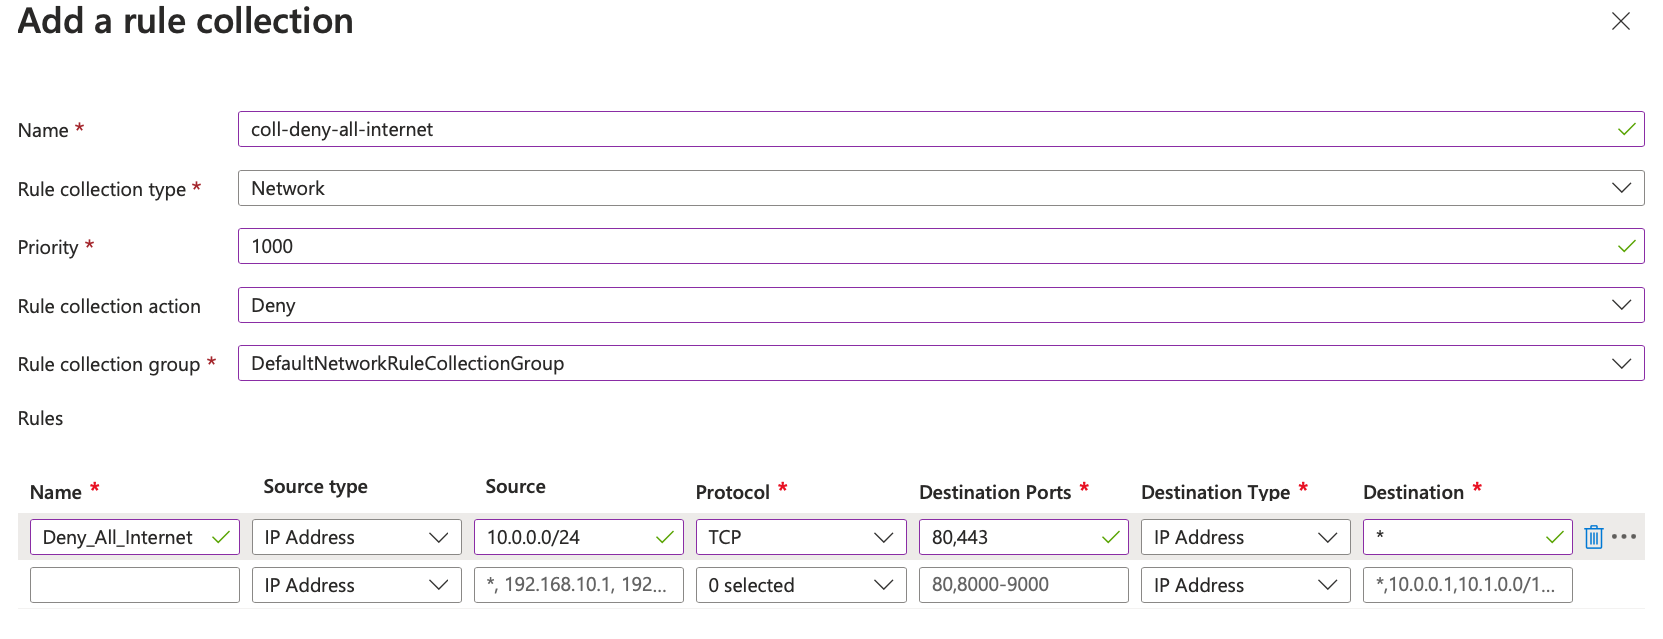
On the Add a rule collection blade, specify the following settings (leave others with their default values):
Setting Value Name coll-deny-all-internet Rule collection type Network Priority 1000 Rule collection action Deny Rule collection group DefaultNetworkRuleCollectionGroup -
On the Rules Section, create a new entry with the following settings (leave others with their default values):
Setting Value Name Deny_All_Internet Source type IP Address Source 10.0.0.0/24 Protocol TCP Destination Ports 80,443 Destination *
- Click Add
In order to test your setup, you can use the Connection Troubleshooting tool of Network Watcher.
-
Use the “Search resources, services and docs” at the top of your Azure Portal windows to locate Network Watcher
-
Under Network diagnostic tools, select Connection troubleshoot
-
On the **Network Watcher Connection troubleshoot** window, specify the following values: Setting Value Source type Virtual Machine Virtual Machine Select the terrafirmworkloadvm Destination type Select Specify manually URI, FQDN, or IP address https://www.bing.com Preferred IP Version Both Protocol Select TCP Destination port 443 Source port Diagnostic tests Connectivity, NSG diagnostics, Next hop, Port scanner Note: Connection should be blocked due to the Azure Firewall.

Congratulations! You have successfully used the Azure Firewall to remove outgoing internet access and a quick test of trying to SSH to the public address of the server will show that it has been removed.
A quick test would be to try and SSH to the public address of the terrafirm-onprem-workload-vm which should fail and then try and access it via the Bastion host - which will succeed.
NOTE : Once you have successfully completed the creation of the Firewall Rule (see above), all outbound traffic to the internet is blocked. This also includes the traffic necessary for the Azure Arc agent you deployed in exercise 3, so after some time your Arc resource in Azure Portal will show “Disconnected” as the status. If you want to re-enable this, you need to create a firewall rule that allows traffic to the endpoints listed in the Azure Arc Network Requirements documentation or create a rule that allows traffic to the AzureCloud service tag.