Task 02 - Migrate your database to Azure Database for PostgreSQL flexible server
Description
In this task, you will setup a migration project and configure the Source and Target connections. You will then execute and monitor a migration of your on-premises PostgreSQL database into Azure Database for PostgreSQL - flexible server.
Success Criteria
- Your PostgreSQL that is hosted on your on-premises server is now migrated to Azure Database for PostgreSQL - flexible server.
Solution
Expand this section to view the solution
Create Database Migration Project in Azure Database for PostgreSQL Flexible Server
-
Select Migration from the menu on the left of the flexible server blade.
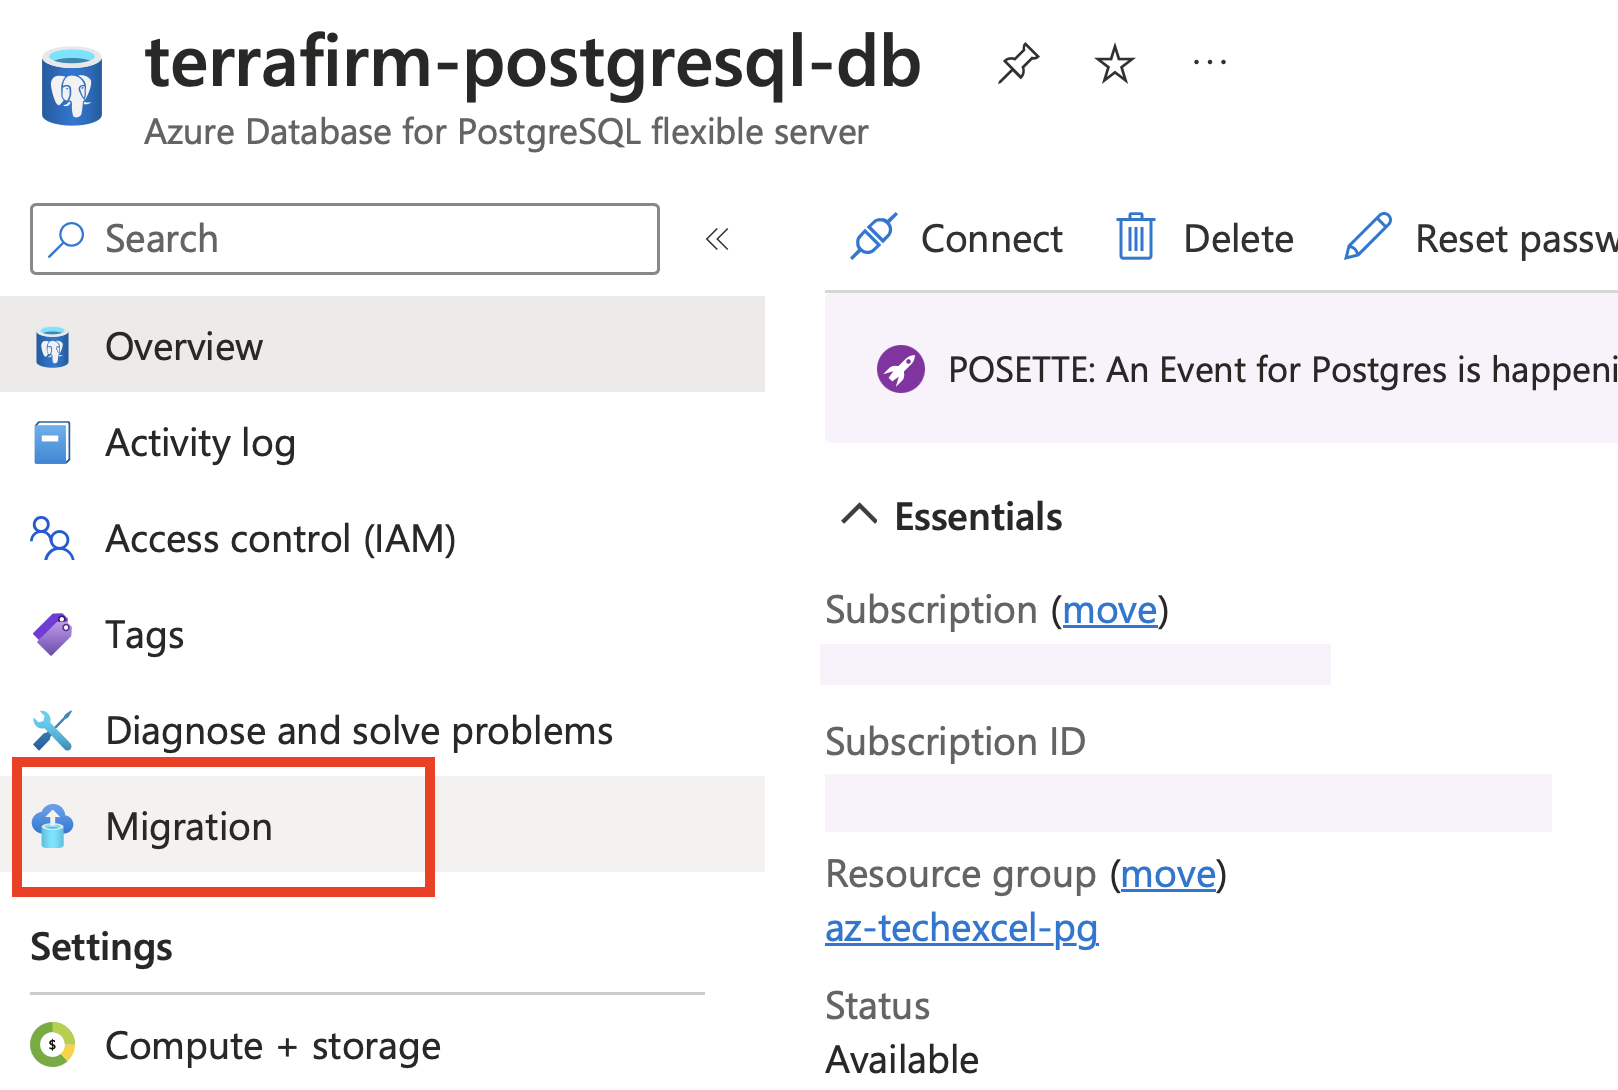
- Click on the + Create option at the top of the Migration blade.
Note: If the + Create option is unavailable, select Compute + storage and change the compute tier to either General Purpose or Memory Optimized and try to create the Migration process again. After the Migration is successful, you can change the compute tier back to Burstable.
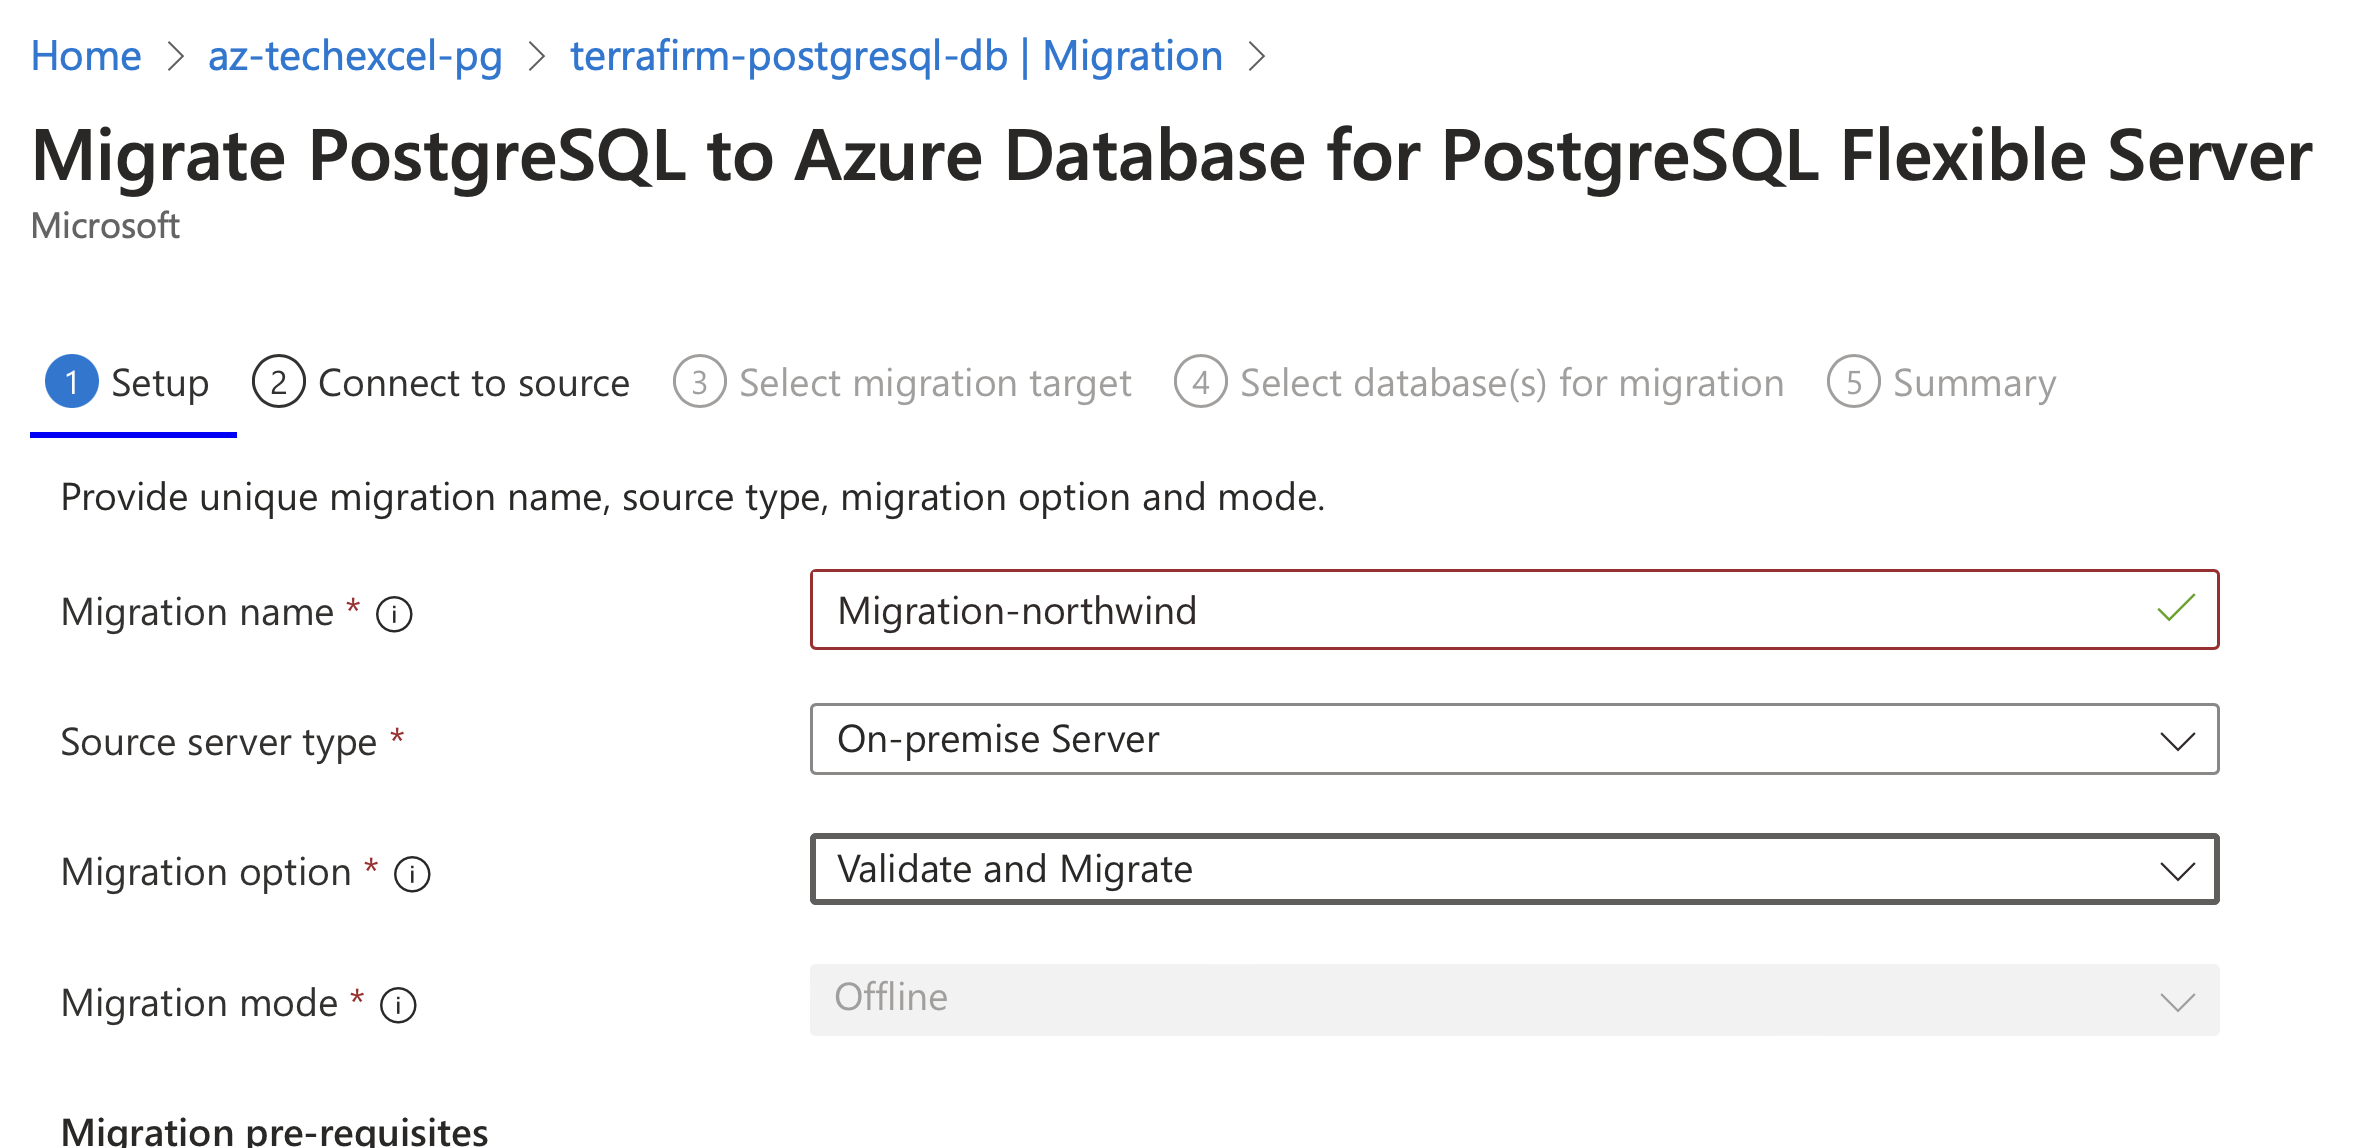
- On the Setup tab, enter each field as follows:
- Migration name -
Migration-northwind. - Source server type - On-premise Server.
- Migration option - Validate and Migrate.
- Select Next: Select Runtime Server >.
- Migration name -
-
We will not use a Runtime Server so just select Next: Connect to source >.
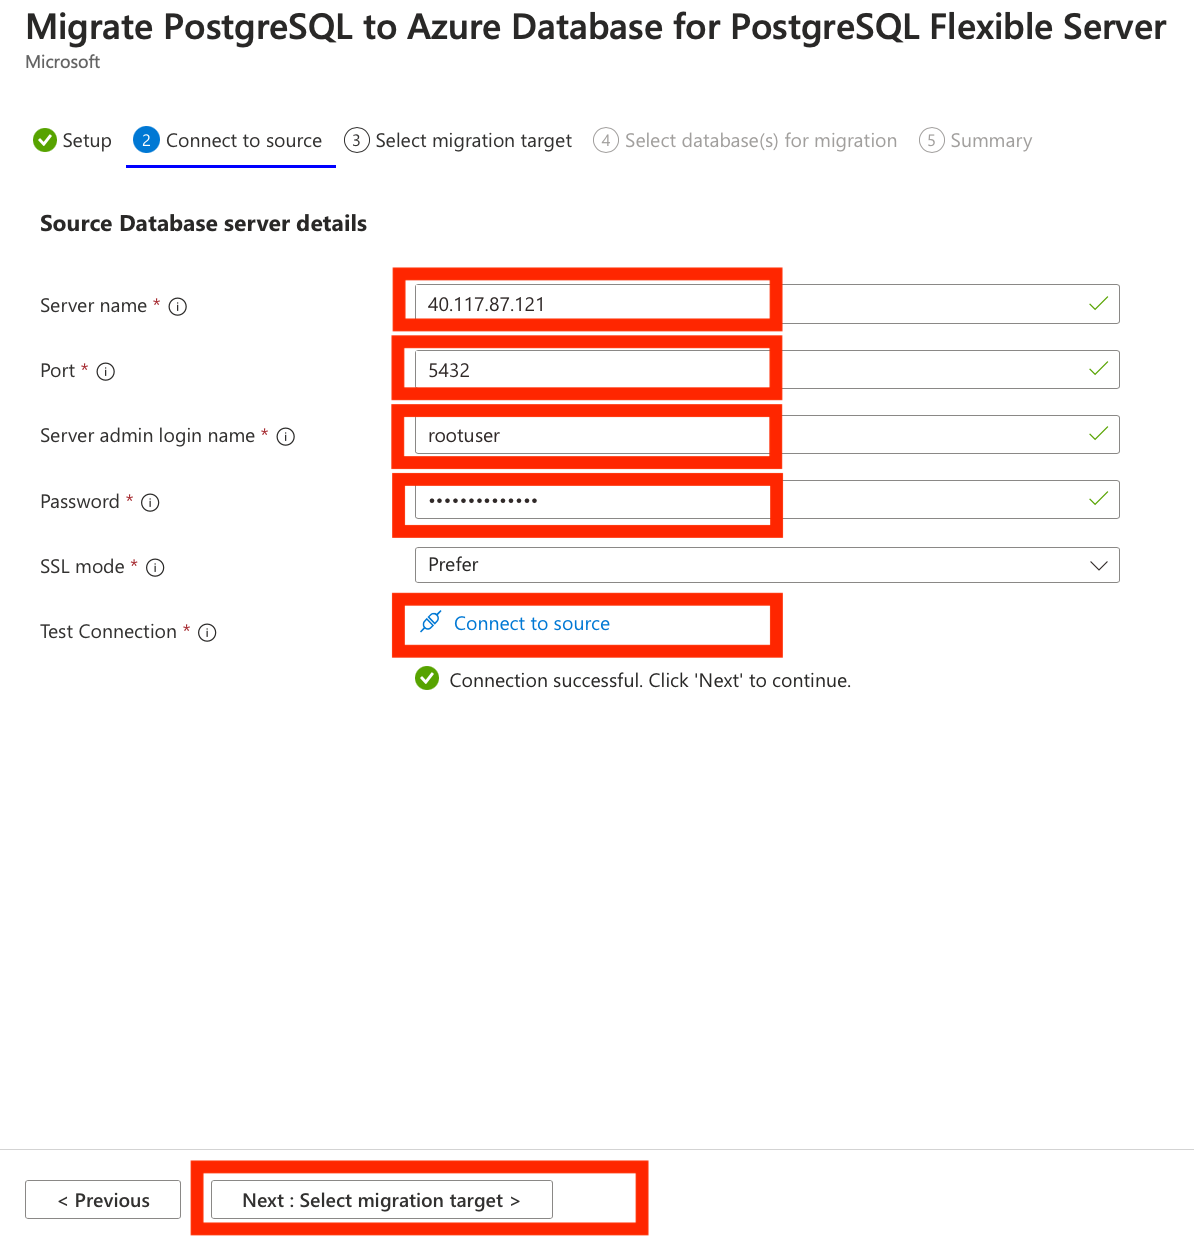
- On the Connect to source tab, enter each field as follows:
- Server name - The IP address of your server that you built using the template.
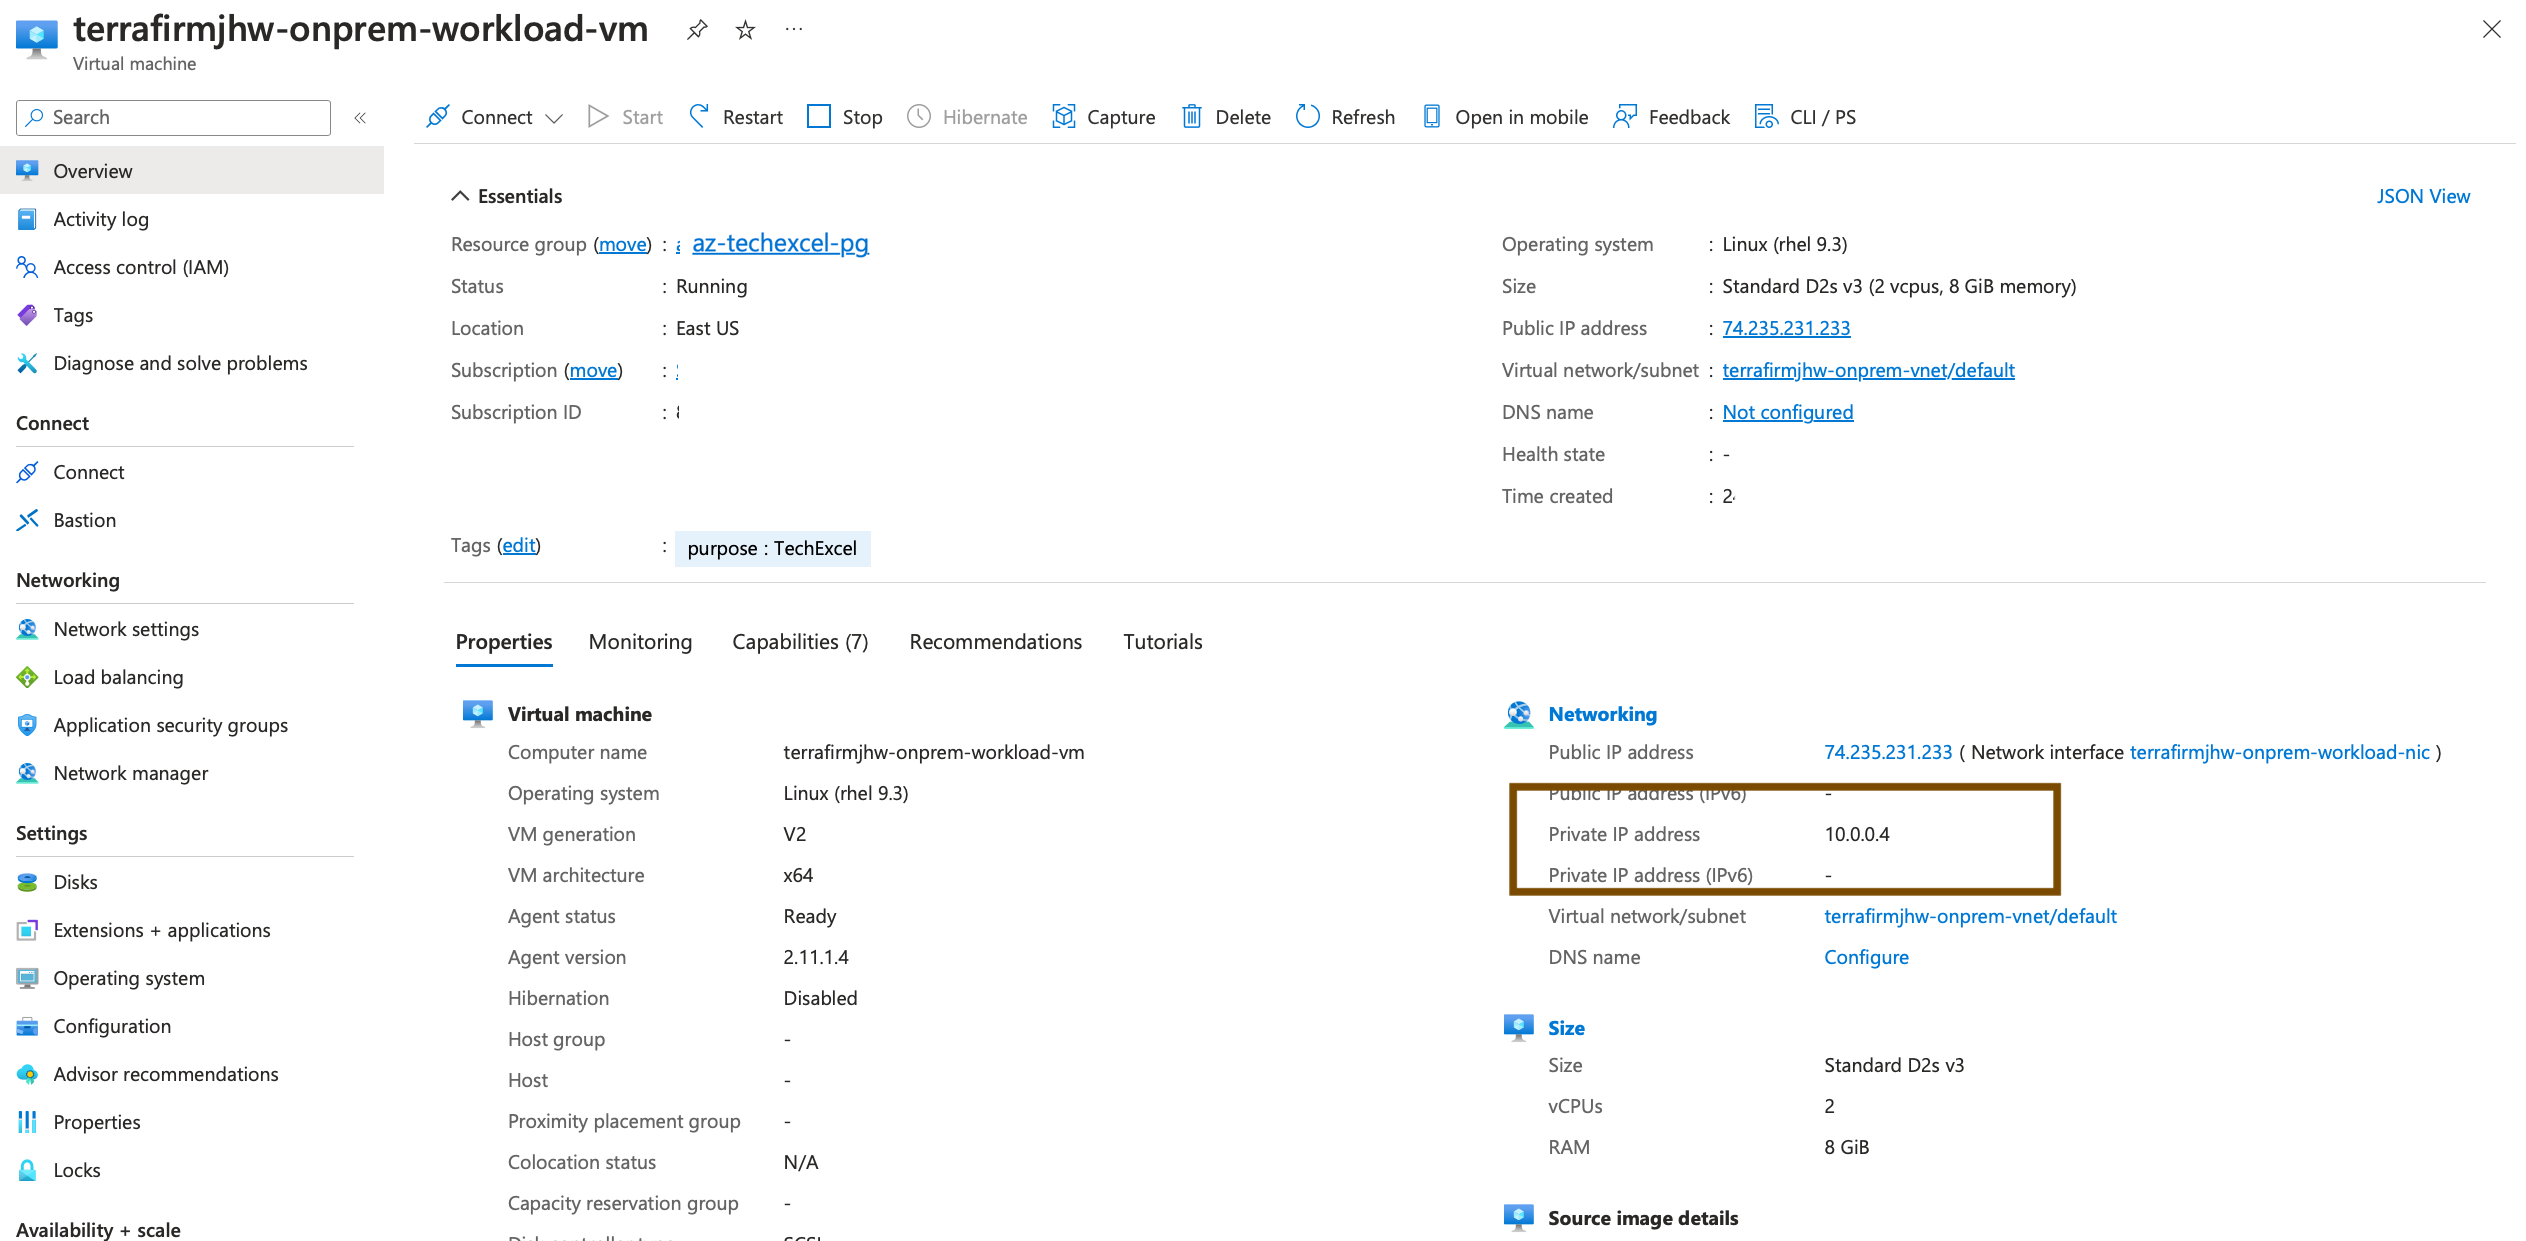
- Port - The port your instance of PostgreSQL uses on your source server (default of 5432).
- Server admin login name - the VM has been setup with an admin user called
rootuser. - Password - The password for the PostgreSQL admin user is
123rootpass456 - SSL mode - Prefer.
- Click on the Connect to source option to validate the connectivity details provided.
- Click on the Next: Select migration target button to progress.
- The connectivity details should be automatically completed for the target server we are migrating to.
- In the password field - enter the secure password for the Admin login you created in the previous task.
- Click on the Connect to target option to validate the connectivity details provided.
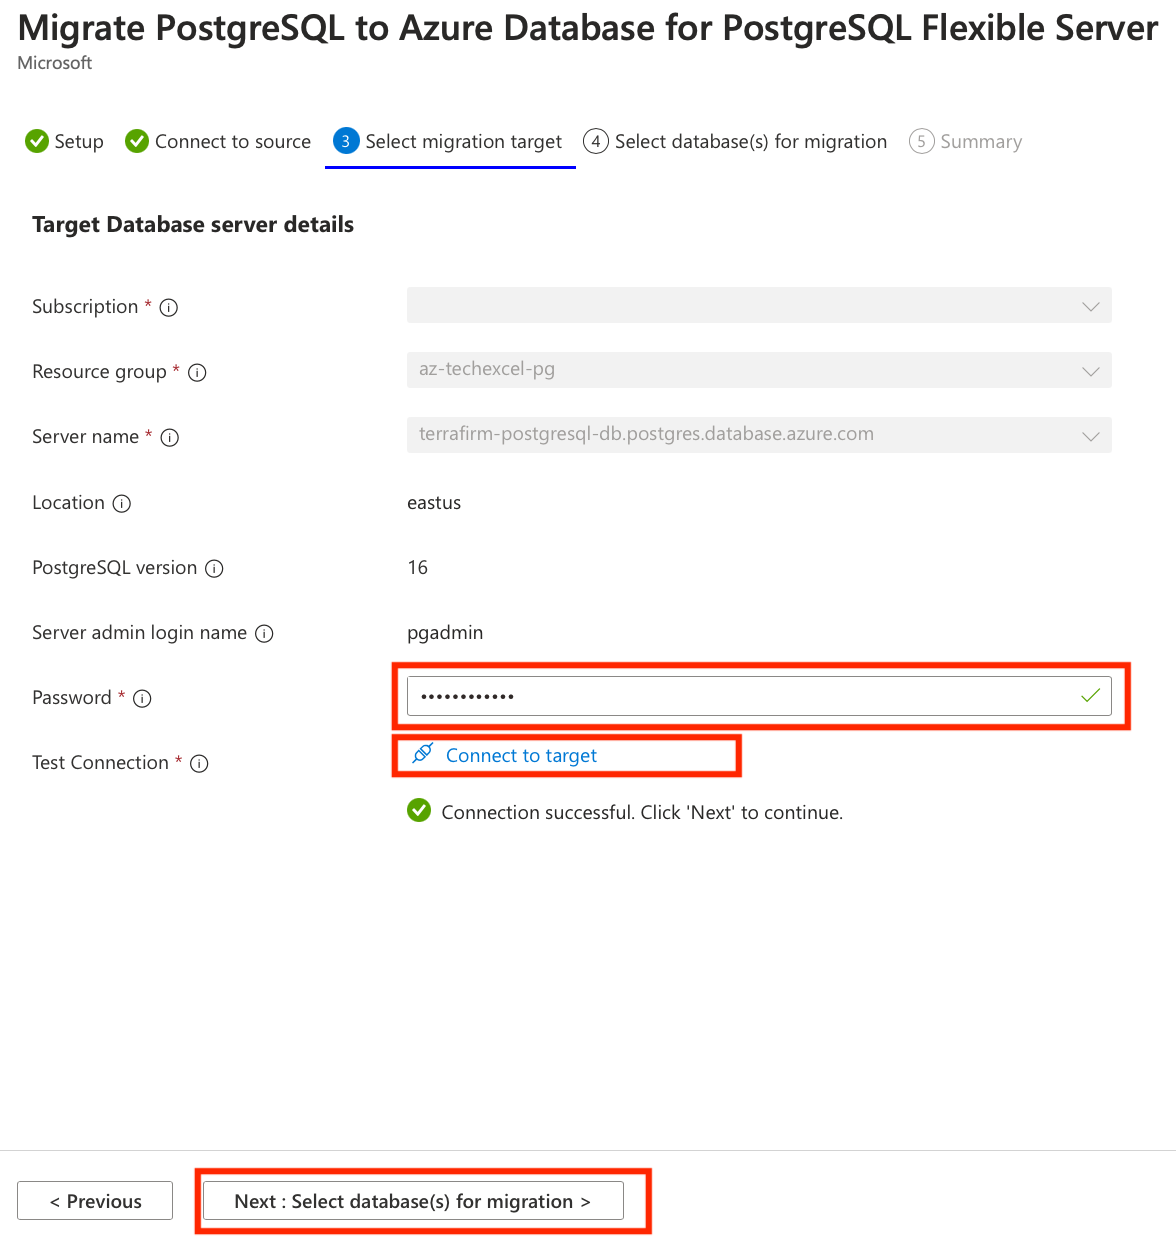
- Click on the Next : Select database(s) for migration > button to progress.
-
On the Select database(s) for migration tab, select the databases from the source server you want to migrate to the flexible server.
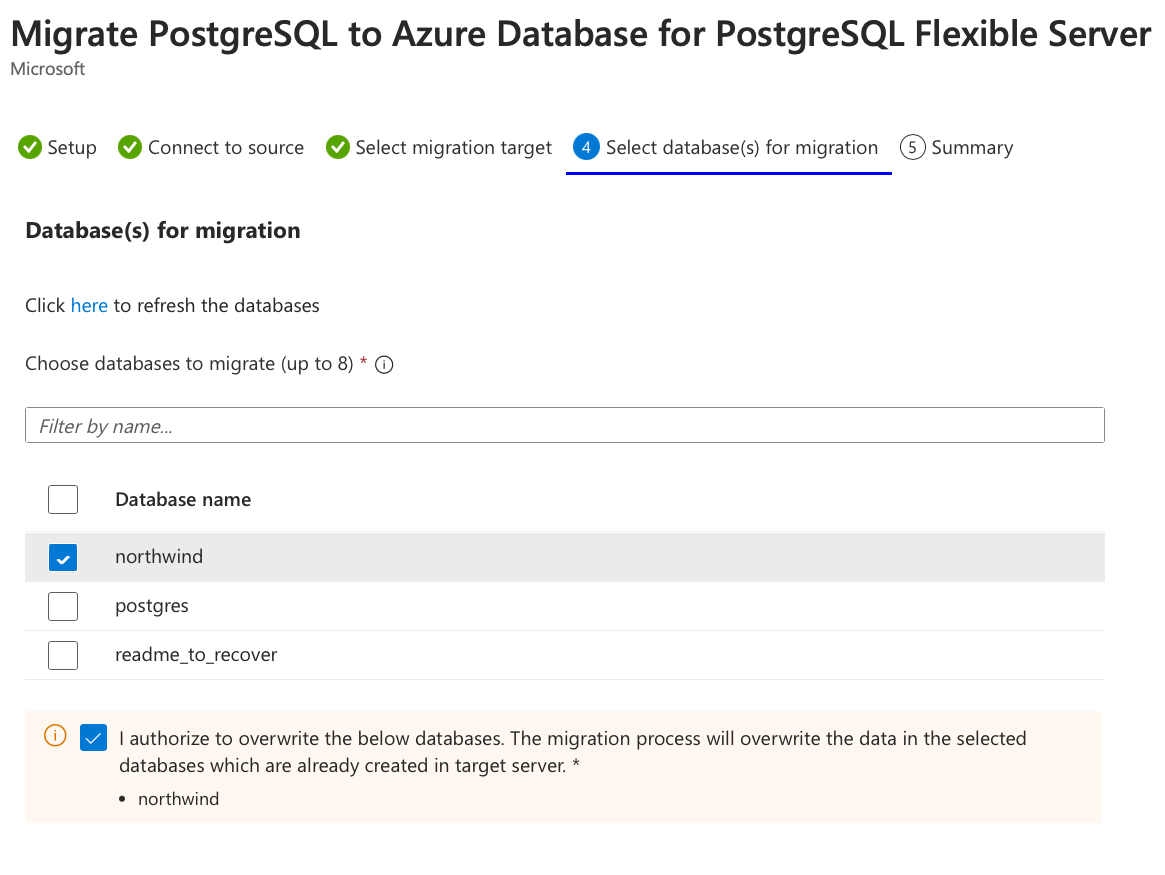
- Click on the Next : Summary > button to progress and review the data provided.
-
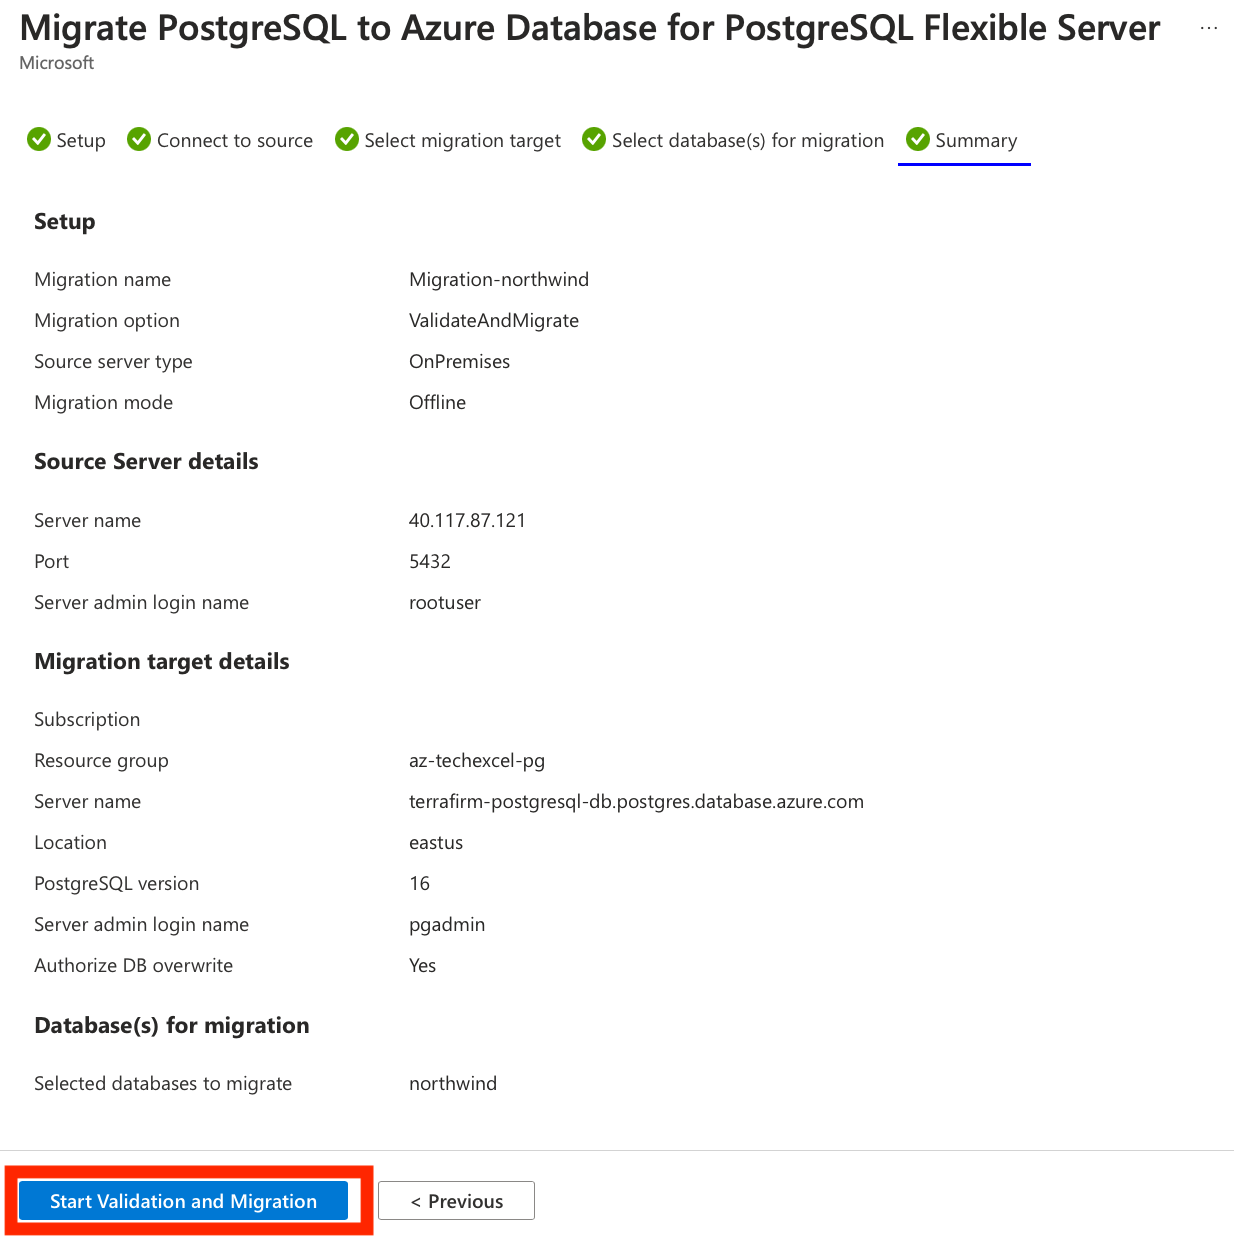
On the Summary tab, review the information and then click the Start Validation and Migration button to start the migration to the flexible server.
-
On the Migration tab, you can monitor the migration progress by using the Refresh button in the top menu to view the progress through the validation and migration process.

- By clicking on the Migration-northwind activity, you can view detailed information about the migration activity’s progress.
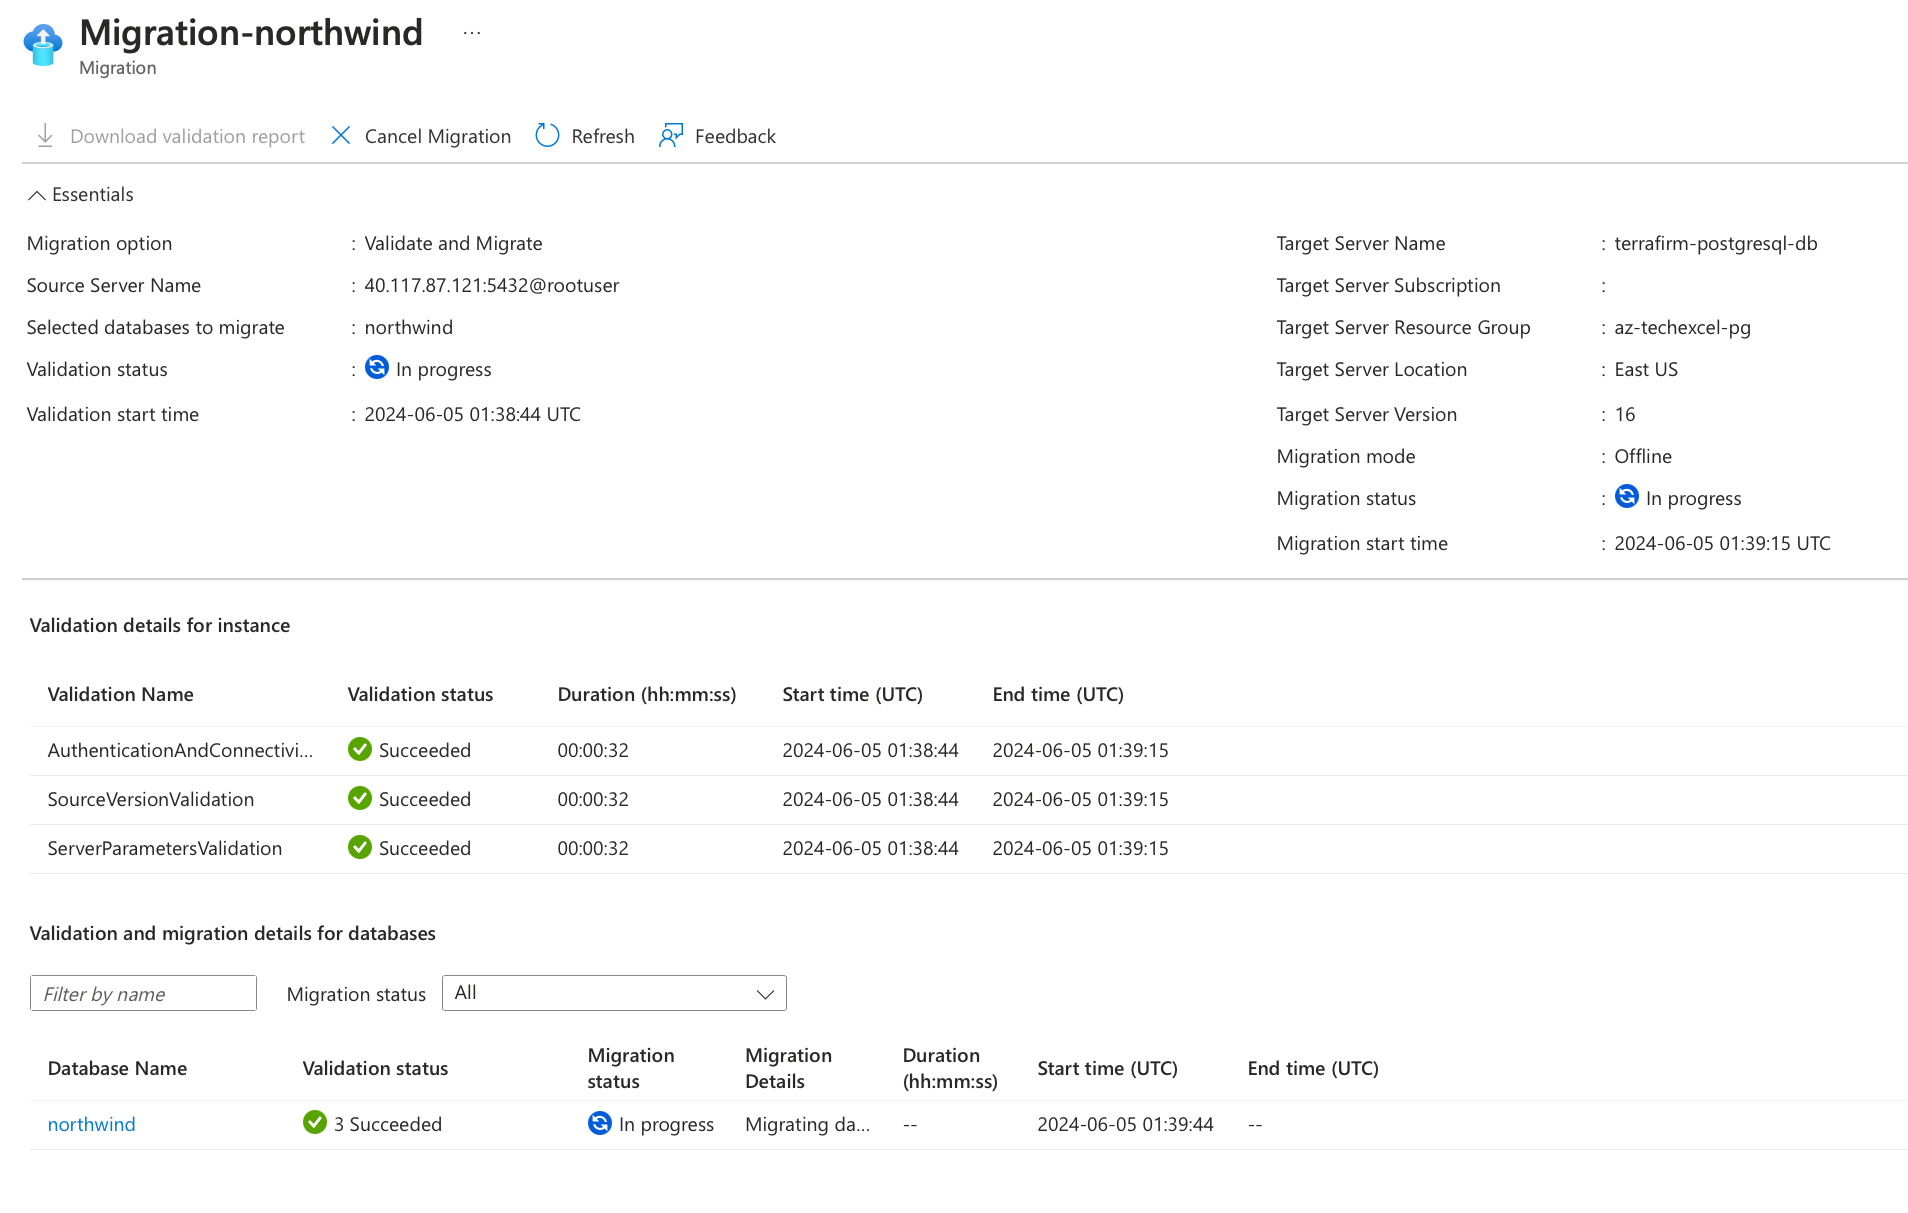
Once the migration process is complete, we can perform post-migration tasks such as data validation in the new database and configuring high availability before pointing the application at the database and turning it on again.