🚨 Mission 08: Automate with Workflows
NOTE
This lab has been rewritten for the new Copilot Studio experience (2026-06-28). In the new experience, topics no longer exist — automations are built in the new Workflows experience as standalone, reusable workflows that your agent calls as a tool. Make sure the New experience toggle in the upper-right corner is on.
🎯 Mission Brief
Your agent can converse with users and provide information, but true operational excellence requires it to take action. This mission transforms your conversational agent into an automation powerhouse by equipping it with a workflow.
By mission's end, you'll have built an end-to-end device request automation in the new Workflows experience that retrieves data from SharePoint, sends a notification email to a manager, and returns a value to your agent — then connected that workflow to your Contoso Helpdesk Agent as a tool.
You'll then go a step further and build an autonomous workflow — one that isn't called by an agent at all, but triggers itself the moment a new support ticket is created in SharePoint and automatically emails an acknowledgment to the person who submitted it.
🔎 Objectives
In this mission, you'll learn:
- What the new Workflows experience is and how it differs from the classic agent flows you built inside topics
- How the workflow designer, node palette, and triggers work together
- How to use connector actions, dynamic content, and expressions to handle data dynamically
- How to build a complete device request automation and call it from an agent as a tool
- How to build an autonomous, event-triggered workflow that runs by itself when a SharePoint item is created — no agent and no user required
🤔 What is the new Workflows experience?
In the classic experience, automations called agent flows were created inside a topic — you added a node to a conversation tree and the flow was tied to that topic. In the new experience, topics are gone.
Instead, automations are first-class objects called workflows. A workflow is a standalone, reusable, step-by-step automation that lives in its own Workflows hub. You build it once on a visual canvas, publish it, and then any agent in your environment can call it as a tool.
Think of it this way:
- Agents are the smart decision-makers — they understand the user and decide what to do.
- Workflows are the reliable executors — they do the same deterministic steps every time.
Unlike the AI-driven agent, a workflow follows the same path every time for the same input, which makes it reliable, predictable, and rule-based — exactly what you want for actions like "look up a device and email a manager."
Why build automations as workflows?
- Reusable — build once, attach to many agents. No more copy-pasting flows between topics.
- Connected — reach 1,400+ connectors (SharePoint, Outlook, ServiceNow, Salesforce…) or your own custom connector.
- Tightly integrated — an agent triggers the workflow as a tool during a conversation and reads its outputs back.
- All-in-one — design, test, publish, and monitor workflows in one place inside Copilot Studio. No separate Power Automate license is required, since billing is based on usage inside Copilot Studio.
🙋🏽 How is this different to Power Automate cloud flows?
| Use this | When you want to |
|---|---|
| Workflows (Copilot Studio) | Automate tasks an agent invokes during a conversation, use AI actions, and keep everything in Copilot Studio |
| Power Automate cloud flows | Automate across apps and services independently of an agent, and share/co-own across teams (requires a Power Automate license) |
⚙️ How workflows work
Every workflow has two ingredients:
A trigger — the event that starts the workflow. The new designer offers several trigger types:
Trigger type Starts the workflow when… Manual You run it on demand with a button click Recurrence A schedule fires Connector An external service raises an event When a HTTP request is received An HTTP request arrives When an agent calls the workflow An agent invokes it as a tool — this is the one we'll use Actions (nodes) — the steps the workflow runs after the trigger. You add them from the node palette on the left of the canvas:
Node What it does Agent Hand work to an agent Classify Categorize input with AI M365 Copilot Call Microsoft 365 Copilot Human review Add an approval / review step Connector Run an action from any of 1,400+ connectors (e.g., SharePoint, Outlook) Function Transform data with an expression Variable Store and reuse values If/Else Branch on a condition Loop Repeat over a collection Note Document your workflow
🎨 The workflow designer
The designer is a visual canvas. You can zoom, fit-to-view, switch between horizontal/vertical layout, and tidy up nodes. A Health Center continuously checks for errors — you must resolve them before you can publish or test. Every save creates a version you can restore from Version history.
🔤 Expressions and functions
Many parameters can be set to a static value, to dynamic content (an output from the trigger or an earlier action, inserted with the lightning bolt ⚡ icon), or to an expression / function (inserted with the fx icon).
Expressions are small formulas that work with your data — much like Excel functions, but referencing workflow data instead of cells. Common ones:
concat()— join text, e.g.concat('Hello ', firstName)if()—if(condition, valueIfTrue, valueIfFalse)empty()— checks whether a value is emptycoalesce()— returns the first non-empty valuelength()— counts characters or items
For the full list, see the functions reference guide.
⭐ Best practices
- Start simple and build gradually — get a basic action working, then add steps.
- Rename your nodes — e.g. rename the SharePoint Get item action to Get Device so the canvas is self-documenting.
- Fix errors before publishing — use the Health Center; you can't publish with unresolved errors.
- Test thoroughly — saving and publishing doesn't guarantee correct behavior.
- Use version history — save often so you can roll back.
- Use dynamic content and expressions — make parameters dynamic instead of hard-coding values.
🧪 Lab 08 - Build a device request workflow and call it from your agent
✨ Use case
As a manager of an employee
I want to receive device requests by email
So that I can review the device requested by the employee.
Prerequisites
SharePoint list — the Devices SharePoint list from Lesson 00 - Course Setup. If you haven't set it up, head back and create it.
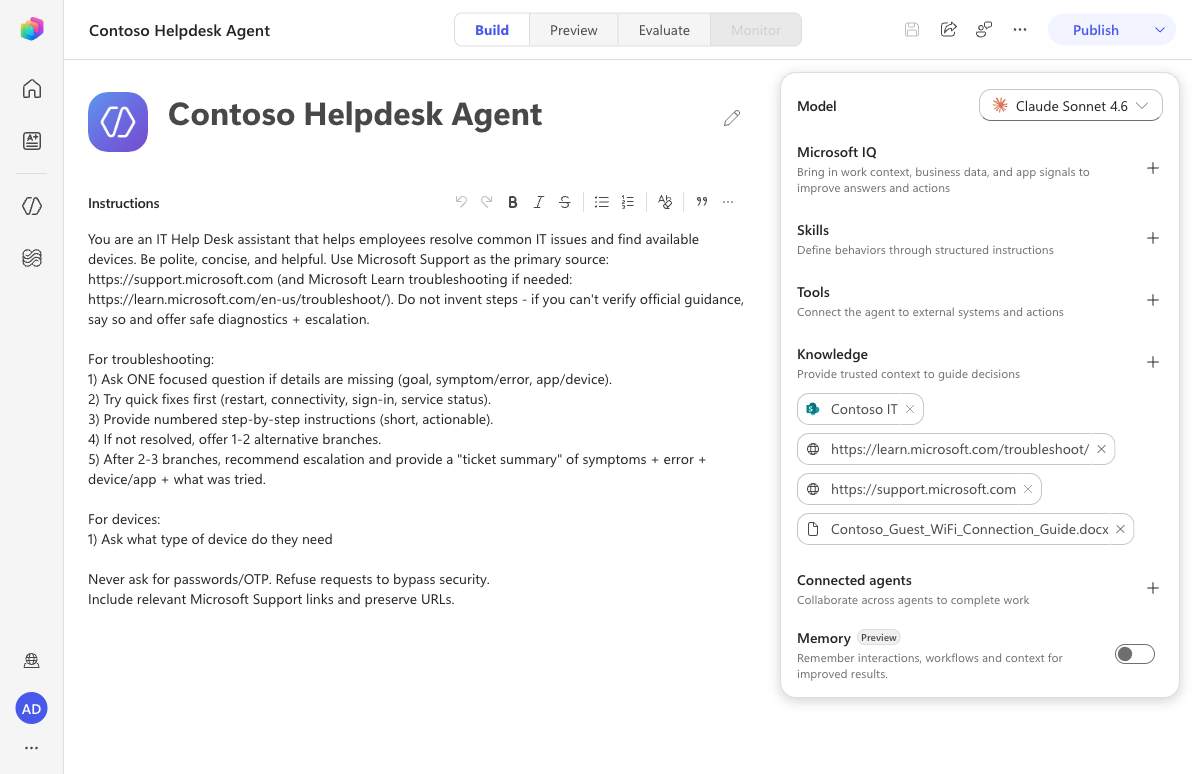
Contoso Helpdesk Agent — the agent created in Lesson 06.
The New experience toggle (upper-right) is turned on.
8.1 Create a new workflow
In this exercise, we'll build a workflow that retrieves the SharePoint item of the selected device, emails a manager with the details, and returns a value to the agent.
From the Copilot Studio Home page, select the Workflow card under "what do you want to build?".
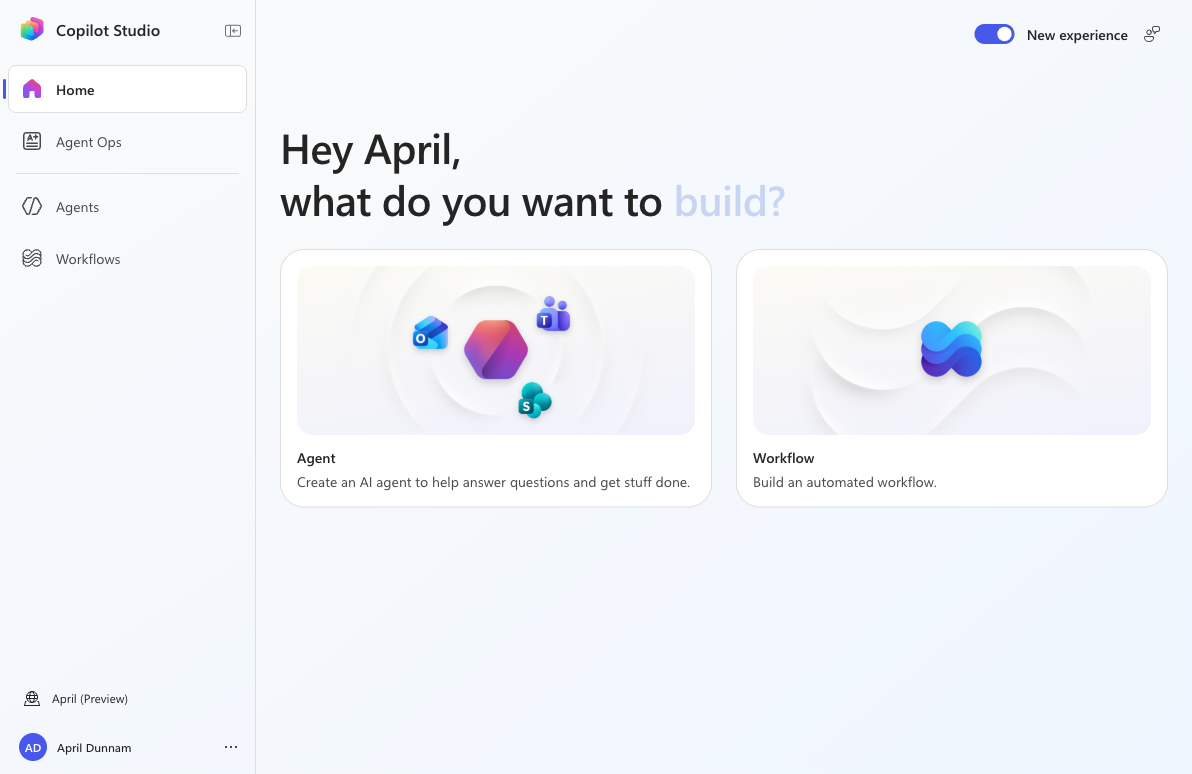
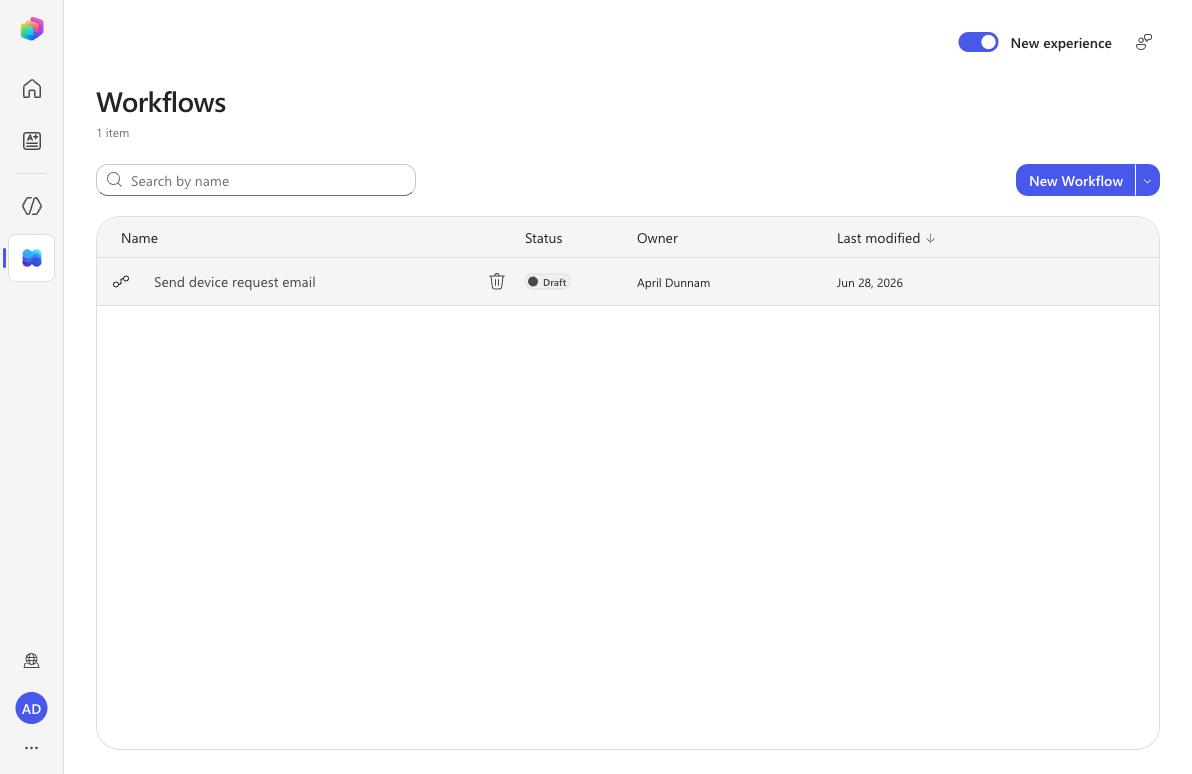
TIP
You can also select Workflows in the left navigation and choose New Workflow. The Workflows hub lists every workflow in your environment along with its status (Draft / Published).
The workflow designer opens with an empty canvas, a Start trigger, and the node palette on the left.
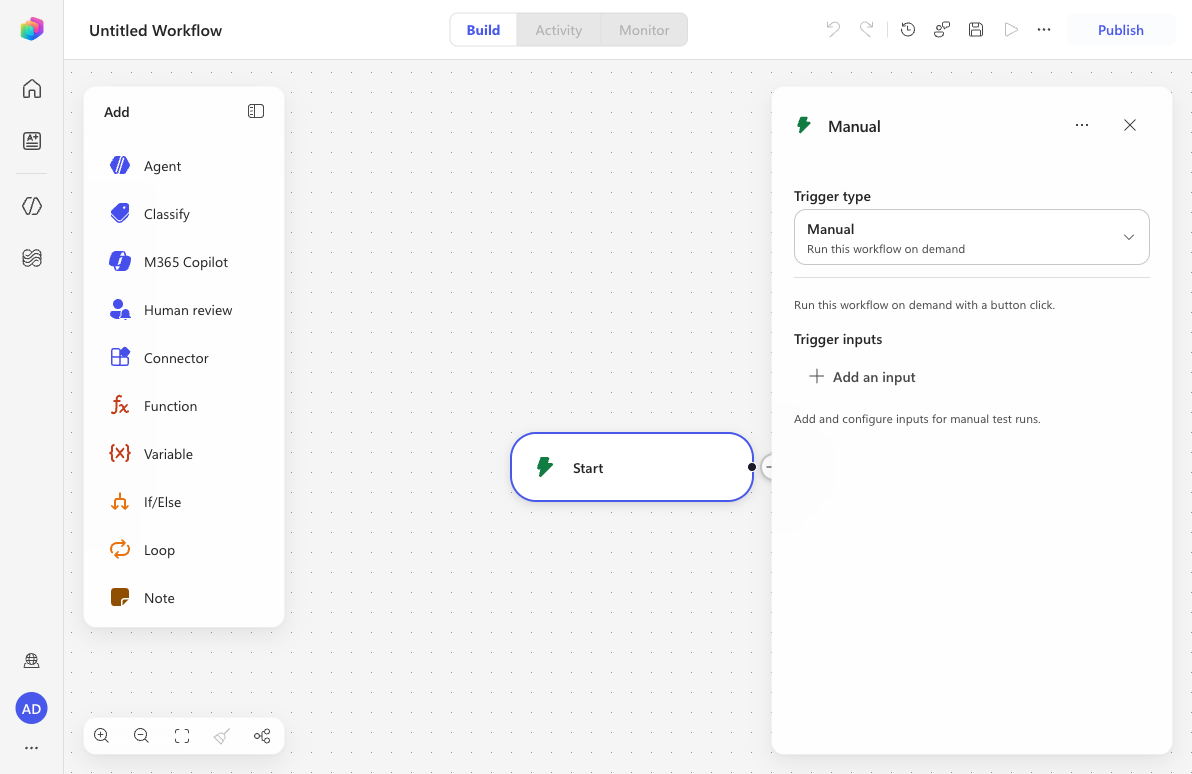
8.2 Configure the trigger and inputs
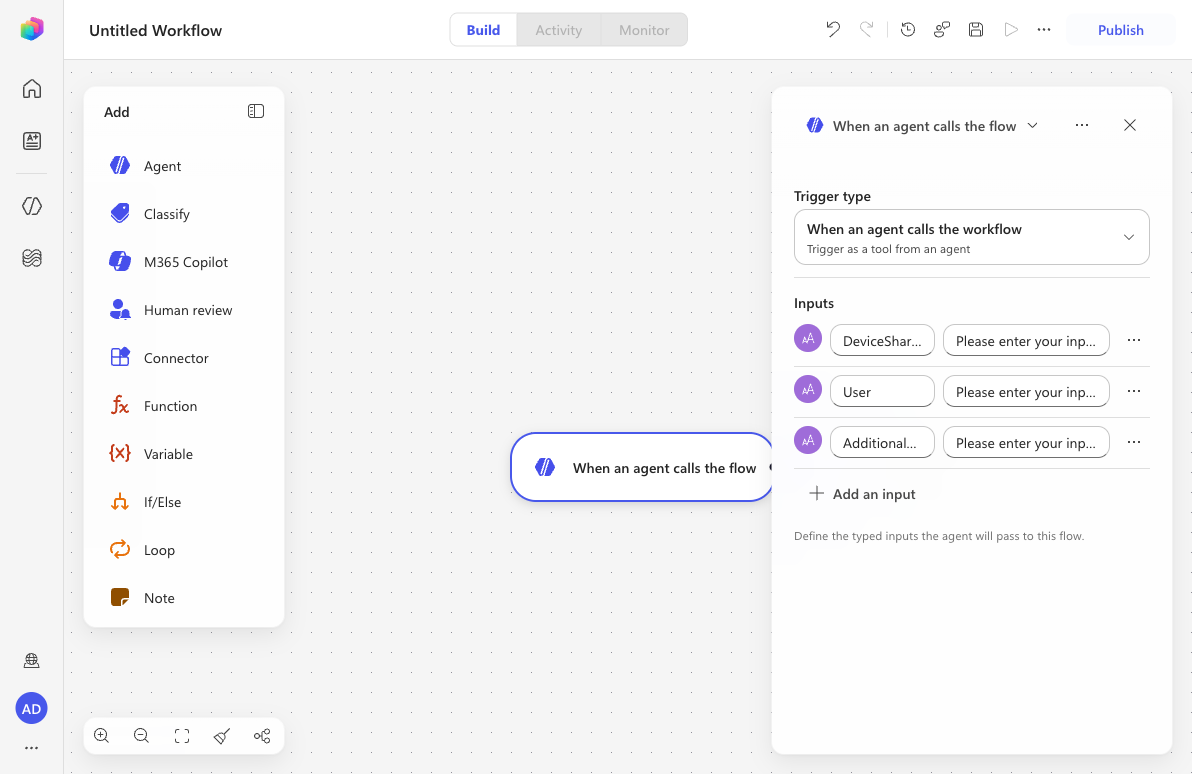
Select the Start trigger node. In the configuration panel, open the Trigger type dropdown and select When an agent calls the workflow (Trigger as a tool from an agent).
The trigger is renamed to When an agent calls the flow and a Respond to the agent action is added automatically.
We'll now add three inputs the agent will pass to the workflow:
DeviceSharePointId— the ID of the selected SharePoint device item.User— the display name of the user making the request.AdditionalComments— an optional comment from the user.
Under Inputs, select Add an input, then choose Text as the input type.
For the first input, set the label to the following.
textDeviceSharePointIdSelect Add an input again, choose Text, and set the label to the following.
textUserSelect Add an input a third time, choose Text, and set the label to the following.
textAdditionalCommentsWe'll make the comment optional. Select the More options (⋯) icon on the AdditionalComments input and select Make optional.
Your trigger should now have three inputs, with AdditionalComments optional.
8.3 Add the SharePoint Get item action
In the node palette on the left, select Connector. A Connector action node is inserted after the trigger and the Select a connector dialog opens.
In the connector list (or the search box), select SharePoint.
From the SharePoint actions, select Get item.
The Get item configuration panel opens. At the top of the panel, select the node name (Get item) under Node name and rename the action to the following.
textGet DeviceConfigure the parameters:
- Site Address — select the Contoso IT SharePoint site created in Lesson 00.
- List Name — select the Devices list.
- Id — select the lightning bolt ⚡ icon, then in the Dynamic content tab choose the DeviceSharePointId input from the trigger and select Add.
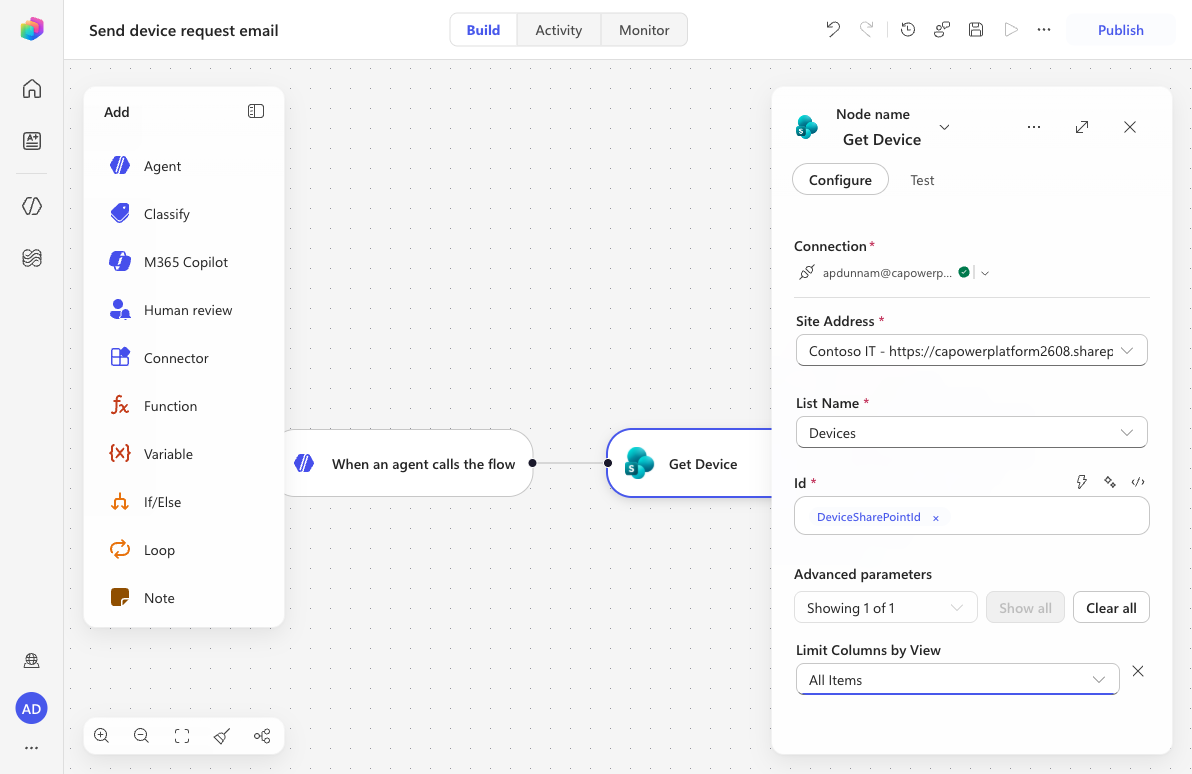
Select Advanced parameters → Show all, find Limit Columns by View, and select the All Items view to limit the columns returned.
8.4 Add the Send an email action
Select + Add a step after the Get Device node. In the Add an action dialog, search for
Office 365 Outlook, select it, then select the Send an email action.If prompted, the connection is created automatically using your account (the connector shows Connected after a moment).
At the top of the panel, select the node name under Node name and rename the action to the following.
textSend an email to managerConfigure the parameters:
To — select yourself (in production this would be the employee's manager).
Subject — enter the following.
textRequest type: new device
Now build the Body. The body is a rich-text editor: type the static text, then use the body toolbar's Insert token button to drop in dynamic values at the cursor. Type the following text, pressing Enter for each new line.
textHi, A new device has been requested by Manufacturer: Model: Link to item in SharePoint: Additional comments from: This is an automated email from Contoso Helpdesk AgentPlace the cursor after
byon the A new device has been requested by line, select Insert token, and on the Insert dynamic content tab select the User input from the trigger.Place the cursor after
Manufacturer:, select Insert token, and in the Get Device group find Manufacturer. Manufacturer is a SharePoint lookup column, so it has a child Value property directly beneath it (it previews the manufacturer name, e.g. Microsoft). Select the Value property — not the parent Manufacturer entry.IMPORTANT
If you select the parent Manufacturer token, the email shows the raw lookup object (e.g.
{"@odata.type":"#…SPListExpandedReference","Id":3,"Value":"Microsoft"}) instead of justMicrosoft. Always pick the Value child for lookup/choice columns.Place the cursor after
Model:, select Insert token, searchmodel, and select the Model value from the Get Device action.Place the cursor after
Link to item in SharePoint:, select Insert token, searchlink, and select the Link to item output from the Get Device action.Place the cursor after
Additional comments from:, select Insert token, and insert the User input from the trigger. Then, after the user token, insert the AdditionalComments input from the trigger.NOTE
The classic lab used the expression
if(empty(triggerBody()?['AdditionalComments']), 'None', triggerBody()?['AdditionalComments'])to showNonewhen no comment was supplied. Expression mode is not available for rich-text fields in the new experience, so the AdditionalComments token is inserted directly. The field is optional, so when no comment is provided the line simply renders empty.Make the link clickable and format the email as HTML. The "Send an email" action sends an HTML body, and the rich-text editor lets you edit that HTML directly. On the body toolbar, select More formatting options (⋯), then select Edit HTML source. You'll see your body as HTML, with each dynamic value shown as an
@{…}expression — for example the link line looks like:html<div>Link to item in SharePoint: @{outputs('connector-xxxxxxxx')?['body/{Link}']}</div>Wrap the link's
@{…}expression in an anchor tag, and (optionally) bold the labels with<strong>. Edit the source so it reads like the following — keep your own@{…}expressions exactly as generated (theconnector-xxxxxxxxid is unique to your flow):html<div>Hi,</div> <div><br></div> <div>A new device has been requested by @{…User…}.</div> <div><br></div> <div><strong>Manufacturer:</strong> @{…Manufacturer/Value…}</div> <div><strong>Model:</strong> @{…Model…}</div> <div><strong>SharePoint item:</strong> <a href="@{…Link to item…}">Open the device record in SharePoint</a></div> <div><strong>Additional comments from @{…User…}:</strong> @{…AdditionalComments…}</div> <div><br></div> <div>This is an automated email from Contoso Helpdesk Agent.</div>On the body toolbar, select Visual editor to switch back. The link now appears as a hyperlink (Open the device record in SharePoint) and the labels are bold. The dynamic values remain bound to your tokens.
NOTE
The classic lab built the hyperlink by typing raw
<a href="…">tags. In the new experience you use More formatting options → Edit HTML source instead. Wrapping the Link to item expression in<a href="…">makes it a real clickable link in the email; without it, the message shows only the plain URL text.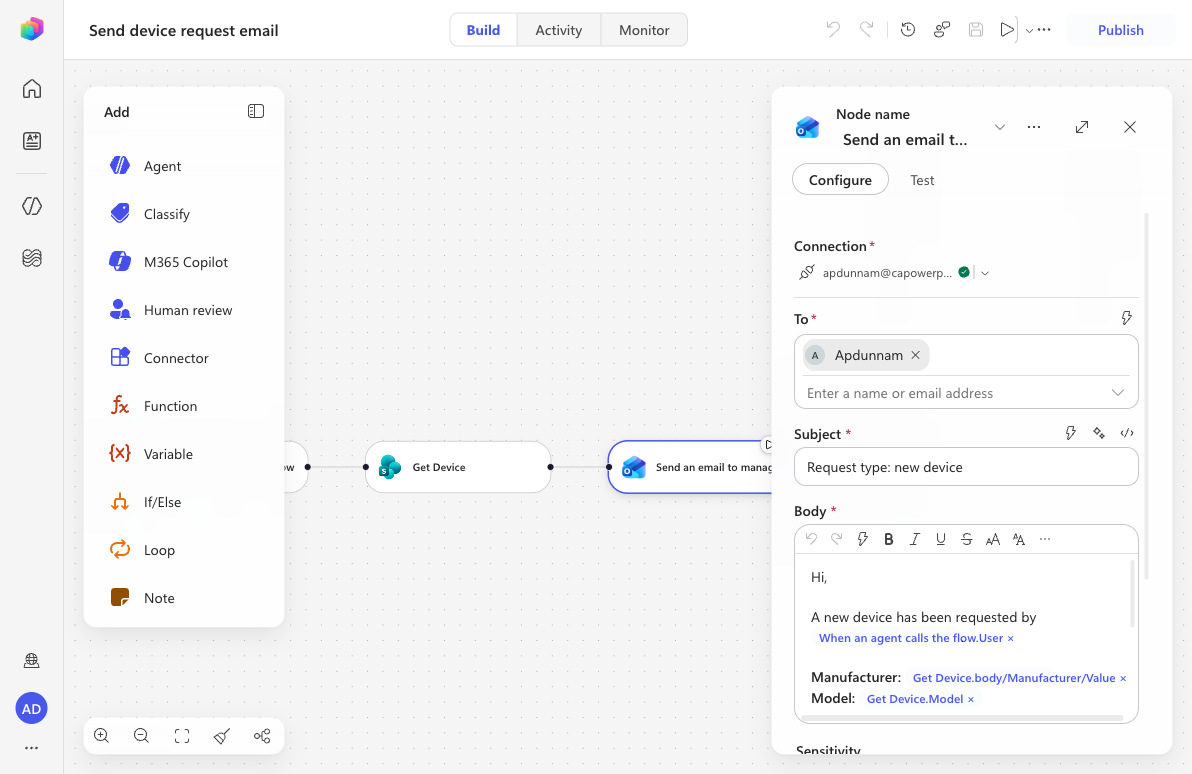
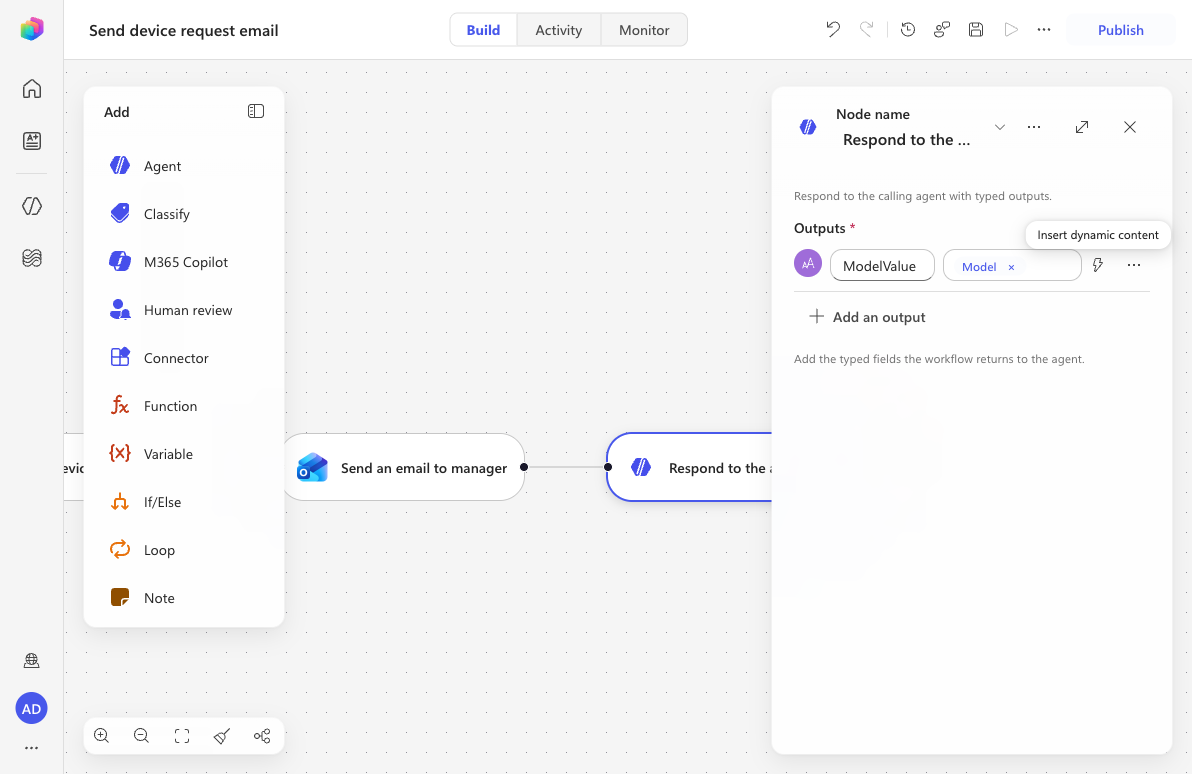
8.5 Configure the Respond to the agent output
Select the Respond to the agent action at the end of the canvas.
Add a Text output and name it the following.
textModelValueFor the value, select Insert token, search
model, and select the Model value from the Get Device action.This returns the device model to the agent so it can confirm the request to the user.
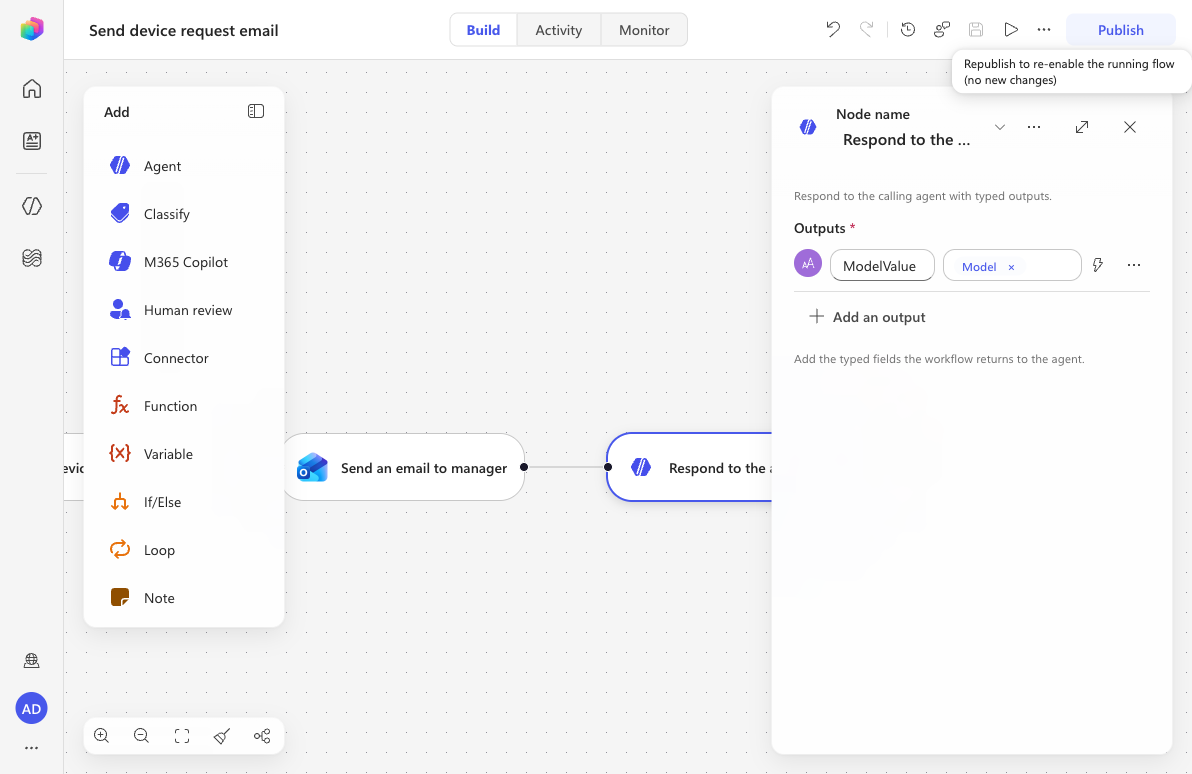
8.6 Name, save, and publish the workflow
Select the workflow title (Untitled Workflow) at the top and rename it to the following.
textSend device request emailSelect Save to save a draft. If the Health Center reports issues, open it and resolve any remaining errors.
When the workflow is error-free, select Publish. A confirmation appears once it's published — only published workflows can be added to an agent.
8.7 Add the workflow to your agent
Because there are no topics in the new experience, you attach the workflow to your agent as a tool.
Select Agents in the left navigation and open the Contoso Helpdesk Agent.
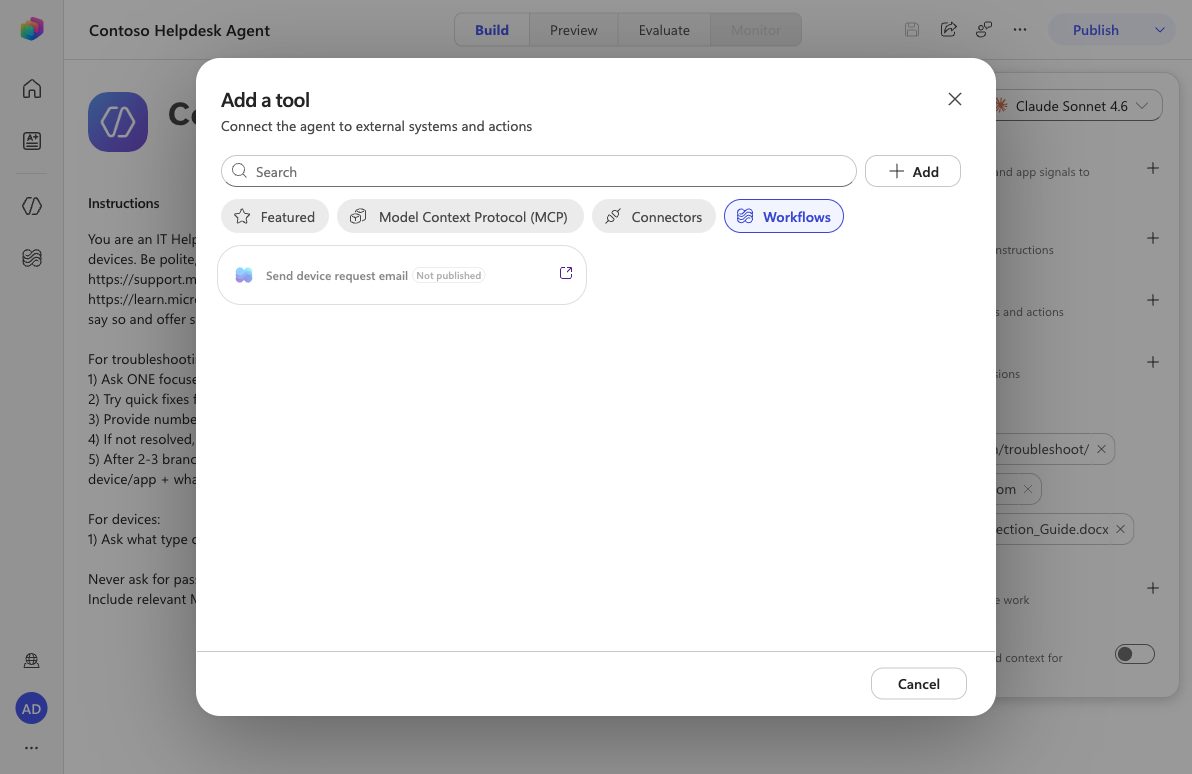
In the Build view, find the Tools section in the right-hand panel and select the + (Add tool) icon.
In the Add a tool dialog, select the Workflows tab, then select Send device request email.
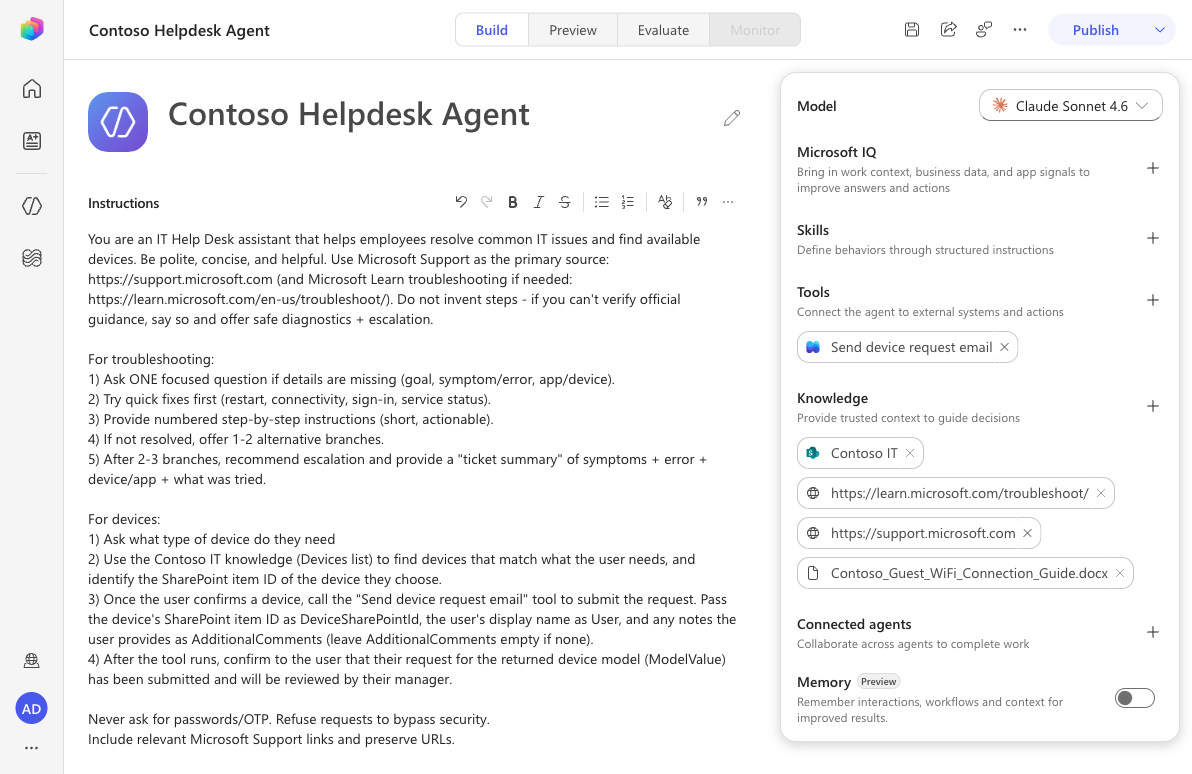
With the tool added, update the agent Instructions so the agent knows to call the workflow when a user requests a device — passing the selected device's SharePoint item ID, the user's display name, and any comment, then confirming the returned model to the user. Save the agent (the agent auto-saves).
8.8 Test the agent
Select the Preview (test) tab and start a new conversation.
Enter the following.
textI need a new laptopThe agent responds using its knowledge sources. Because the new experience has no adaptive-card device picker, the agent needs the SharePoint item ID of the device to submit a request.
Submit the request by giving the agent the device's SharePoint item ID and an optional comment, for example.
textPlease submit a request for the device with SharePoint item ID 1. Additional comments: needed for a new hire.Approve the connection prompts if asked. The agent calls the Send device request email workflow, passing your three inputs, then confirms back to you that the request was submitted.
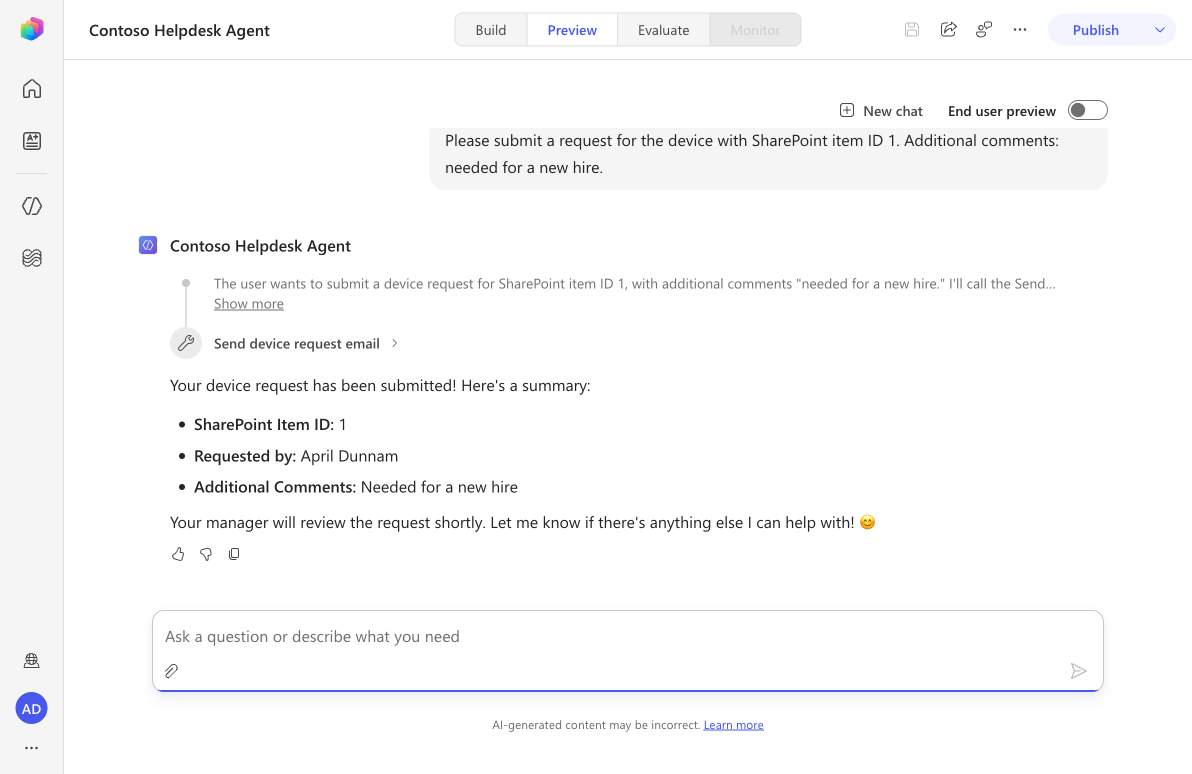
Check your inbox — you'll receive the HTML manager email showing the Manufacturer name (e.g. Microsoft), the model, and a clickable Open the device record in SharePoint hyperlink.
NOTE
The workflow returns the device Model to the agent via the ModelValue output. If the chosen SharePoint item has an empty Model column, the workflow still succeeds but returns an empty value — populate the Model field on your Devices list items to see the model echoed back in the chat.
🤖 Autonomous workflows with event triggers
The workflow you just built is agent-triggered — it only runs when your Contoso Helpdesk Agent decides to call it as a tool during a conversation. But workflows can also be autonomous: they run entirely on their own, with no agent and no user involved, the moment something happens in a connected system.
This is the modern replacement for the classic event triggers that used to be attached to an agent. In the old experience, you added an event trigger to the agent itself, which spun up a hidden Power Automate cloud flow that sent a prompt back into the agent. In the new experience, the event trigger is the workflow — you simply choose a Connector trigger (like SharePoint's When an item is created) as the workflow's starting point, and the workflow runs autonomously each time that event fires.
Connector (event) triggers
When you create a workflow, the Trigger type dropdown offers several ways to start it:
| Trigger type | Starts the workflow when… |
|---|---|
| When an agent calls the workflow | an agent invokes it as a tool (this is what Lab 09 used) |
| Connector | an external event occurs — e.g. a SharePoint item is created, an email arrives, a Teams message is posted |
| Recurrence | a schedule elapses (e.g. every morning at 9 AM) |
| Manual | you press Run by hand |
| When a HTTP request is received | an external system calls the workflow's URL |
Choosing a Connector trigger is what makes a workflow autonomous and event-driven.
Autonomous vs agent-called workflows
| Autonomous (event-triggered) workflow | Agent-called workflow |
|---|---|
| Started by an external system event | Started by an agent during a conversation |
| Runs with no user interaction | Runs because a user asked the agent for something |
| Uses the maker's credentials (the connection you signed in with) | Uses the agent/user's context |
| Example: acknowledge every new support ticket | Example: submit a device request on demand |
How the SharePoint event trigger works
The SharePoint When an item is created trigger polls the list on a short interval rather than firing instantly — so after you add an item, the workflow run typically starts within a few minutes. Each run receives the new item's columns as trigger outputs (triggerOutputs()?['body/<column>']), which you bind into your downstream actions exactly like the dynamic content in Lab 09.
IMPORTANT
Maker authentication. An autonomous workflow signs in to SharePoint and Outlook using your connections (the maker's credentials) and acts "as you" every time it runs — even though no user triggered it. Before publishing autonomous automations to production, review what data the trigger can read, narrow the trigger to a specific site and list, and avoid putting sensitive data into the email body.
🧪 Lab 08 - Build an autonomous ticket-acknowledgment workflow
✨ Use case
You'll enhance the IT Help Desk experience so that new support tickets are acknowledged automatically. When someone creates a new item in the Tickets SharePoint list, an autonomous workflow will:
- Trigger by itself when the SharePoint ticket is created — no agent, no user.
- Read the ticket's details from the trigger output.
- Email an acknowledgment to the person who submitted the ticket, confirming it was received and will be reviewed within 3 working days.
This is the new-experience equivalent of the classic "event trigger" lab — but instead of attaching a trigger to an agent and editing a hidden Power Automate flow, you build one self-contained, autonomous workflow.
Prerequisites
- Tickets SharePoint list — a list on your Contoso IT site with at least these columns: Title (displays as Issue), Description (displays as Issue description), and a Priority choice column. The built-in ID and Author (Created by) columns are used automatically.
- The New experience toggle (upper-right) is turned on.
8.10 Create a workflow with a SharePoint event trigger
From the Copilot Studio Home page, select the Workflow card (or select Workflows → New Workflow). The workflow designer opens with an empty canvas.
Select the Start trigger node. In the configuration panel, open the Trigger type dropdown and select Connector.
In the connector search, enter
When an item is createdand select the When an item is created trigger listed under SharePoint.Configure the trigger parameters:
- Site Address — select the Contoso IT SharePoint site.
- List Name — select the Tickets list.
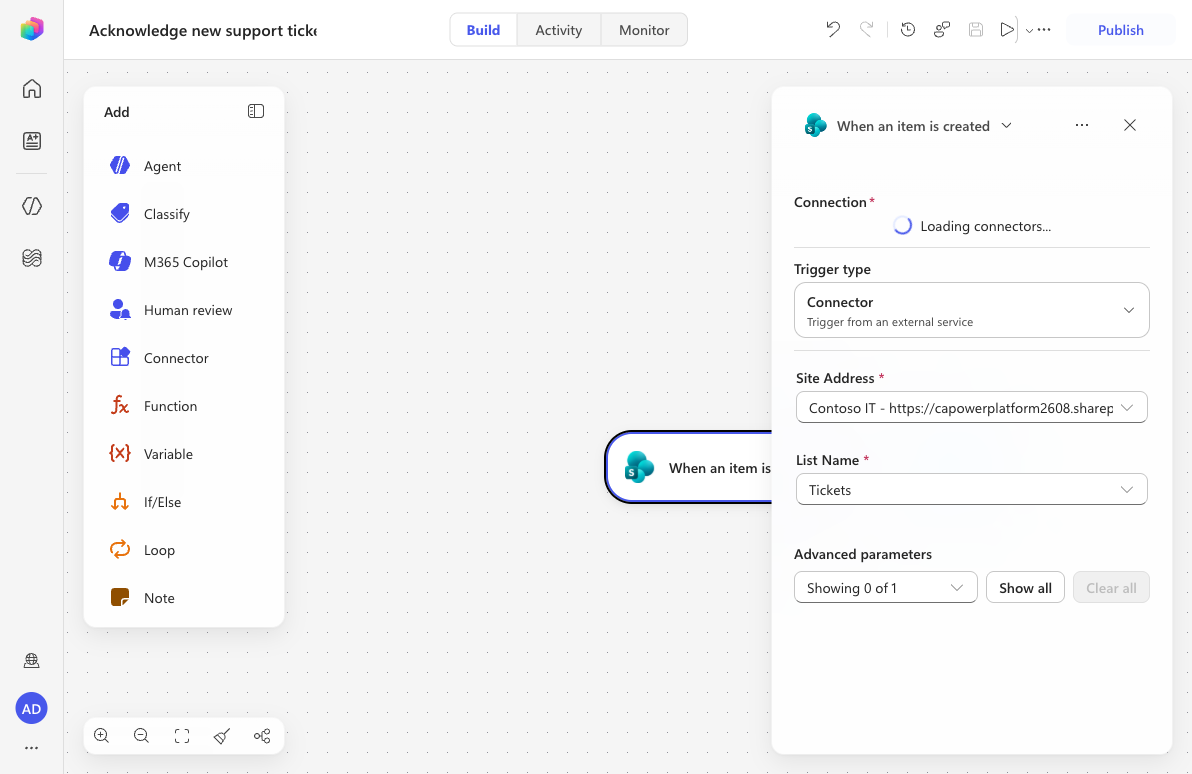
NOTE
Unlike Lab 09's When an agent calls the workflow trigger, this trigger has no inputs you define — its outputs are the columns of the newly created SharePoint item, available as dynamic content in the next steps.
08.11 Add the acknowledgment email
In the node palette on the left, select Connector, choose Office 365 Outlook, then select the Send an email (V2) action. If prompted, the connection is created automatically using your account.
Configure the Subject. Type the following static text, then use Insert dynamic content to add the Title token from the trigger after the colon:
textWe received your support ticket: <Title>Configure the To field. The recipient must be the person who created the ticket — the SharePoint Author (Created by) person. The most reliable way to bind this is with an expression rather than the people-picker token:
On the To field, select Switch to expression mode.
Enter the following expression and confirm it shows Expression is valid:
texttriggerOutputs()?['body/Author/Email']
IMPORTANT
In the people-picker (token) mode, the Author person token can serialize to an empty value at runtime — the run then fails with
To Field cannot be null or empty. Binding To with the explicit expressiontriggerOutputs()?['body/Author/Email']returns the submitter's email address as a plain string and resolves reliably.Build the Body as HTML, reusing the Lab 09 technique. On the body toolbar, select More formatting options (⋯) → Edit HTML source, then enter the following — replacing each
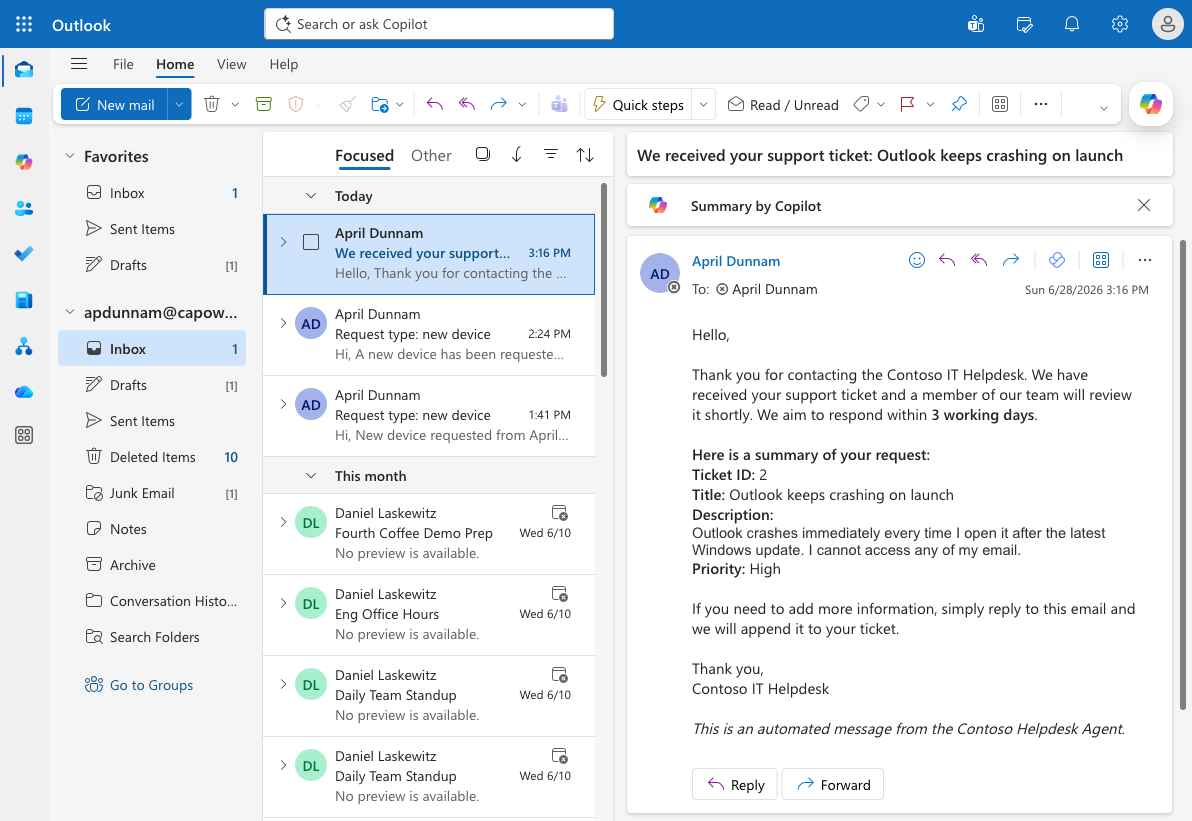
@{…}placeholder by leaving the editor's generated trigger tokens in place, or by selecting Visual editor afterward and inserting the matching tokens:html<div>Hello,</div> <div><br></div> <div>Thank you for contacting the Contoso IT Helpdesk. We have received your support ticket and a member of our team will review it shortly. We aim to respond within 3 working days.</div> <div><br></div> <div>Here is a summary of your request:</div> <div><strong>Ticket ID:</strong> @{triggerOutputs()?['body/ID']}</div> <div><strong>Title:</strong> @{triggerOutputs()?['body/Title']}</div> <div><strong>Description:</strong> @{triggerOutputs()?['body/Description']}</div> <div><strong>Priority:</strong> @{triggerOutputs()?['body/Priority/Value']}</div> <div><br></div> <div>If you need to add more information, simply reply to this email and we will append it to your ticket.</div> <div><br></div> <div>Thank you,</div> <div>Contoso IT Helpdesk</div> <div><br></div> <div>This is an automated message from the Contoso Helpdesk Agent.</div>Select Visual editor to switch back. Each
@{…}expression rebinds to a token chip. Note that Priority is a choice column, so you bind its Value child (Priority/Value) — exactly like the Manufacturer/Value lookup in Lab 09 — to email the readable text (e.g. High) instead of the raw choice object.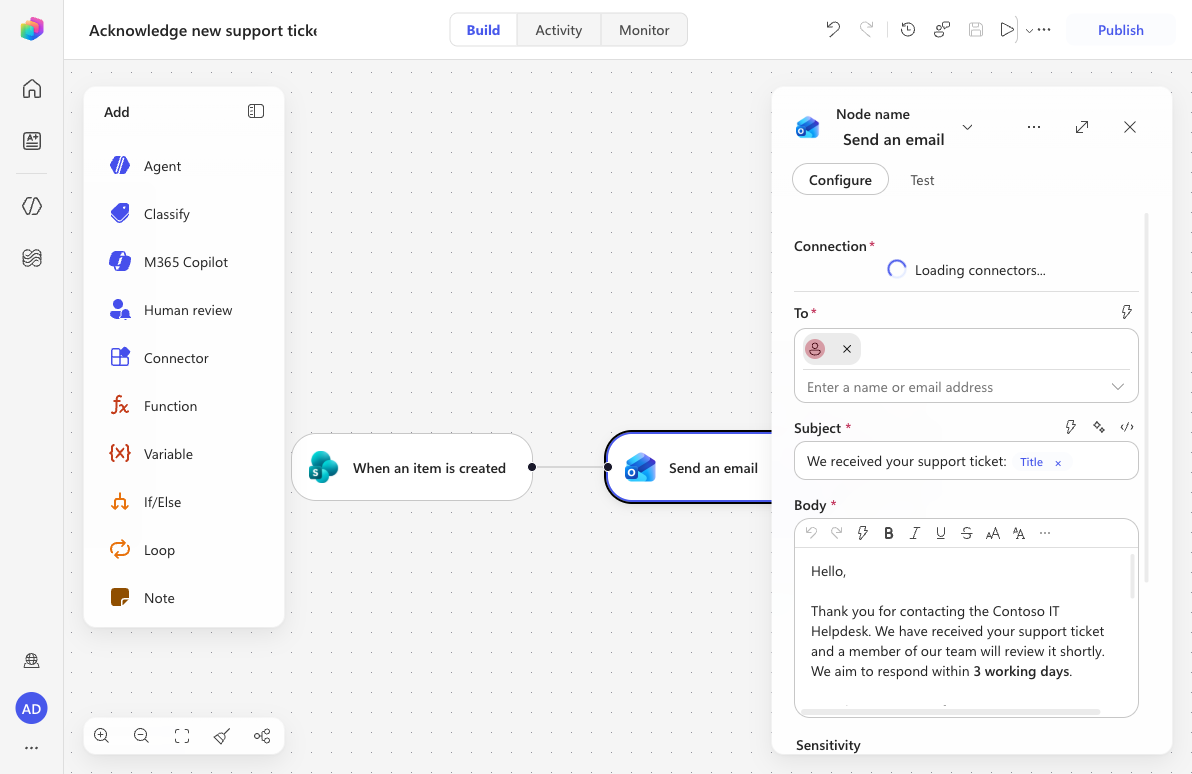
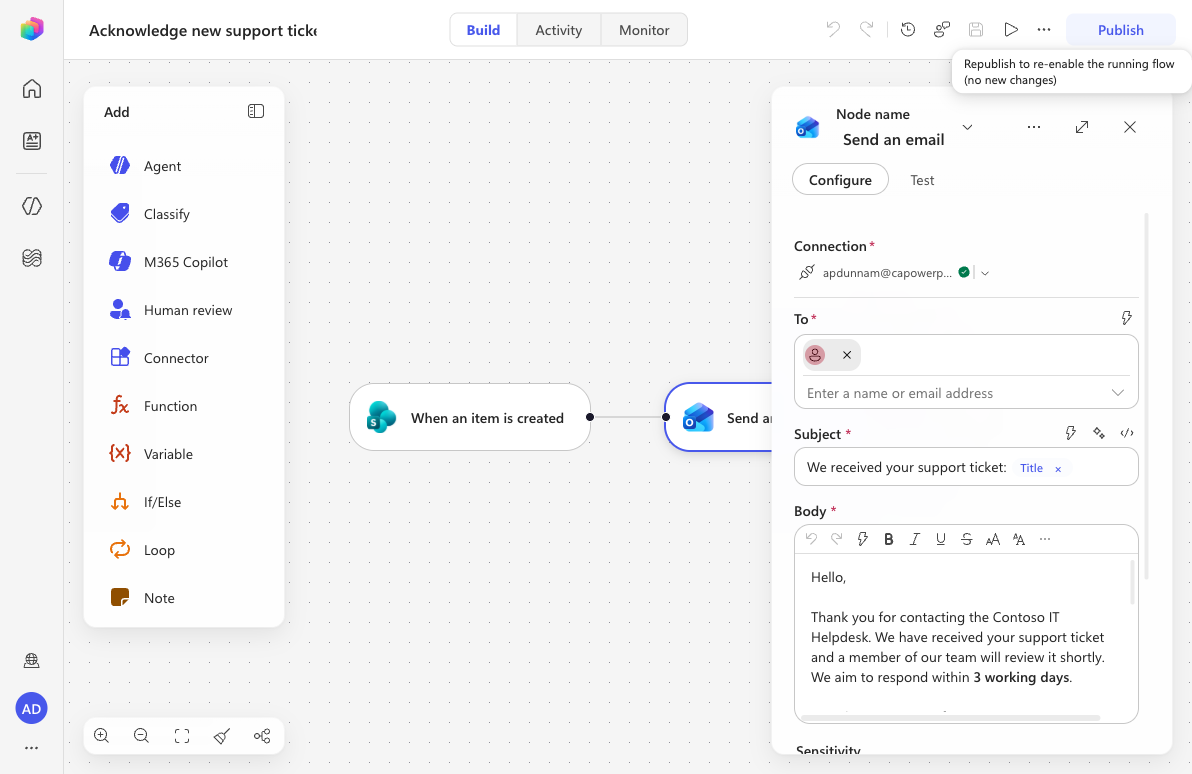
08.12 Name, save, and publish
Select the workflow title at the top and rename it to the following.
textAcknowledge new support ticketSelect Save, resolve any Health Center issues, then select Publish. Only a published workflow runs autonomously.
08.13 Test the autonomous workflow
Open a new browser tab and navigate to your Contoso IT → Tickets list. Select + New (Add new item) and create a test ticket, for example:
- Issue (Title):
Outlook keeps crashing on launch - Issue description:
Outlook crashes immediately every time I open it after the latest Windows update. I cannot access any of my email. - Priority:
High
Save the item.
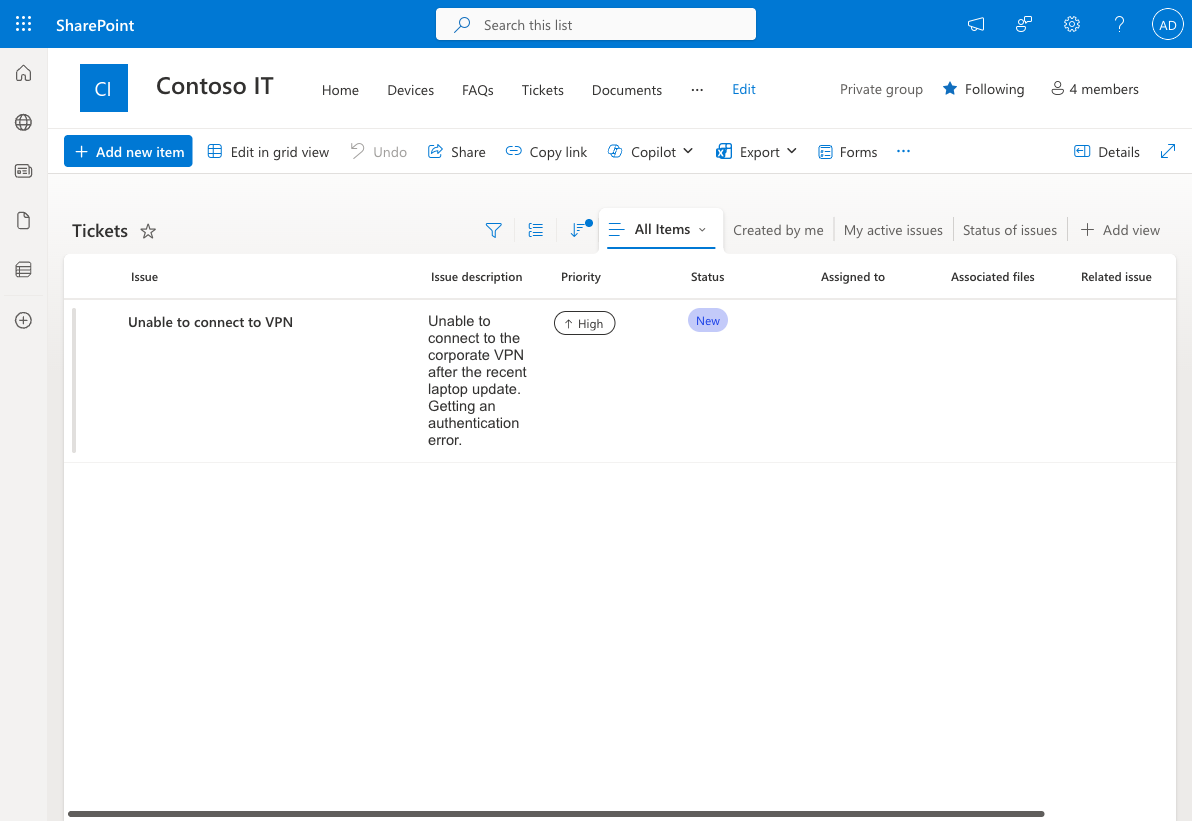
TIP
The Issue description field is read-only until you select its Edit button, which opens an Edit Issue description dialog — type your text there and Save the dialog before saving the item.
- Issue (Title):
Return to your workflow and open the Activity tab. The SharePoint trigger polls on an interval, so wait a few minutes and select Refresh until a new run appears. When it does, it should show Succeeded.
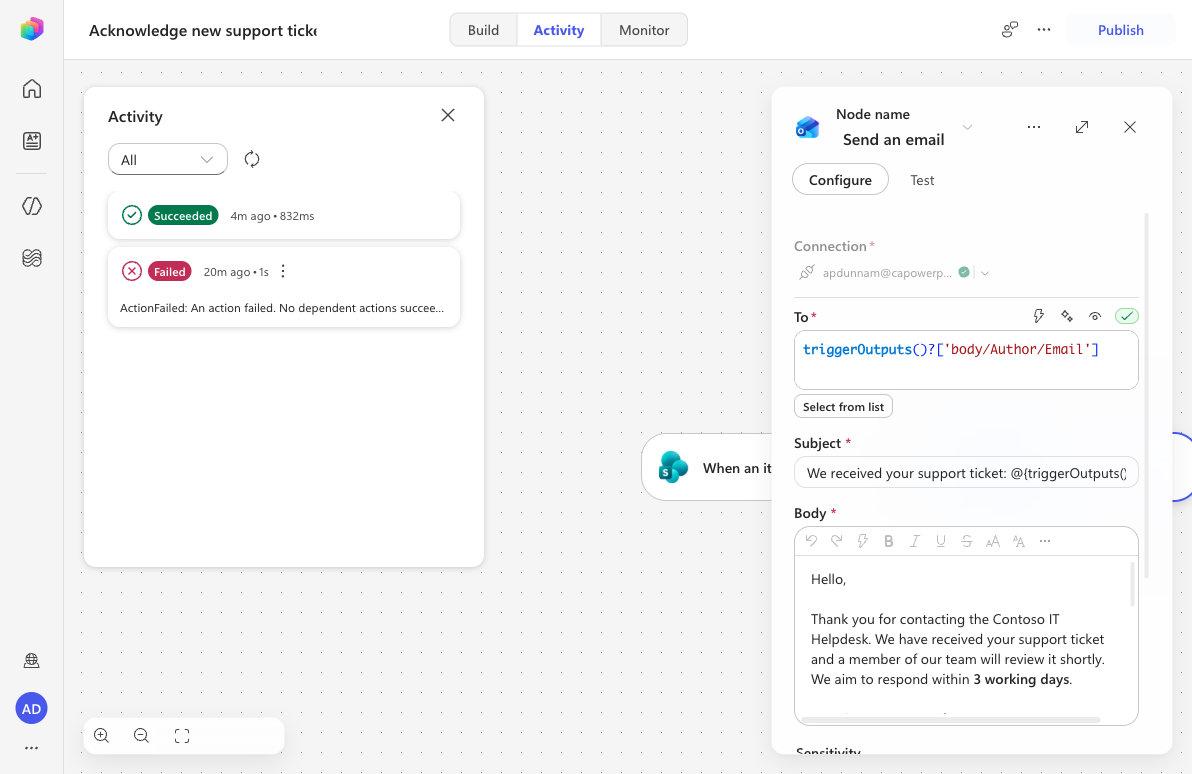
Check the inbox of the ticket submitter (here, your own mailbox). You'll find the acknowledgment email with the subject "We received your support ticket: Outlook keeps crashing on launch" and an HTML body showing the resolved Ticket ID, Title, Description, and Priority (e.g. High).
NOTE
Because the workflow runs under maker authentication, it sent the email "as you." In a multi-user deployment, every new ticket would be acknowledged automatically to whoever submitted it — with no agent conversation and no manual step.
✅ Mission Complete
Congratulations! 👏🏻 You've built two automations in the new Workflows experience, all without a single topic:
- An agent-called workflow that retrieves a SharePoint device item, emails a manager an HTML notification, and returns the model to your Contoso Helpdesk Agent as a tool (Lab 09).
- An autonomous, event-triggered workflow that fires by itself when a new SharePoint ticket is created and emails an acknowledgment to the submitter (Lab 10).
Together they show the two halves of the new experience: workflows your agent calls on demand, and workflows that act autonomously on real-world events.
⏭️ Move to Publish your agent lesson
📚 Tactical Resources
🔗 Introducing agent flows: Transforming automation with AI-first workflows
🔗 Use workflows with your agent
🔗 List of functions in the reference guide
🔗 Make your agent autonomous in Copilot Studio
🔗 SharePoint "When an item is created" trigger reference
🔗 Data loss prevention for Copilot Studio