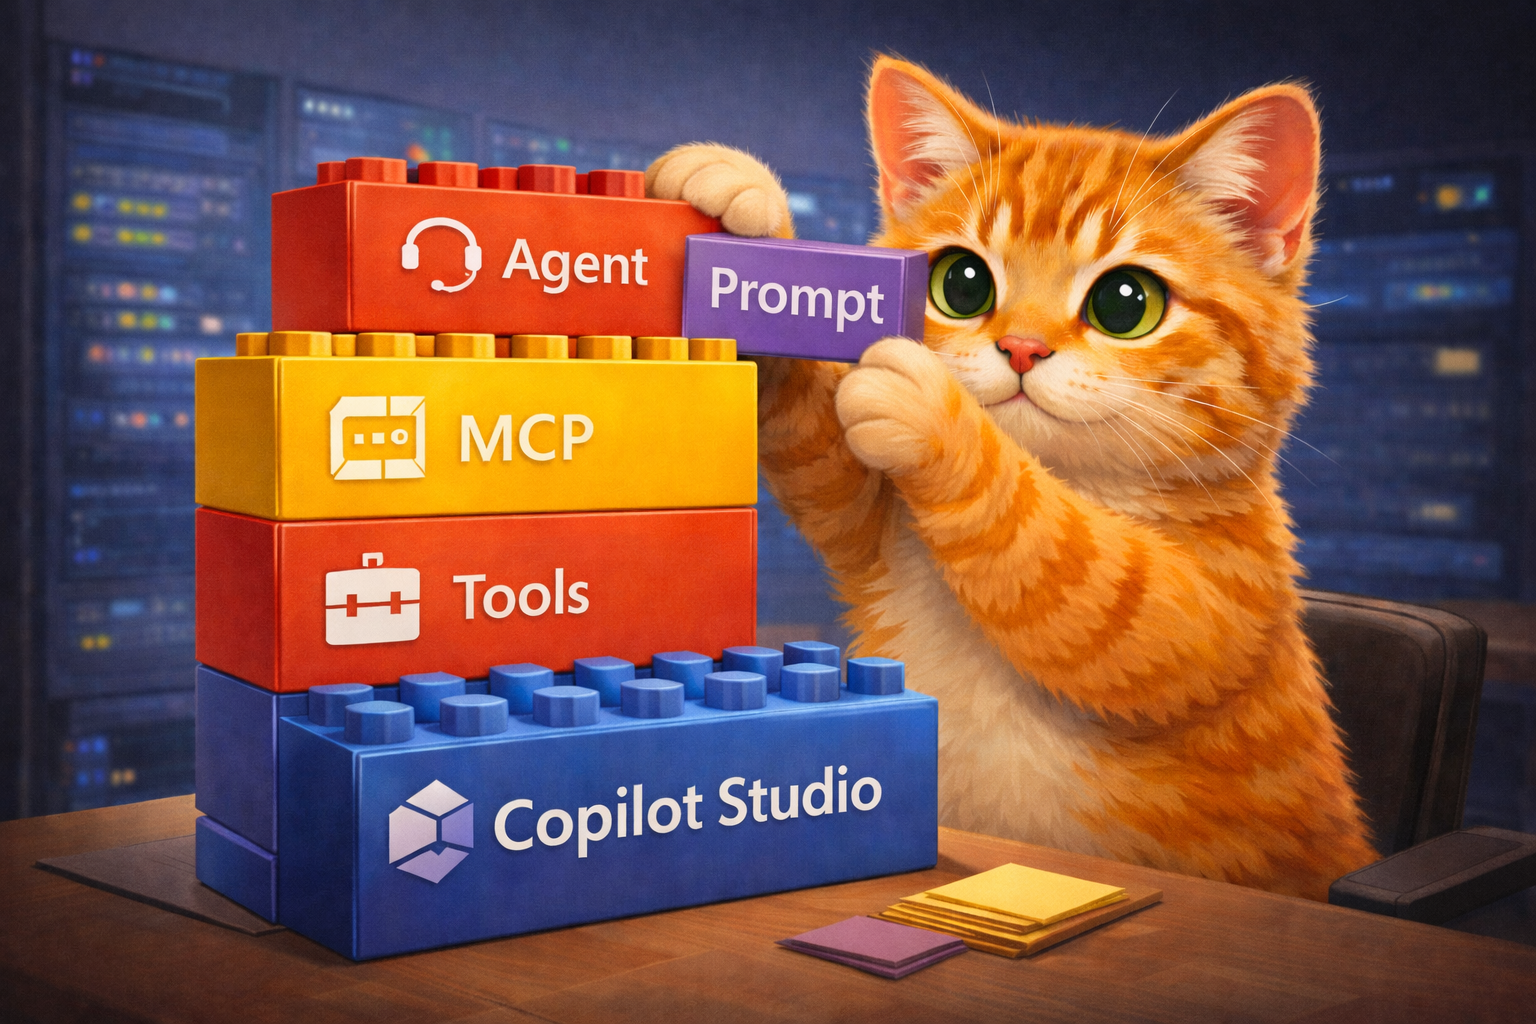
Five Minutes to Your First MCP Connector in Copilot Studio
Classic agents
Create your first MCP connector in Copilot Studio in five minutes, then understand what was created behind the scenes: custom connectors, connection references, and solution structure.
Every MCP tutorial seems to start the same way: “First, build an MCP server.” But what if you just want to see an MCP server working in Copilot Studio, without an existing connector and without writing a single line of code?
You can connect a Copilot Studio agent to an existing, publicly available MCP server in about five minutes. No server setup, no authentication, no deployment. Just paste a URL and go. Along the way, we’ll look at what Copilot Studio actually creates behind the scenes and why it matters for managing your agent across environments.
What We’re Connecting
DeepWiki provides a free, public MCP server that lets you query documentation for any public GitHub repository. No API key required. It exposes three tools:
| Tool | What it does |
|---|---|
read_wiki_structure |
Lists documentation topics for a GitHub repo |
read_wiki_contents |
Retrieves the actual documentation content |
ask_question |
Answers questions about a repo using AI-grounded context |
DeepWiki uses the Streamable HTTP transport, which is what Copilot Studio’s MCP integration requires.
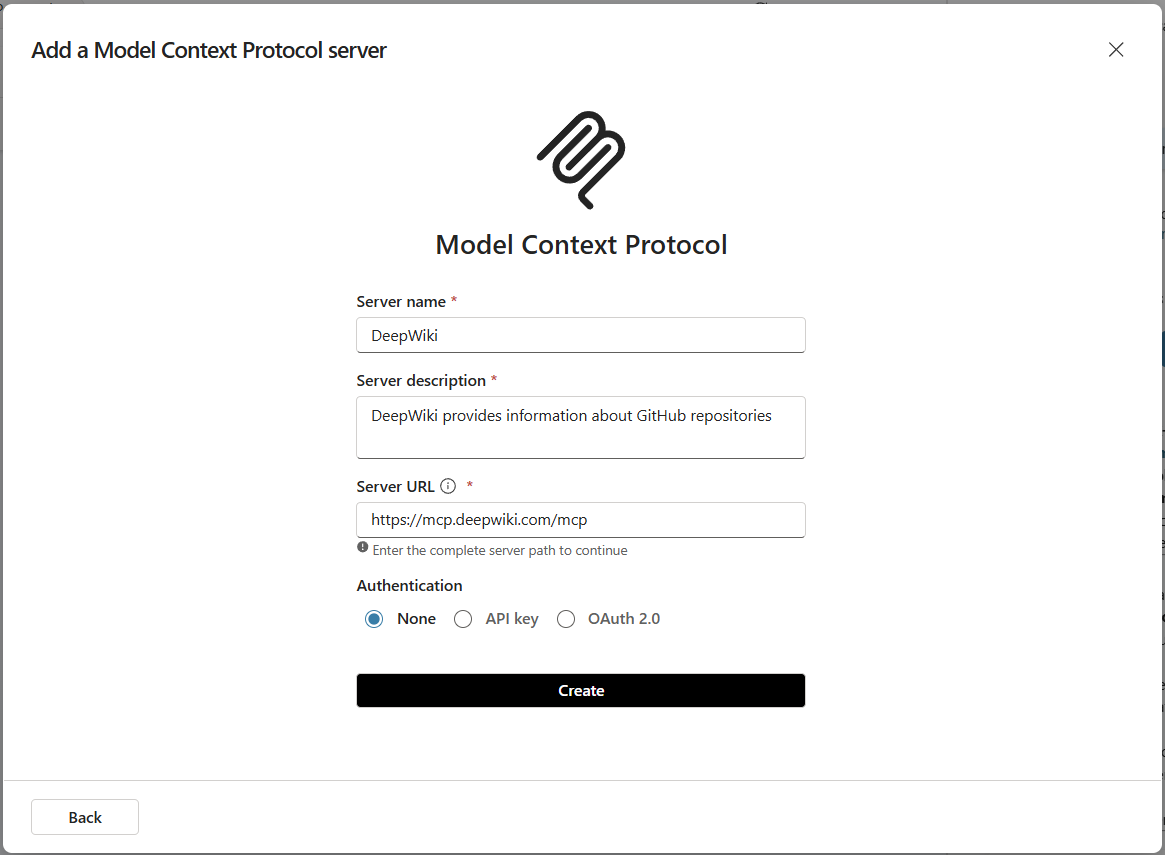
Step 1: Add the MCP Server to Your Agent
In Copilot Studio, open your agent (or create a new one) and navigate to Tools.
- Click Add a tool
- Select Model Context Protocol
- Enter the server URL:
https://mcp.deepwiki.com/mcp - Give it a name like “DeepWiki”
- Set the Server description to “DeepWiki provides information about GitHub repositories”
- Leave Authentication as None
- Click Create
For more detail about MCP onboarding wizard, see the official documentation.
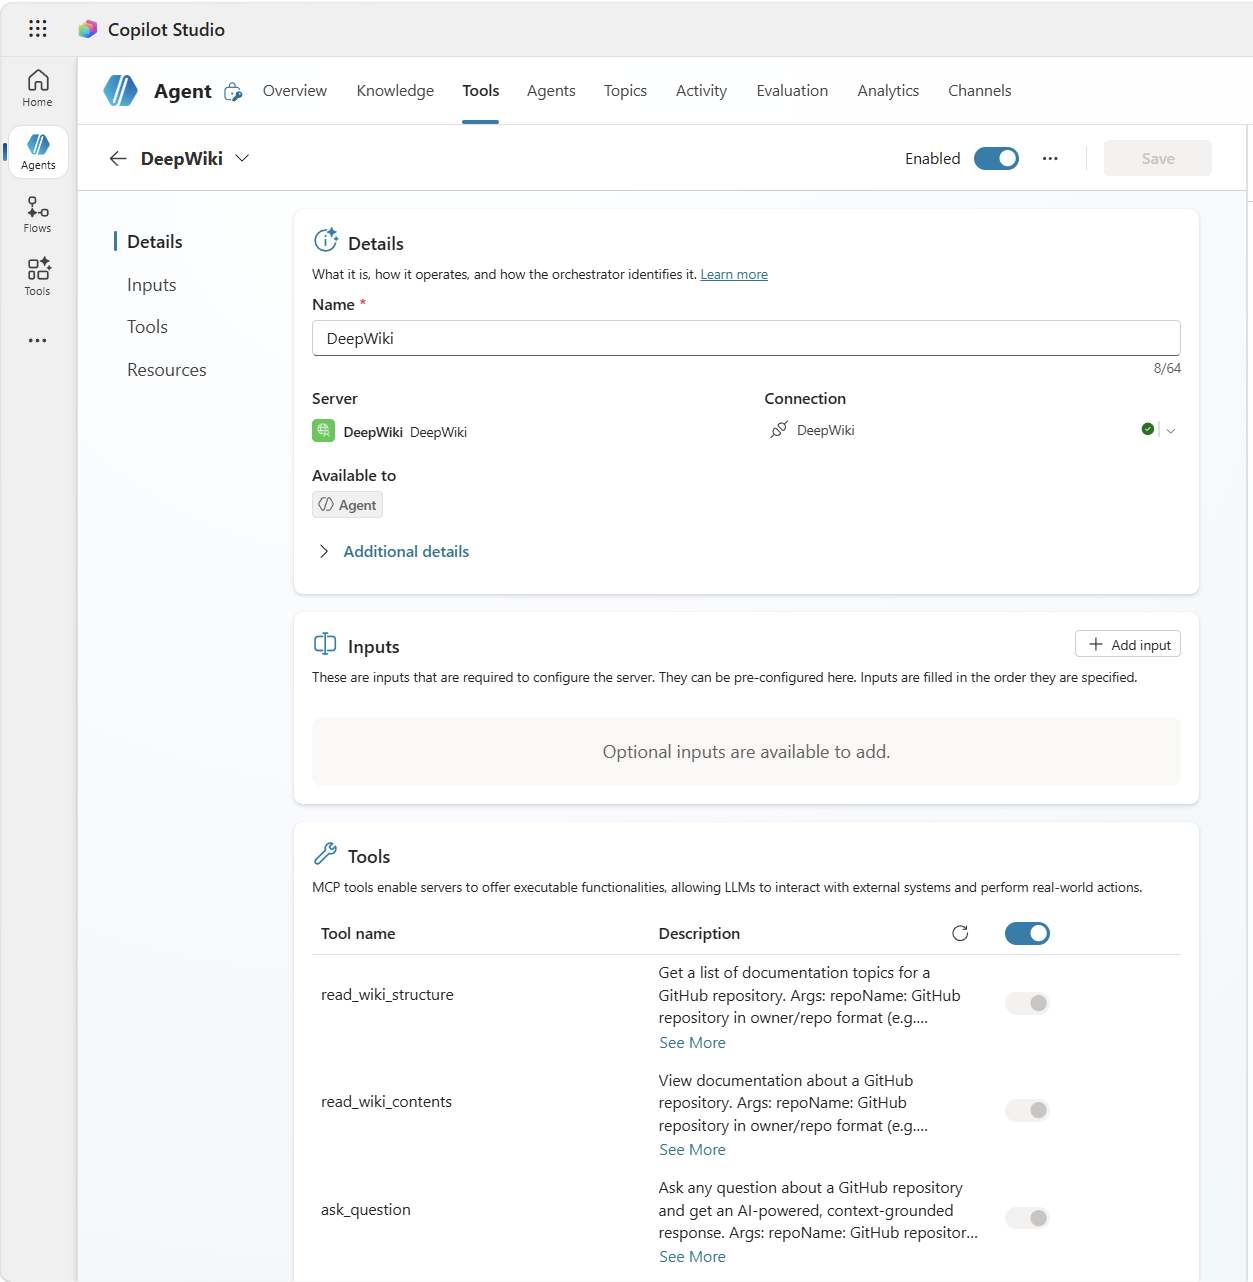
Step 2: Select Tools for Your Agent
- In the Connection dropdown, click Create connection, then click Create, then click Add and configure
- Review the tools that the MCP server provides. You’ll see the three DeepWiki tools listed. Tools can be individually disabled as needed.
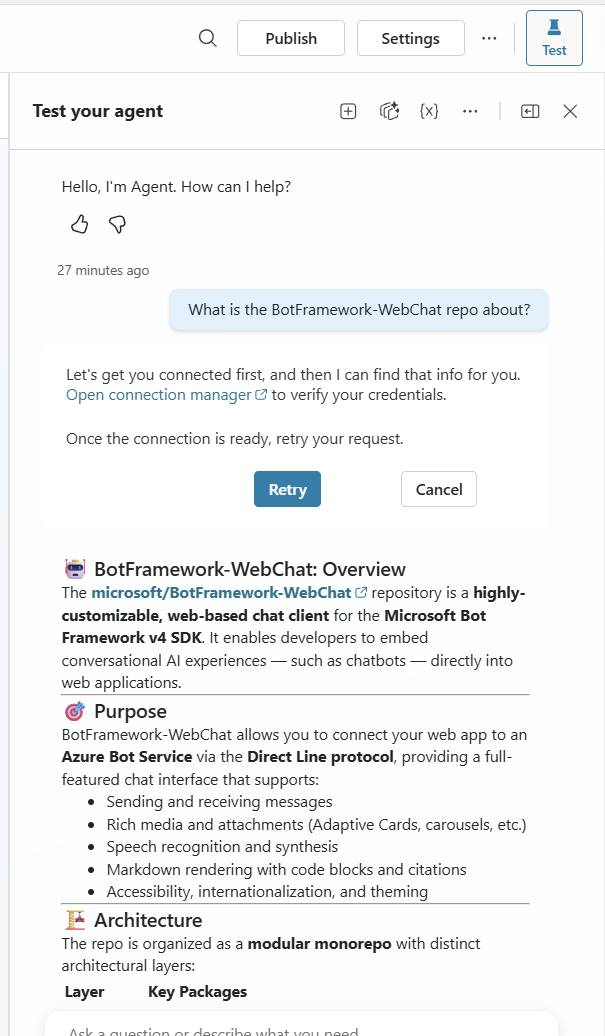
Step 3: Test It
- Open the Test pane and try a prompt like: “What is the BotFramework-WebChat repo about?”
- On first use, you’ll need to enable the connection. Click Open connection manager, then click Connect, then click Submit. Back in the test panel, click Retry and the prompt will now continue.
- The agent will now call the DeepWiki MCP tools and return a grounded answer based on the repository’s documentation.
That’s it. You have a working MCP connector configured as a tool for your agent.
What happened under the hood?
When you added the MCP server through the wizard, Copilot Studio created a custom connector in your Power Platform environment under the hood. This connector contains an OpenAPI specification that routes requests to the MCP server’s /mcp endpoint using the Streamable HTTP protocol.
You can view and edit this connector in the current solution. From the agent details page, click the … menu, select View solution, and then find the “DeepWiki” Custom Connector. If you want to inspect the generated spec or make changes, click on the custom connector, then click Edit. This is exactly what you’d do if you needed to add custom headers to your connector.
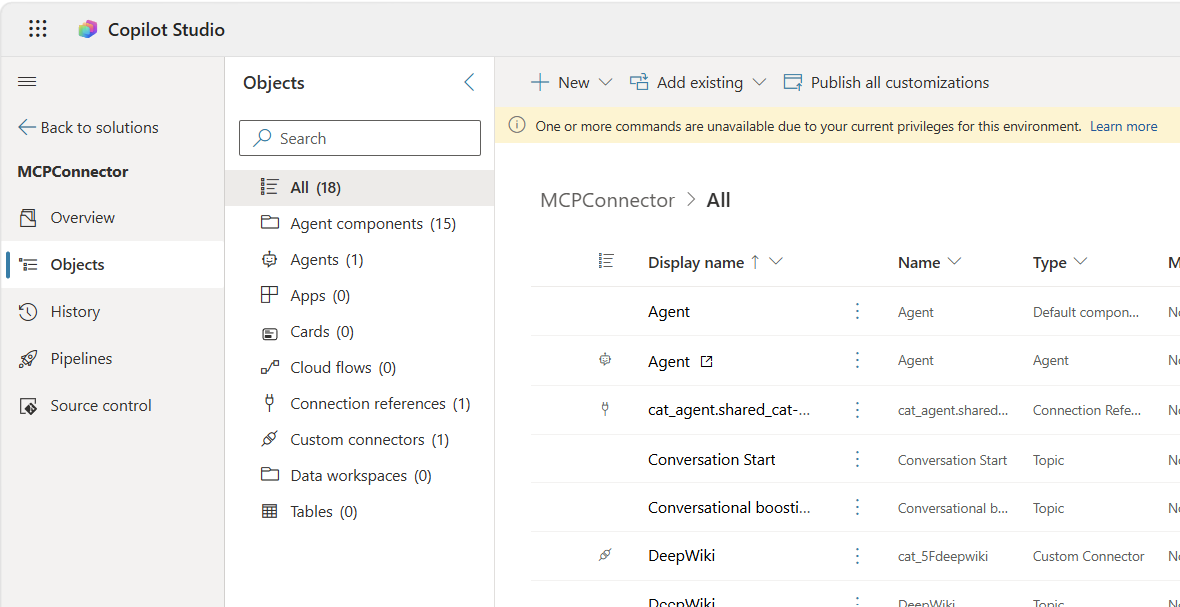
But the wizard created more than just a custom connector. Look at the solution contents and you’ll also find a connection reference.
Three distinct things associated with the custom connector
- Custom connector: the API definition itself. It describes the MCP server’s endpoint, transport, and authentication. Think of it as the template.
- Connection reference: a solution-aware pointer that says “this agent needs a connection for the DeepWiki custom connector.” It doesn’t contain credentials or a live connection. It’s a pointer that gets resolved per-environment.
- Connection: the actual runtime connection you created when you clicked “Create connection” in Step 2. Each connection is specific to an environment and associated a specific user. It’s not part of the solution.
Why do the solution component details matter?
When you use pipelines or manual export/import to more your solution into another environment (say, test or production), the custom connector and connection reference are included in the solution. However the connection does not. Someone in the target environment will need to create a new connection and map it to the connection reference. This is standard Power Platform ALM, but if you’re coming from an M365 background, it’s easy to miss.
This same pattern applies to A2A (Agent-to-Agent) connectors. When you connect to an external agent over the A2A protocol, Copilot Studio creates a custom connector and connection reference in exactly the same way. Everything in this section applies to A2A.
Resources
If you’re new to Power Platform and want to dig deeper into the concepts behind what the wizard created:
- Connect your agent to an MCP server: the official wizard walkthrough
- Custom connectors overview: what custom connectors are and how they work
- Connection references in solutions: how connection references enable ALM across environments
- Solution concepts for ALM: the broader Power Platform solution lifecycle
- Connect to an A2A agent: same pattern, different protocol
- DLP and custom connector parity: governance controls for custom connectors including endpoint filtering
What’s Next?
- Build your own MCP server: the Copilot Studio MCP lab walks through creating a Jokes MCP server from scratch and connecting it
- Customize your connector: once you need to pass headers, tokens, or user context, see Adding Custom Headers to MCP Connectors to go deep with a full lab exercise
- Choose your integration pattern: not sure whether to use MCP or a traditional connector? The MCP vs Connectors decision guide breaks down the trade-offs
What MCP server are you going to connect to next?