Task 00: Setup AI Project and AI Hub Resources
Description
In this setup task, you will learn how to start a new project by creating a GitHub repository and an AI Project in a centralized Azure AI Hub. The Azure AI Hub is a top-level resource in Azure AI Foundry that enables governance, self-service, security, and collaboration for AI projects.
Success Criteria
- Verify Prerequisites for Workshop
- Initialize a GitHub Repository for Your Project
- Set Up an Azure AI Hub and Project
Prerequisites
Expand this section to view the prerequisites
Required Tools
- Azure CLI (az) - to manage Azure resources.
- Azure Developer CLI (azd) - to manage Azure deployments.
- GitHub CLI (gh) - to create GitHub repo.
- Git - to update repository contents.
- Powershell 7.4.5 - to run commands.
- Python 3.11
You will also need:
- Azure Subscription - sign up for a free account.
- GitHub Account - sign up for a free account.
- Access to Azure OpenAI - submit a form to request access.
- Permissions to create a Service Principal (SP) in your Azure AD Tenant.
- Permissions to assign the Owner role or Contributor and User Access Administrator to the SP within the subscription.
- Install jq (optional) - a lightweight and flexible command-line JSON processor by running the following command
winget install jqlang.jq
The Windows installers make modifications to your PATH. When using Windows Terminal or VS Code Terminal or other environment, you will need to open a new window for the changes to take effect. (Simply opening a new tab will not be sufficient.)
Verifiy tools are installed
From a command line, verify the tools are installed and on your path.
-
Open a Windows Terminal or Command Prompt and enter the following:
 az -v
 azd version
 git -v
 gh --version
if any of the tools suggest an upgrade please do so. This can be acomplished with the
winget upgradeconmand
Check Azure OpenAI Model Availability:
You will need 40k TPM of gpt-35-turbo, gpt-4o and text-embedding-ada-002 models. If the region you want to use does not have availability, you can choose another region.
- Run the following command in powershell or bash to check how many TPMs do you have available for those models in the desired region/sub.
Powershell
$subscriptionId = "replace by your subscription id"
$region = "replace by the desired region"
$results = az cognitiveservices usage list --subscription $subscriptionId --location $region
$results | ConvertFrom-Json | Where-Object { $_.name.value -eq 'OpenAI.Standard.gpt-4o' } | Select-Object *
$results | ConvertFrom-Json | Where-Object { $_.name.value -eq 'OpenAI.Standard.gpt-35-turbo' } | Select-Object *
$results | ConvertFrom-Json | Where-Object { $_.name.value -eq 'OpenAI.Standard.text-embedding-ada-002' } | Select-Object *
bash
subscriptionId="replace by your subscription id"
region="replace by the desired region"
results=$(az cognitiveservices usage list --subscription $subscriptionId --location $region)
echo $results | jq -r '.[] | select(.name.value == "OpenAI.Standard.gpt-4o")'
echo $results | jq -r '.[] | select(.name.value == "OpenAI.Standard.gpt-35-turbo")'
echo $results | jq -r '.[] | select(.name.value == "OpenAI.Standard.text-embedding-ada-002")'
Availability, quotas, and limits: https://learn.microsoft.com/en-us/azure/ai-services/openai/quotas-limits
Steps to Bootstrap a Project
The bootstrapping process involves creating a new project repository on GitHub and populating it with content from a project template. Additionally, it sets up the development environment for your project. This environment will include an Azure AI Studio project and deploy the necessary resources to support a centralized Azure AI Hub.
01: Clone the GenAIOps Repo into a temporary directory
Expand this section to view the solution
-
Clone the repository from GitHub into a temporary directory:
 mkdir temp
 cd temp
 git clone https://github.com/azure/GenAIOps
02: Define Properties for Bootstrapping
Expand this section to view the solution
-
Go to the GenAIOps directory.
cd GenAIOps -
Create a copy of the bootstrap.properties.template file with this filename bootstrap.properties.
cp bootstrap.properties.template bootstrap.properties -
Open the bootstrap.properties with a text editor and update it with the following information:
- GitHub Repo Creation (related to the new repository to be created)
github_username: Your GitHub username.github_use_ssh: Set to false to use HTTPS or true to interact with GitHub repos using SSH.github_template_repo: Set azure/GenAIOps-project-template.github_new_repo: The bootstrapped project repo to be created. Ex: placerda/my-rag-project.github_new_repo_visibility: Set to public.
- Dev Environment Provision Properties
-
azd_dev_env_provision: Set to true to provision a development environment.If you set it to false, you will need to manually create the environment for the project.
azd_dev_env_name: The name of the development environment. Ex: rag-project-dev.azd_dev_env_subscription: Your Azure subscription ID.azd_dev_env_location: The Azure region for your dev environment. Ex: eastus2.
-
The dev environment resources will be created in the selected subscription and region. This decision should consider the quota available for the resources to be created in the region, as well as the fact that some resources have specific features enabled only in certain regions. Therefore, ensure that the resources to be created by the IaC of your template project have quota and availability in the chosen subscription and region. More information about the resources to be created can be found on the template page, as shown in this project template example: GenAIOps Project Template Resources.
The following three regions are the only ones known to support all features in the lab exercises: eastus2, swedencentral, uksouth. If you select a different region, you will run into service support issues in later exercises.
Here is an example of the bootstrap.properties file:
github_username="placerda" github_use_ssh="false" github_template_repo="azure/GenAIOps-project-template" github_new_repo="placerda/my-rag-project" github_new_repo_visibility="public" azd_dev_env_provision="true" azd_dev_env_name="rag-project-dev" azd_dev_env_subscription="12345678-1234-1234-1234-123456789098" azd_dev_env_location="eastus2" - GitHub Repo Creation (related to the new repository to be created)
03: Authenticate with Azure and GitHub
Expand this section to view the solution
-
Log in to Azure CLI:
az login -
Log in to Azure Developer CLI:
azd auth login -
Log in to GitHub CLI:
gh auth login
04: Run the Bootstrap Script
Expand this section to view the solution
The bootstrap script is available in two versions: Bash (bootstrap.sh) and PowerShell (bootstrap.ps1).
-
Run the appropriate script for your environment.
For Bash:
./bootstrap.shFor PowerShell:
.\bootstrap.ps1
At the end of its execution, the script will have created and initialized the new repository and provisioned the development environment resources, provided you set azd_dev_env_provision to true. During its execution, the script checks if the new repository exists and creates it if it does not. It then clones the template repository and mirrors it to the new repository. Additionally, it sets the default branch for the new repository.
Since 2025/02/13 the version of GPT-35-Turbo 0613 is not supported and causes the deployment to fail. If you deployment fails because of this, go to your github repo, to the file ./infra/ai.yaml, change on line 8 to version “0125”
05: Create a Service Principal
Expand this section to view the solution
-
Create a service principal using the following command:
az ad sp create-for-rbac --name "<your-service-principal-name>" --role Owner --scopes /subscriptions/<your-subscription-id> --sdk-authEnsure that the output information created here is properly saved for future use.
06: Set GitHub Environment Variables
Expand this section to view the solution
-
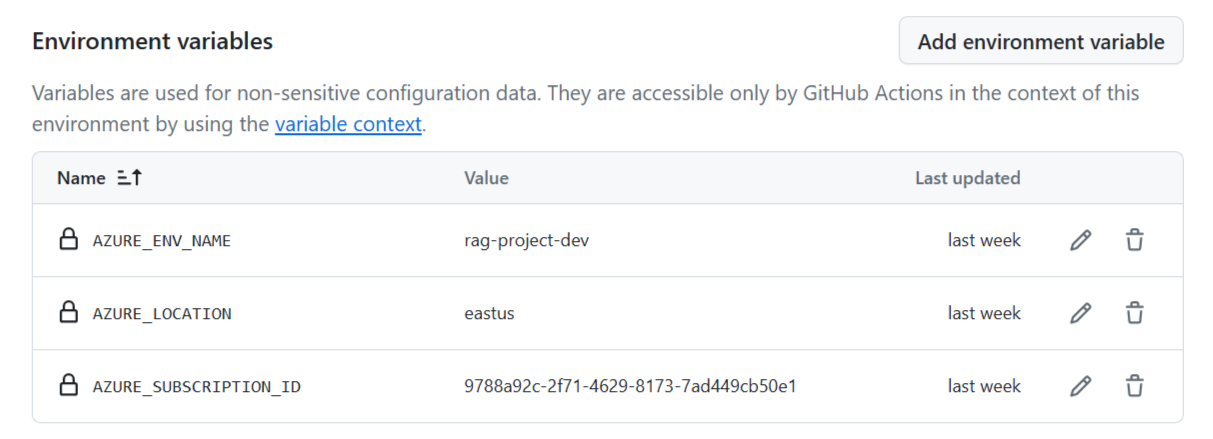
Go to the newly created project repository and set the following GitHub environment variables and secret for three environments:
dev,qa, andprod.- Environment Variables:
AZURE_ENV_NAMEAZURE_LOCATIONAZURE_SUBSCRIPTION_ID
- Secret:
AZURE_CREDENTIALS
- Environment Variables:
After creating the variables and secret, your Environments page should resemble the following example:

Below is an example of environment variable values for a development environment:
The AZURE_CREDENTIALS secret should be formatted as follows:
   {
       "clientId": "your-client-id",
       "clientSecret": "your-client-secret",
       "subscriptionId": "your-subscription-id",
       "tenantId": "your-tenant-id"
   }
If you are only interested in experimenting with this accelerator, you can use the same subscription, varying only
AZURE_ENV_NAMEfor each enviornment.
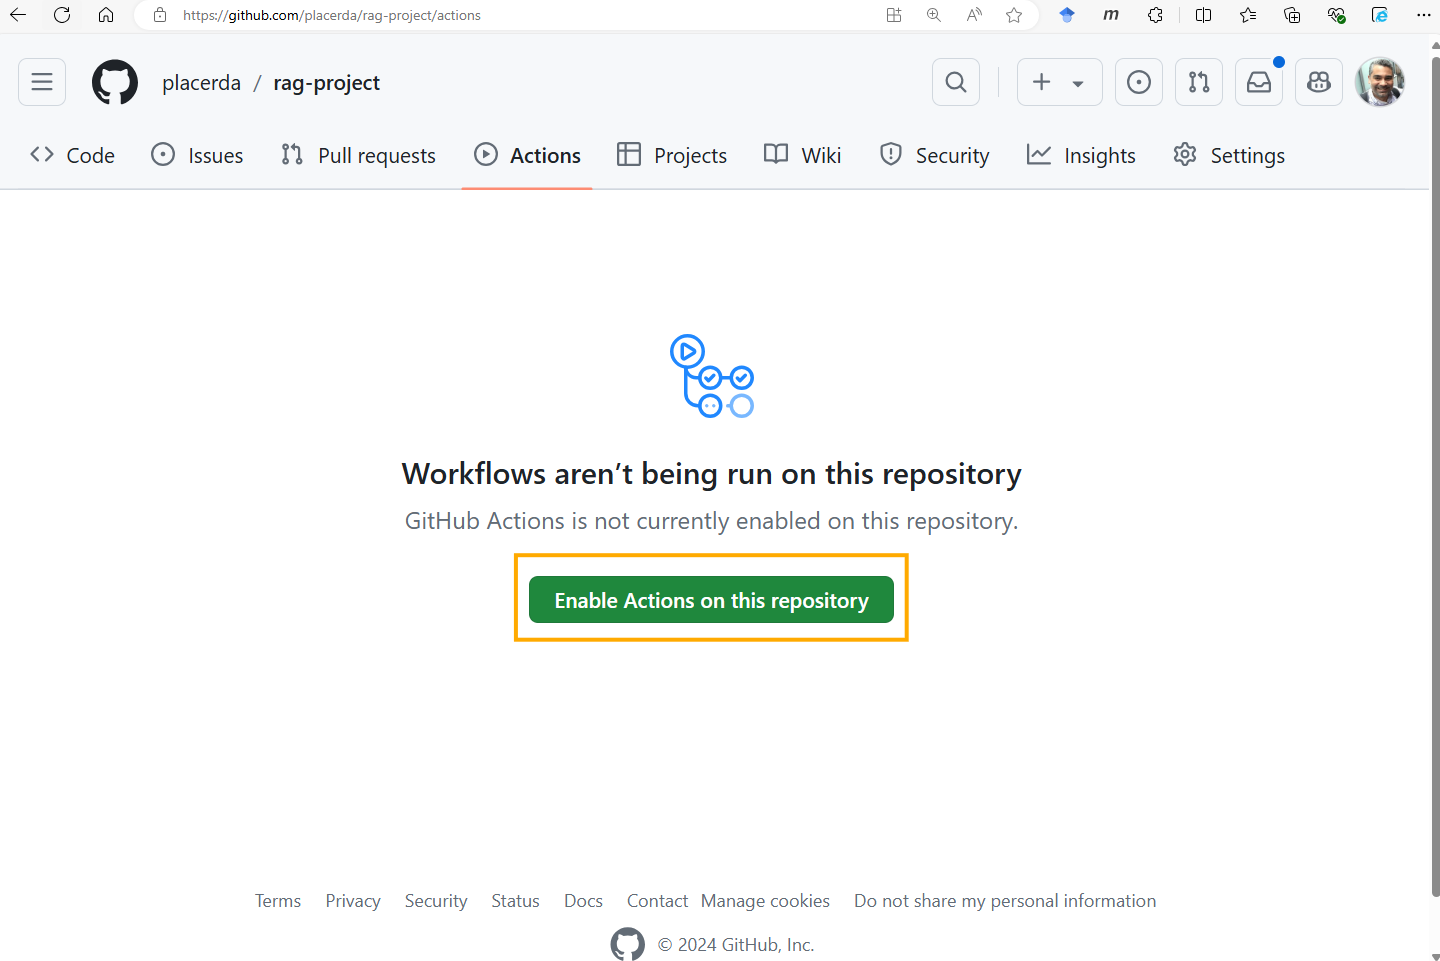
07. Enable GitHub Actions
Expand this section to view the solution
-
Ensure that GitHub Actions are enabled in your repository, as in some cases, organizational policies may not have this feature enabled by default. To do this, simply select Enable Actions on this repository, as indicated in the figure below:
That’s all! Your new project is now bootstrapped and you are ready to start the workshop. </details>