Task 02: Deploy the RAG flow to an online endpoint
Description
In this task, you will use the included reference instructions to deploy the RAG flow to a managed endpoint
Success Criteria
- Successfully deploy the RAG flow to a remote endpoint
- Verify that the deployment completes successfully
- Verify you can Test the deployment by using the endpoint on the Test tab
Solution
In this task, you will deploy your application to a managed endpoint in Azure by building your flow Docker image, creating an online endpoint, and then creating a deployment in that endpoint. Finally, you will route all traffic to that deployment.
01: Package your flow as a Docker image
First, you need to package your flow as a model. This process will create a Dockerfile for your flow.
Expand this section to view the solution
-
Open a terminal in the root directory of your project.
-
Run the following command to build your flow and create a Docker image:
pf flow build --source src --output dist --format dockerThis command packages your flow and outputs it in the dist directory in Docker format.
02: Set the PYTHONPATH environment variable
To allow Python to find modules in the flow source directory, you need to set the PYTHONPATH environment variable.
Expand this section to view the solution
-
In your terminal, run the following command:
export PYTHONPATH=./src:$PYTHONPATH
Skipping this step will result in a ModuleNotFoundError: No module named ‘chat_request’. Sometimes you will see errors related to azure_config also . This is because the files in /src cannot be found. To test your path, you can type echo $PYTHONPATH. You should see ./src. If you need to modify a corrupted path, you can type export PYTHONPATH=”“ to clear it and try again.
03: Deploy your flow using the deployment script
Now you are ready to deploy your flow.
Expand this section to view the solution
-
Open the deployment script: util/deploy_moe.py
-
Go to util/deploy_moe.py, line 77 and update it with the following code to configure your flow to work with the AI Foundry Test Chat interface.
model=Model( name="ragflow", path=flow_path, # path to promptflow folder properties=[ # this enables the chat interface in the endpoint test tab ["azureml.promptflow.source_flow_id", "ragflow"], ["azureml.promptflow.mode", "chat"], ["azureml.promptflow.chat_input", "question"], ["azureml.promptflow.chat_output", "answer"] ] ), -
In util/deploy_moe.py, under environment_variables on line 111, add the following values:
"AZURE_TENANT_ID": os.environ["AZURE_TENANT_ID"],
"AZURE_CLIENT_ID": os.environ["AZURE_CLIENT_ID"],
"AZURE_CLIENT_SECRET": os.environ["AZURE_CLIENT_SECRET"],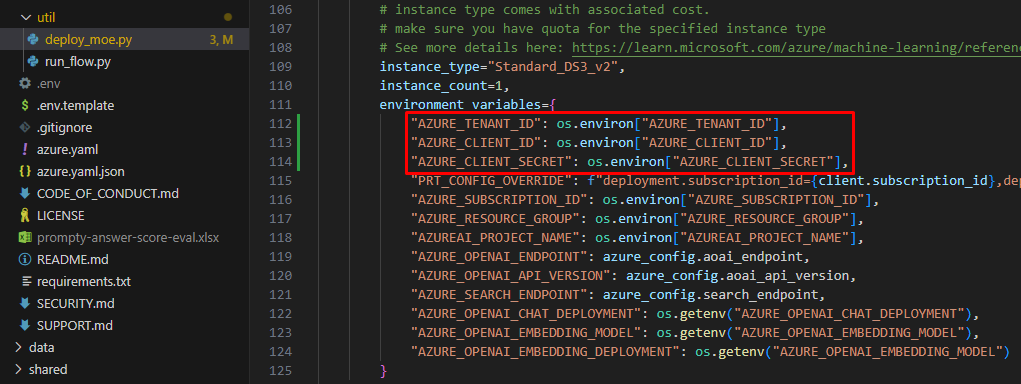
-
Save changes to deploy_moe.py.
-
Open the .env file in your project folder, replace the following values and add to the file:
AZURE_CLIENT_ID=[YOUR_SP_CLIENT_ID]
AZURE_CLIENT_SECRET=[YOUR_SP_CLIENT_SECRET]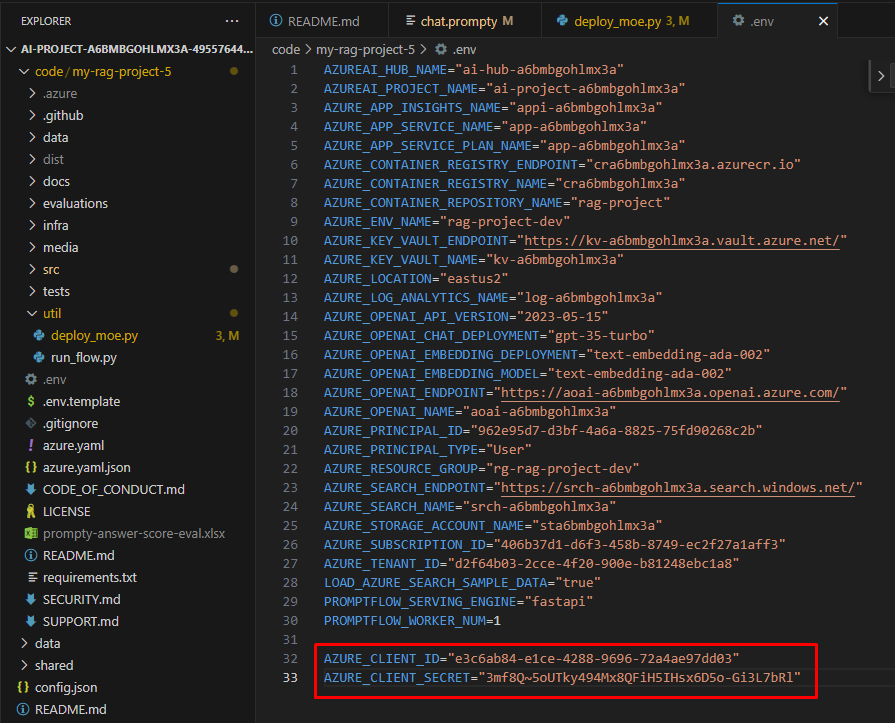
-
Save changes to .env.
-
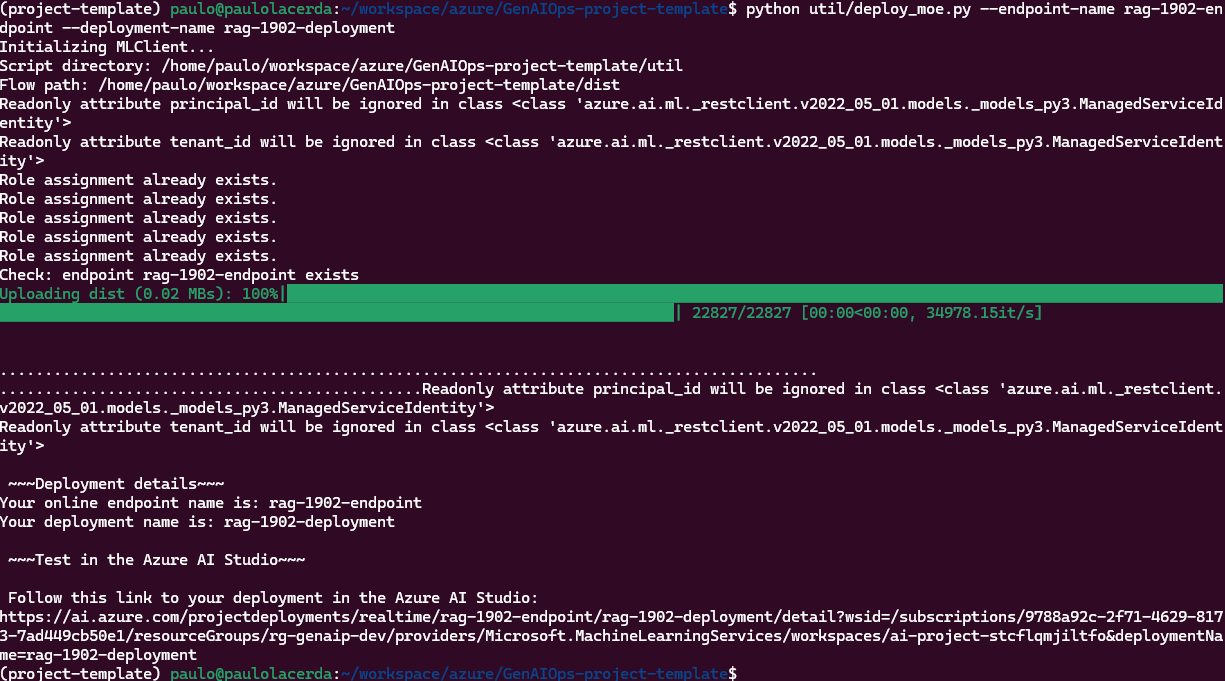
In the terminal, run the following command. Be sure to replace the placeholder XXXX in both the endpoint-name and deployment-name with a unique four-digit number of your choice.
python util/deploy_moe.py --endpoint-name rag-XXXX-endpoint --deployment-name rag-XXXX-deploymentBoth the endpoint and deployment names must be unique within your Azure region. If you see an error indicating that the name is already in use, simply choose different names. Please note, the deployment process can take several minutes to complete.
This may take around 20 minutes to deploy.
-
Once the deployment completes, you should see output similar to the following in your terminal:
If you receive the error “Key based authentication is not permitted on this storage account,” enable the option Allow storage account key access in the Configuration section of your storage account in the Azure portal.
04: Testing the Deployed Flow
After completing the deployment, you can test it in AI Studio.
Expand this section to view the solution
-
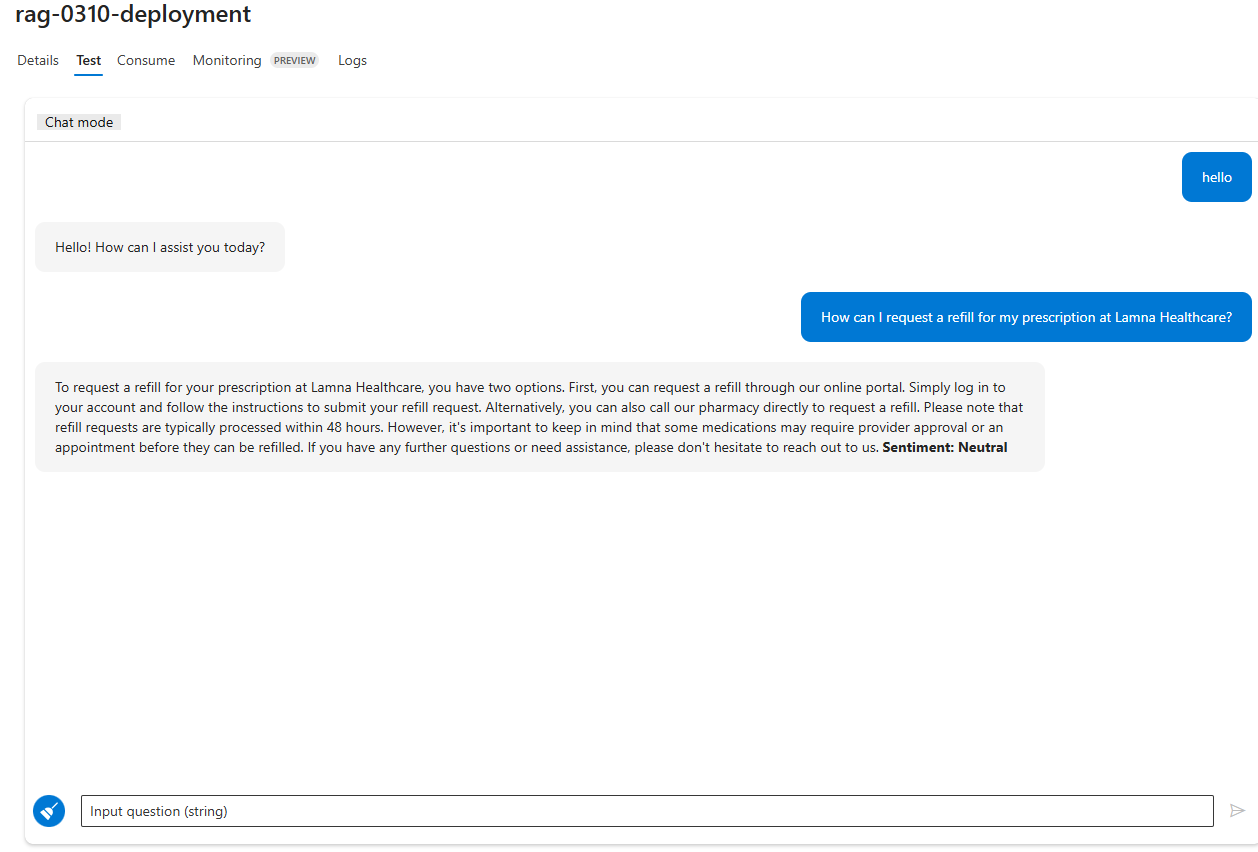
Go to your new deployment in AI Studio and open the Test tab.
-
Ask a question like this: “How can I request a refill for my prescription at Lamna Healthcare?”
05: Consuming the Deployed Flow
Expand this section to view the solution
-
Navigate to your deployment in AI Studio and open the Consume tab.
-
Select the Python tab, then copy the example code.
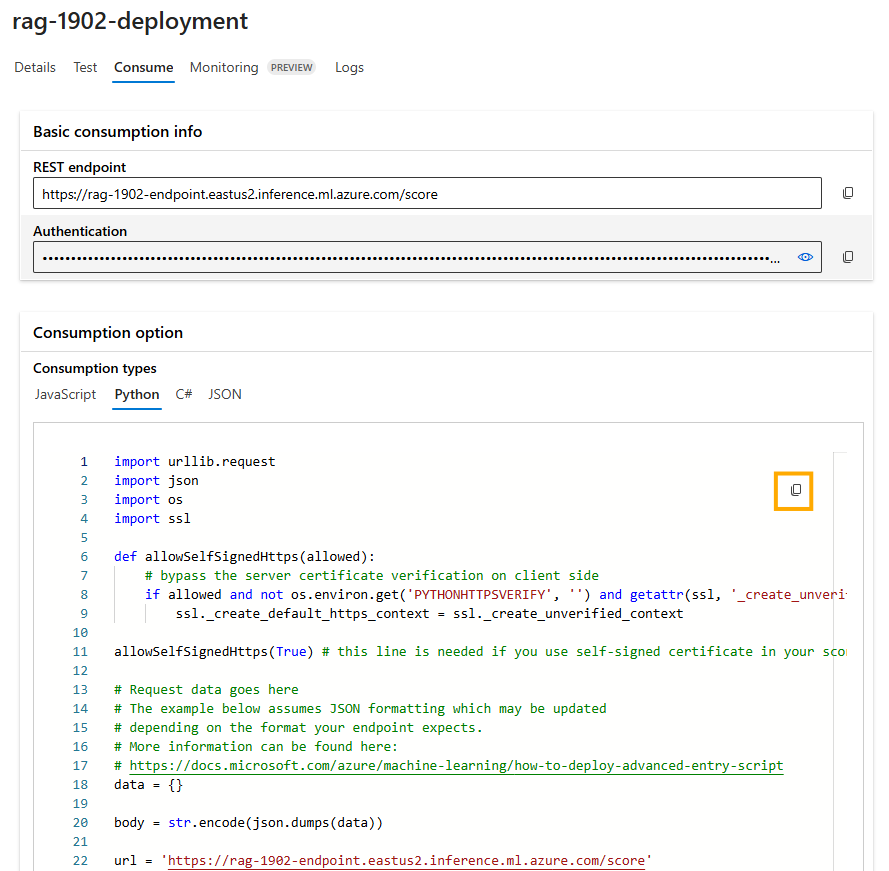
-
Save it as a test.py file in the ./local directory within your repository.
-
Before running the program, update the test.py file with the request data and your deployment API key for accessing the deployment.
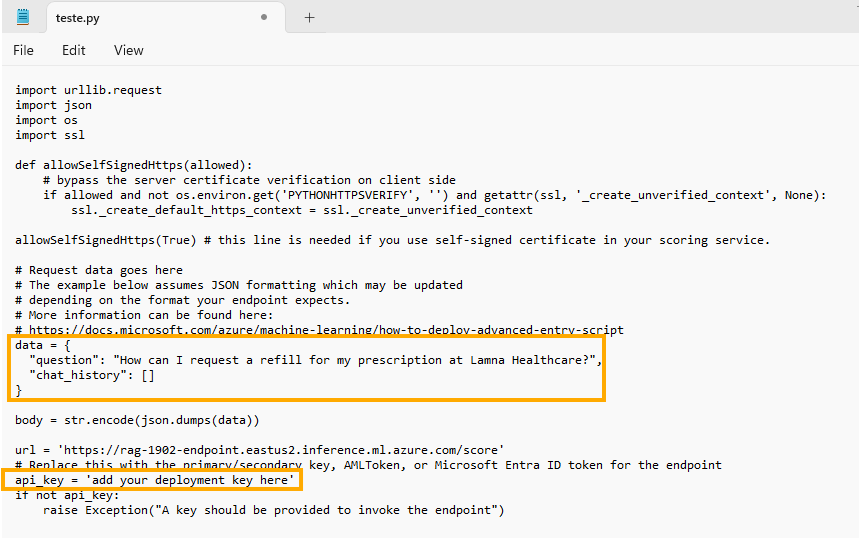
Request data:
{ "question": "How can I request a refill for my prescription at Lamna Healthcare?", "chat_history": [] } -
Now, you’re ready to run the test.py program.
python local/test.py
Congratulations! You have successfully deployed your flow to a managed endpoint. You can now integrate this endpoint into your applications or services, allowing you to leverage the power of your RAG (Retrieval-Augmented Generation) flow in a scalable and reliable manner.