Task 01: Create a Conversational RAG Flow
Introduction
Lamna Healthcare aims to provide conversational assistants that answer questions using proprietary, non-public data. They have discovered the RAG (Retrieval-Augmented Generation) pattern, which effectively combines retrieval and generation models’ strengths. Lamna Healthcare seeks to create a conversational RAG flow that can answer customer inquiries using a no-code visual approach.
Info:
In this exercise, we will take a full-code approach to build the orchestration flow. The flow will be implemented using Python functions, and this method is referred to as “flex flow.”
Description
In this task, you will create a conversational RAG flow using VS Code in Azure AI Foundry. This flow will answer customer questions based on information from a knowledge base of support procedures. Additionally, you will create and populate a vector index to search for textual references, which will then be passed to the LLM as part of the RAG pattern.
Key steps include:
- Set up VS Code in Azure AI Foundry
- Load the Vector Index
- Modify the Prompt
- Test the Prompt
- Test the Flow
- Debug the Flow
Success Criteria
- The Prompt Flow correctly retrieves information from the vector index and passes it to the LLM. The LLM uses this information to respond appropriately to the user’s question.
Solution
01: Set Up VS Code in Azure AI Foundry
Expand this section to view the solution
-
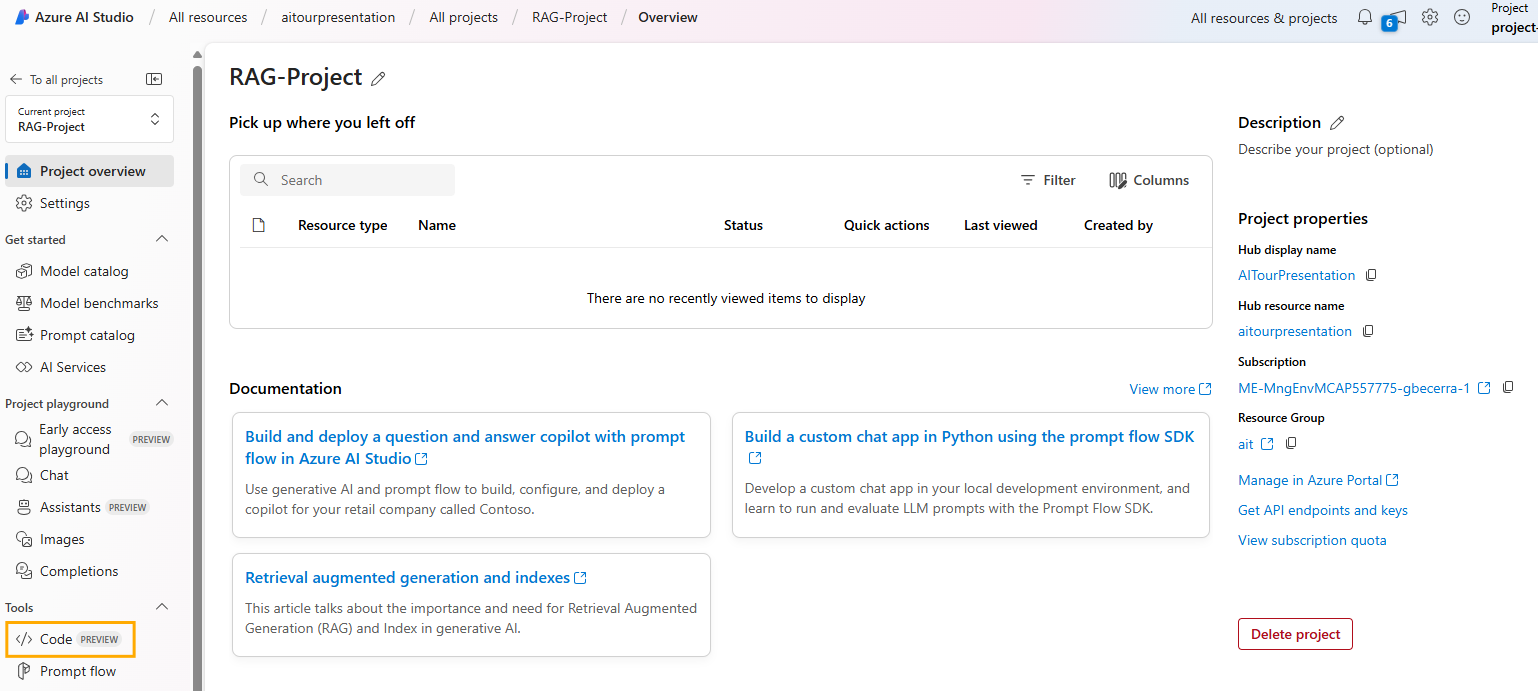
In Azure AI Studio, open the project created in Exercise 1 and select the </> Code option.
-
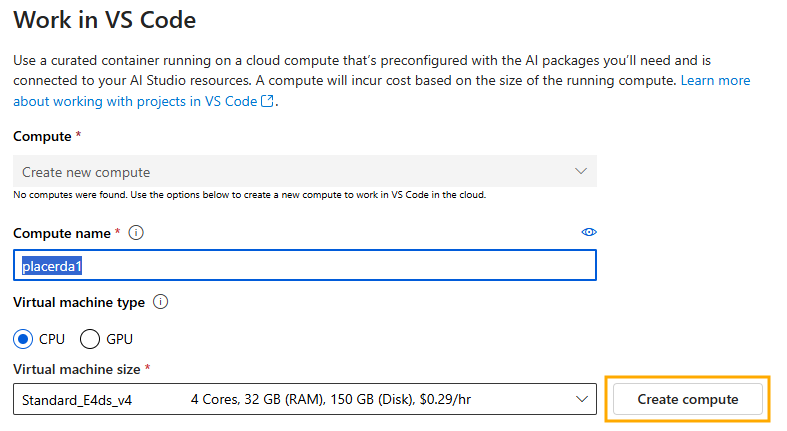
After selecting Code, you will create a compute instance to run VS Code in the cloud.

-
Select Authenticate.
-
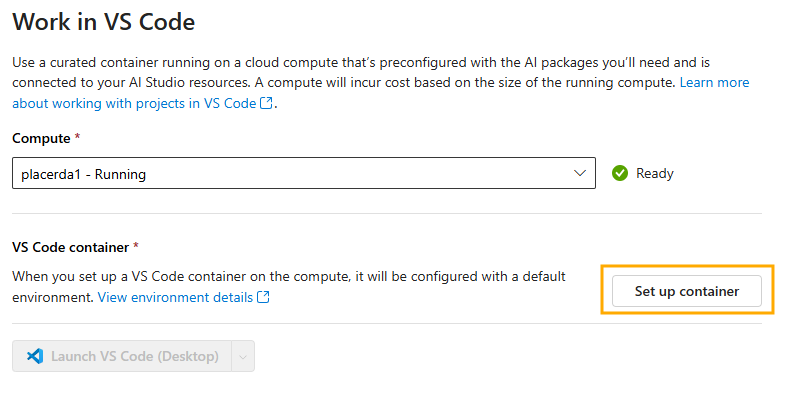
After authentication, set up the VS Code container with configurations optimized for developing GenAI Apps.
-
Once set up, launch VS Code. In the example below, we start the Web version of VS Code, so you don’t need to have it installed on your local machine.
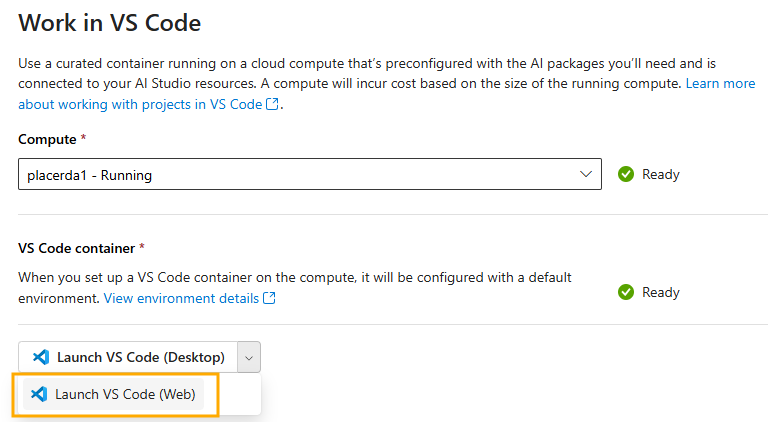
If you prefer, you can also use VS Code on your desktop instead of the Web version.
02: Clone Your Git Repository
Expand this section to view the solution
-
After launching VS Code, clone the repository of your project created during the bootstrapping in Exercise 1.
-
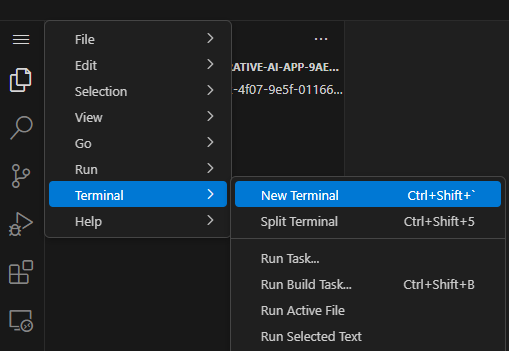
Open the terminal in VS Code.
-
Execute the following commands:
cd code
git clone https://github.com/your_github_user/your_project_repo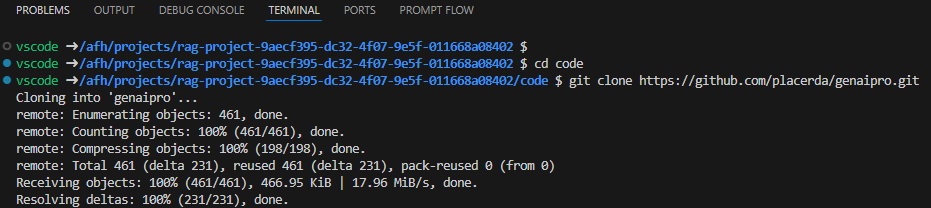
1) In AI Studio VS Code, store all your code in the code/ directory.
2) Remember that your_github_user/your_project_repo was defined in the github_new_repo variable in the bootstrap.properties file from Exercise 1.
-
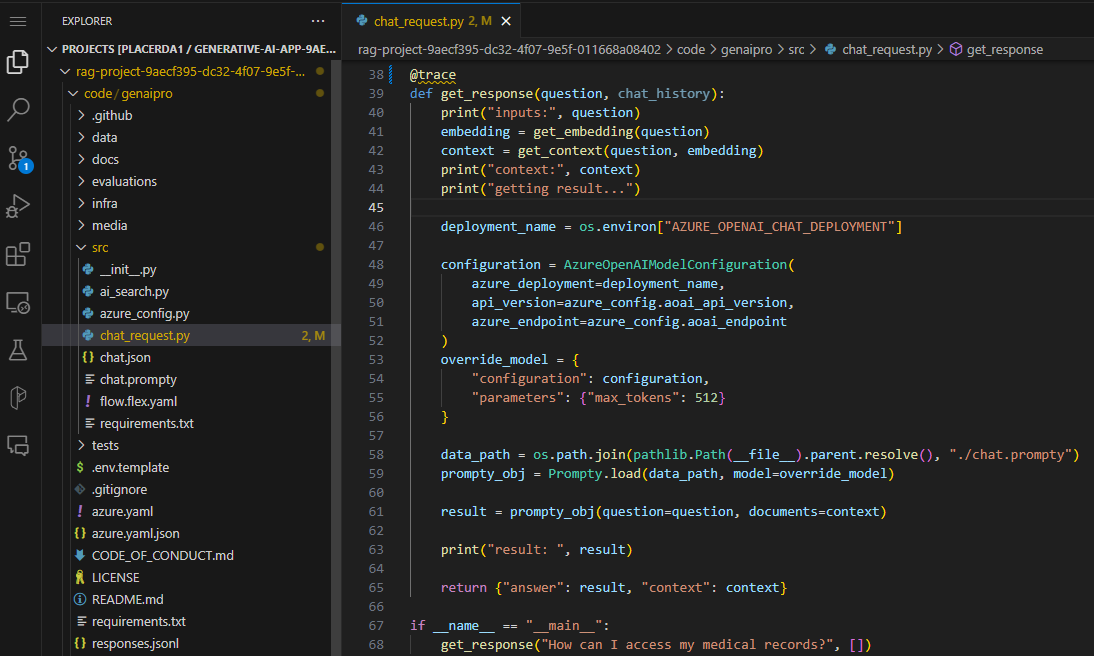
Your code is now loaded in VS Code. The src/chat_request.py file contains the Python program with the flex flow. You can review the get_response function to understand how the RAG flow is implemented.
03: Load the Vector Index
Expand this section to view the solution
-
Before starting development, load the data into the index in the development environment.
We will load the files located in the data/sample-documents.csv directory of your project.
-
Open the terminal and perform the following steps:
-
Update the Azure Developer CLI:
curl -fsSL https://aka.ms/install-azd.sh | bash -
Log in to Azure CLI:
az login --use-device-code -
With the –use-device-code option, navigate to https://microsoft.com/devicelogin in your browser and enter the code displayed in the terminal.
-
Log in to Azure Developer CLI:
azd auth login --use-device-code- Similarly, visit https://microsoft.com/devicelogin to complete authentication.
-
Add roles to your Service Principal
principalId is the Enterprise Application Object ID
rg='[your-your-resource-group-name]'
principalId='[your-sp-objectId]'
clientId='[your-sp-clientId]'
clientSecret='[your-clientSequence]'
tenantId='[your-tenantId]'
subscriptionId='[your-subscriptionId]'

# Service principal
az login --service-principal --username $clientId --password $clientSecret --tenant $tenantId
azd auth login --client-id $clientId --client-secret $clientSecret --tenant-id $tenantId

scope="/subscriptions/$subscriptionId/resourceGroups/$rg"

# Assign roles
roles=(
'2a2b9908-6ea1-4ae2-8e65-a410df84e7d1'  # Storage Blob Data Reader
'8311e382-0749-4cb8-b61a-304f252e45ec'  # ACR Push Role
'7f951dda-4ed3-4680-a7ca-43fe172d538d'  # ACR Pull Role
'5e0bd9bd-7b93-4f28-af87-19fc36ad61bd'  # Cognitive Services OpenAI User
'f6c7c914-8db3-469d-8ca1-694a8f32e121'  # Data Scientist
'ea01e6af-a1c1-4350-9563-ad00f8c72ec5'  # Secrets Reader
'8ebe5a00-799e-43f5-93ac-243d3dce84a7'  # Search Index Data Contributor
'7ca78c08-252a-4471-8644-bb5ff32d4ba0'  # Search Service Contributor
'64702f94-c441-49e6-a78b-ef80e0188fee'  # Azure AI Developer
)

for roleId in "${roles[@]}"; do
az role assignment create \
   --assignee-object-id "$principalId" \
   --assignee-principal-type "ServicePrincipal" \
   --role "$roleId" \
   --scope "$scope"
done
-
-
Navigate to the root of the project repo:
cd your_project_repoFrom this point onward, all terminal commands will be executed within the code/your_project_repo directory, where your_project_repo is the name you chose for your project.
-
Initialize the environment variables with your development environment values:
azd env refreshEnsure you use the same values for location, subscription, and environment name as used in the bootstrapping process.
-
Finally, execute the script to load the documents into AI Search:
OpenAI and PromptFlow versions need to be updated in the requirement files. Open the file ./requirements.txt and update line 7 to: openai==1.56.2. Then, open the file ./src/requirements.txt and update lines 5 and 7 to: promptflow==1.17.1 and promptflow[azure]==1.17.1 respectively. Then run the pip install code to update the modules.
pip install -r requirements.txt./infra/hooks/postprovision.shIf you are trying to run this in your own computer instead of AI Studio’s VS Code, make sure to use 3.11.
04: Modify the Prompt
Now that your project is set up in VS Code and the index is created, you can start making code changes. An important first step is to create a new branch for your changes: feature/feature_x
Expand this section to view the solution
-
Navigate to your repository directory and run:
git checkout -b feature/feature_x -
Open the src/chat.prompty file. This is the prompt for your RAG flow. Notice it is a generic prompt; you will create a specific prompt for your Lamna Health virtual assistant.
-
Replace the content of chat.prompty with the contents of the following file:
Notice that the new prompt provides better context for the assistant’s objectives.
05: Test the Prompt
Now that you have modified the prompt, testing it is straightforward.
Expand this section to view the solution
-
Install the required libraries specified by our flow:
pip install -r requirements.txt -
Run the program with the flex flow:
python src/chat_request.py
06: Debug the Flow
To debug the flow, take advantage of VS Code’s debugging capabilities.
Expand this section to view the solution
-
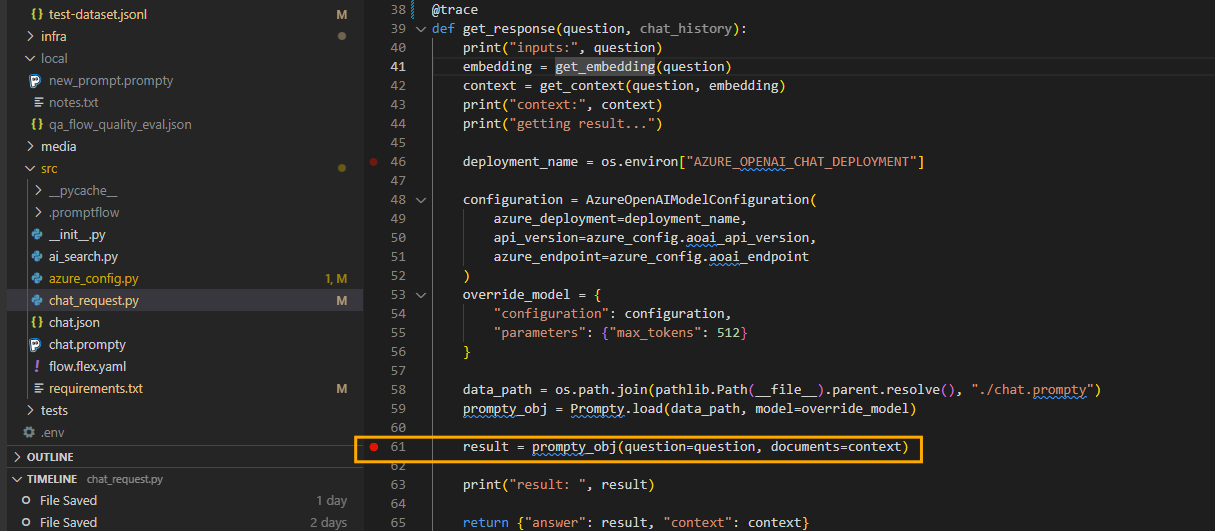
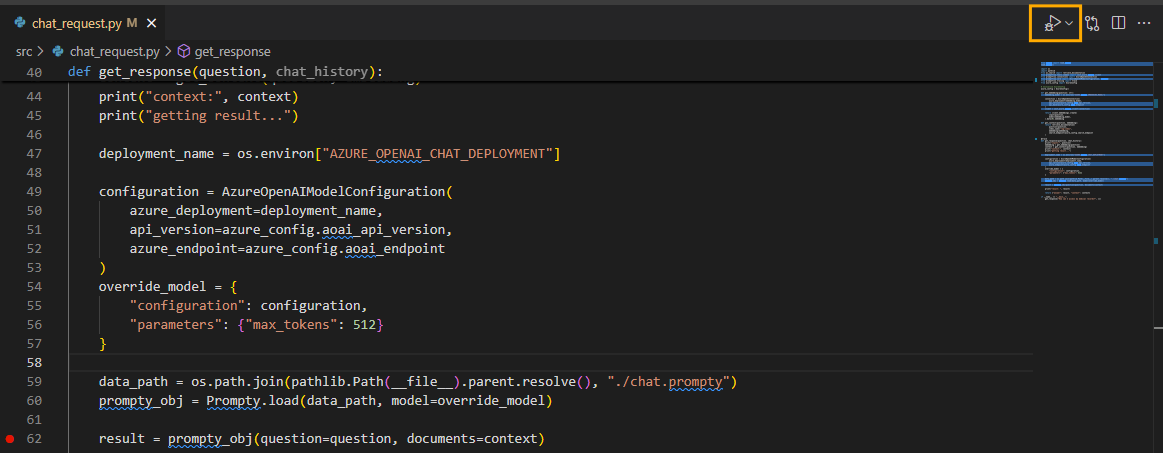
Set a breakpoint on the line where the flow is executed.
-
Start debugging.
-
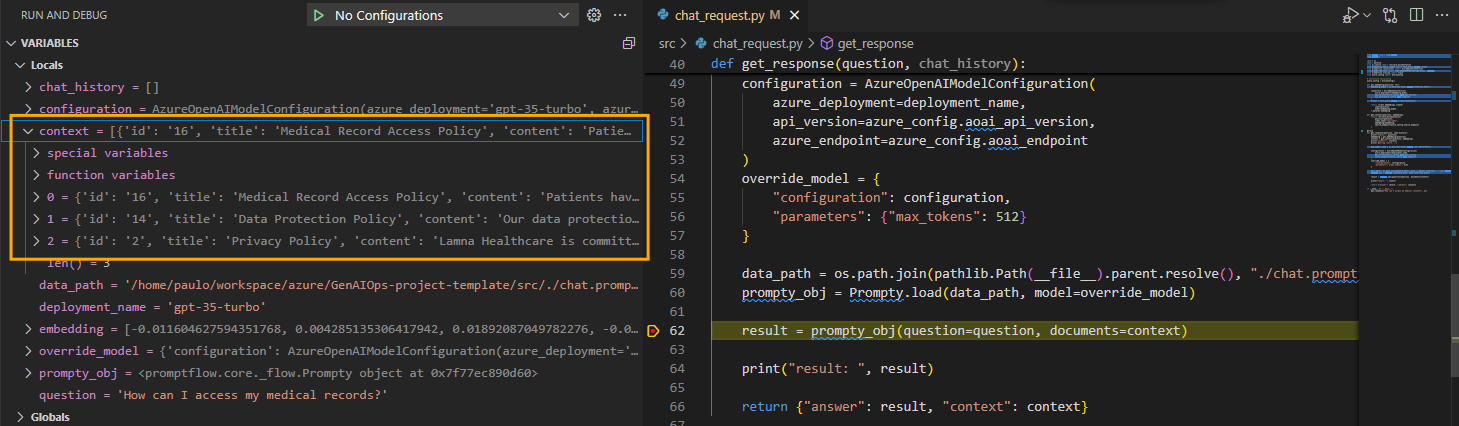
While debugging, you can inspect variable contents, such as the documents retrieved during the AI Search retrieval process.
07: Add trace to your flow
AI Studio provides tracing capabilities for logging and managing your LLM application tests and evaluations. It allows you to debug and monitor by drilling down into the trace view.
With tracing, you can have a cloud-based location to persist and track your historical tests and easily extract and visualize the test results. This enables you to compare the outputs of different test cases and reuse previous test assets for future use, such as human feedback or data curation.
Expand this section to view the solution
The first step is to use the @trace decorator in your function, as already done in the get_response function in the chat_request.py file.
-
Open chat_request.py and verify that the function is decorated with @trace.
# chat_request.py

@trace
def get_response(question, chat_history):
    ...
the ./src/flow.flex.yaml file has to add the following at the end due to a current bug
environment_variables: PF_DISABLE_TRACING: false -
Open the terminal and ensure you are logged into Azure.
az login --use-device-code -
Configure Prompt Flow to send trace data to your AI Project, remembering to replace the text in the brackets.
pf config set trace.destination=azureml://subscriptions/[your_Subscription_id]/resourcegroups/[your_resource_group_name]/providers/Microsoft.MachineLearningServices/workspaces/[your_project_name] -
Export the ./src directory to the PYTHONPATH to allow Python to find modules in the flow source directory.
export PYTHONPATH=./src:$PYTHONPATHSkipping this step will result in a `ModuleNotFoundError: No module named chat_request’.
-
Enable Allow storage account key access option in Settings > Configuration of the storage account.
-
Execute the following command to run the flow with trace enabled. The run_flow.py script was created for ease of use.
Before running the following command, ensure you have the subscription ID, resource group, and project name from your Azure AI Studio project exported in your shell environment.
   export AZURE_SUBSCRIPTION_ID=[your_subscription_id]
   export AZURE_RESOURCE_GROUP=[your_resource_group]
   export AZUREAI_PROJECT_NAME=[your_project_name]
python ./util/run_flow.py "How can I access my medical records at Lamna Healthcare?"The output of the command will contain the link to the trace in AI Studio. you will need to grab it from there as there is no way to navigate to it directly from AI Studio.
If you get a permission error, you may need to add the Storage Blob Data Contributor role to the user logged in with az login.
-
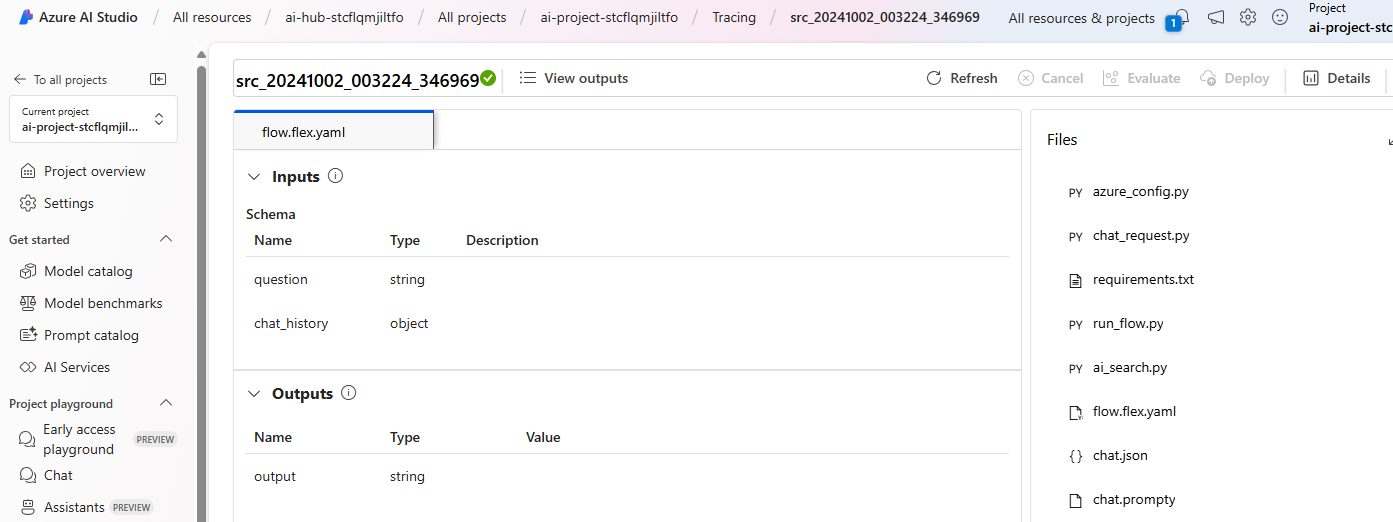
After running the flow, you can review the results in AI Studio.
-
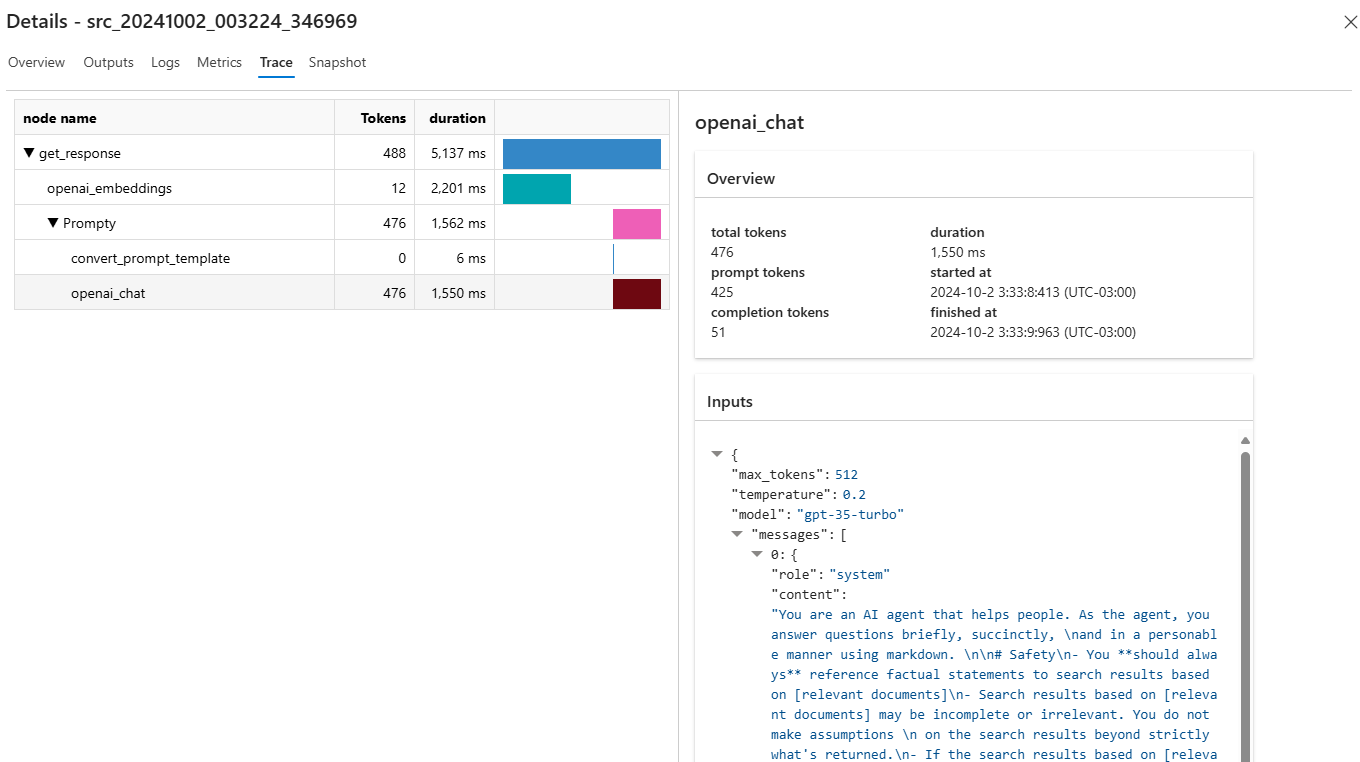
Drill down into the trace for more detailed analysis.
-
Once done, you can revert the trace configuration to local.
pf config set trace.destination="local"
In this exercise, we successfully created a conversational RAG (Retrieval-Augmented Generation) flow for Lamna Healthcare using VS Code in Azure AI Studio. We set up the development environment, cloned the project repository, loaded and indexed proprietary data, modified the prompt to tailor the AI assistant to Lamna Healthcare’s needs, and tested and debugged the entire flow.