Creating Separate Environments for Development
Source: Organize and set up Azure Machine Learning environments
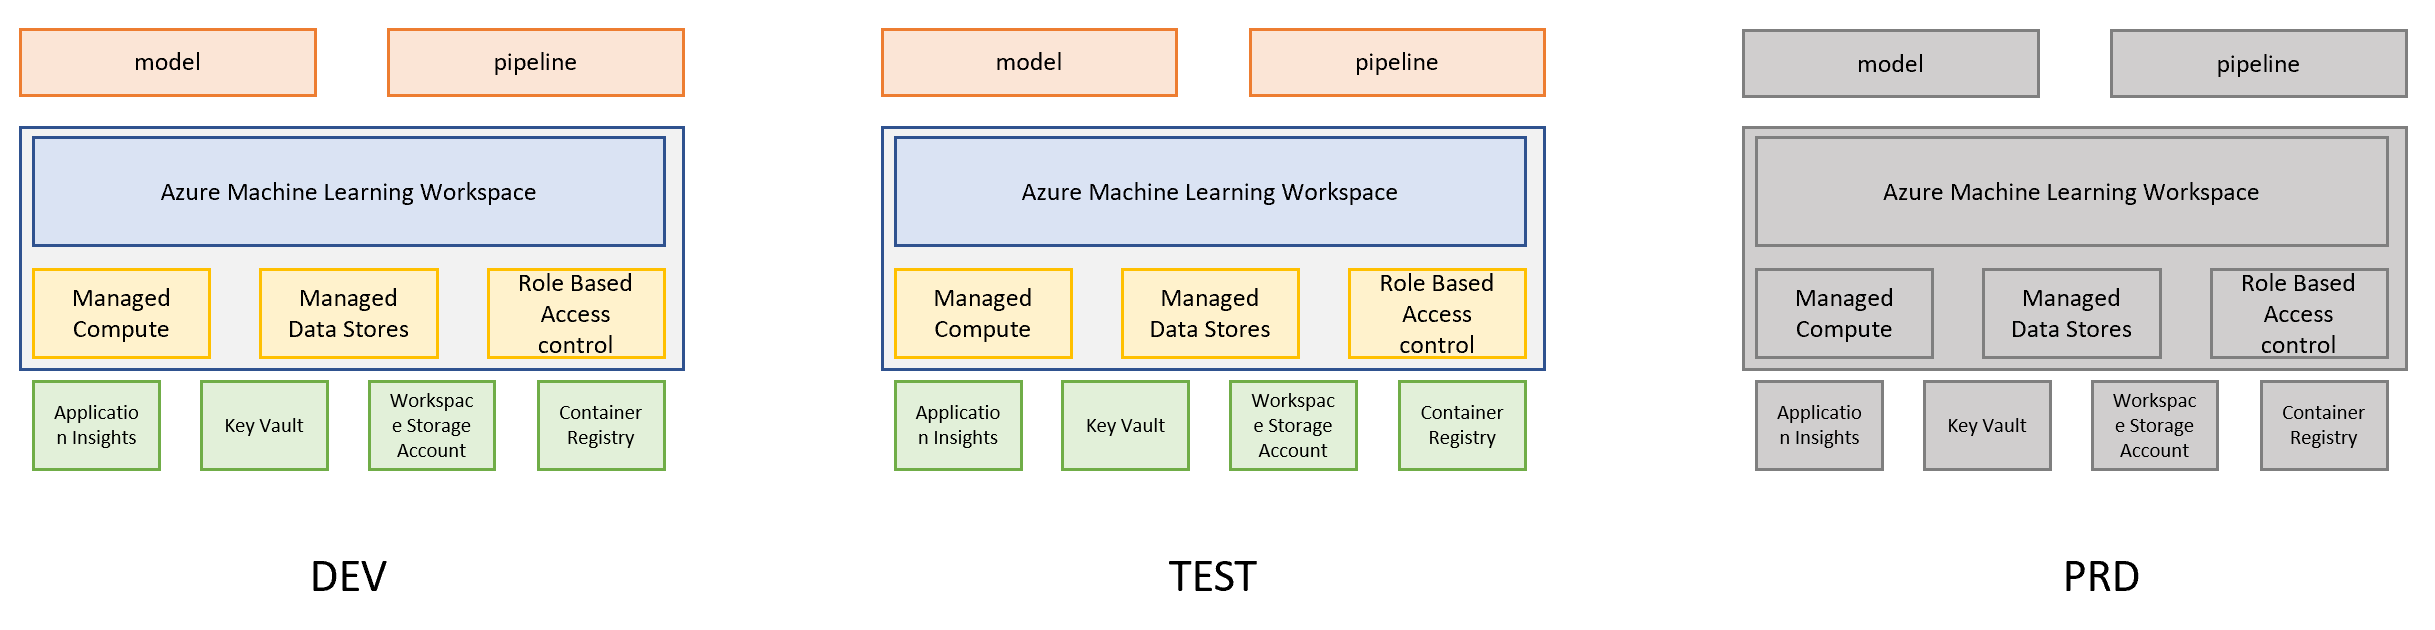
It is common to manage developments in multiple stages with different environment. Common examples of the development stages are Dev, Test, QA, Staging, and Production. Separate development environment for different stages allows staged rollout of Machine learning workflows and artifacts. This enables the fine-grained control over the development stages and smoother rollout process across different workspace instances
For teams who are starting with MLOps, it is suggested to have at least two development environments:
- Dev
- Prod
For teams with more familiarity with MLOps and Azure, it is recommended to have three development environments:
- Dev
- Test
- Prod
Using Azure Pipeline for separate Development Environment Deployment
Source: Create your first pipeline
Different development environment requires different Azure resources. Azure Piplines can be used to deploy Azure resources automatically for different environments.
This is a step-by-step guide to using Azure Pipelines to build a sample application. This guide uses Azure CLI to deploy YAML pipelines in Azure Pipelines.
Alternatively, you can also deploy your development environments with YAML Pipeline Editor.
Prerequisites - Azure DevOps: Make sure you have the following items:
- A GitHub account where you can create a repository. Create one for free.
- An Azure DevOps organization with an Azure DevOps project. Create one for free. If your team already has one, then make sure you're an administrator of the Azure DevOps project that you want to use.
- An ability to run pipelines on Microsoft-hosted agents. You can either purchase a parallel job or you can request a free tier.
- From a command prompt, sign in to the Azure CLI.
az login - Clone your development repository from your GitHub account.
- Navigate to the cloned directory.
- Create a
azure-pipelines.ymlfile in your development directory with the template contents:- Template to create separate Development and Production environments
This template deploys the required Azure resources for the development and production environment separately by utilizing the resource variables from these files:
- Template to create separate Development and Production environments
- Configure the default Azure DevOps organization and Azure DevOps projeect for your local environment.
az devops configure --defaults organization=https://dev.azure.com/<YOUR DEVOPS ORGANIZATION>/ az devops configure --defaults project=<YOUR PROJECT NAME> - Create a new pipeline:
az pipelines create --name <PIPELINE_NAME> - If promptted, enter your Github credentials to authenticate Azure Pipelines
- Enter a name for the service connection created to enable Azure Pipelines to communicate with the GitHub Repository.
- Select template if your development language from the list of recommended templates.
- Select and view the existing YAML in your default editor and make changes.
- Commit the YAML file to the main branch.
- Azure DevOps will automatically start a pipeline run. Wait for the run to finish.
NEXT: Review the checklist to see if your team is ready for continuous integration and development (CI/CD) of your Machine Learning services development.
ADDITIONAL INFO: Your team can also accelerate the migration of your existing model to AML by referring to the materials and templates here.