Lab E2 - Build an API
Key concepts before you build
In this lab you will set up an API based on Azure Functions and install it as an API plugin for Microsoft 365 Copilot.
Introduction
In this lab you will set up a REST API for Trey Research, a hypothetical consulting company. It provides API's for accessing information about consultants (using the /api/consultants path) and about the current user (using the /api/me path). For now the API doesn't support authentication, so the current user will always be "Avery Howard"; in Lab E6a you will add authentication and the ability to access the logged in user.
The code consists of Azure Functions written in TypeScript, backed by a database in Azure Table storage. When you run the app locally, table storage will be provided by the Azurite storage emulator.
How did you create this API?
The project was created using Microsoft 365 Agents Toolkit. You can create the same scaffolding for your own project by opening an empty folder in VS Code and going to Agents Toolkit. Read more.
Exercise 1: Configure and run the starting application
Step 1: Install additional prerequisites
This lab calls for a couple of additional prerequisites; please install them now.
- Azure functions core tool
- REST Client add-in for Visual Studio Code: You will use one of these toolkits to test your API locally
- (optional) Azure Storage Explorer: This will allow you to view and modify the Trey Research database
Step 2: Download the starting application
Begin by downloading the source code for the base project.
⬇ Download path-e-lab02-build-api.zip
Download not working?
The download service uses the GitHub API which has a rate limit of 60 requests/hour per IP. If the button above fails, download directly via GitHub: go to the trey-research folder on GitHub, click Code → Download ZIP, then extract only the trey-research subfolder.
Unzip and copy path-e-lab02-build-api folder to a location on your computer where you want to do your work. These instructions will refer to this as the "working folder" going forward.
Step 3: Set up the local environment files
Open your working folder in Visual Studio Code. You might see a popup dialog asking you to "trust the authors of the files in this folder". If that is the case, select the button "Yes, I trust the authors" to proceed. Copy the /env/.env.local.user.sample file to /env/.env.local.user. If env.local.user already exists, ensure this line is present:
SECRET_STORAGE_ACCOUNT_CONNECTION_STRING=UseDevelopmentStorage=true
Step 4: Install the dependencies
Open a command line / VS Code terminal in your working folder to type and enter:
npm install
Step 5: Run the application
In Visual Studio Code, click the logo for Microsoft 365 Agents Toolkit in the left sidebar to open Agents Toolkit. Ensure you are logged into Microsoft 365 and that Custom App Uploads and Copilot Access Enabled indicators are both showing green checkmarks.
You'll need to sign into the Microsoft 365 Agents Toolkit in order to upload and test your agent from within it. Within the project window, select the Microsoft 365 Agents Toolkit icon from the left side menu. This will open the Agent Toolkit’s activity bar with sections like Accounts, Environment, Development etc. Under "Accounts" section select "Sign in to Microsoft 365". This will open a dialog from the editor to sign in or create a Microsoft 365 developer sandbox or Cancel. Select "Sign in". Once signed in, close the browser and go back to the project window.
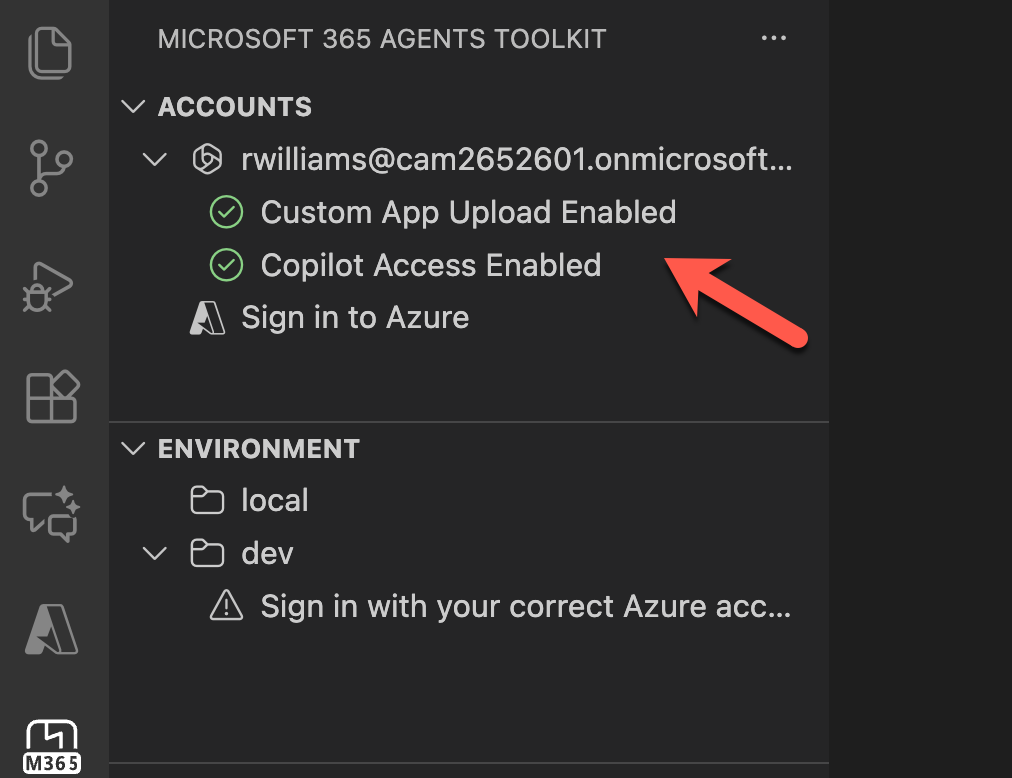
Now you can just hit F5 to debug using Microsoft Edge or in VS Code menu select Run > Start Debugging.
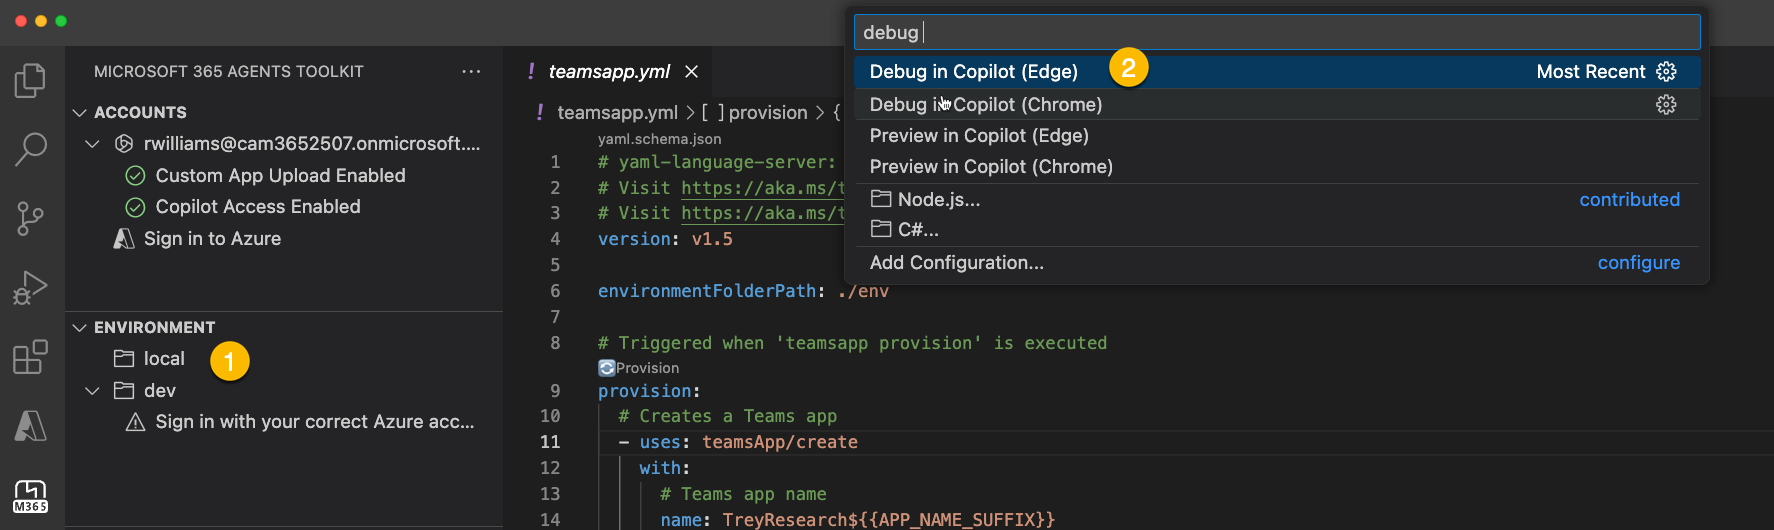
Or you can hover over the "local" enviroment and click the debugger symbol that will be displayed 1️⃣, then select the browser of your choice 2️⃣.
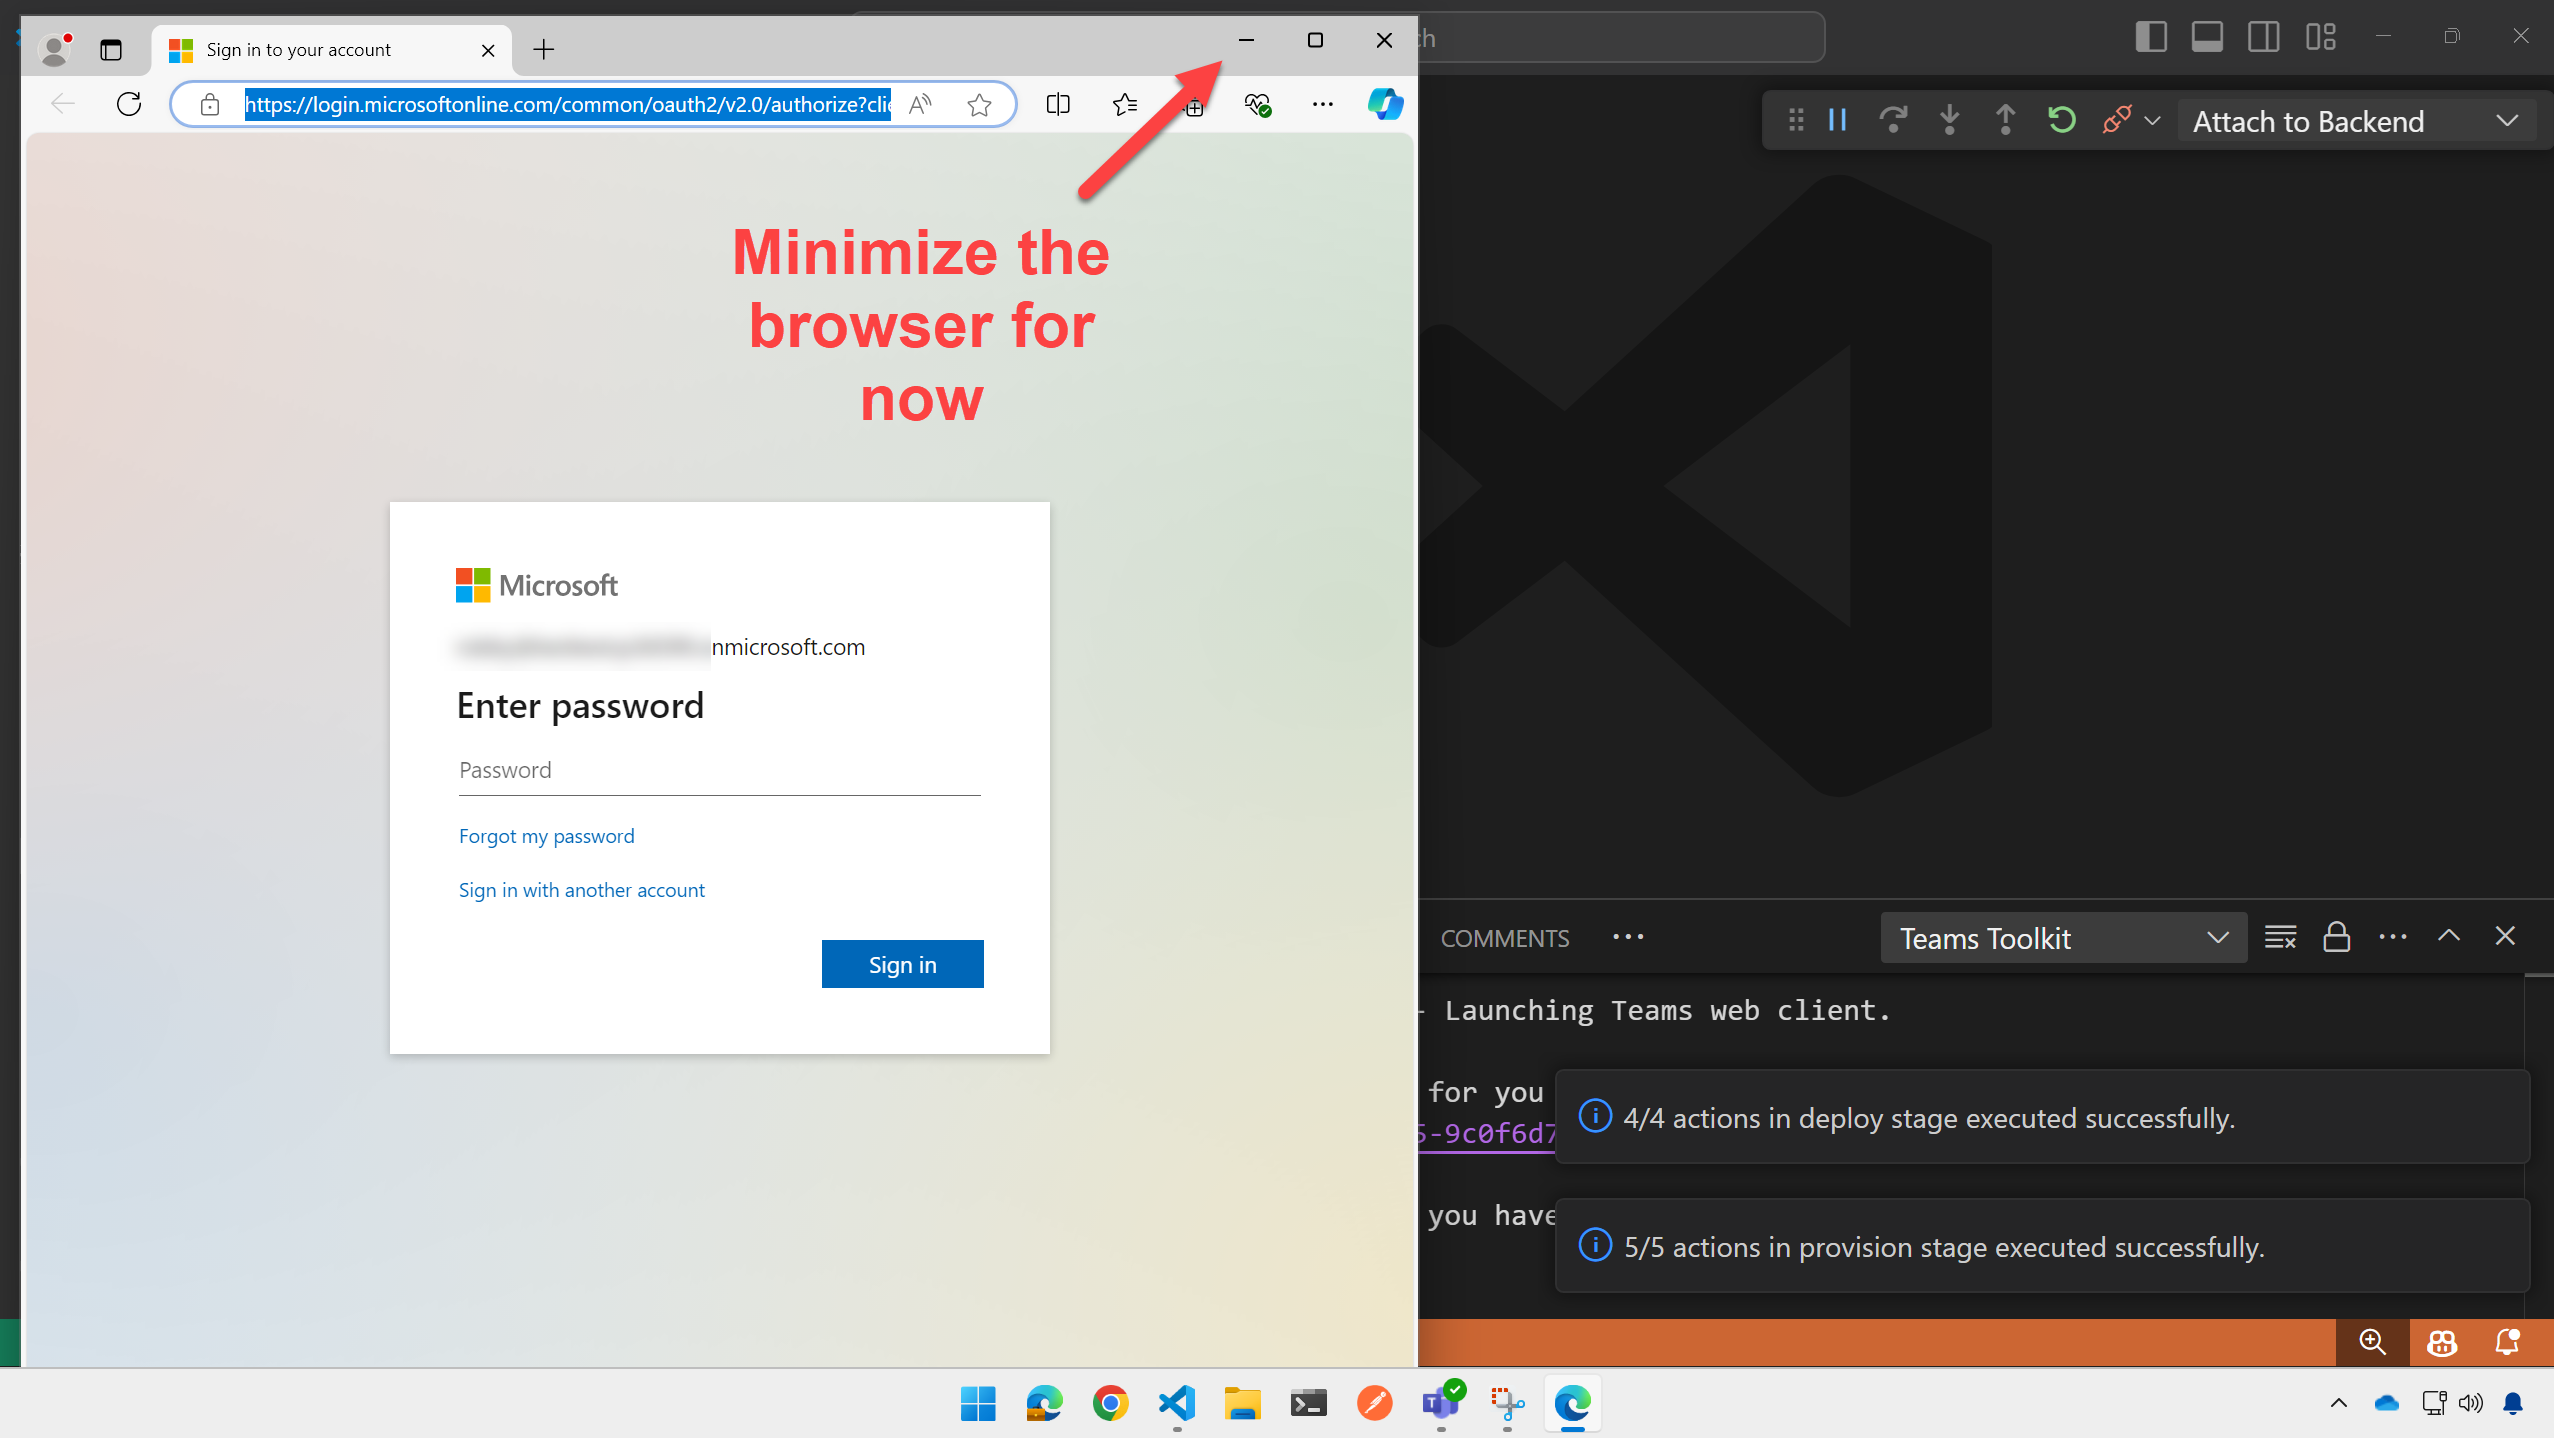
Eventually a browser will open (it's faster after the first time). You'll log into this in the next lab to test with Copilot, but for now just minimize the browser so your app keeps running, and we'll proceed to test the API.
Exercise 2: Test the app's web services
The Trey Resarch project is an API plugin, so naturally it includes an API. In this exercise you'll test the API manually and, in the process, learn about what it does.
Step 1: GET the /me resource
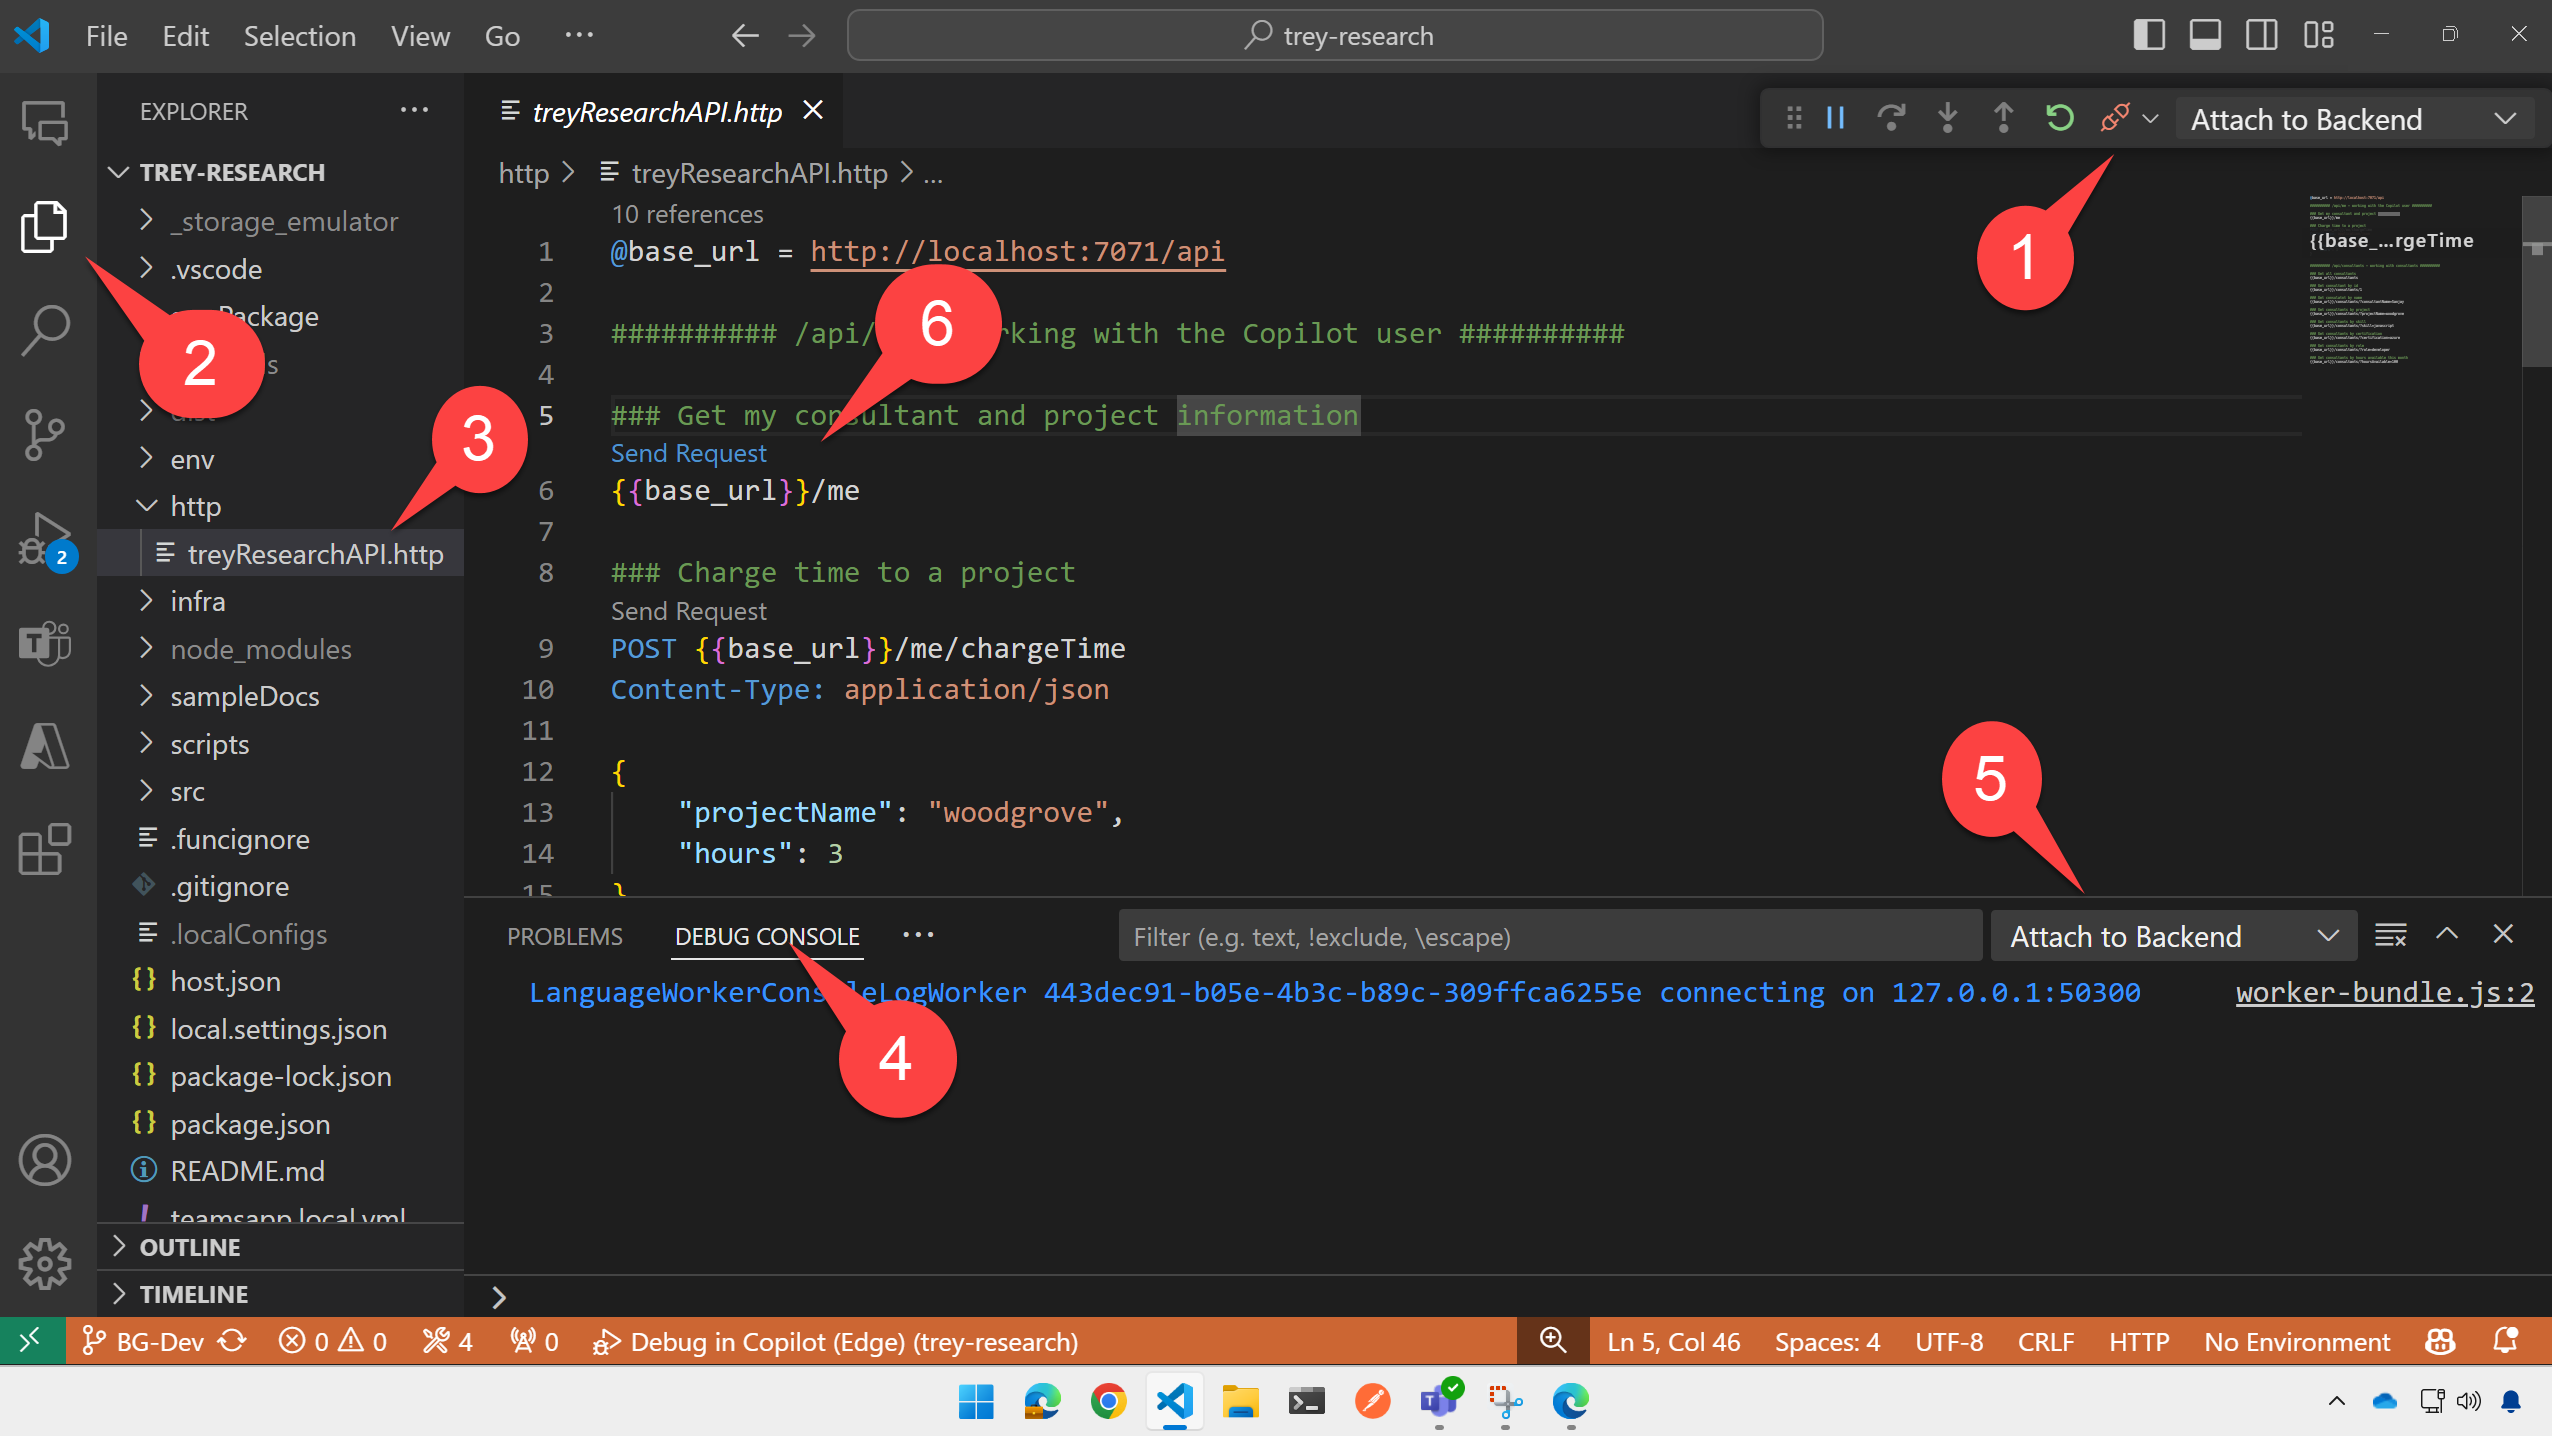
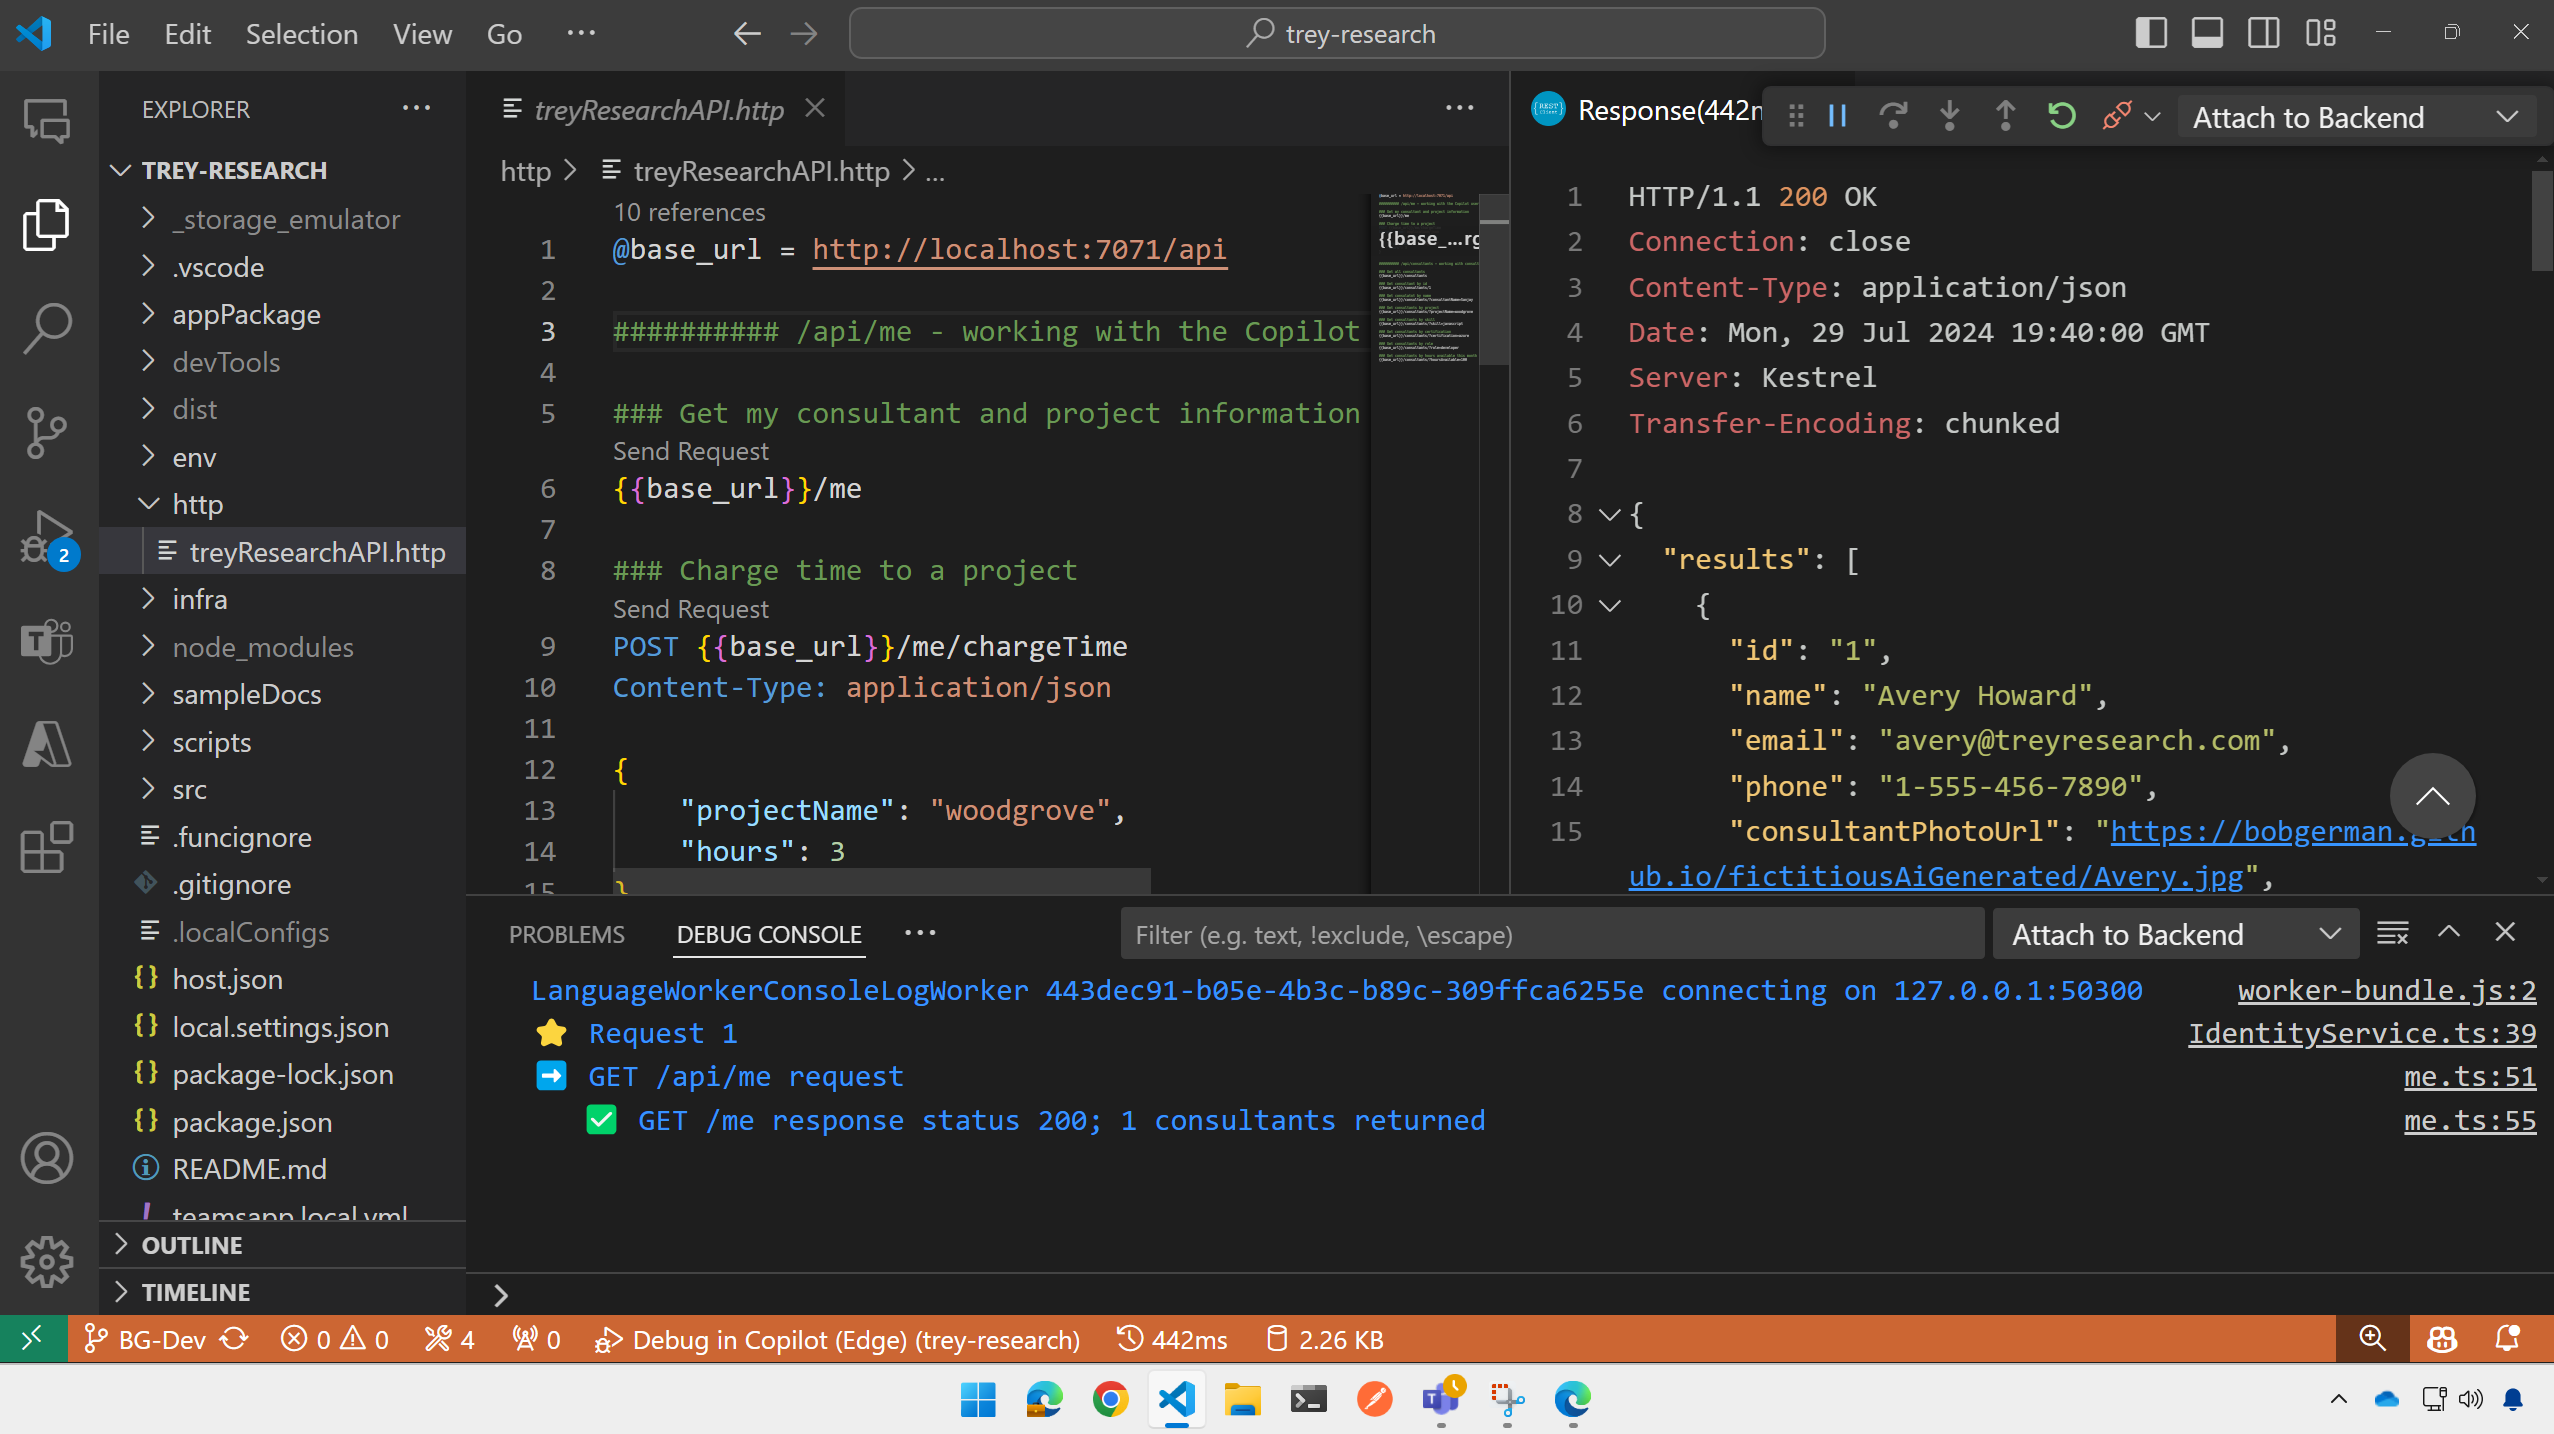
With the debugger still running 1️⃣, switch to the code view in Visual Studio Code 2️⃣. Open the http folder and select the treyResearchAPI.http file 3️⃣.
Before proceeding, ensure the log file is in view by opening the "Debug console" tab 4️⃣ and ensuring that the console called "Attach to Backend" is selected 5️⃣.
Now click the "Send Request" link in treyResearchAAPI.http just above the link {{base_url}}/me 6️⃣.
You should see the response in the right panel, and a log of the request in the bottom panel. The response shows the information about the logged-in user, but since we haven't implemented authentication as yet (that's coming in Lab 6a), the app will return information on the fictitious consultant "Avery Howard". Take a moment to scroll through the response to see details about Avery, including a list of project assignments.
Step 2: Try the other methods and resources
Now try sending the POST request for {{base_url}}/me/chargeTime. This will charge 3 hours of Avery's time to the Woodgrove Bank project. This is stored in the project database, which is a locally hosted emulation of Azure Table Storage, so the system will remember that Avery has delivered these hours. (To test this, call the /me resource again and look at the "deliveredThisMonth" property under the Woodgrove project).
Continue to try the various GET requests in the .http file to find consultants with various skills, certifications, roles, and availability. All this information will be available to your agent so it can answer user prompts.
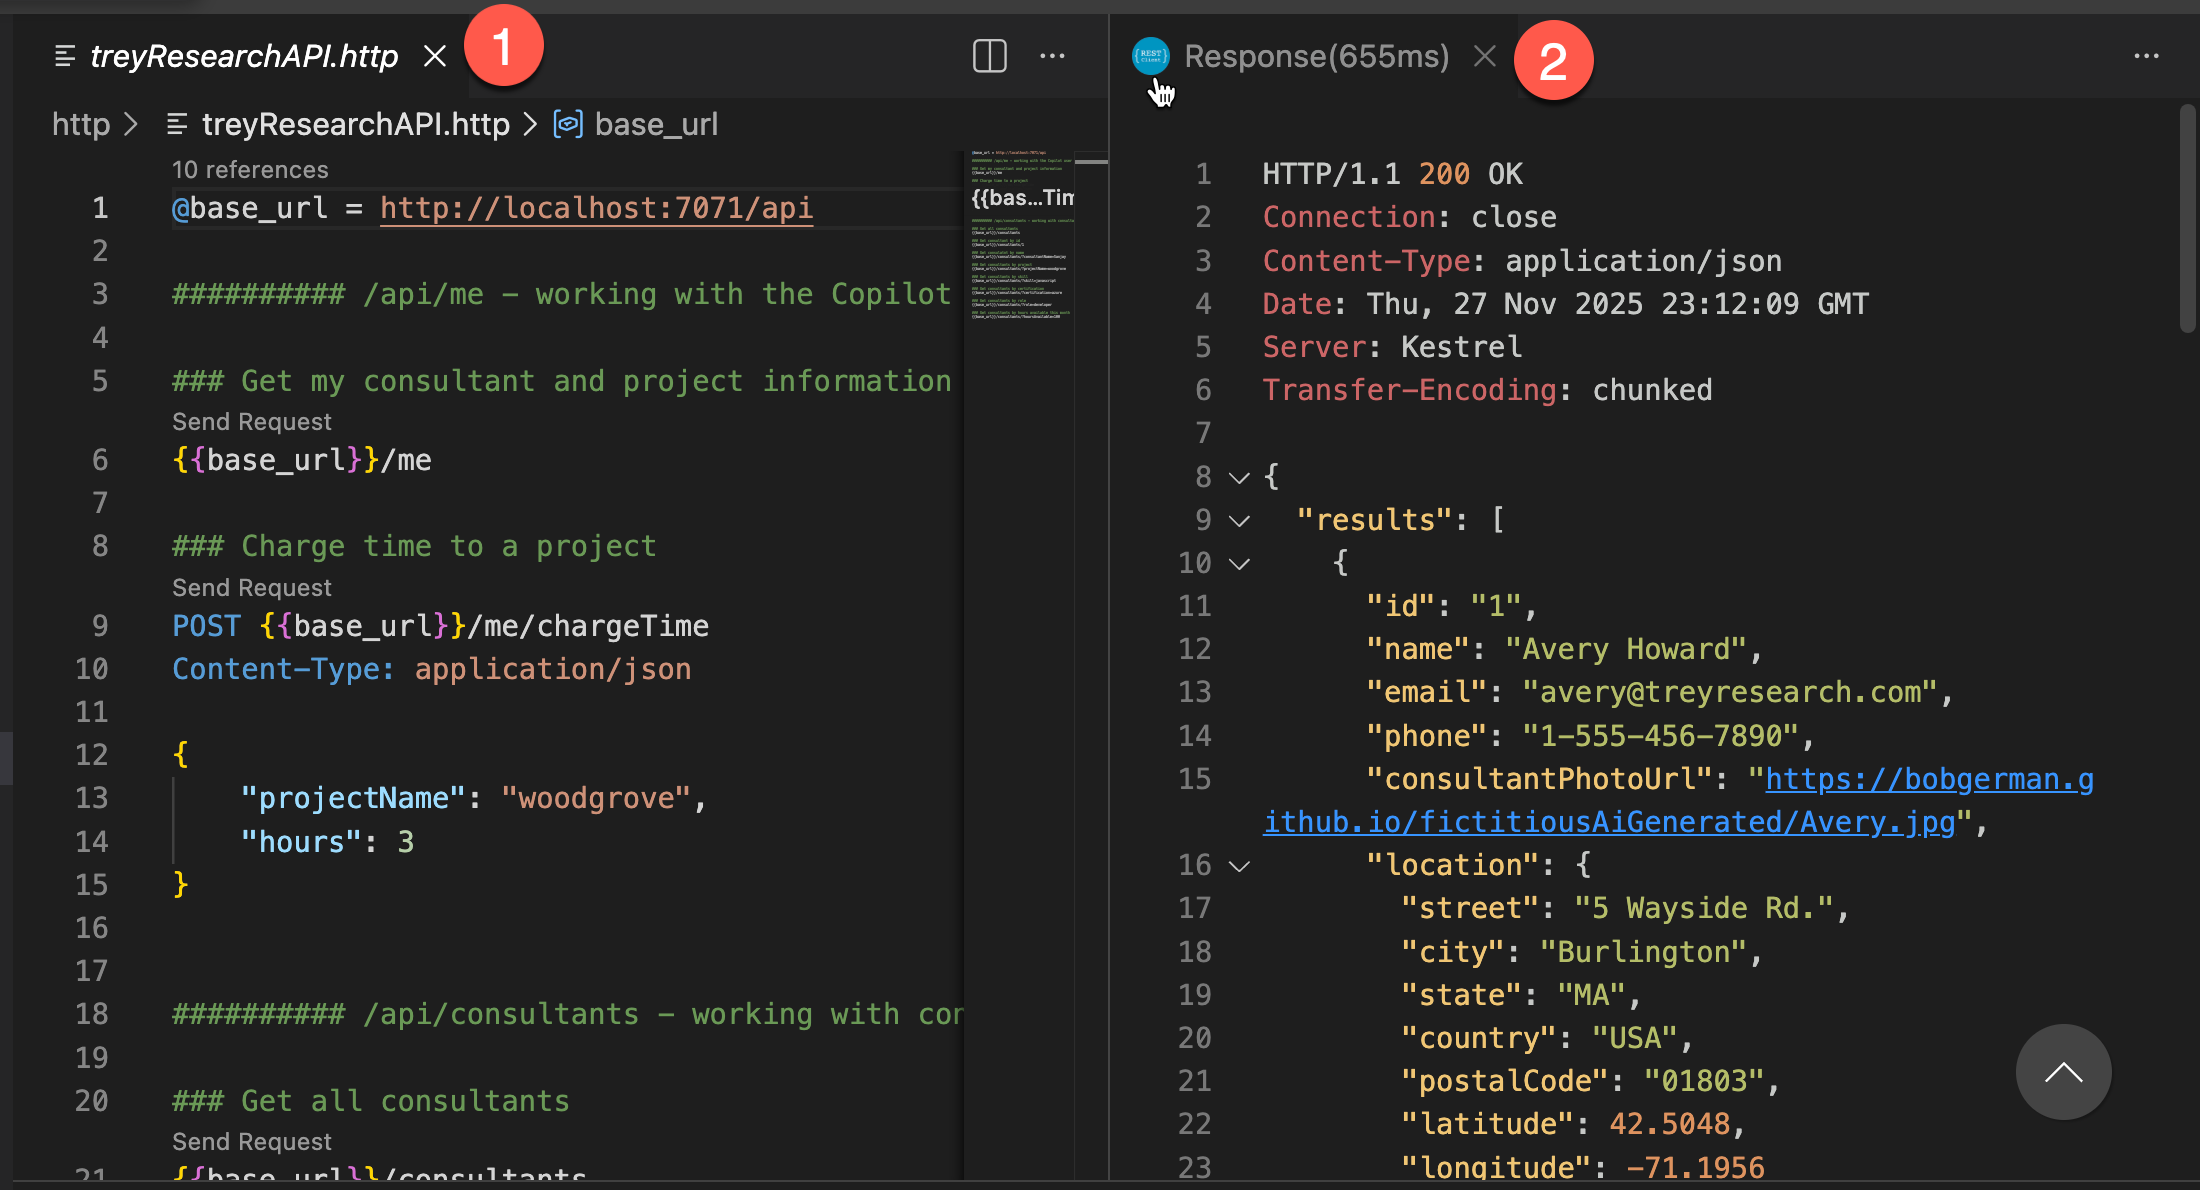
Once done testing, stop the debugger by going to the VS Code menu Run > Stop Debugging. Also close all windows inside VS Code like .http file 1️⃣ as well as the Response view 2️⃣.
Step 3: Examine the database (optional)
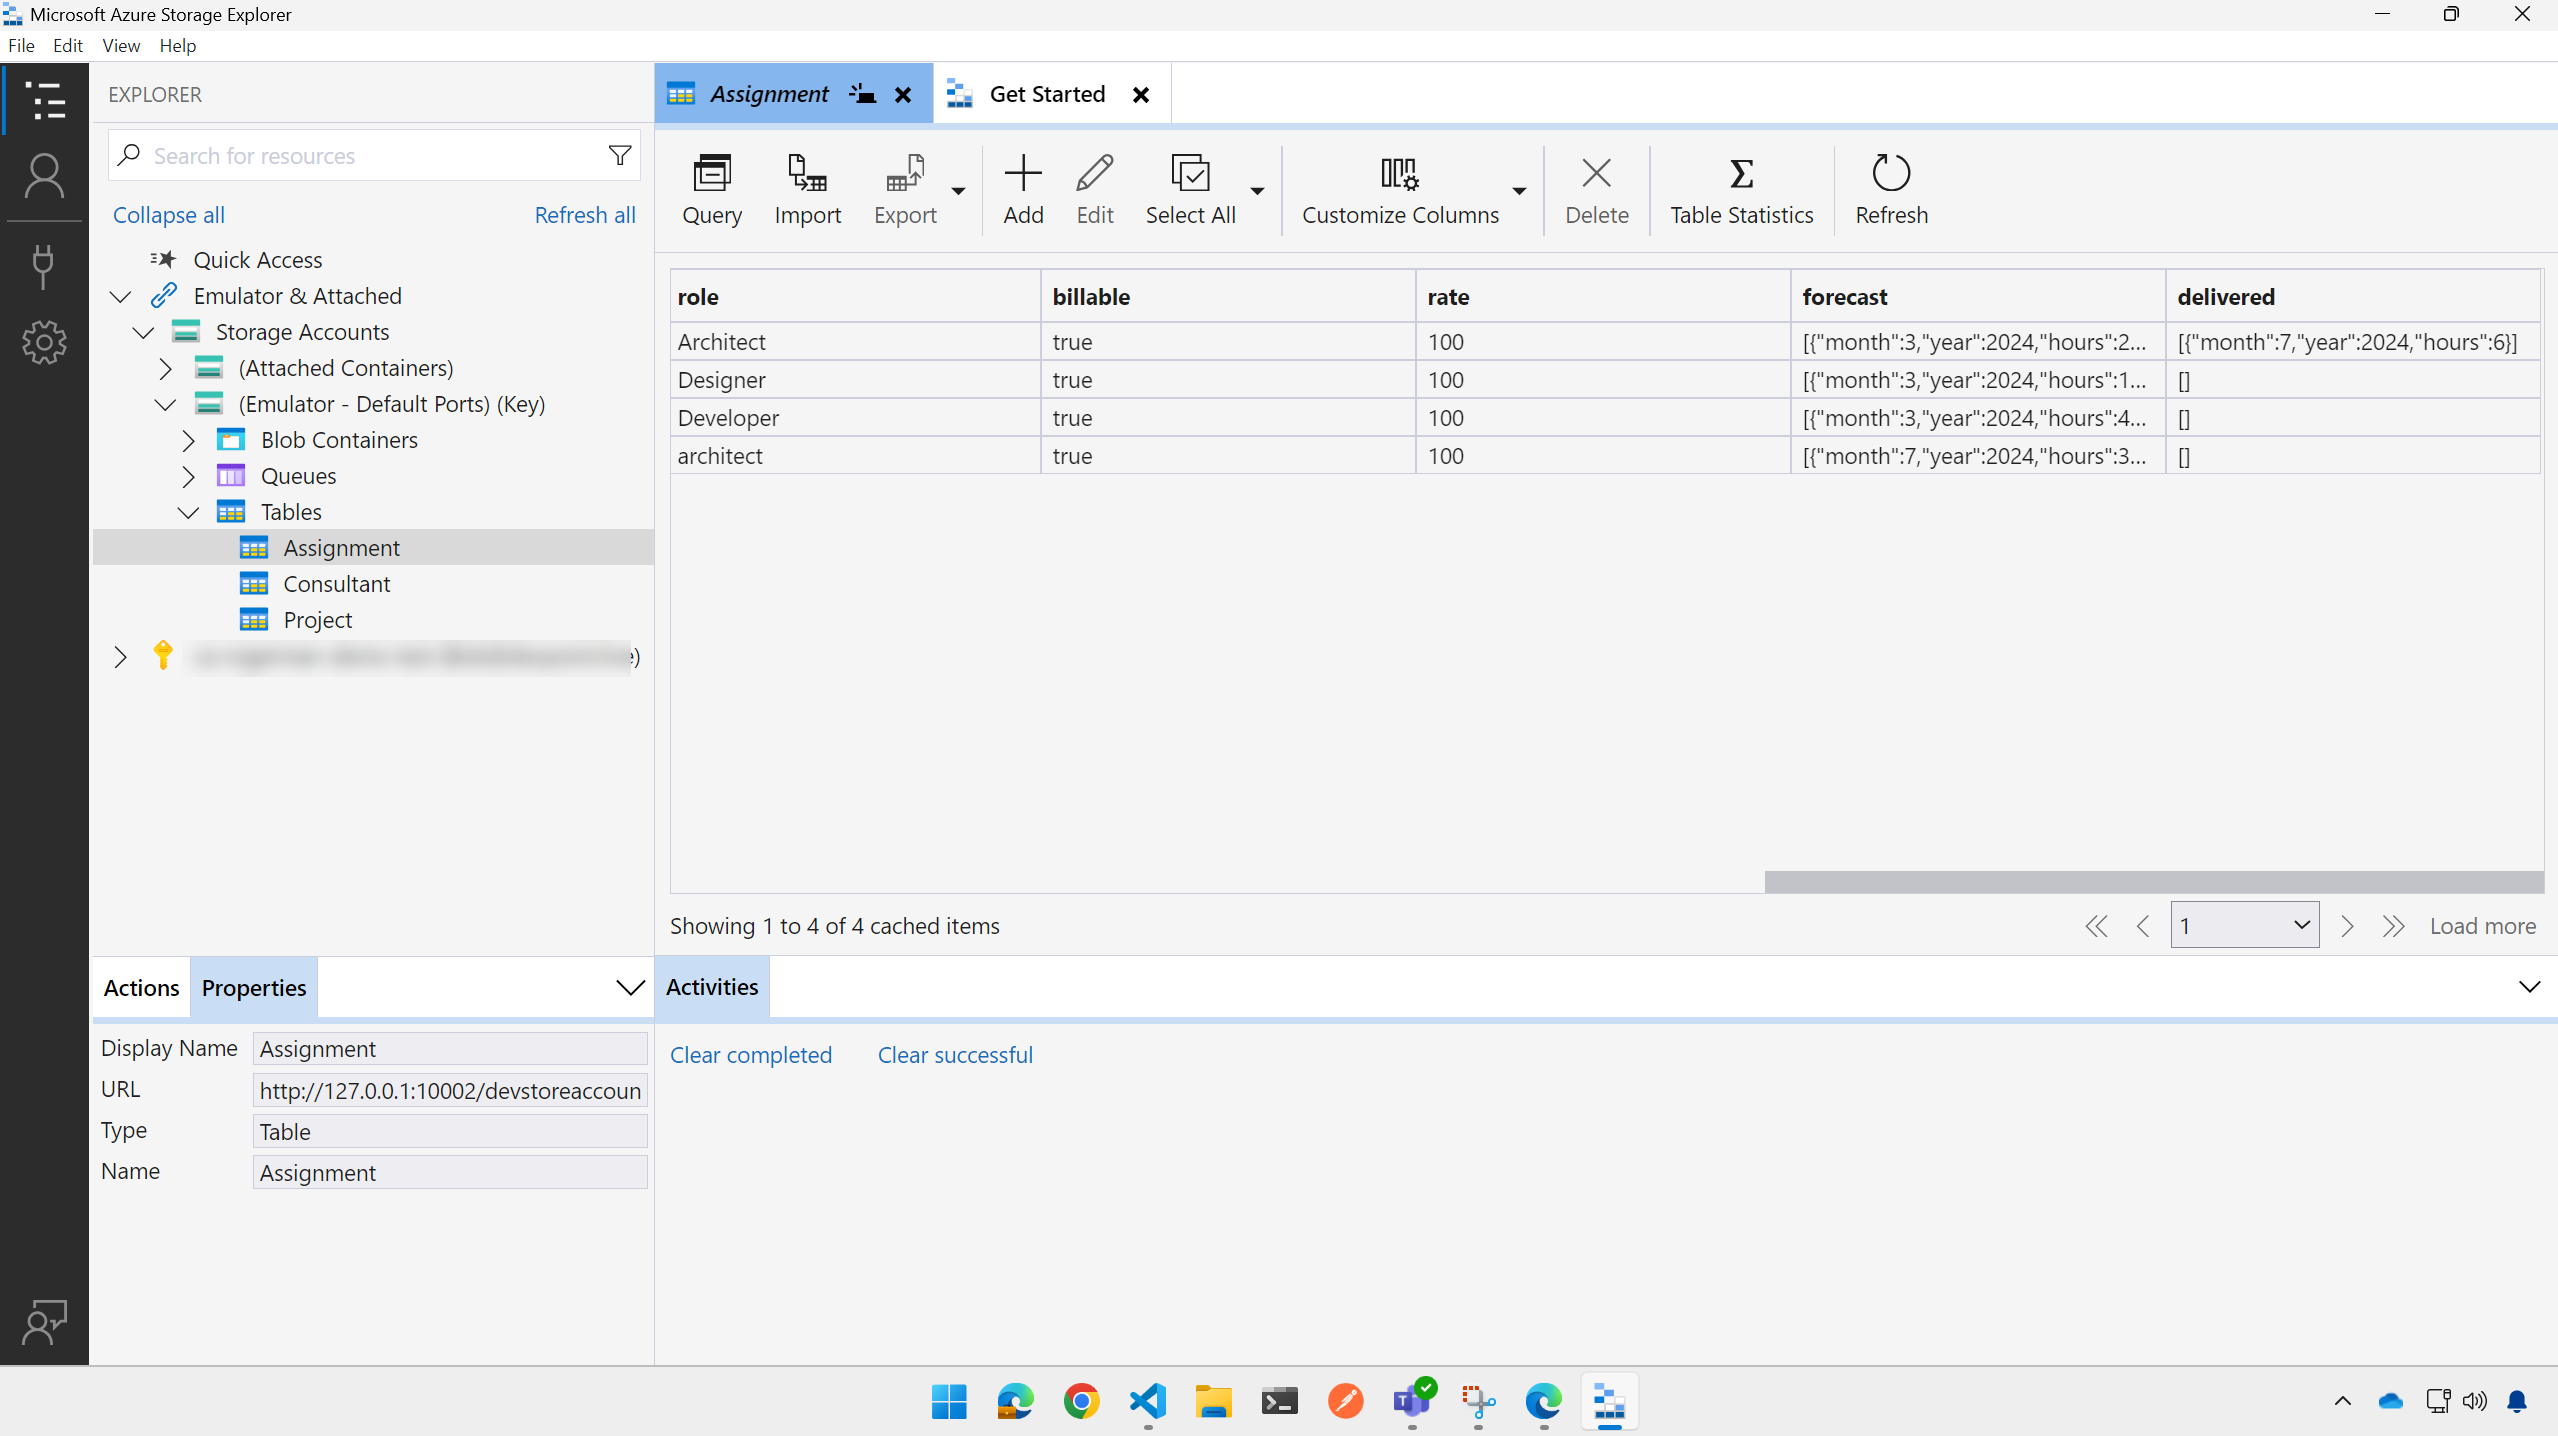
If you've installed the Azure Storage Explorer, you can examine and modify the application's data. The data is stored in Azure Table Storage, which in this case is running locally using the Azurite emulator.
Note
When you ran npm install in the previous exercise you installed the Azurite storage emulator. For more information check the Azurite documention here, and when you start the project, Azurite is automatically started up. So as long as your project is started successfully you can view the storage.
Within the Azure Storage Explorer, open the "Emulator & Attached" selection and pick the "(Emulator: Default Ports)" collection; then drill down to "Tables". You shold see 3 tables:
- Consultant: This table stores details about Trey Research consultants
- Project: This table stores details about Trey Research projects
- Assignment: This table stores consultant assignments to projects, such as Avery Howard's assignment to the Woodgrove Bank project. This table includes a "delivered" field that contains a JSON representation of the hours delivered by that consultant on the project over time.
CONGRATULATIONS!
You've successfully built the lab sample API! You can now proceed to make it into a plugin, and expose it via a Declarative agent.