Create Virtual Network
This section will create the virtual network that will be used by Azure Automation, Function Apps and SQL.
Manual Steps:
Step 1: Create Virtual Network
- Browse and log into the Azure Portal
Use the correct URL for your environment:
Worldwide (Commercial) & GCC
https://portal.azure.com
GCC-High and DoD
https://portal.azure.us
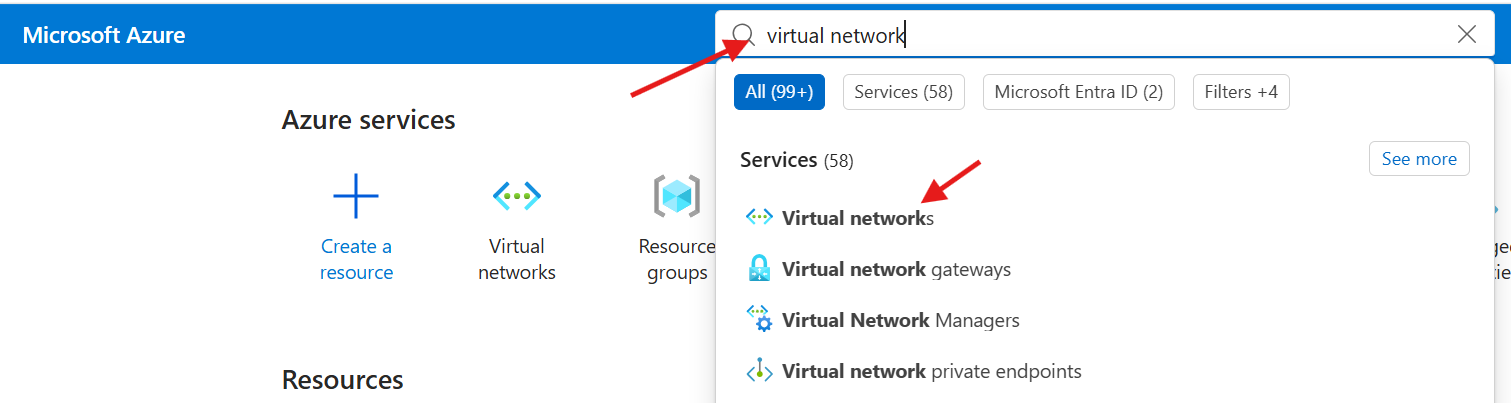
- Type in virtual network in the top search box
- Select Virtual networks
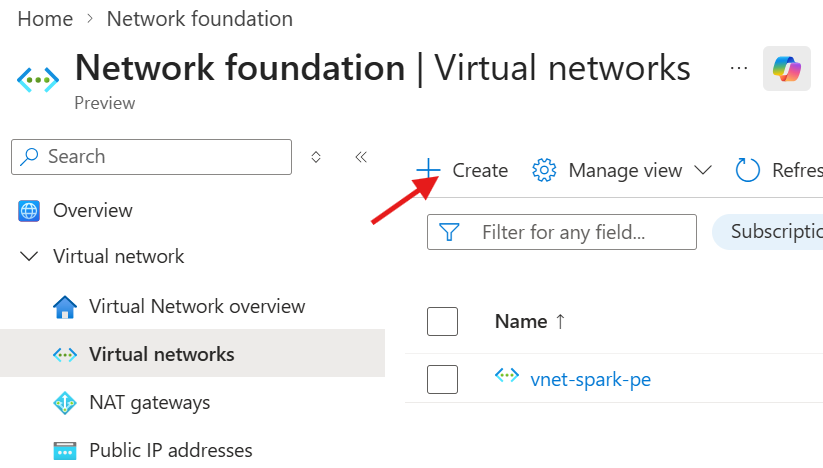
- Select + Create
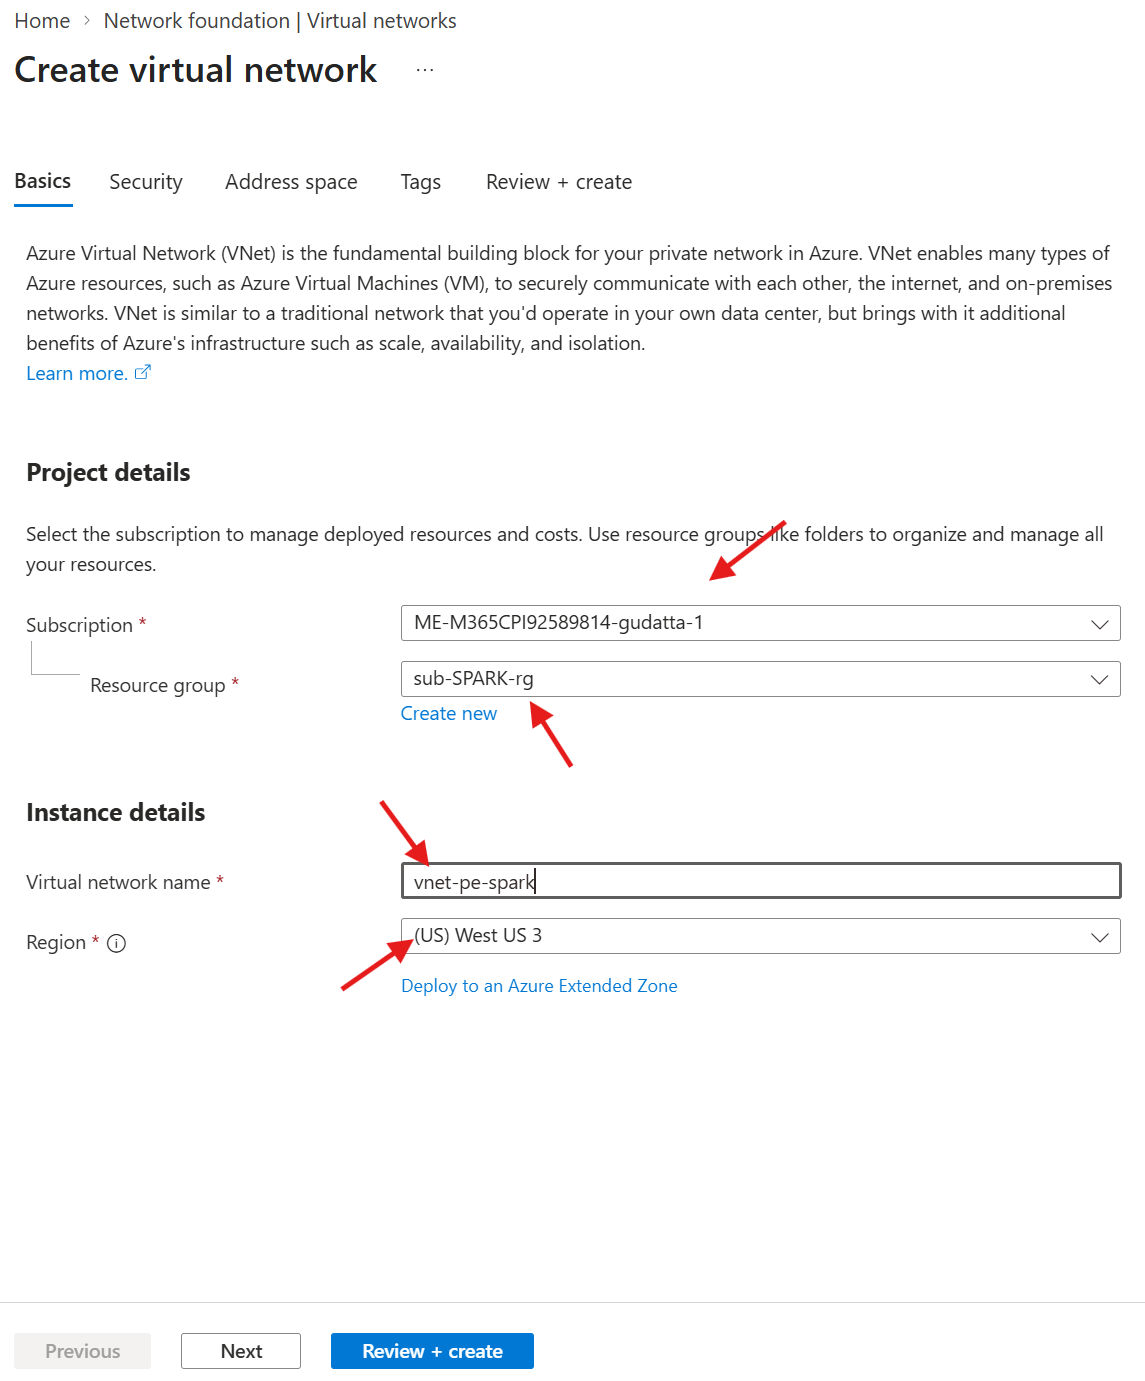
- Set the values for the virtual network
- Select Next
| Name |
Value |
| Subscription |
The subscription associated with this account. |
| Resource Group |
The Resource Group created for SPARK |
| Virtual network name |
vnet-pe-spark |
| Region |
The same region as the Resource Group |
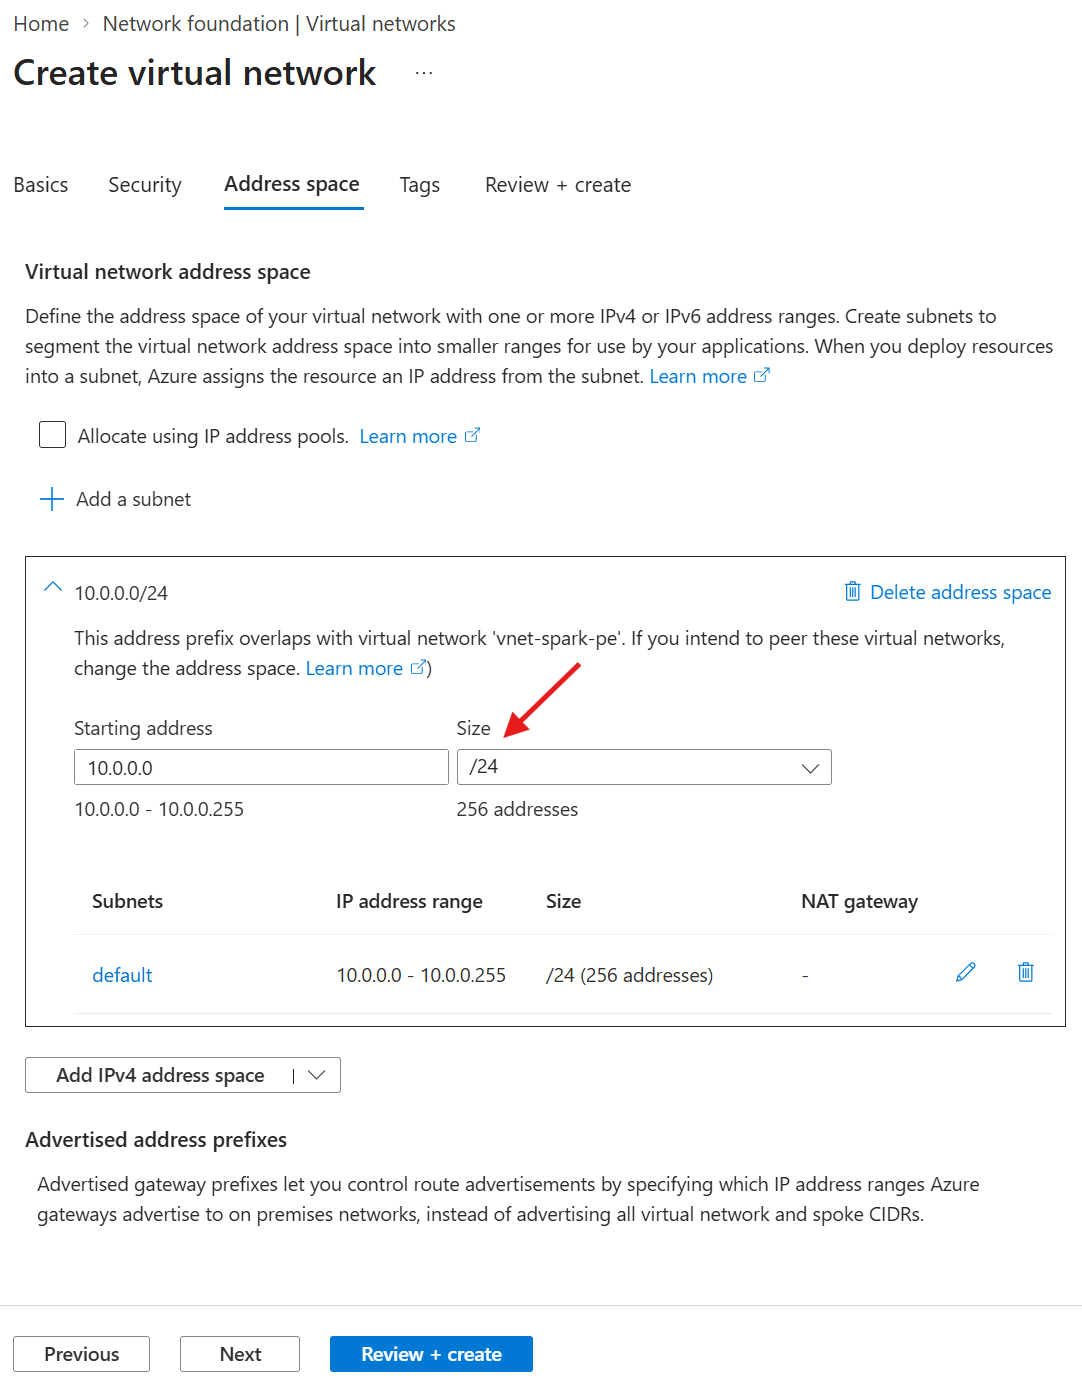
- Set the size of the address space to 24
- Select Review + Create and then Create
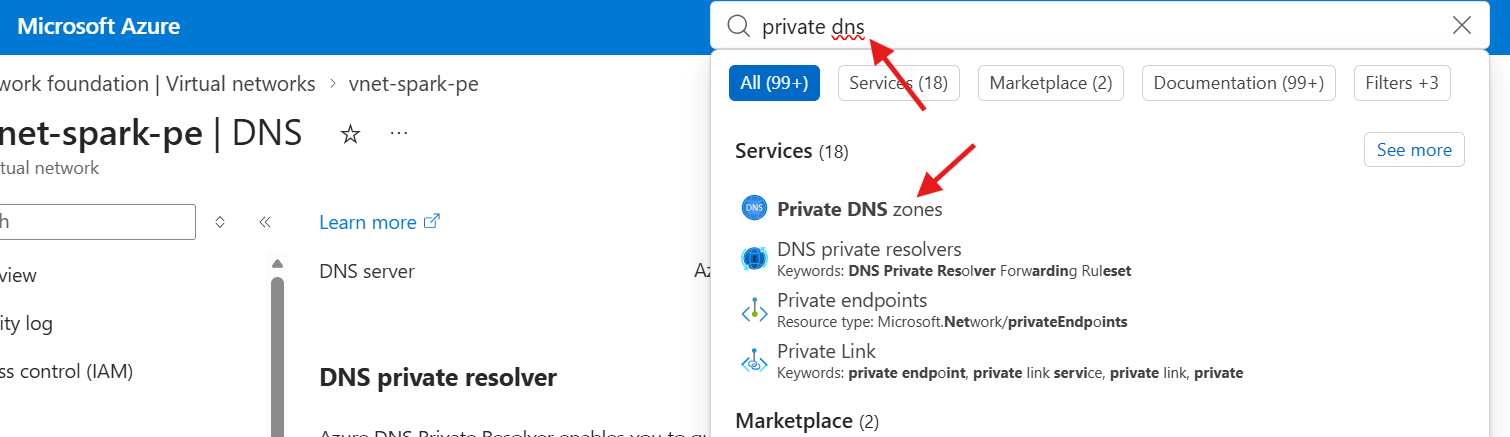
- Type in private dns in the top search box
- Select Private DNS Zones
- We will create a private dns zone for each service in the table below
| Service |
Private DNS Zone (Commercial/GCC) |
Private DNS Zone (GCC-H/DoD) |
| Azure Automation |
privatelink.azure-automation.net |
privatelink.azure-automation.us |
| Azure Function App |
privatelink.azurewebsites.net |
privatelink.azurewebsites.usgovcloudapi.net |
| Azure Storage Blob |
privatelink.blob.core.windows.net |
privatelink.blob.core.usgovcloudapi.net |
| Azure Storage File |
privatelink.file.core.windows.net |
privatelink.file.core.usgovcloudapi.net |
| Azure Storage Queue |
privatelink.queue.core.windows.net |
privatelink.queue.core.usgovcloudapi.net |
| Azure Storage Table |
privatelink.table.core.windows.net |
privatelink.table.core.usgovcloudapi.net |
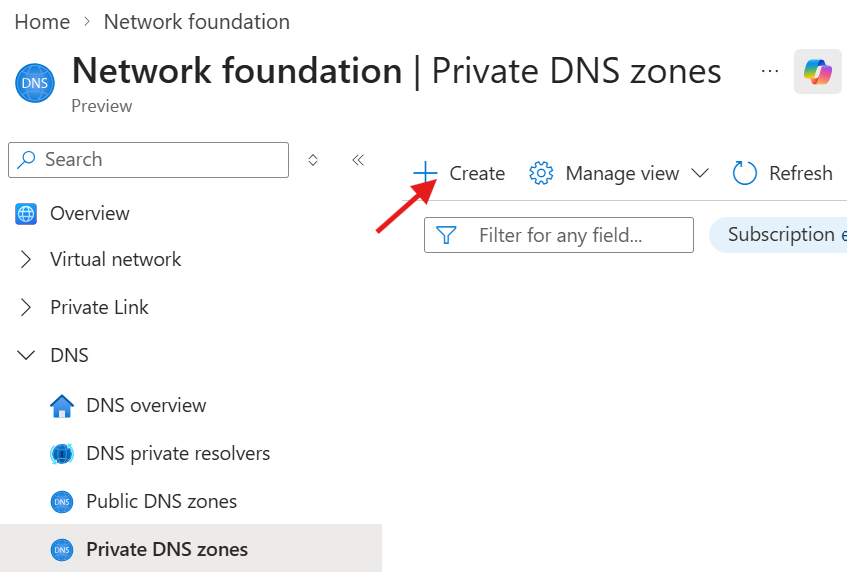
- Select + Create
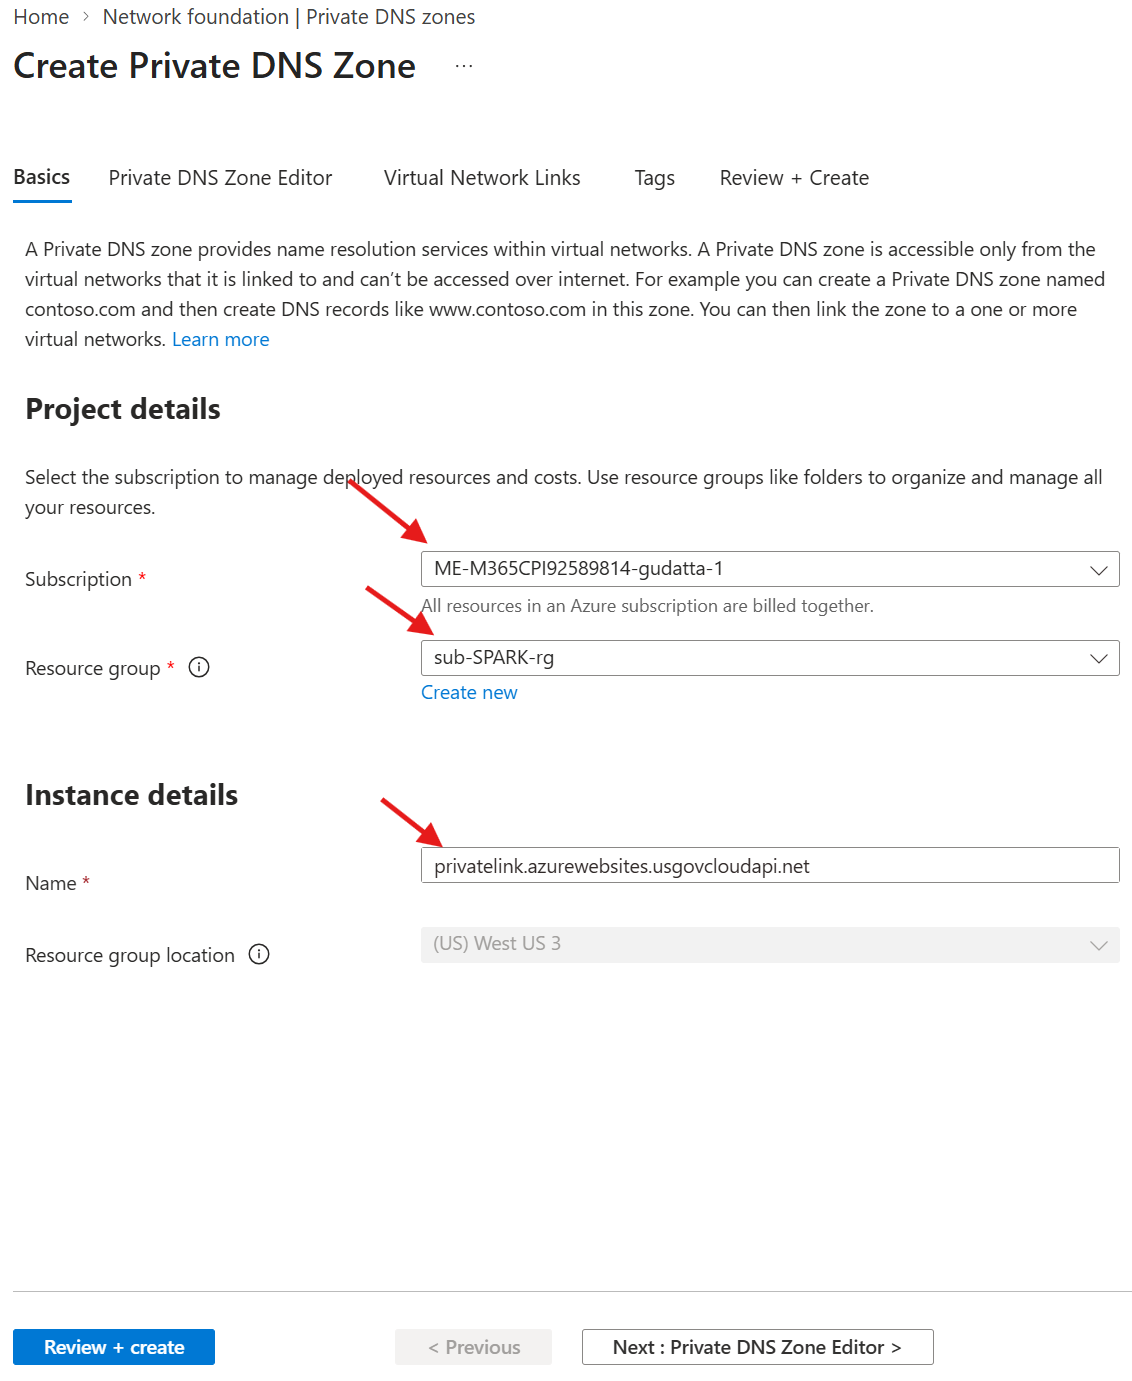
- Set the values for the private dns zone
- Click on Next twice to get to the Virtual Network Links
| Name |
Value |
| Subscription |
The subscription associated with this account |
| Resource Group |
The Resource Group created for SPARK |
| Name |
The value from the table in the previous step |
| Region |
The same region as the Resource Group |
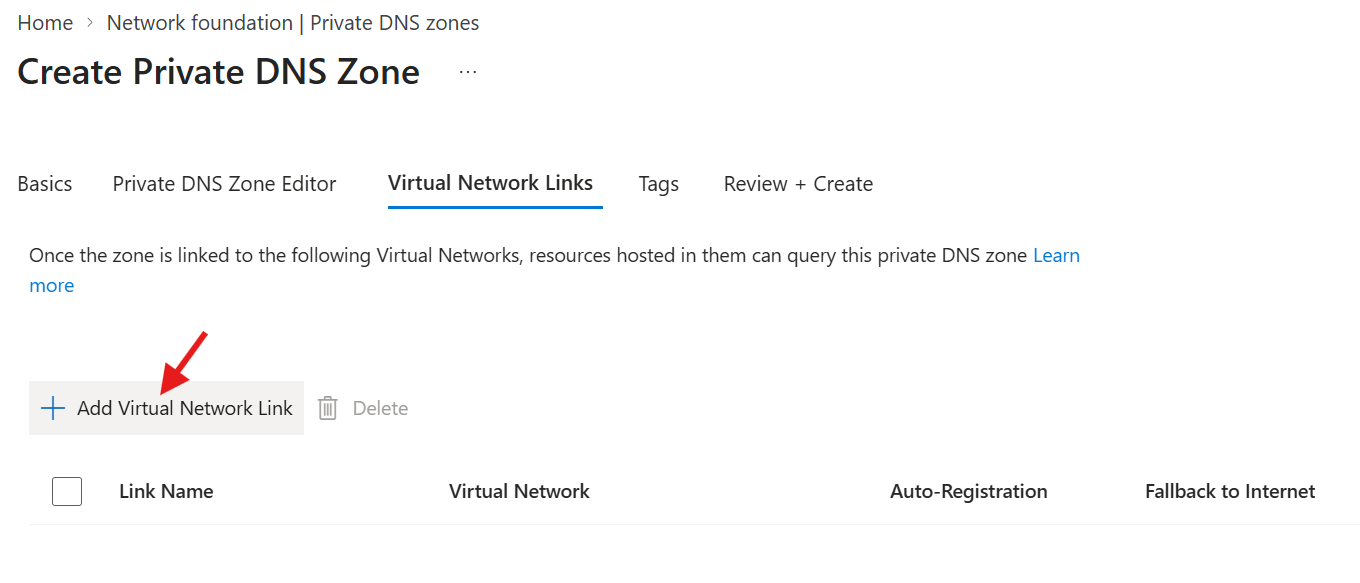
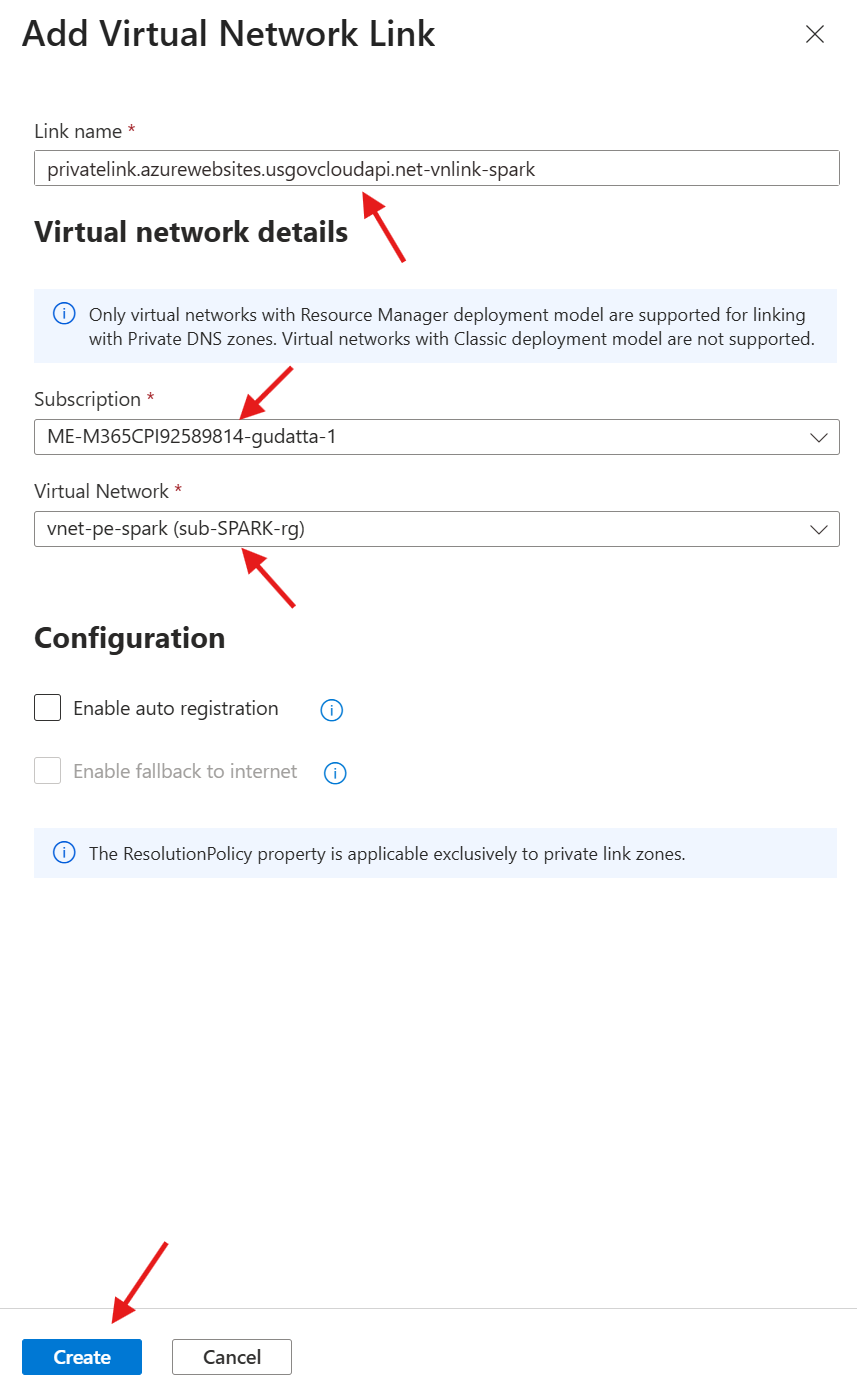
- Select + Add Virtual Network Link
- Set the values for the virtual network link
- Select Create
- Select Review + Create and then Create
| Name |
Value |
| Link name |
[Private DNS Zone Name]-vnlink-spark |
| Subscription |
The subscription associated with this account |
| Virtual Network |
vnet-pe-spark |
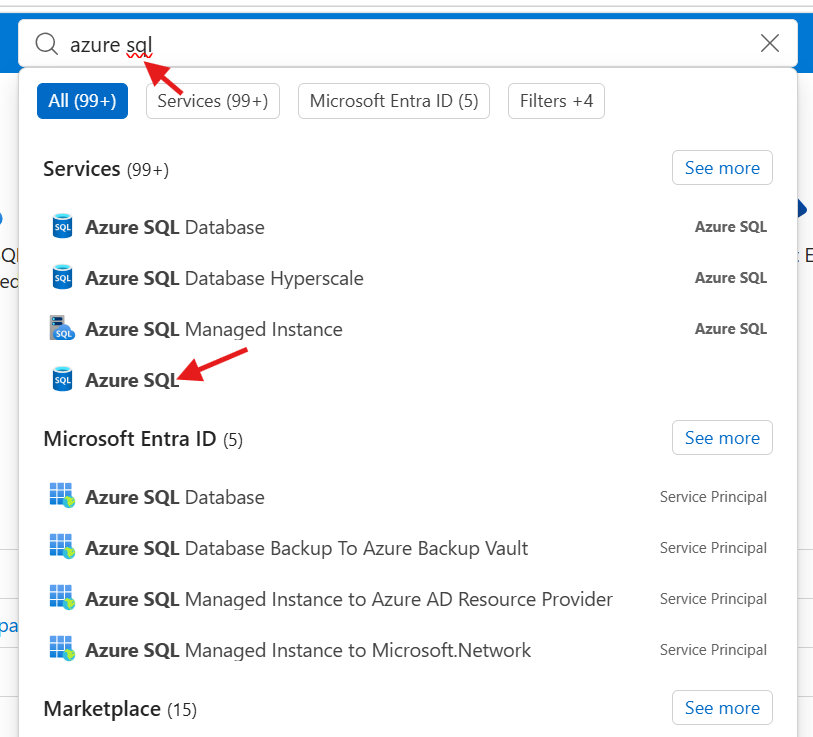
- Type in azure sql in the top search box
- Select Azure SQL
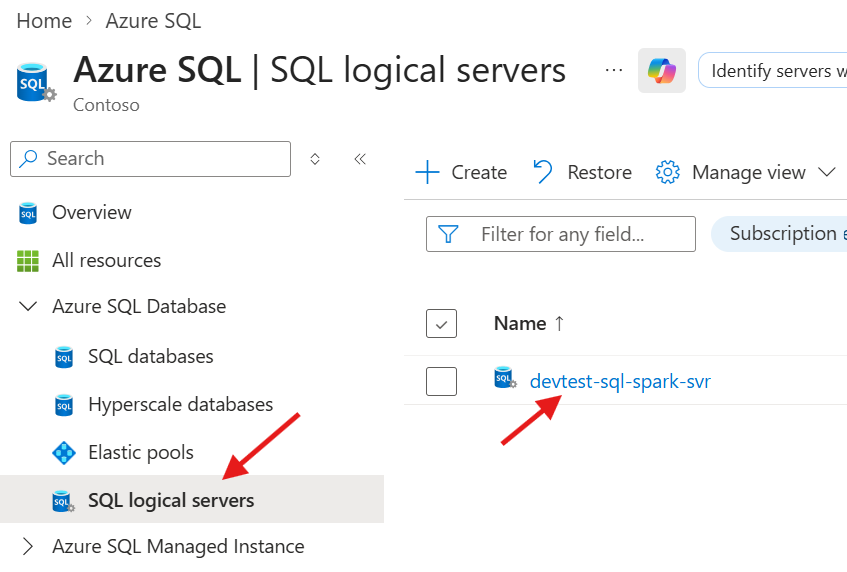
- Select SQL logical servers
- Select the SPARK SQL server
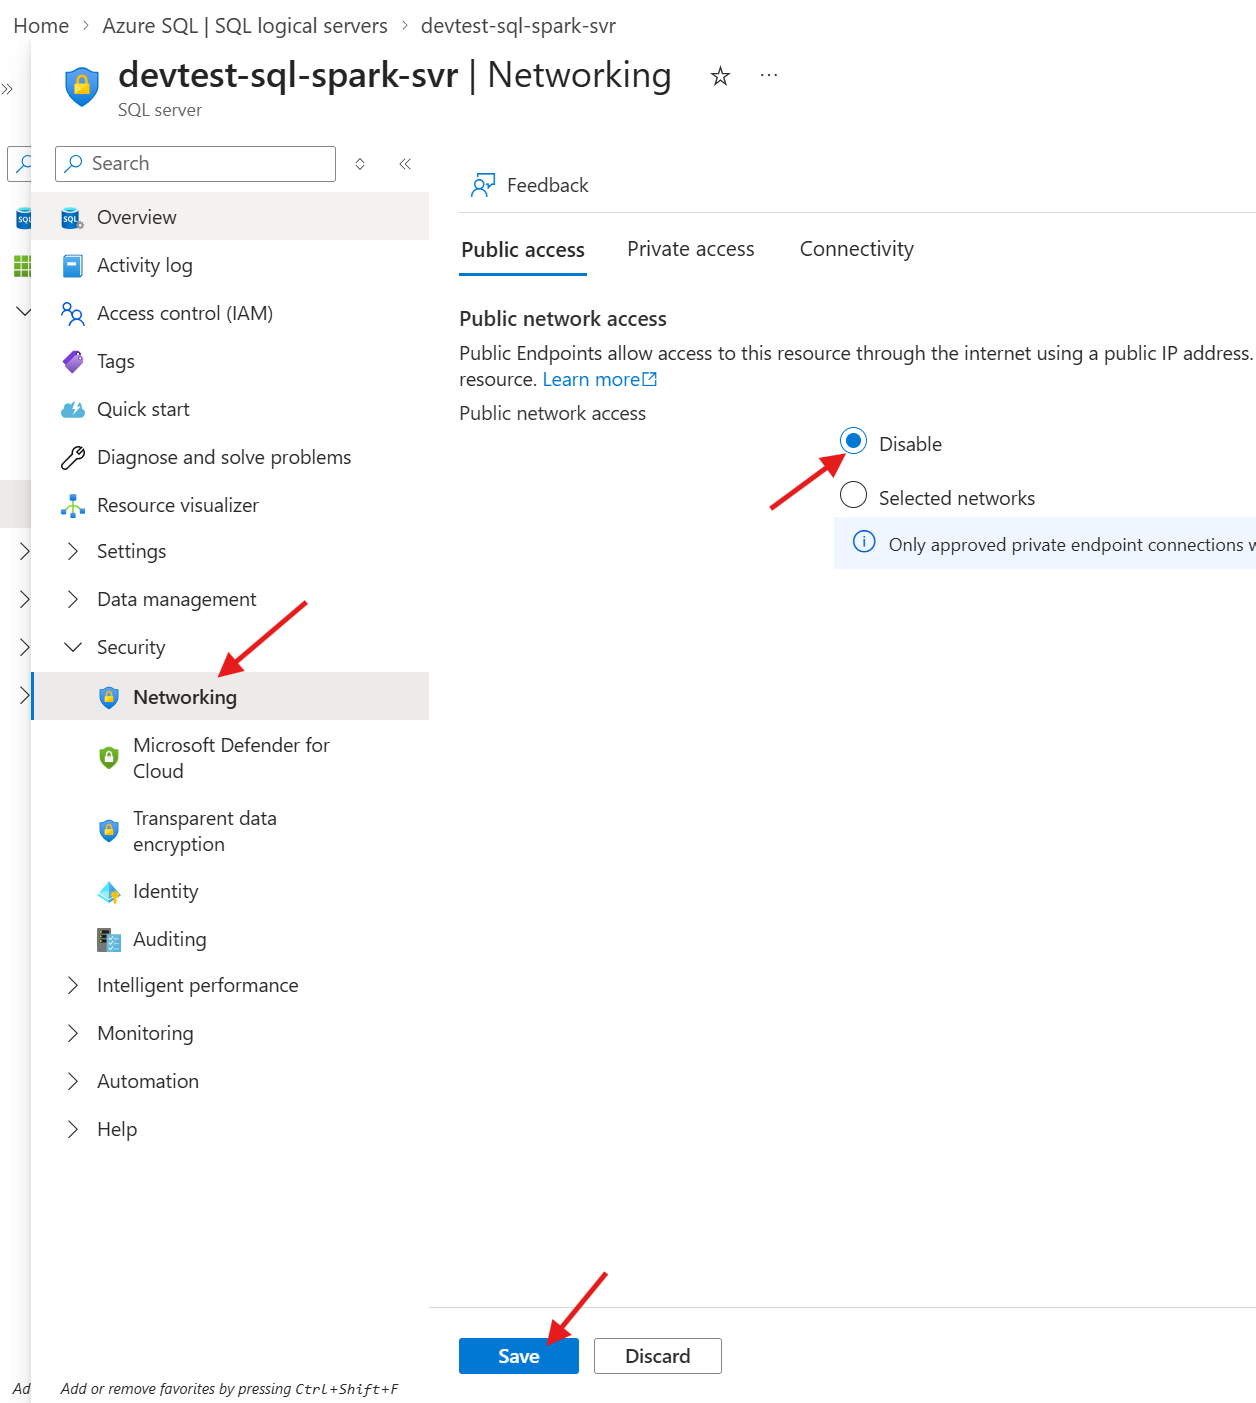
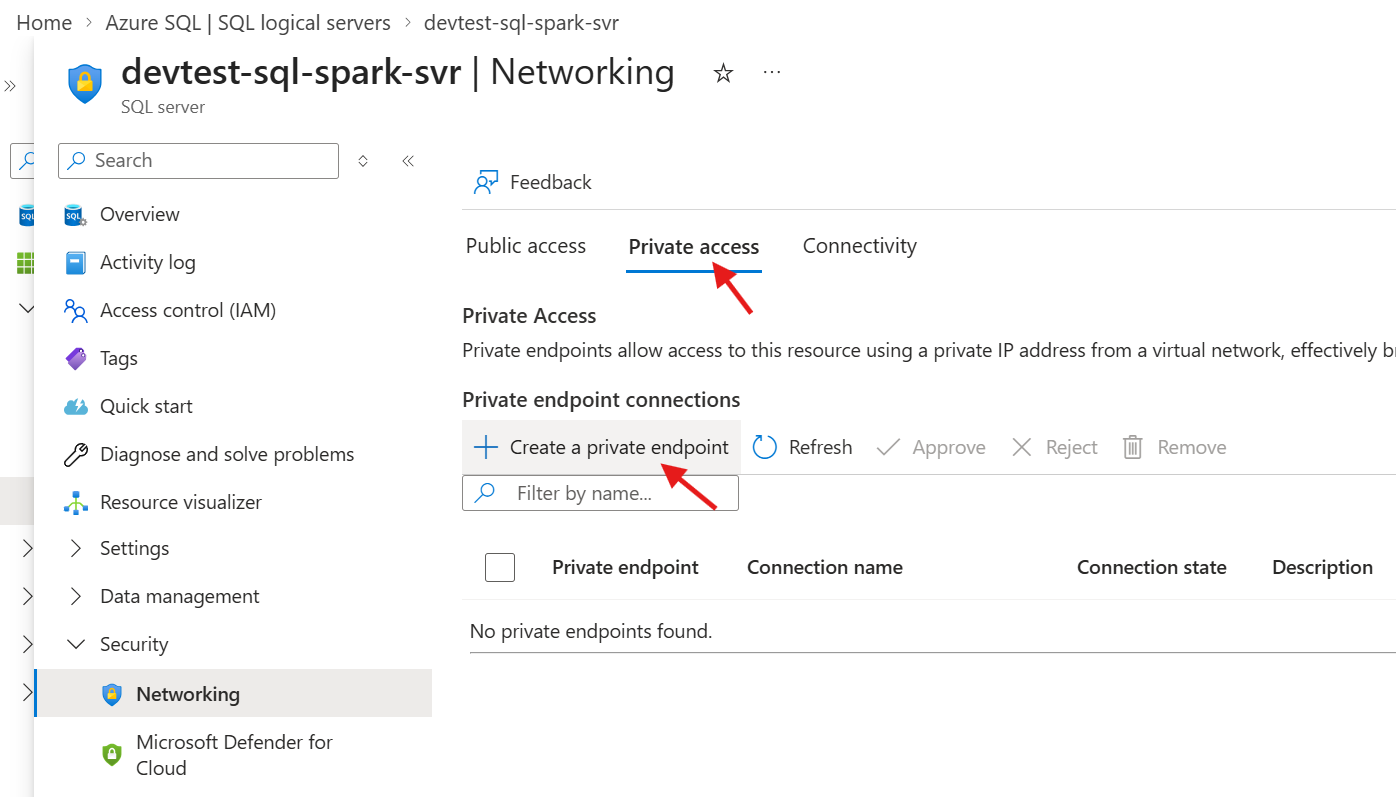
- Select Networking under the Security navigation menu
- Select the option to Disable the Public Access
- Select Save
- Select Private Access
- Select + Create a Private Endpoint
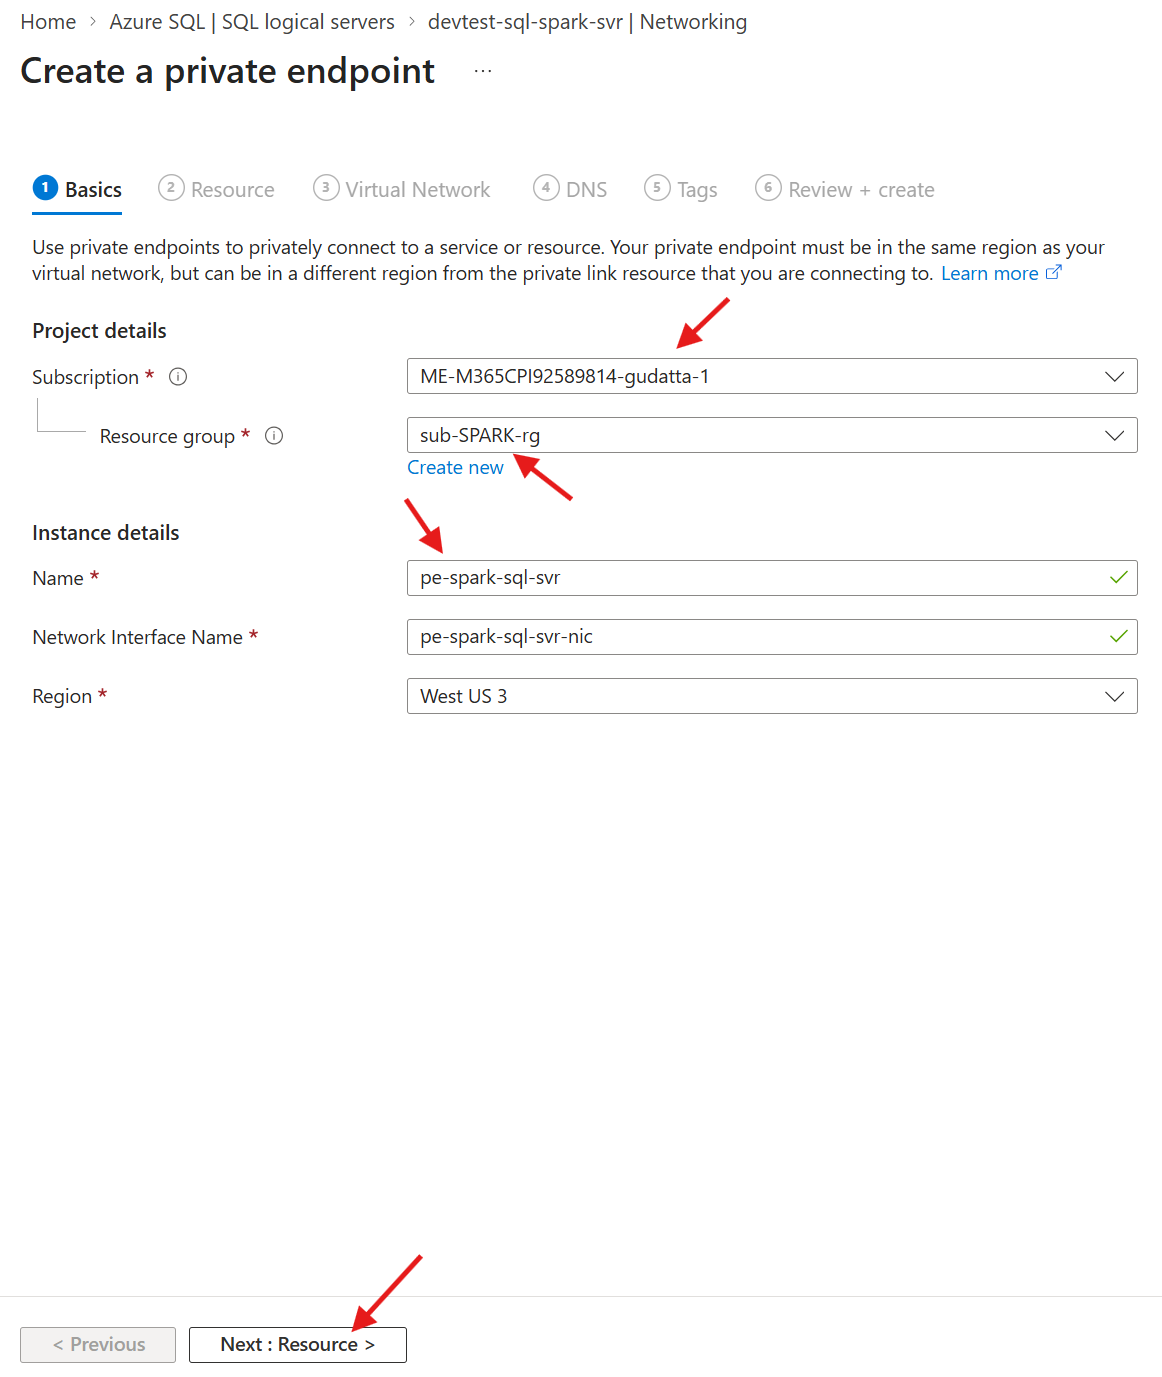
- Fill in the values and select Next until you get to the Virtual Network tab
| Name |
Value |
| Subscription |
The subscription associated with this account |
| Resource Group |
The Resource Group created for SPARK |
| Name |
pe-spark-sql-svr |
- Fill in the values and select Next until you get to the Virtual Network tab
- Select Next until you get to Review + Create
- Select Create
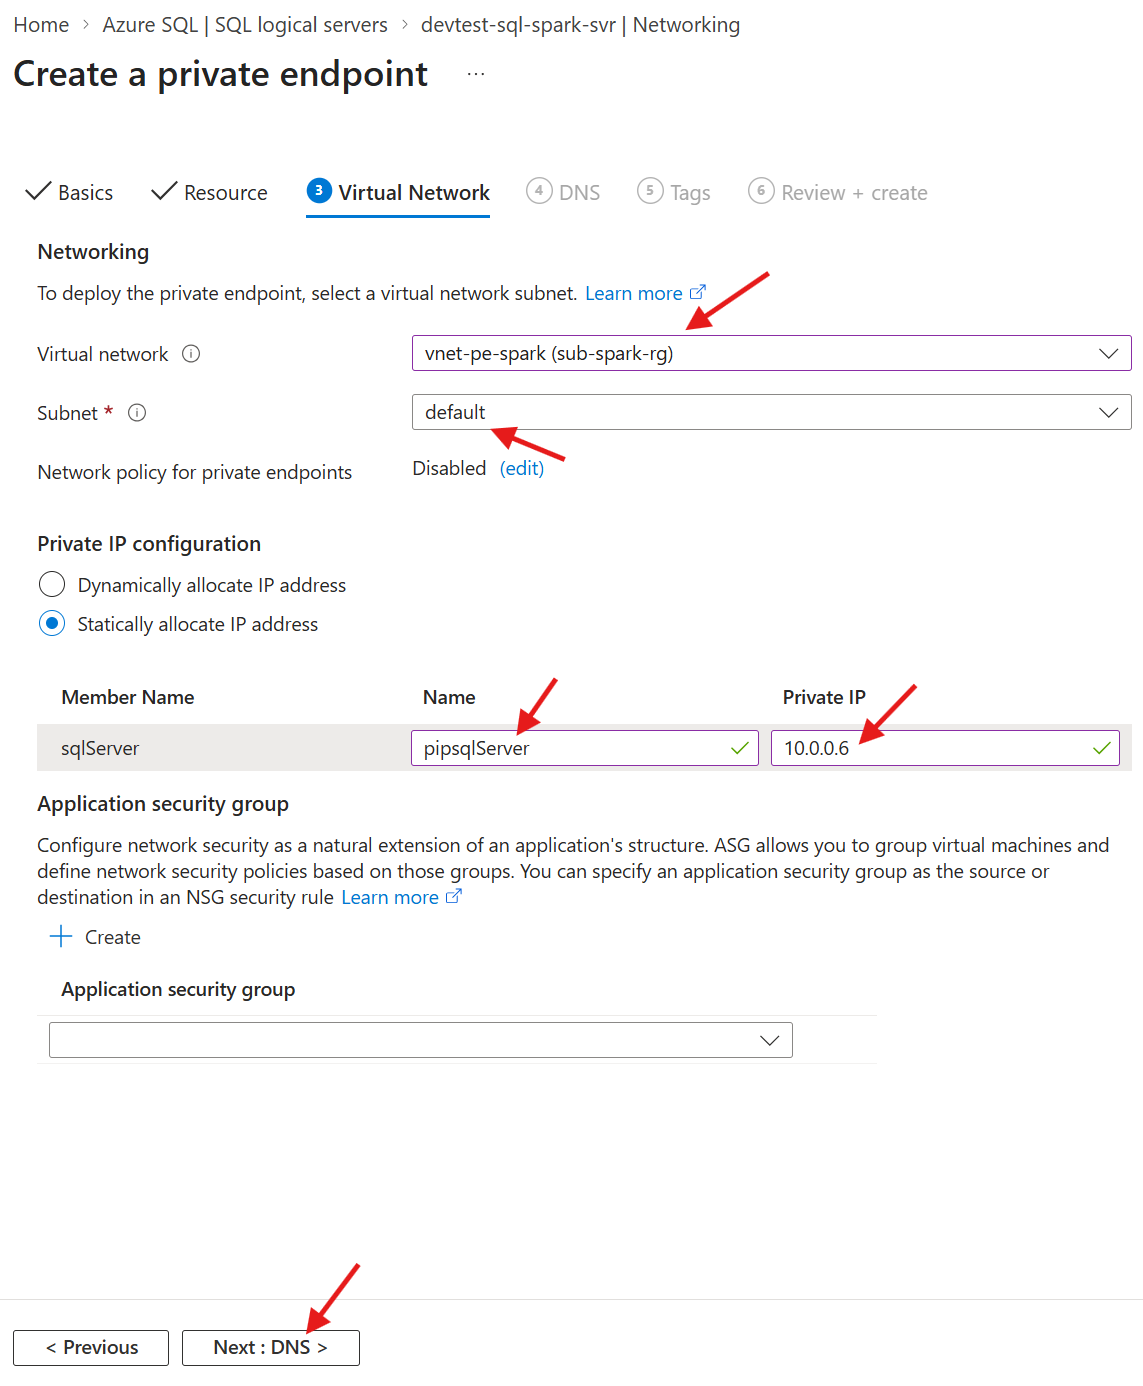
| Name |
Value |
| Virtual Network |
vnet-spark-pe |
| Subnet |
default |
| Private IP Configuration |
Statically allocate IP address |
| Name |
pipsqlServer |
| Private IP |
10.0.0.6 |