
TIP
🔥 Make sure you star the repo (opens new window) to keep up to date with new tips and tricks.
💡 Learn more : Azure Storage account overview (opens new window).
📺 Watch the video : How to move Azure Storage Blobs between containers (opens new window).
# How to move Azure Storage Blobs between containers
# Easy file management
Azure Storage (opens new window) is a versatile and secure storage service. You can create storage containers with folder hierarchies and store Blobs (opens new window) in them. But it isn't very straightforward to move Blobs between containers or between storage accounts. Azure offers several options to help with this, including Azure Storage Explorer (opens new window).
In this post, we'll use Azure Storage Explorer (opens new window) to move Blobs (opens new window) between containers in Azure Storage Accounts (opens new window).
# Prerequisites
If you want to follow along, you'll need the following:
- An Azure subscription (If you don't have an Azure subscription, create a free account (opens new window) before you begin)
- Two existing Azure Storage accounts (opens new window) with Blobs in one of them. Learn how to work with Blobs here (opens new window)
# Copy Blobs with Azure Storage Explorer
I have two Azure Storage accounts. In one of them, I have a container that contains several Blobs. Let's move those Blobs to the other Storage account.
- Go to the Azure portal (opens new window)
- Open the Storage Account that contains the Blobs
- Navigate to the Data migration menu
- Click on the "Browse data migration tools" button. This will show all the options to migrate or move data in Azure Storage. There are many options, including the Azure CLI, Azure Data Factory, AzCopy and the Azure Storage Explorer. This last one is a GUI-based application that enables you to manage data in Azure Storage

(Azure Storage data migration options)
- We'll use the Azure Storage Explorer to manage Blobs. Go to http://aka.ms/storageexplorer (opens new window) and click Download now
- Use the downloaded file to install the Azure Storage Explorer on your machine and open it
- When prompted, sign into your Azure account
- Now you can see your Storage accounts and navigate through them. You can add and delete containers and Blobs. Navigate to the container that contains the Blobs, right-click on it and click "Copy Blob Container"
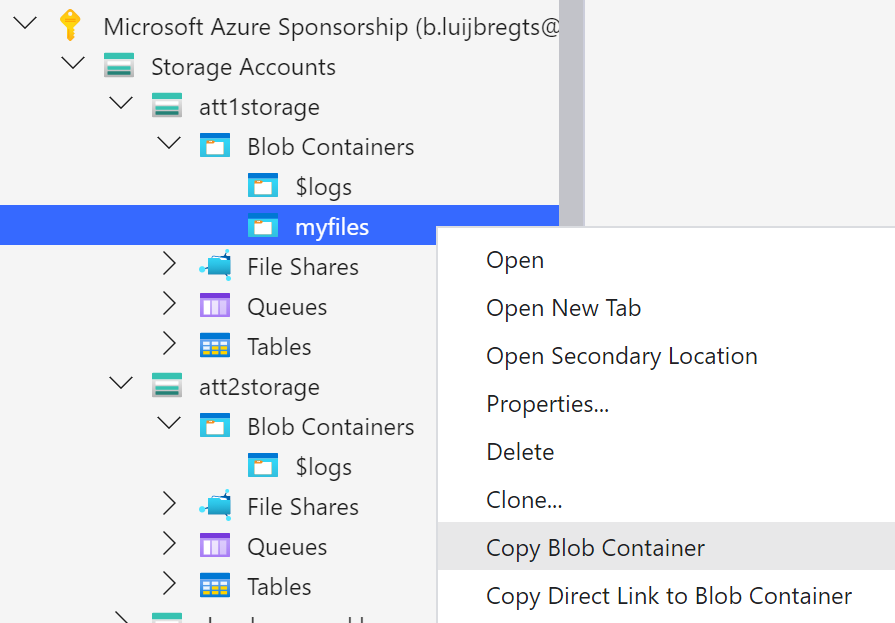
(Copy Blob Container in the Azure Storage Explorer)
- Navigate to the other Azure Storage account, right-click the Blob Containers node and click "Paste Blob Container". This copies the entire container, including Blobs and properties, to the Storage account
- Click on the original container. This will reveal the Blobs in it
- Select all the Blobs and click on the Delete button in the top menu. This is needed to move the Blobs, as there is no cut and paste functionality
Alternatively, you can also copy the Blobs that you need and paste them in any container, including in containers of other Storage accounts.
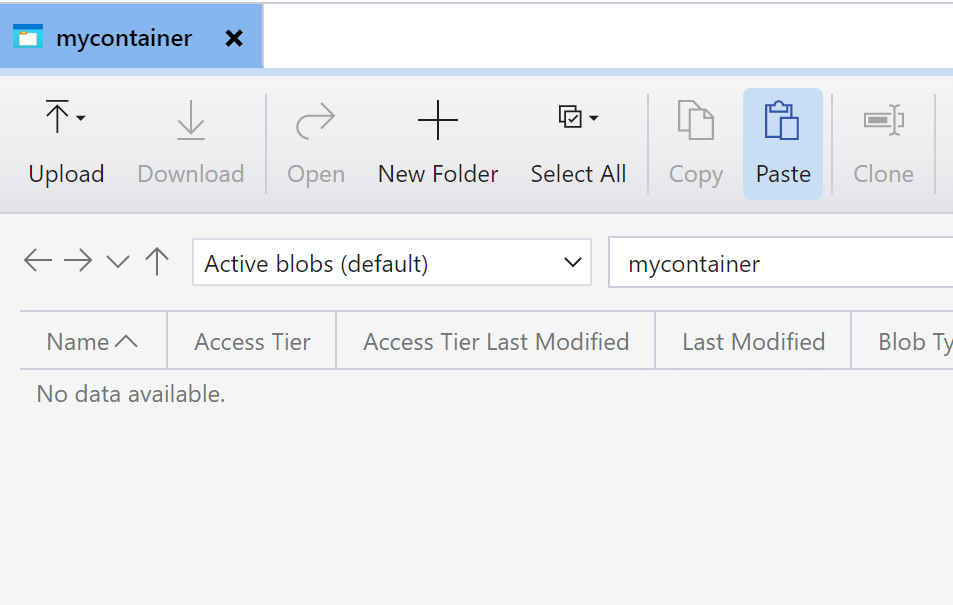
(Paste Blobs to a container in the Azure Storage Explorer)
# Conclusion
The Azure Storage Explorer (opens new window) is a GUI-based tool that enables you to easily manage your data in Azure Storage (opens new window). Go and check it out!