
TIP
🔥 🔥 Download the FREE Azure Developer Guide eBook here (opens new window).
💡 Learn more : What is the Azure Face service? (opens new window)
📺 Watch the video : How to identify faces with the Azure Face service (opens new window).
# How to identify faces with the Azure Face service
# Automatic face detection
Detecting and recognizing faces programmatically can be very difficult. Azure Face service provides this capability to you as-a-service. Azure Face service (opens new window) is an API that you can call and use in your applications to detect faces and facial features in images. It comes with a pre-trained machine learning model, so you only have to use the service, not configure or manage it.
In this post, we'll use Azure Face service (opens new window) to detect a face and facial features.
# Prerequisites
If you want to follow along, you'll need the following:
- An Azure subscription (If you don't have an Azure subscription, create a free account (opens new window) before you begin)
# Create and use an Azure Cognitive Services Face Service
We'll start by creating a Face service resource in the Azure portal.
- Go to the Azure portal (opens new window)
- Click the Create a resource button (the plus-sign in the top left corner)
- Search for Face, select the "Face" result and click Create
- Select a Resource Group
- Pick a Region for the service
- Fill in a Name
- Select a Pricing tier. The "Free F0" tier is fine
- Check the box to agree to the terms
- Click Review + create and then Create
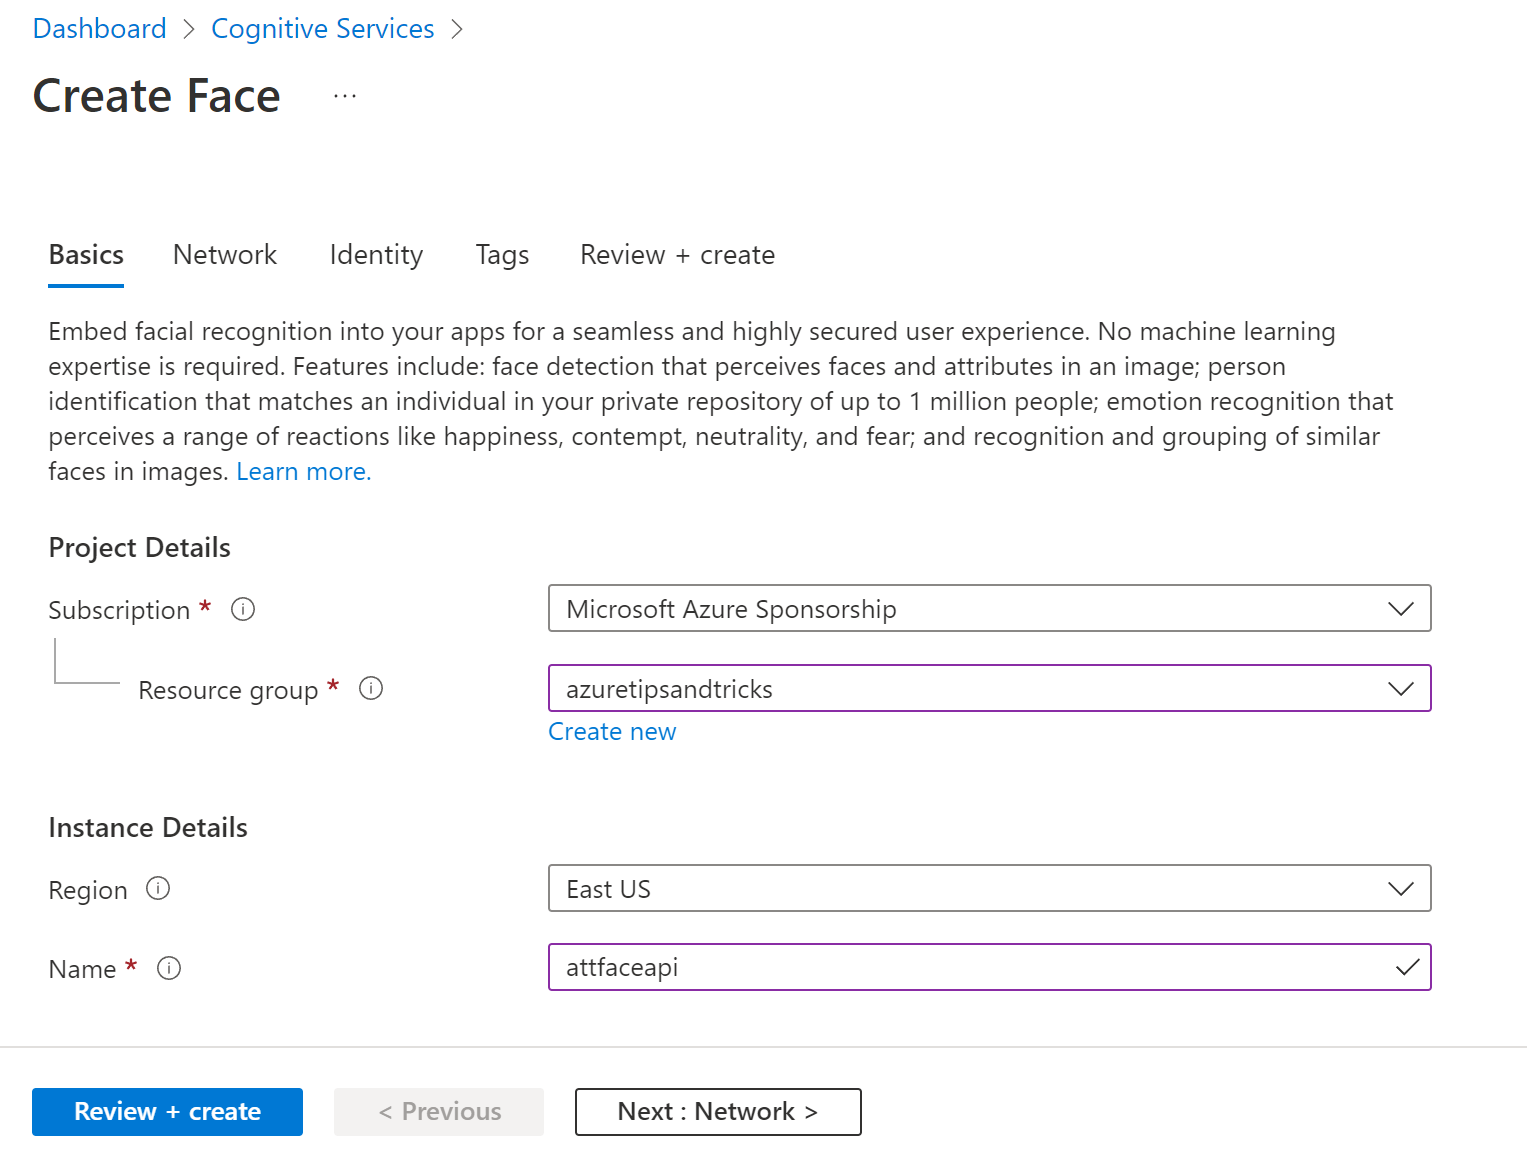
(Create a Face service resource)
When the Face service is created, navigate to it in the Azure portal.
- In the Face service, click on the Quick start menu
- We will use the API console to test the service. Click on API console
- Scroll down and select the Azure region in which you created the service. This will reload the page and makes sure that we are calling the correct service endpoint
- We will enter all the information to make an API call to the Face service and test it. Scroll to the Query parameters
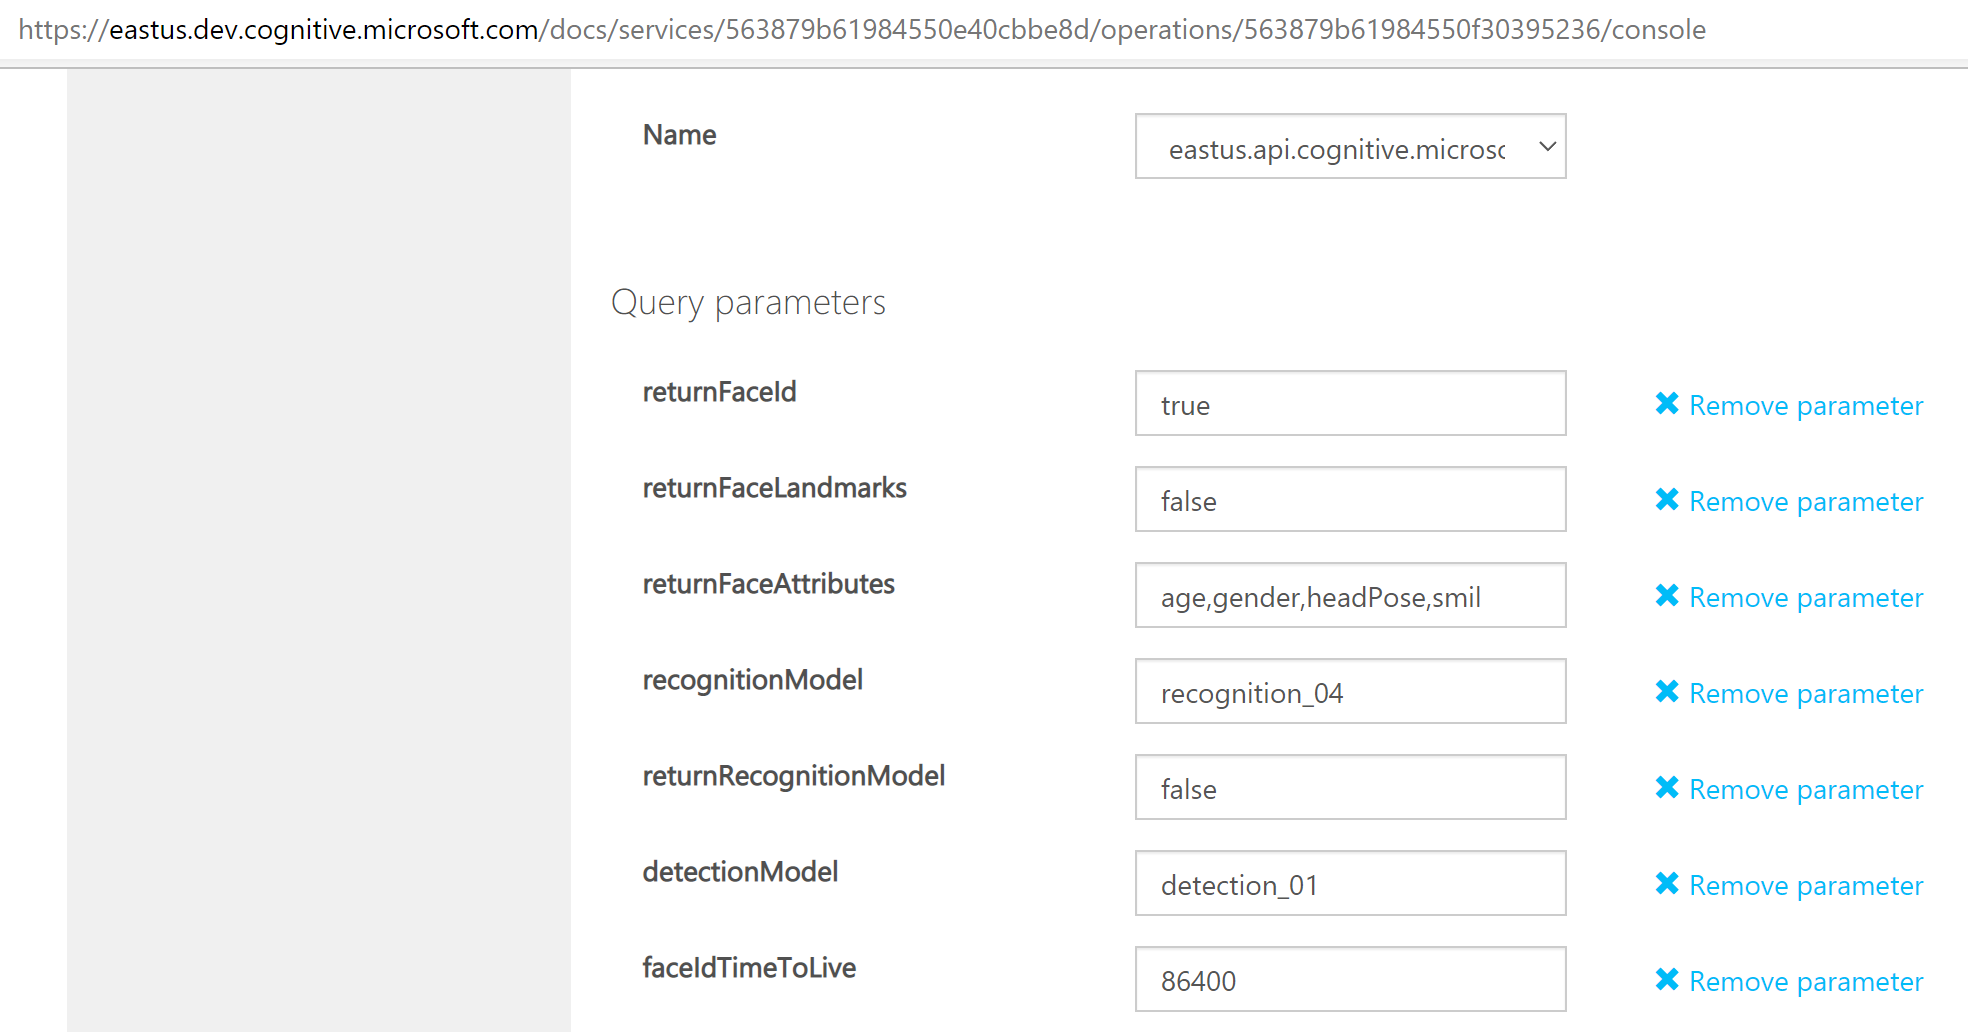
(Query parameters in the API Console)
- For returnFaceAttributes, enter "age,gender,headPose,smile,facialHair,glasses,emotion,hair,makeup,occlusion,accessories,blur,exposure,noise". You can find a list of all possible face attributes here (opens new window)
- Change the detectionModel to detection_01
- Go to Headers. You need to enter the Face service subscription key here
- Go back to the Face service in the Azure portal
- Navigate to the Keys and Endpoint menu
- Copy KEY 1
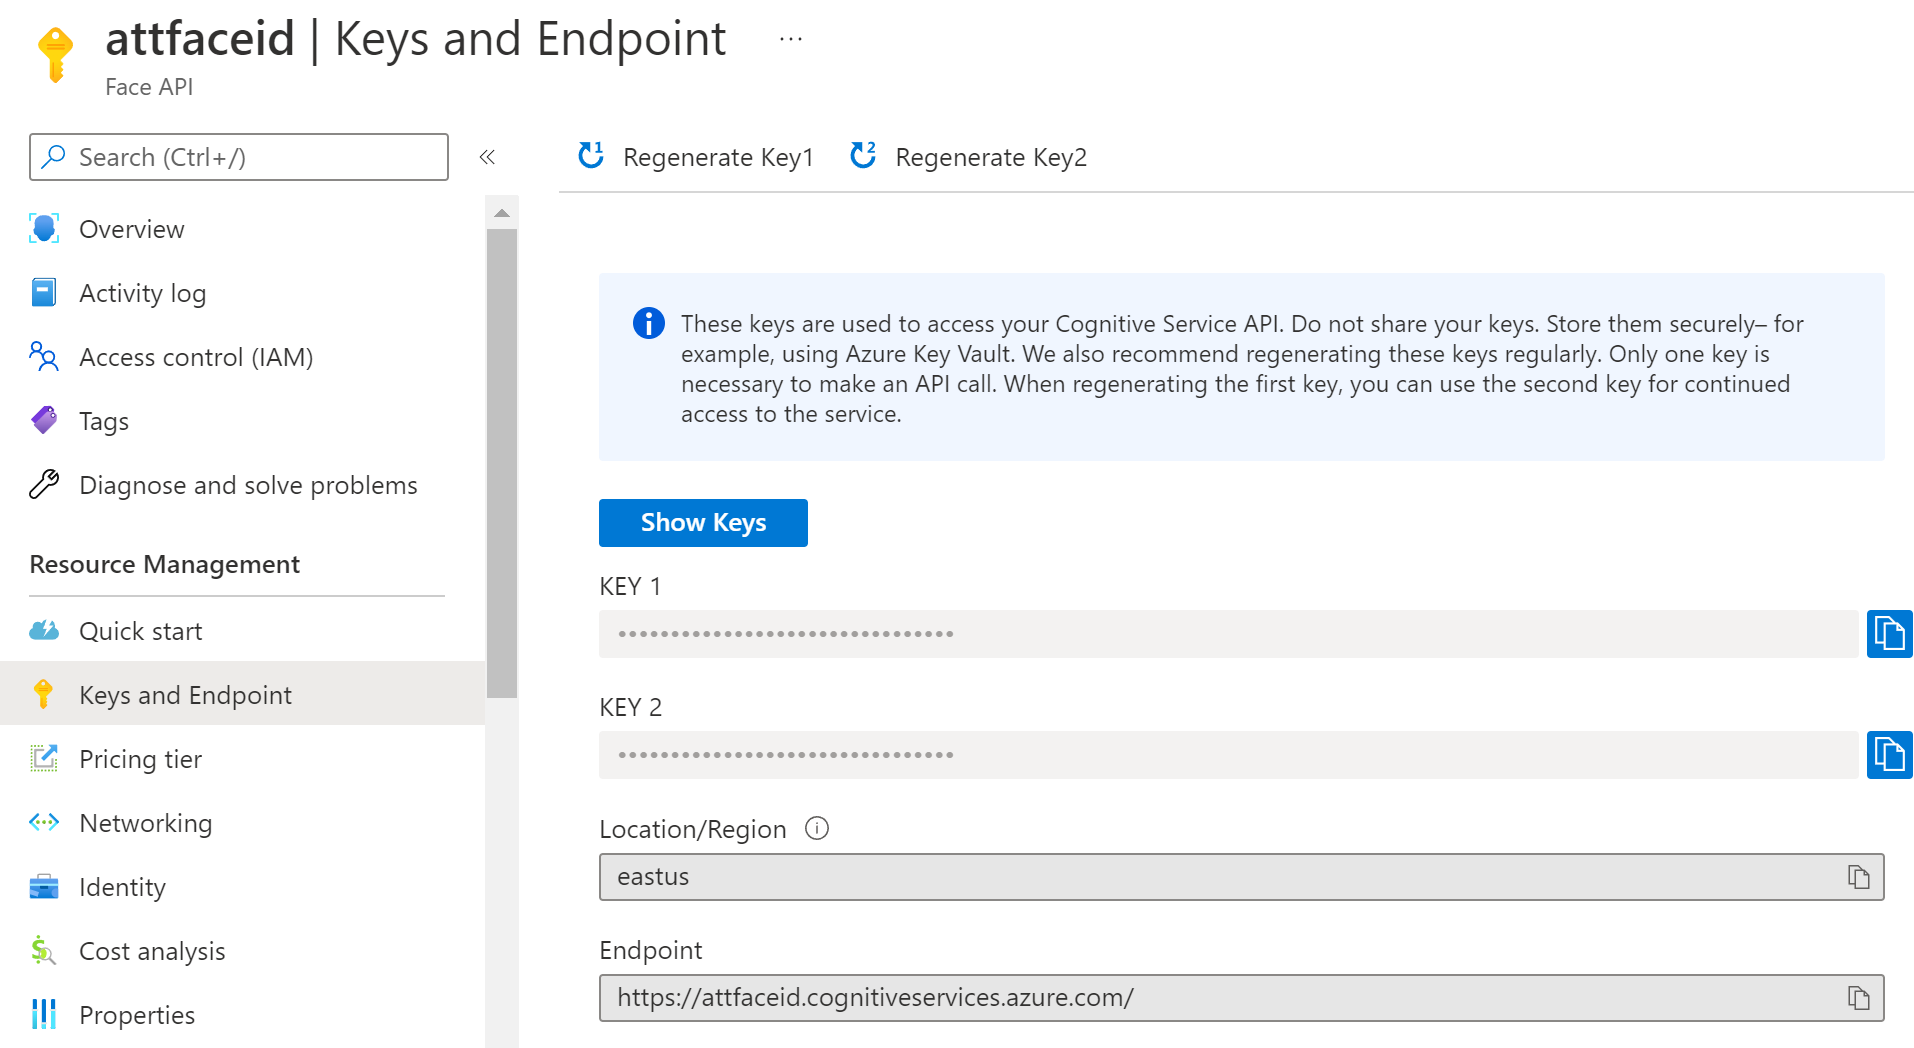
(Keys and endpoints of the Face service)
- Back in the API console, paste the key value in the Ocp-Apim-Subscription-Key field
- In the request body, change the url value to "https://upload.wikimedia.org/wikipedia/commons/c/c3/RH_Louise_Lillian_Gish.jpg". This is a sample picture on wikipedia
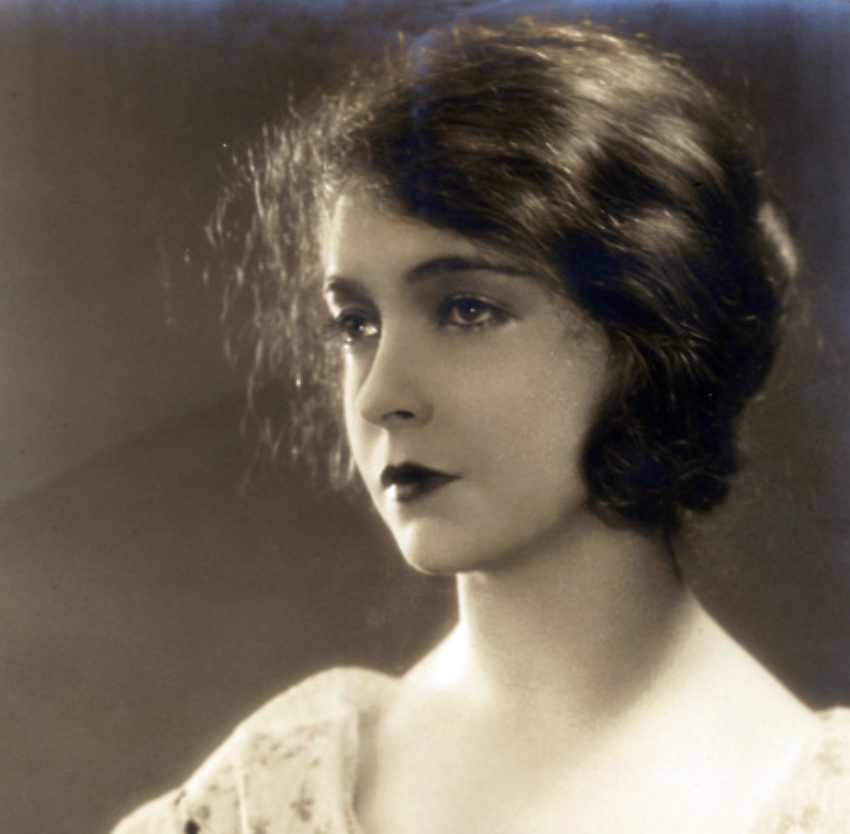
(Sample picture on wikipedia)
- Click Send to send the request to the Face service
- The Response status should be 200 OK if everything went alright. This should result in a Response content that looks like the one below. This shows that one face was detected in the image, and that the face is likely to be of a female, 23 years old, without glasses and with brown hair. Pretty cool, right?
x-envoy-upstream-service-time: 533
apim-request-id: c35cf15b-d1ac-4b36-9c13-aaf758daaff4
Strict-Transport-Security: max-age=31536000; includeSubDomains; preload
x-content-type-options: nosniff
CSP-Billing-Usage: CognitiveServices.Face.Transaction=1
Date: Fri, 07 15:13:42 GMT
Content-Length: 1019
Content-Type: application/json; charset=utf-8

[{
  "faceId": "be10f68d-b895-40b6-b3bb-e57bde7fcd9c",
  "faceRectangle": {
    "top": 131,
    "left": 177,
    "width": 162,
    "height": 162
  },
  "faceAttributes": {
    "smile": 0.001,
    "headPose": {
      "pitch": -5.7,
      "roll": -9.1,
      "yaw": -34.1
    },
    "gender": "female",
    "age": 23.0,
    "facialHair": {
      "moustache": 0.0,
      "beard": 0.0,
      "sideburns": 0.0
    },
    "glasses": "NoGlasses",
    "emotion": {
      "anger": 0.0,
      "contempt": 0.0,
      "disgust": 0.0,
      "fear": 0.0,
      "happiness": 0.001,
      "neutral": 0.987,
      "sadness": 0.001,
      "surprise": 0.01
    },
    "blur": {
      "blurLevel": "low",
      "value": 0.06
    },
    "exposure": {
      "exposureLevel": "goodExposure",
      "value": 0.67
    },
    "noise": {
      "noiseLevel": "low",
      "value": 0.0
    },
    "makeup": {
      "eyeMakeup": true,
      "lipMakeup": true
    },
    "accessories": [],
    "occlusion": {
      "foreheadOccluded": false,
      "eyeOccluded": false,
      "mouthOccluded": false
    },
    "hair": {
      "bald": 0.01,
      "invisible": false,
      "hairColor": [{
        "color": "brown",
        "confidence": 1.0
      }, {
        "color": "gray",
        "confidence": 0.53
      }, {
        "color": "black",
        "confidence": 0.51
      }, {
        "color": "blond",
        "confidence": 0.13
      }, {
        "color": "red",
        "confidence": 0.13
      }, {
        "color": "other",
        "confidence": 0.02
      }, {
        "color": "white",
        "confidence": 0.0
      }]
    }
  }
}]
2
3
4
5
6
7
8
9
10
11
12
13
14
15
16
17
18
19
20
21
22
23
24
25
26
27
28
29
30
31
32
33
34
35
36
37
38
39
40
41
42
43
44
45
46
47
48
49
50
51
52
53
54
55
56
57
58
59
60
61
62
63
64
65
66
67
68
69
70
71
72
73
74
75
76
77
78
79
80
81
82
83
84
85
86
87
88
89
90
91
92
# Conclusion
You can use the Azure Face service (opens new window) to detect faces and facial features, just by calling an API. Go and check it out!