
TIP
🔥 Help shape the future of Azure Tips and Tricks by telling what you'd like for us to write about here (opens new window).
💡 Learn more : Azure Dashboards overview (opens new window).
📺 Watch the video : How to customize tiles in your Azure dashboard (opens new window).
# How to customize tiles in your Azure dashboard
# Information at a glance
Azure provides many services and capabilities. To access them and to see how they are doing, you can use the Azure portal (opens new window). And to make it even easier, the Azure portal provides Dashboards (opens new window), which let you monitor resources and quickly launch tasks for day-to-day operations.
In this post, we'll customize an Azure Dashboard (opens new window).
# Prerequisites
If you want to follow along, you'll need the following:
- An Azure subscription (If you don't have an Azure subscription, create a free account (opens new window) before you begin)
# Customize your Azure Dashboards
Let's customize a dashboard in the Azure portal.
- Go to the Azure portal (opens new window)
- If your Azure portal is configured to show Home, click on the top-left menu and select Dashboard. You can configure to see dashboards by default in the Azure portal settings
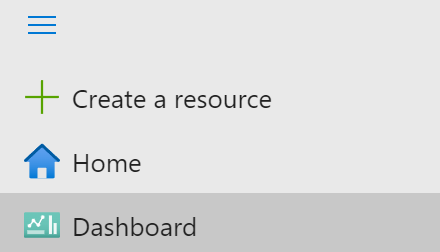
(Dashboard in the Azure portal menu)
- In the dashboard, click on the Edit button. This puts the dashboard in customizing mode and opens the Tile Gallery
- Find and select the "Resource groups" tile from the Tile Gallery, and click Add
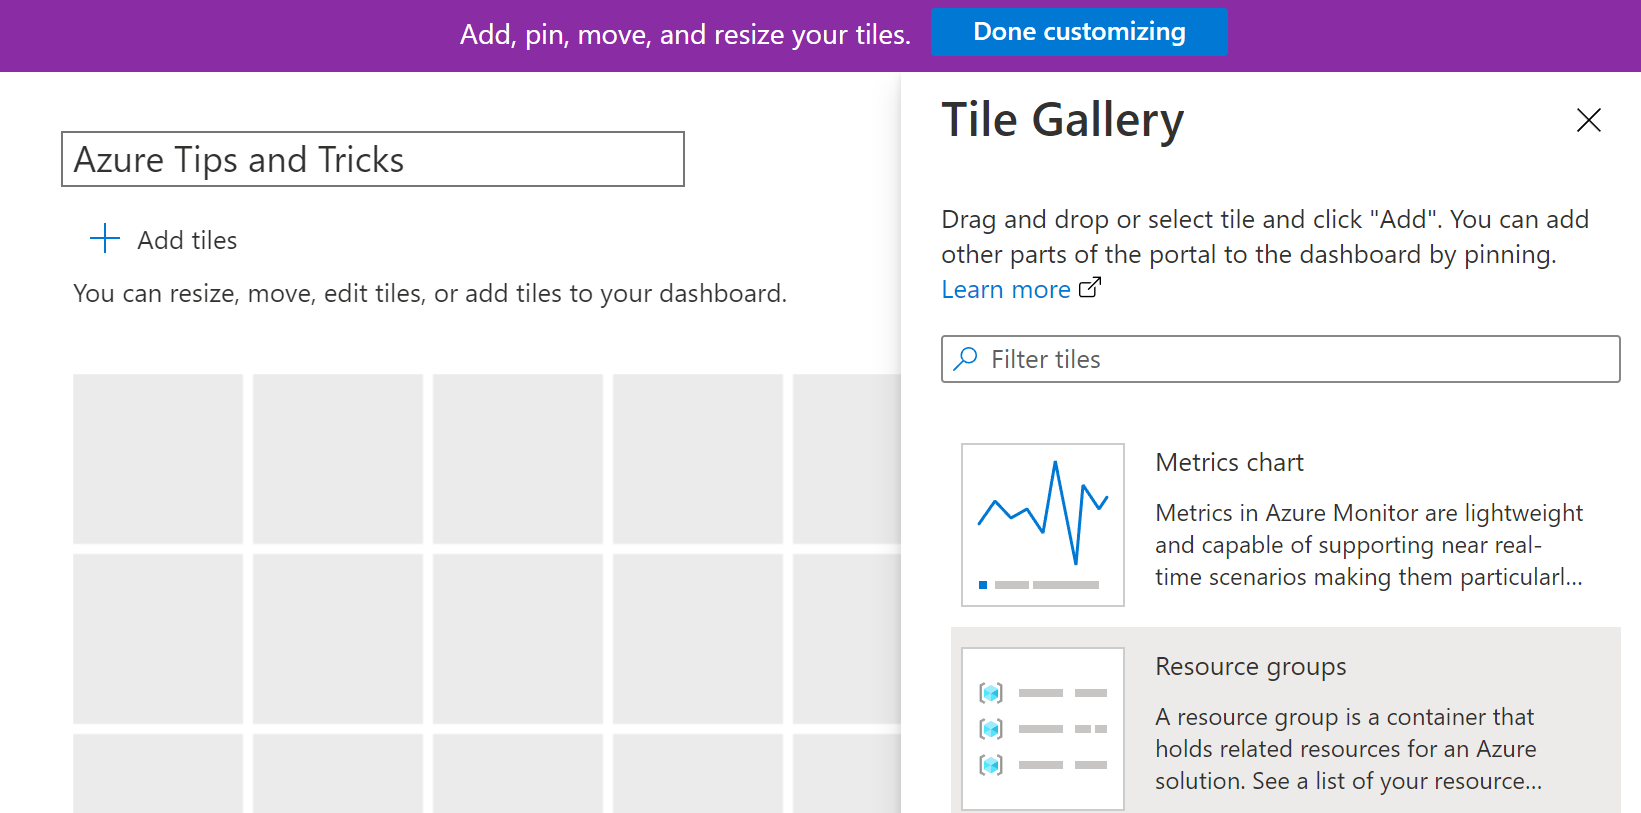
(Add a tile from the Tile Gallery)
- You now have a tile that shows all of your resource groups. Click on the edge of the tile and drag it to resize it
- Click on the ... button in the top-right of the tile to open its menu. From here, you can choose a size for the tile and refresh it, copy it, delete it, and further configure it
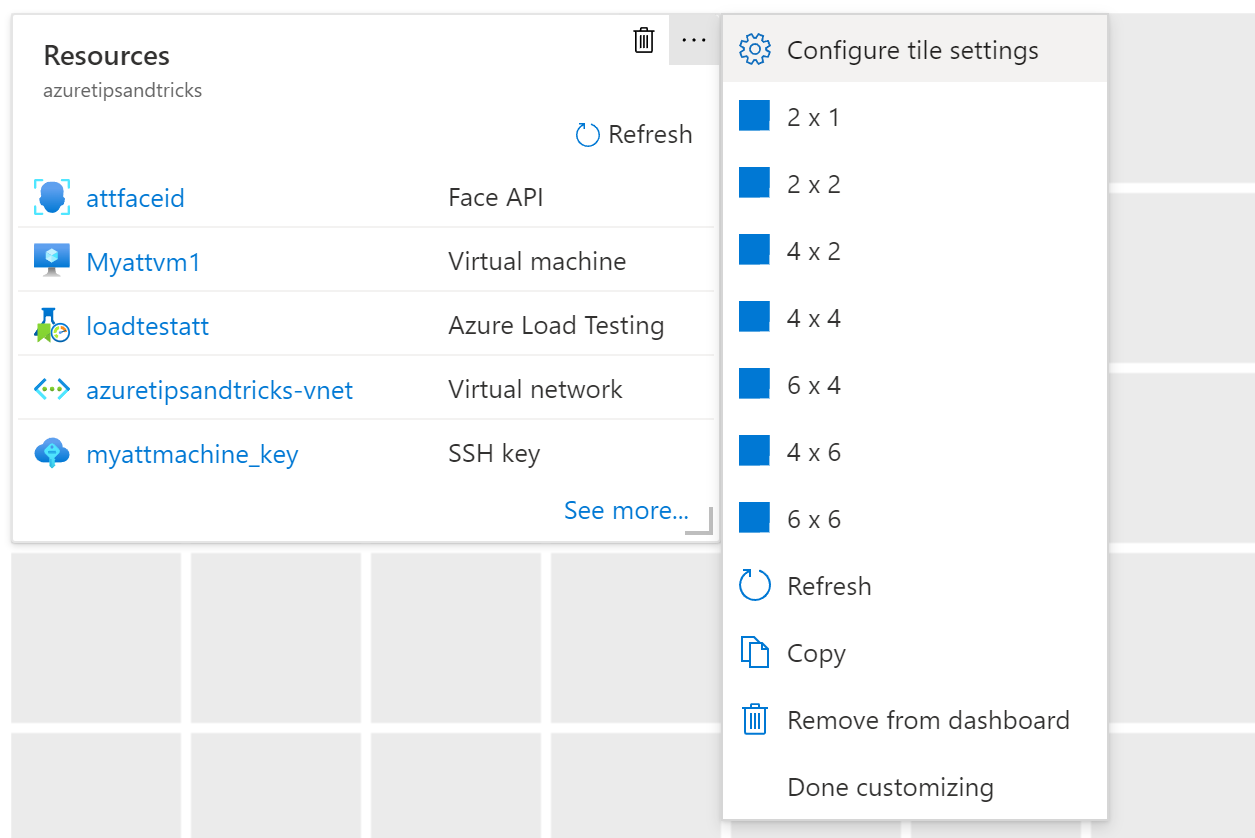
(The tile menu)
- In the tile menu, click "Customize tile settings"
- Change the Title of the tile
- Enter a Subtitle
- Click Apply. The tile is now changed
You can also add tiles to your dashboard from an Azure service. Let's try that.
- Go to one of your Azure resources and open it in the portal
- In the Overview blade of most Azure resources, you'll see a pin next to the resource name. Click on it. This opens the "Pin to dashboard blade". You can pin any resource you like, including charts, resource groups, and individual resources
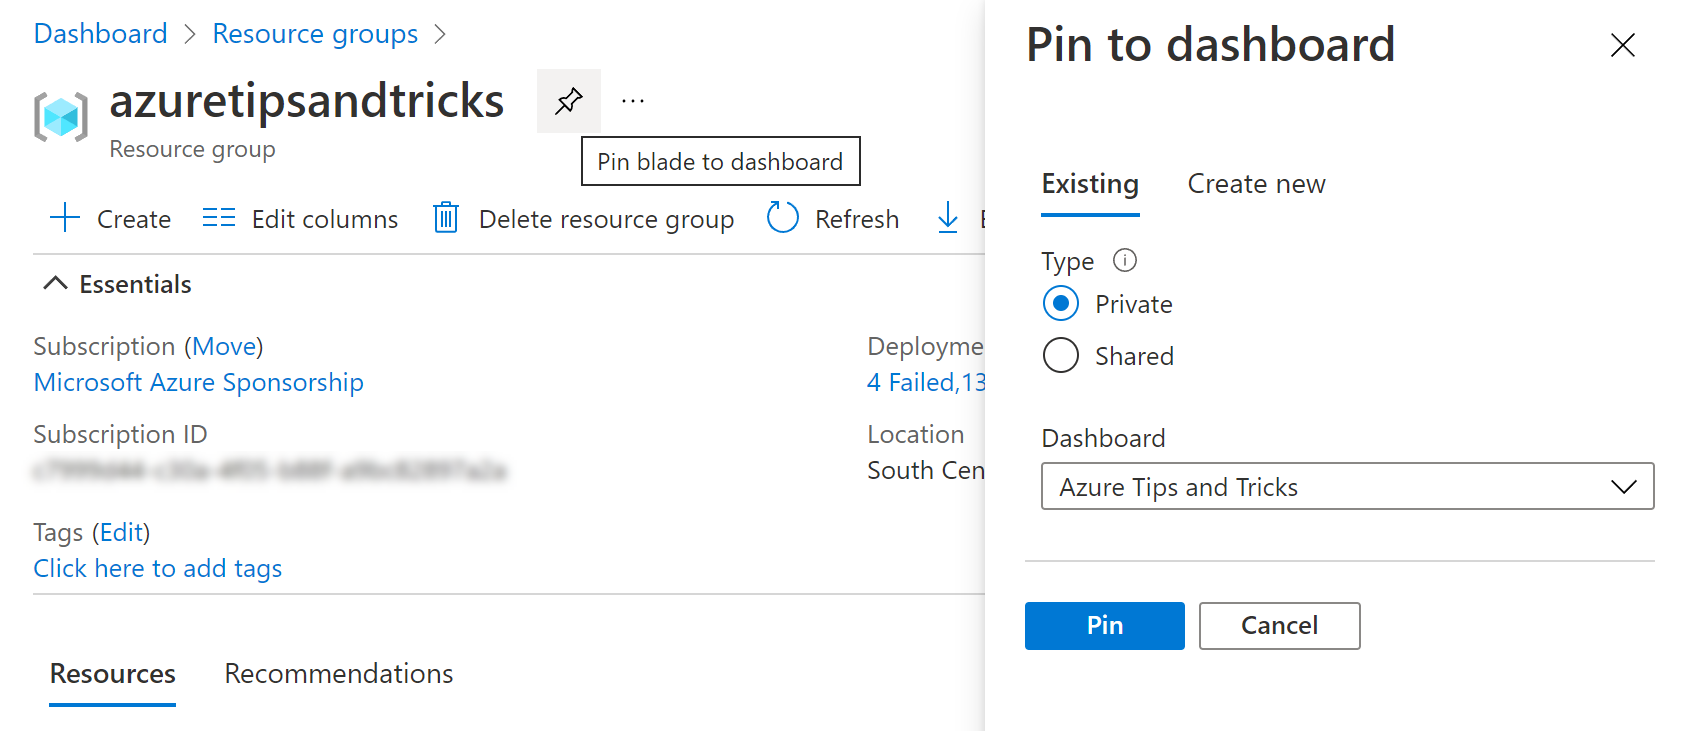
(Pin a resource to a dashboard)
- Choose which dashboard to pin the resource to and click on the Pin button
- Your dashboard opens and shows the pinned resource. If it doesn't, navigate to the dashboard. Right-click on the dashboard and click Edit
- You can now drag the pinned resource to any place on the dashboard. And just like any other tile, you can resize and customize it
# Conclusion
Dashboards (opens new window) in the Azure portal (opens new window) are a great place to create a workspace for your day-to-day Azure work. Go and check it out!