Task 02: Ingest SAP data
Introduction
Ingesting SAP data into Microsoft Fabric involves configuring both cloud and on-premises integration components, preparing datasets, running pipelines, and validating the results across the Silver and Gold layers of a medallion architecture. This process brings together Azure Data Factory, the Business Process Solutions (BPS) workload, SAP source systems, and Power BI to provide a complete end-to-end data ingestion and analytics experience.
Description
In this task, you’ll perform the full workflow required to extract and process SAP data in Microsoft Fabric. You’ll configure the SAP source system in Azure Data Factory, validate the self-hosted integration runtime, set up and activate a dataset, run pipelines that extract metadata and data, and verify that the Silver and Gold lakehouses are populated. You will then deploy Power BI reports, configure a semantic model connection for refreshes, and import required lakehouse views to support downstream insights.
Success criteria
- An SAP source system has been configured in Azure Data Factory.
- A self-hosted integration runtime is running and connected.
- A dataset has been configured and activated using an SAP template.
- Pipelines have been run to extract metadata and data into the Silver lakehouse.
- The Silver lakehouse contains tables populated from SAP.
- Data has been processed into the Gold lakehouse.
- Power BI reports have been deployed using the imported dataset.
- A Fabric connection has been configured to enable semantic model refresh.
- Required lakehouse views have been created and imported successfully.
Duration
Estimated time to complete this exercise: 20 minutes
Key steps
01: Configure an SAP source for Azure Data Factory
-
Return to the web page that displays Fabric or open a new browser tab and go to
app.powerbi.com. -
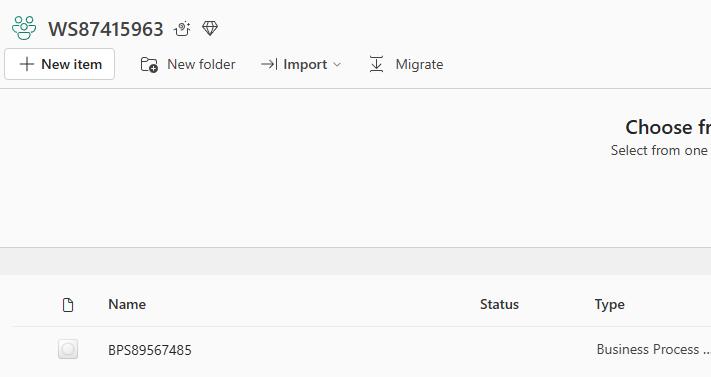
In the left pane, select Workspaces and then select WS57383073.

-
Select the BPS57383073 BPS resource.
-
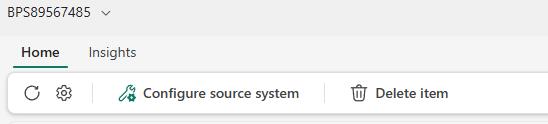
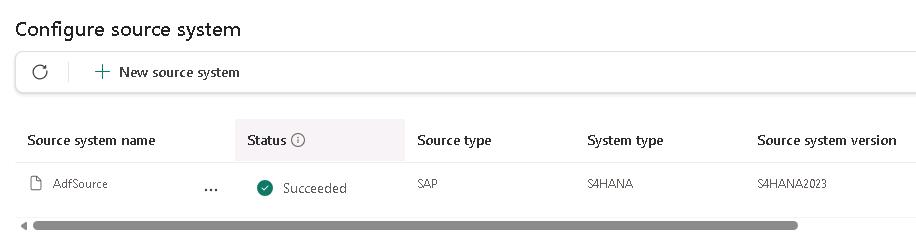
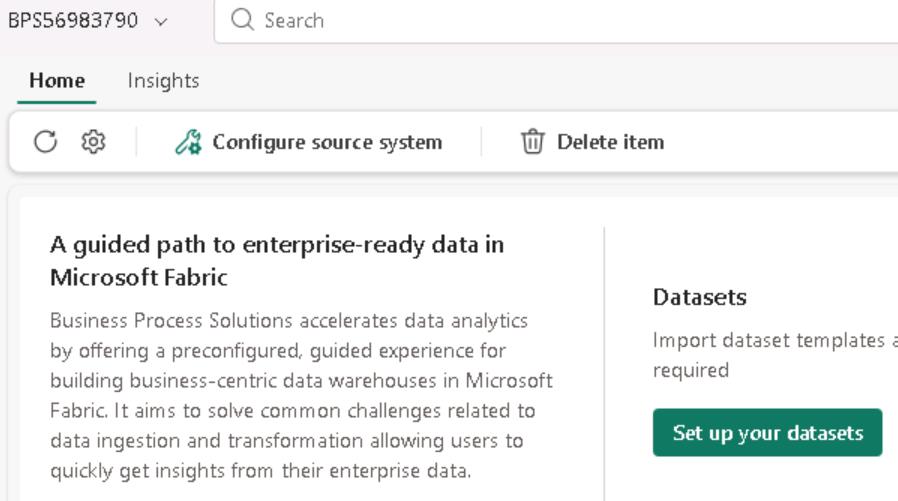
On the BPS57383073 page, on the command bar, select Configure source system.
-
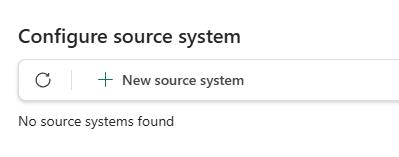
In the Configure source system pane, select + New source system.
-
Configure the fields in the New source system page by using the values in the following table. Leave all other settings at the default values.
Setting Value Source type SAP Source system name AdfSource57383073System type SAP S/4HANA Source system version SAP S/4HANA 2023 Connection type Azure Data Factory Azure Subscription ID insert your cloud subscription Location insert your location Resource group insert your resource group 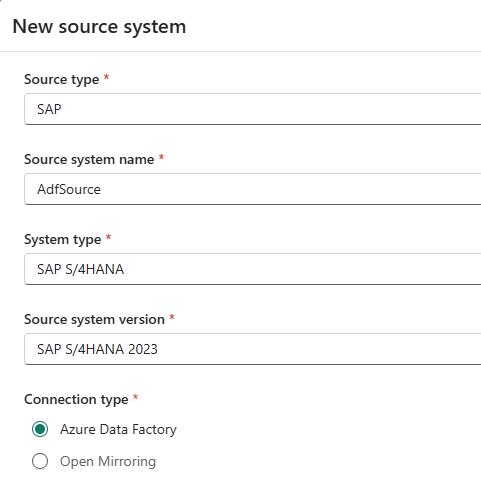
-
Continue configuring the fields in the New source system page by using the values in the following table. Leave all other settings at the default values.
Setting Value Hostname 10.15.0.6SAP Instance number 01SAP Client ID 400Username DATAEXPassword Welcome1Service Principal - Name BPS-SAPapp57383073Service Principal - Object ID @lab.Variable(ObjectID)Service Principal - Client ID @lab.Variable(ClientID)Service Principal - Secret @lab.Variable(Secret)Here you’d use the ID’s saved in your notepad file.
-
Select Create. The Configure source system pane displays the status for the deployment status.
In the Configure source system dialog, on the command bar, select Refresh periodically to monitor progress.
It can take 5-10 minutes for the process to complete.
-
Close the Configure source system pane.
Task 02: Configure a self-hosted integration runtime
-
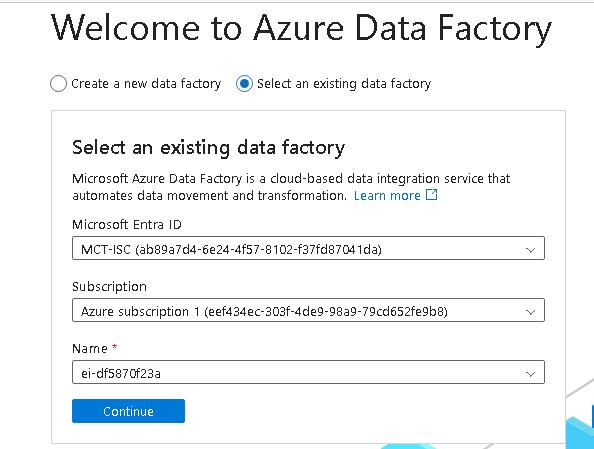
Open a new browser tab and go to
https://adf.azure.com/. -
On the Azure Data Factory page, in the Name field, select the available value and then select Continue.
In the lab, this resource was created for you when you configured the Azure Data Factory source in the previous task. If you’re using your own tenant, you’ll have to set up this yourself.
-
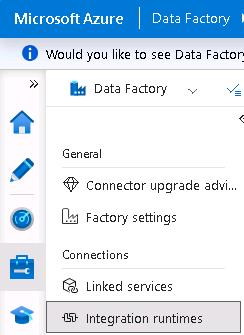
In the left pane, select Manage (the toolbox icon). Then, in the Connections section, select Integration runtimes.
-
Locate the resource of type Self-Hosted and verify that the status is Running.
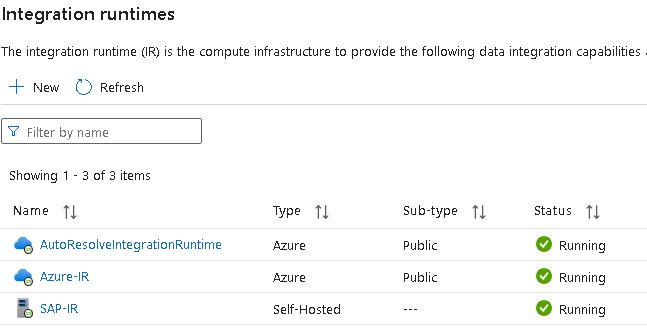
The Running status indicates that the integration runtime is connected to and communicating with the SAP system.
{: .warning } This was set up for you in the hands on lab, if you wish to use this, you have to set it up yourself.
- Leave the Azure Data Factory page open. You will use the page again later in the workshop.
03: Configure a dataset
-
Return to the web page that displays Fabric or open a new browser tab and go to
app.powerbi.com. -
In the left pane, select Workspaces and then select WS57383073.
-
Select the BPS57383073 BPS resource.
-
On the BPS57383073 page, on the command bar, select Set up your datasets.
-
You may see the Additional authentication or authorization required dialog. If you do, select Continue and sign in by using your tenant’s credentials.
-
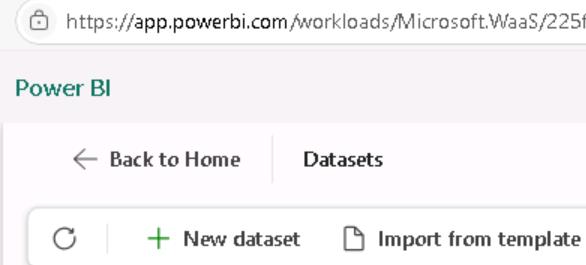
On the Datasets page, on the command bar, select Import from template.
-
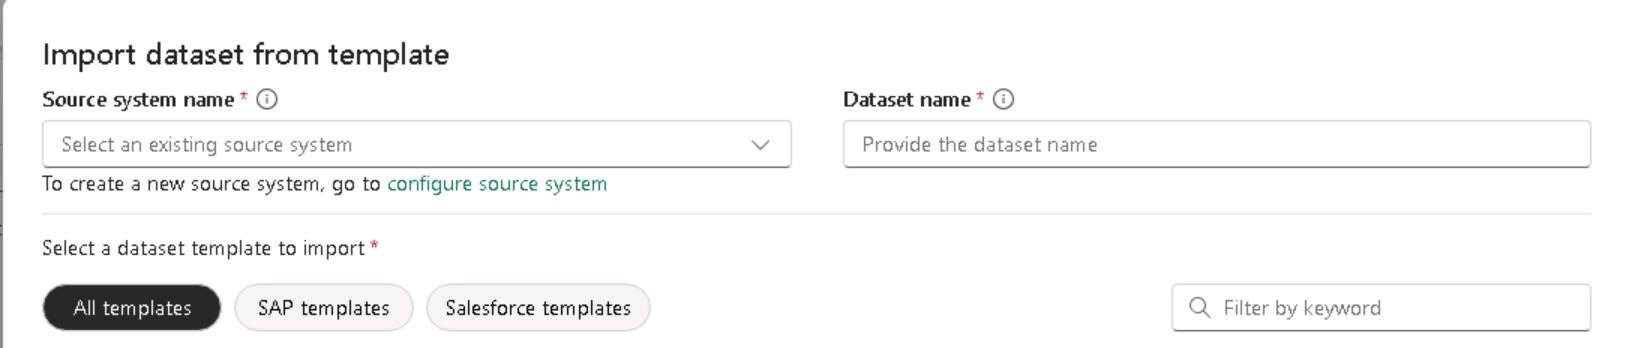
In the Import dataset from template dialog, select SAP templates:
Setting Value Source system name AdfSource57383073 Dataset name SAPds57383073spend
-
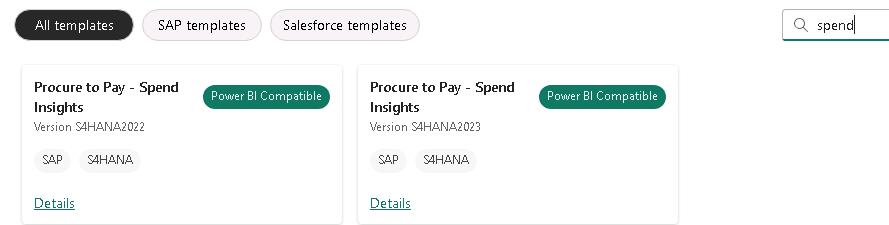
In the Filter by keyword field, enter
Spend. -
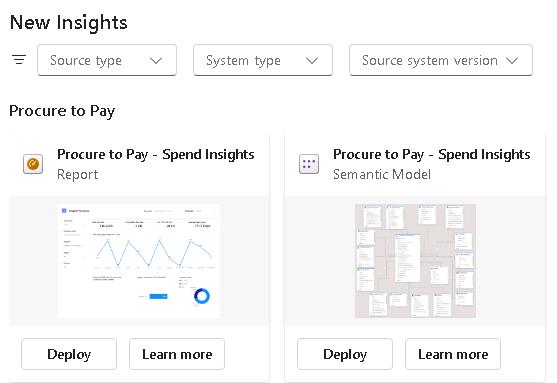
Select the Procure to pay - Spend Insights tile and then select Import.
You may see multiple versions of the template. Each version targets a specific version of SAP S4HANA. Be sure to select the S4HANA2023 version.
The Spend Insights dataset forms the foundation for Spend Insights dashboard. It provides a consolidated view of organizational expenditure across multiple dimensions.
The dataset also enables monitoring of spending behavior, identification of cost-saving opportunities, and assurance of compliance with procurement policies within a single reporting layer.
-
In the list of datasets, select SAPds57383073 and then, on the command bar, select Activate datasets.
On the command bar, you may need to select Refresh to see the newly created dataset.
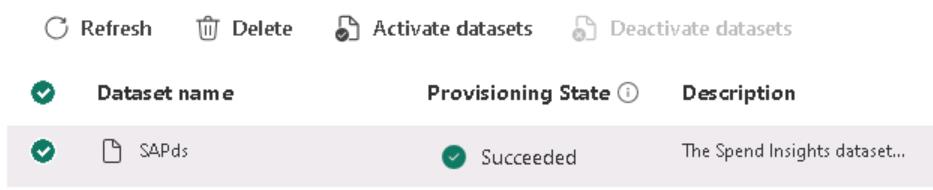
Datasets are created in a disabled state. You must activate the dataset to use it.
-
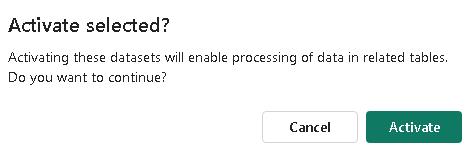
In the Activate selected dialog, select Activate.
-
It may take 1-3 minutes for the provisioning to complete. Do not proceed to the next task until the provisioning state for the dataset is Succeeded.
-
Leave the Fabric page open. You will use the page again later in the workshop.
04: Run a pipeline to extract field metadata
-
Return to the Azure Data Factory page or open a new browser tab and go to
https://adf.azure.com/. -
On the Azure Data Factory page, in the Name field, select the available value and then select Continue.
-
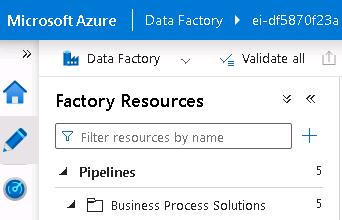
In the left pane, select Author (the pencil icon). Expand the Pipelines section and then expand Business Process Solutions.
-
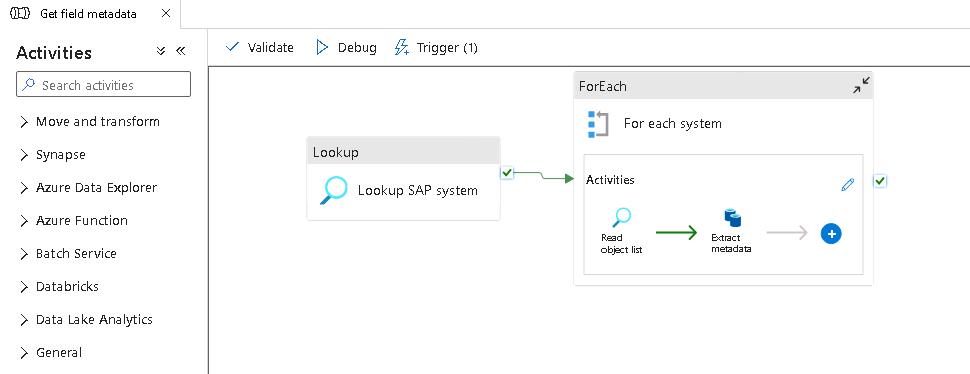
In the Business Process Solutions section, select the Get field metadata pipeline.
-
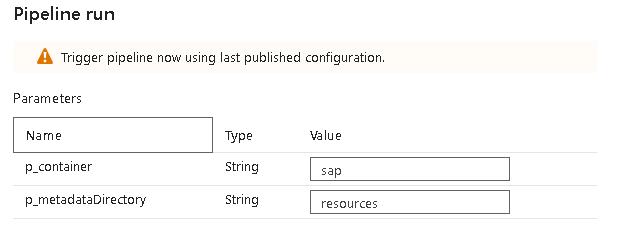
On the command bar, select Add Trigger and then select Trigger now.
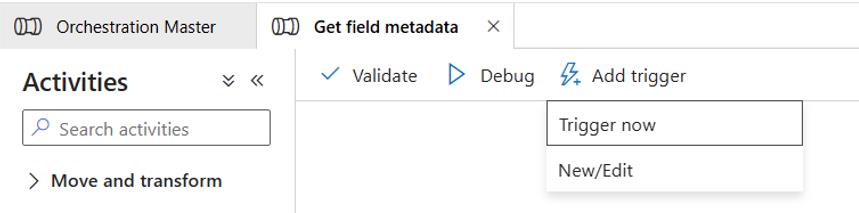
-
In the Pipeline run pane, select OK.

-
On the command bar, select Notifications (the bell icon).
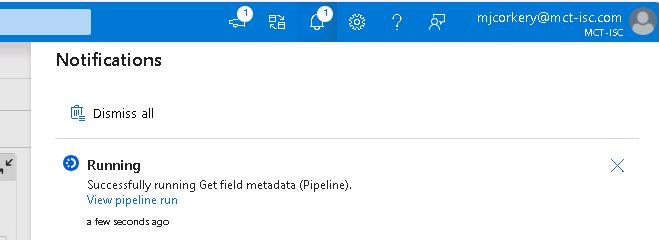
-
In the Notifications pane, select View pipeline run. This allows you to monitor to pipeline process.
-
Do not proceed to the next task until the pipeline completes successfully.
The pipeline populates the metadata table. It may take 15-20 minutes for the pipeline to complete.
-
Leave the Fabric page open. You will use the page again later in the workshop.
05: Extract data
-
Return to the Azure Data Factory page or open a new browser tab and go to
https://adf.azure.com/. -
On the Azure Data Factory page, in the Name field, select the available value and then select Continue.
-
In the left pane, select Author (the pencil icon). Expand the Pipelines section and then expand Business Process Solutions.
-
In the Business Process Solutions section, select the Orchestration Master pipeline.
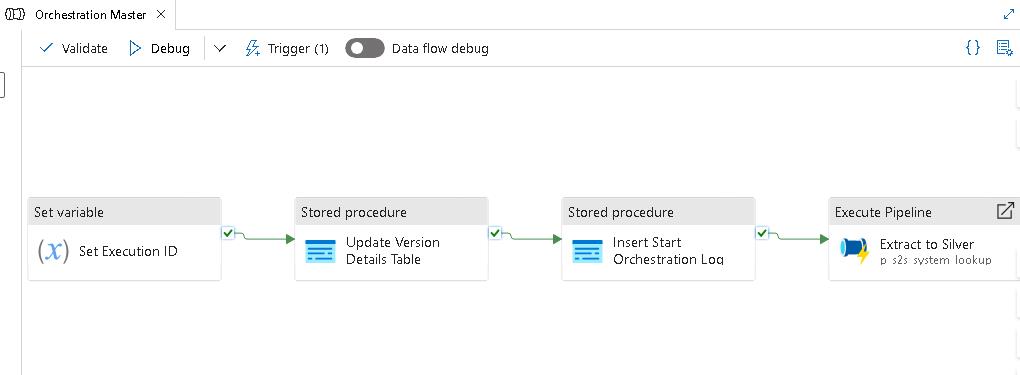
-
On the command bar, select Add trigger and then select Trigger now.
-
In the Pipeline run pane, select OK.
-
On the command bar, select Notifications (the bell icon).
-
In the Notifications pane, select View pipeline run. This allows you to monitor to pipeline process.
-
Do not proceed to the next task until the pipeline completes successfully.
The pipeline populates the metadata table. It may take 2-3 minutes for the pipeline to complete.
06: Verify that the Silver lakehouse contains tables
-
Return to the web page that displays Fabric or open a new browser tab and go to
app.powerbi.com. -
In the left pane, select Workspaces and then select WS57383073.
-
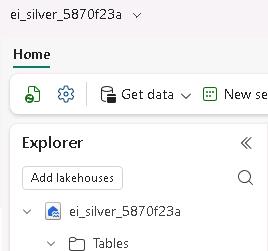
Locate and select the silver lakehouse.
-
In the Explorer pane, expand Tables. Verify that multiple tables are present.
-
Leave the Fabric page open. You will use the page again later in the workshop.
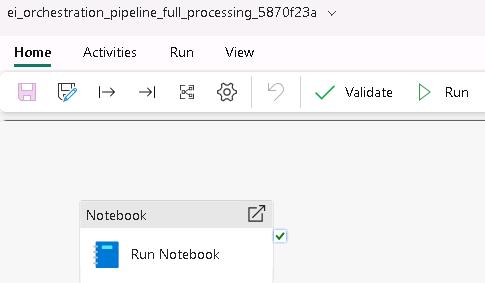
07: Process data
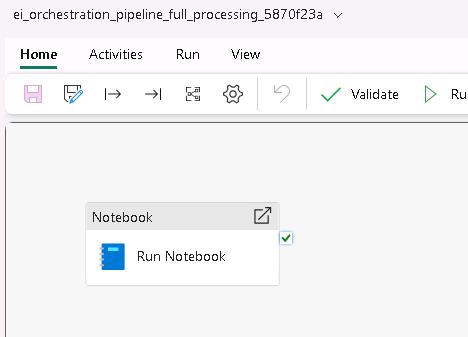
The pipeline has a single activity that automates a notebook.
You can view the ei_orchestration_pipeline_full_processing notebook in the workspace to see all the operations that the code performs.
-
Return to the web page that displays Fabric or open a new browser tab and go to
app.powerbi.com. -
In the left pane, select Workspaces and then select WS57383073.
-
Locate and select the ei_orchestration_pipeline_full_processing pipeline.

-
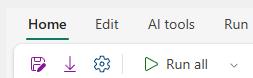
On the pipeline page, on the command bar, select Run All.
-
Wait for the pipeline to complete before proceeding with the next task.
-
Leave the Fabric page open. You will use the page again later in the workshop.
08: Verify that the Gold lakehouse contains tables
-
Return to the web page that displays Fabric or open a new browser tab and go to
app.powerbi.com. -
In the left pane, select Workspaces and then select WS57383073.
-
Locate and select the gold lakehouse.
-
In the Explorer pane, expand Tables. Verify that multiple tables are present.
-
Leave the Fabric page open. You will use the page again later in the workshop.
09: Deploy Power BI reports
-
Return to the web page that displays Fabric or open a new browser tab and go to
app.powerbi.com. -
In the left pane, select Workspaces and then select WS57383073.
-
Select the BPS57383073 BPS resource.
-
On the command bar, select Insights.
-
Select + New Insights.
-
In the Filter by keyword field, enter
Spend. -
Select the Procure to Pay - Spend Insights Report tile and then select Deploy.
-
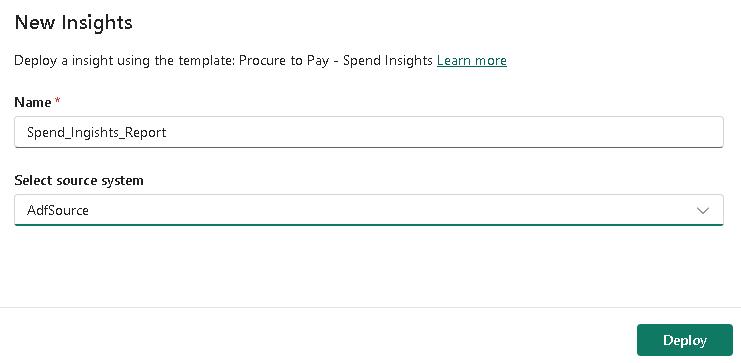
In the New Insights dialog, in the Name field, enter
Spend_Insights_Report. -
In the Select source system field, select AdfSource57383073 and then select Deploy.
-
Wait for the, and then review the data.
-
Once the deployment completes, you should be able to see the report in your workspace.
10: Configure the connection to allow semantic model refreshes
-
Return to the web page that displays Fabric or open a new browser tab and go to
app.powerbi.com. -
In the left pane, select Workspaces and then select WS57383073.
-
Select the BPS57383073 BPS resource.
-
On the command bar, select Insights.
-
Select the Deployed Insights tab.
-
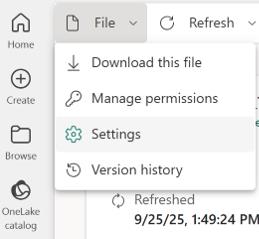
Select the semantic model. Then, in the File menu, select Settings.
-
Expand the Gateway and cloud connections section. Then, in the Cloud connections field, select Create a connection.
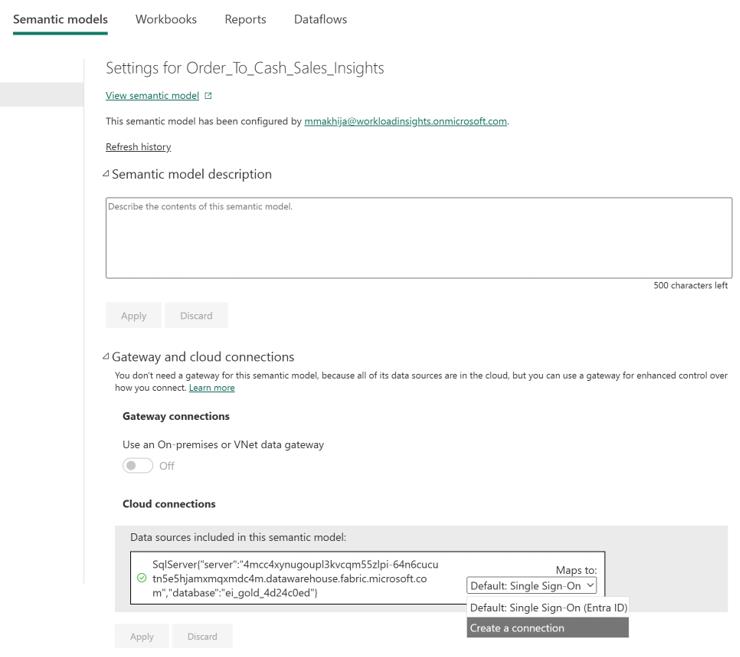
-
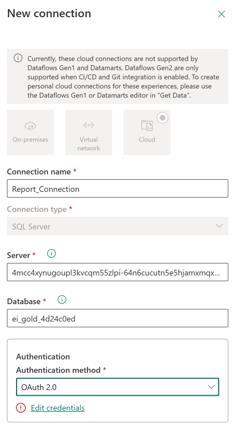
In the Connection name field, enter
Report_Connection. -
In the Authentication method field, select OAuth 2.0.
-
Select Edit credentials. Select your credentials and then select Create.
-
Expand the Gateway and cloud connections section. Then, in the Cloud connections field, select Report_Connection.
11: Import lakehouse views
-
On the Fabric page, in the left pane, select Workspaces and then select WS57383073.
-
Locate and select the ei_gold_view_creation notebook.
-
On the command bar, select Run all. Wait for code execution to complete.
Congratulations!
You’ve completed this lab!