Installation
GenAIScript is available as a command line or a Visual Studio Code Extension.
Node.JS
Section titled “Node.JS”GenAIScript requires Node.JS to run. We recommend installing the LTS version using a node version manager.
Install Node.JS (node) with a package manager. You need at least Node.JS v22.
Check your installation
Terminal window node -vnpx -vYou should see something similar or higher than the following versions:
v22.16.010.5.0
Visual Studio Code Extension
Section titled “Visual Studio Code Extension ”The Visual Studio Code Marketplace contains the latest stable release of the extension.
Install Visual Studio Code.
Visual Studio Code is a lightweight but powerful source code editor which runs on your desktop and is available for Windows, macOS and Linux.
Open your project folder in Visual Studio Code.
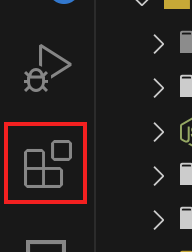
Click on the Extensions view

Search genaiscript and click Install.

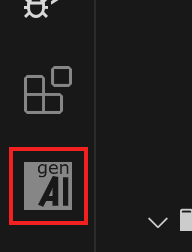
If successful, you will see the icon in the Extensions view.

(Optional) Click on the ⚙️ gearwheel icon on the extension page and select Add to Workspace Recommendations.
To install a specific version of the extension, we recommend storing the genaiscript.vsix
in your repository and using the manual installation steps.
Default Profile for Terminal
Section titled “Default Profile for Terminal”GenAIScript launches a node server in the default terminal. If the default terminal is not configured or does not support node.js, you may need to update it in your user/workspace settings.
- Open command palette
Ctrl+Shift+Pand search forTerminal: Select Default Profile. - Select the terminal profile like Git Bash
Manual Installation (Advanced)
Section titled “Manual Installation (Advanced)”The latest development build of the extension is also available on through the GitHub releases. This allows access to bug fixes earlier than the marketplace release.
Open the latest release on GitHub
Download the
genaiscript.vsixinto your project root folder- …
Directory.genaiscript/ folder created by the extension to store supporting files
Directorycache/ various cache files
- …
Directoryretrieval/ retrieval database caches
- …
- … supporting files
- genaiscript.vsix
Open your project in Visual Studio Code
Right click on the
.vsixfile and select Install Extension VSIX…
Command Line
Section titled “Command Line ”The genaiscript command line tool lets you run your GenAIScript from any terminal.
npx genaiscript run my-script some/path/*.pdfnpx will automatically install and cache the CLI.
DevContainer
Section titled “DevContainer”You can add this file in your project to use GenAIScript in a DevContainer, it contains a minimum of tools to get started..
{ "image": "mcr.microsoft.com/devcontainers/typescript-node:20", "customizations": { "vscode": { "extensions": ["genaiscript.genaiscript-vscode"] } }}The devcontainer definition will automatically be used by GitHub CodeSpaces, the devcontainer cli or various editor integrations.
Next steps
Section titled “Next steps”Let’s configure the LLM connection information