Federated Identity Credentials Setup
Federated Identity Credentials (FIC) allows you to assign managed identities directly to your App Registration instead of creating a separate User Assigned Managed Identity resource.
Prerequisites
Before you begin, ensure you have:
- An Azure subscription
- Permissions to create App Registrations, Azure Bot Services, and manage identities
- A compute resource where your bot will be hosted (App Service, Container App, VM, etc.)
- Either a User Assigned Managed Identity or the ability to use System Assigned Identity
Setup Steps
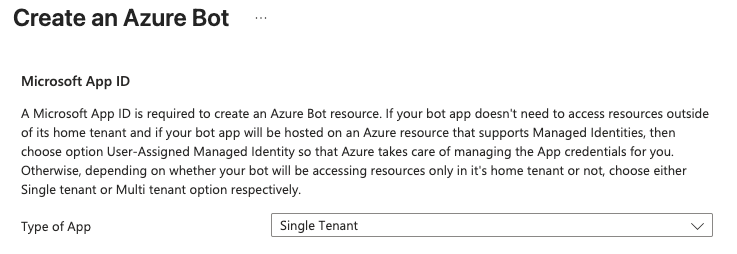
Step 1: Create Azure Bot with Single Tenant
When creating your Azure Bot Service, select Single Tenant for the Type of App.
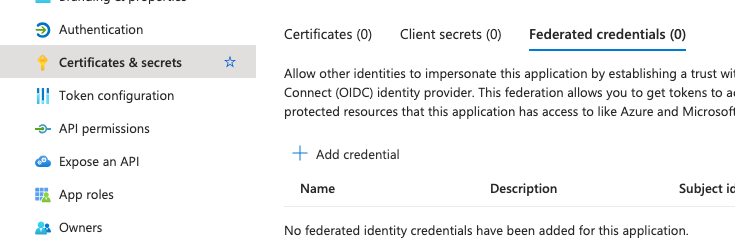
Step 2: Configure Federated Credentials
Assign managed identities to your App Registration using Federated Credentials.
- Azure Portal
- Azure CLI
- Navigate to your App Registration in the Azure Portal
- Go to Certificates and Secrets
- Select the Federated Credentials tab
- Click Add credential
- Select the federated credential scenario (e.g., "Customer managed keys")
- Choose the User Assigned Managed Identity or configure for System Assigned Identity
- Complete the required fields and click Add
The identity you select here must also be assigned to the compute resource where your application is hosted.
# Add a federated credential for a user assigned managed identity
az ad app federated-credential create \
  --id $APP_ID \
  --parameters '{
    "name": "MyFederatedCredential",
    "issuer": "https://login.microsoftonline.com/'$TENANT_ID'/v2.0",
    "subject": "'$MANAGED_IDENTITY_CLIENT_ID'",
    "audiences": ["api://AzureADTokenExchange"]
  }'
Step 3: Assign the Managed Identity to Your Compute Resource
The managed identity configured in the federated credential must be assigned to your compute resource.
- Azure Portal
- Azure CLI
For User Assigned Managed Identity:
- Navigate to your compute resource in the Azure Portal
- Go to Identity section in the left menu
- Select the User assigned tab
- Click Add
- Select the User Assigned Managed Identity you configured in the federated credential
- Click Add to confirm
For System Assigned Identity:
- Navigate to your compute resource in the Azure Portal
- Go to Identity section in the left menu
- Select the System assigned tab
- Set Status to On
- Click Save
# For user assigned managed identity:
az webapp identity assign \
  --name $APP_NAME \
  --resource-group $RESOURCE_GROUP \
  --identities $MANAGED_IDENTITY_RESOURCE_ID

# For system assigned identity:
az webapp identity assign \
  --name $APP_NAME \
  --resource-group $RESOURCE_GROUP
Next Steps
After completing the Azure setup, configure your application code with the appropriate environment variables. See the App Authentication Essentials Guide for details.