PartsUnlimited Setup with Visual Studio
The purpose of this lab is to provide some details for setting up the PartsUnlimited sample application for use with Visual Studio 2017. Its is an optional lab and only relevant if you intend using Visual Studio with the PartsUnlimited for later labs. It will be required for some labs, such as application monitoring, where build files may required to be modified.
Visual Studio will be required for some labs in the Microsoft Professional Program (MPP) for DevOps course track but will not be required for the majority of the labs in the DevOps courses.
DevOps Course Source
This lab is used in the following courses:
- DevOps200.1x: DevOps Practices and Principles
- AZ-400T05: Implementing Application infrastructure
Lab Video:
Pre-requisites:
- Visual Studio 2017 Visual Studio Community 2017 version is available to use for free if you need
- Access to PartsUnlimited github repository https://github.com/Microsoft/PartsUnlimited
Lab Tasks:
- Setup your local machine
- Get the Source Code
- Build the PartsUnlimited solution within Visual Studio
- Debug the PartsUnlimited website using Visual Studio
Estimated Lab Time:
- approx. 45 minutes
Task 1: Set up your local machine
-
Install Visual Studio 2017. Visual Studio Community 2017 version is available to use for free if you need.
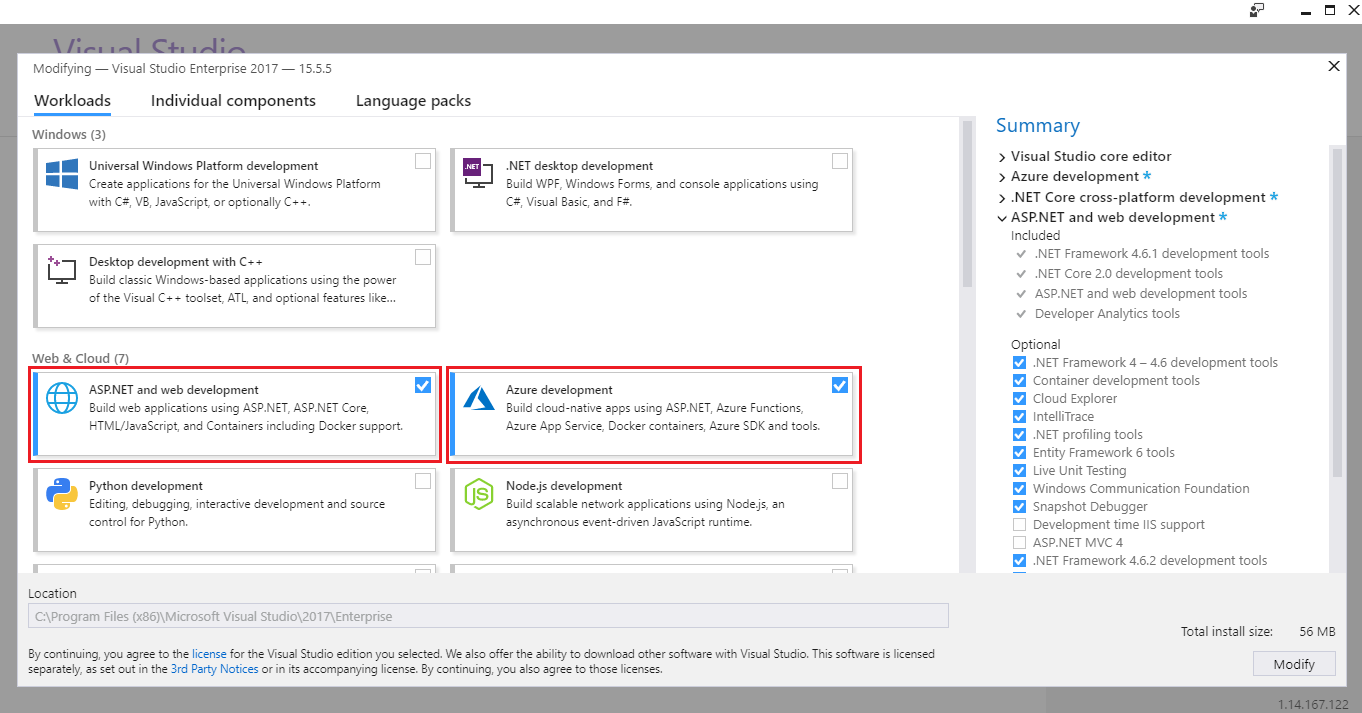
- During the VS2017 installation select the following components
- ASP. NET and web development
- Azure development
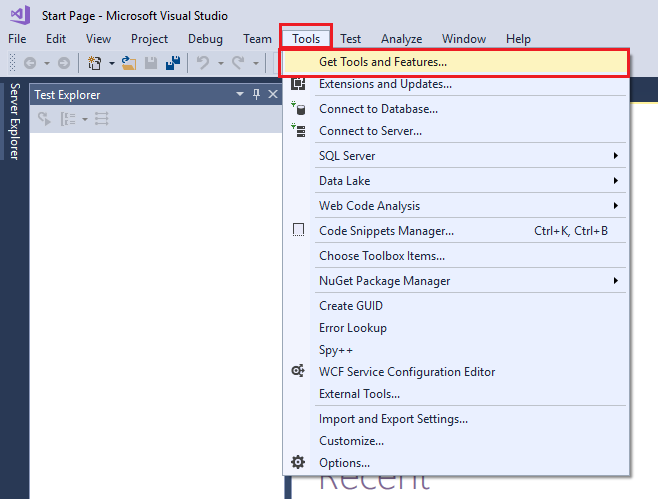
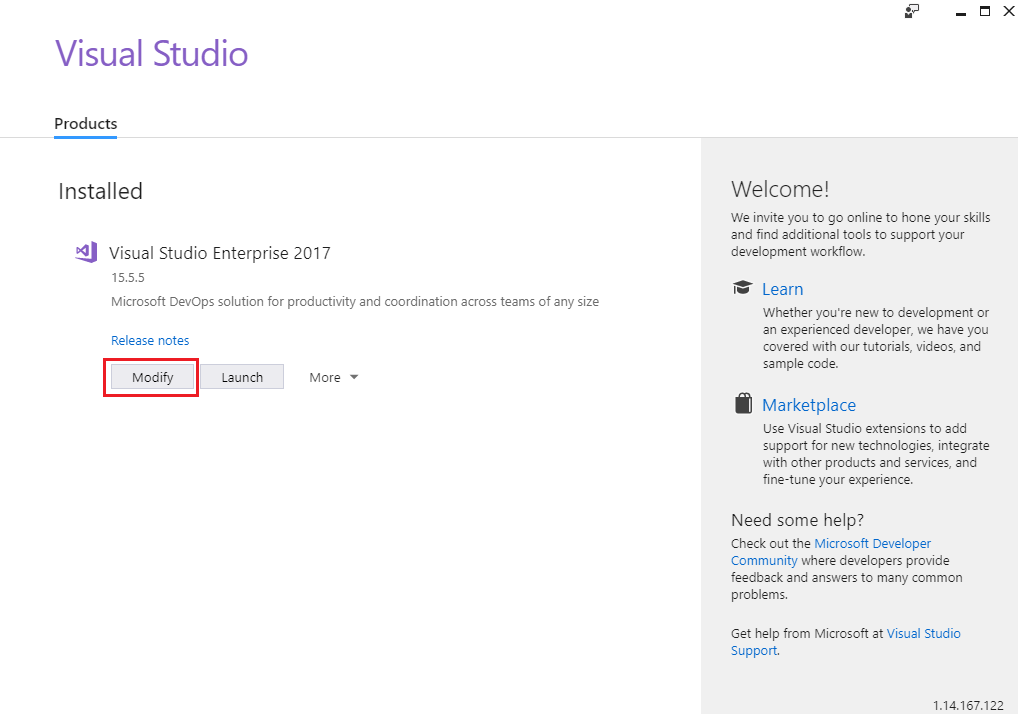
Note: If VS2017 is already installed you can add the required components by accessing Tools > Get Tools and Features from within Visual Studio. You may receive a prompt to update the Installer. If you do receive such a message, update the installer as prompted.
-
Install .NET Core 2.2 by choosing the .NET Core SDK from the Download .NET in the link provided.
Note: For use with Visual Studio 2017, you need to use version .NET Core 2.2.1xx (which is not compatible with VS2019). If you use the latest release of .NET Core 2.2.2xx (which is compatible with VS2019), the build may not compile successfully.
Once installed, check the
dotnetversion details by running the commandsdotnet --info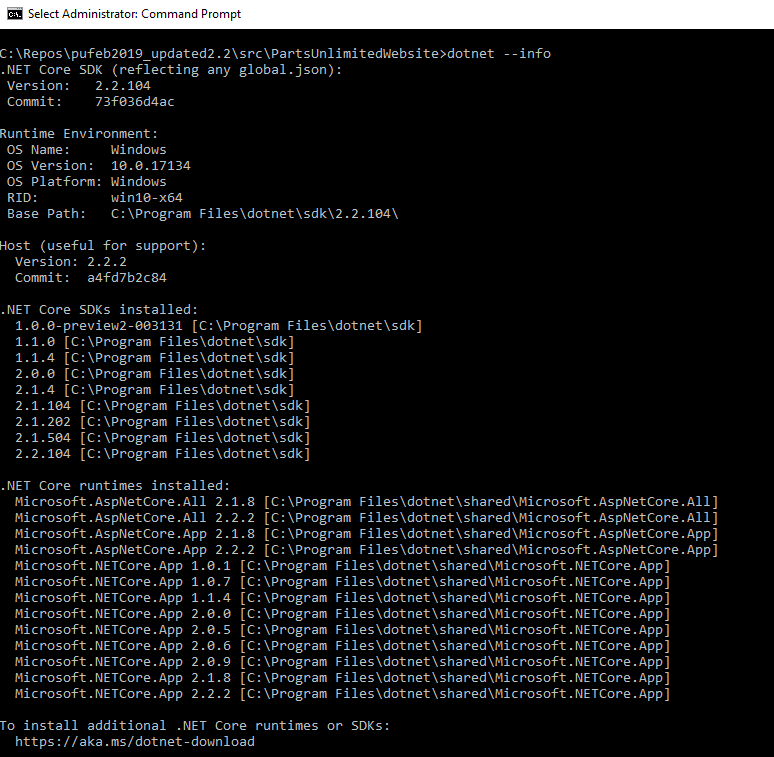
and
dotnet --version
Note: The PartsUnlimited app was updated to .NET Core 2.2 approx Feb 2019 and .NET Core 2.2 is required to be installed locally in order to be able to successfully build the application in a local install of Visual Studio 2017.
-
Install Azure Power Shell, as per the steps in the link provided here i.e. Open a Windows PowerShell command line console, or the PowerShell ISE, and run the below command accepting all prompts.
Install-Module AzureRM -AllowClobberOnce installed you can import the AzureRM module into your active Powershell session by running the below command when you need.
Import-Module AzureRMYou can view the imported and available modules in your active PowerShell session by running the command
Get-Module -
Install NodeJS
Note: Do not use the current version, which is 8.11.4 LTS as of Aug 2018, which is labelled 8.11.4 LTS - Recommended For Most Users, as in the screenshot below. Using this version may result in node-sass build errors when you go to build your PartsUnlimited solution in Visual Studio. ver 6x has the build tools installation embedded into it, whereas ver 8x doesn’t.
If you wish to use the latest Node.js 8.11.4 LTS, after installing it, you will need to run npm install –g windows-build-tools as this will install the missing build tools. This needs to be run as administrator. However it is recommended to use the ver 6x.
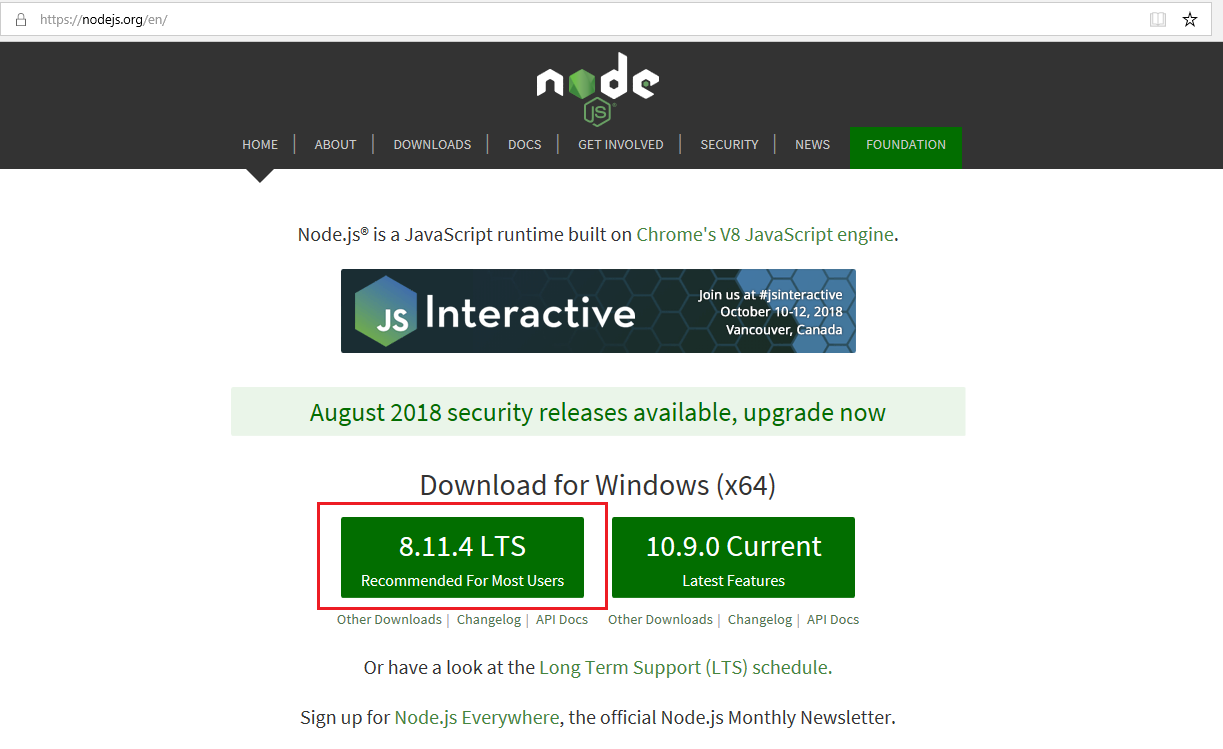
Install version 6x, we recommend v6.12.3, which is available on this page, then locate and click on on node-v6.12.3-x64.msi
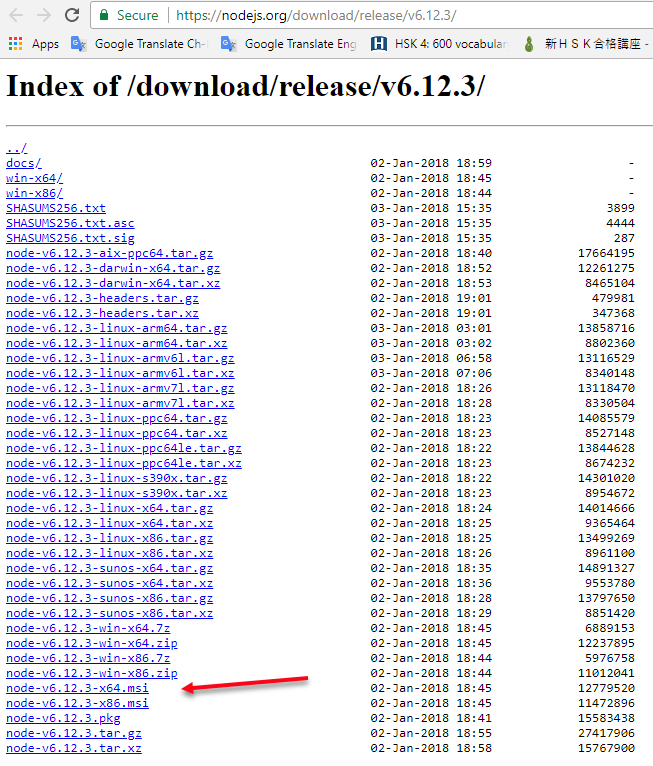
Complete the wizard accepting the defaults. You should not have to restart after install.
You can also view general Node.js install details on the Node.js home page
- Then run the following commands on a command line as administrator:
    npm install bower -g
    npm install grunt-cli -g
Task 2: Get the source code
- Open Visual Studio 2017
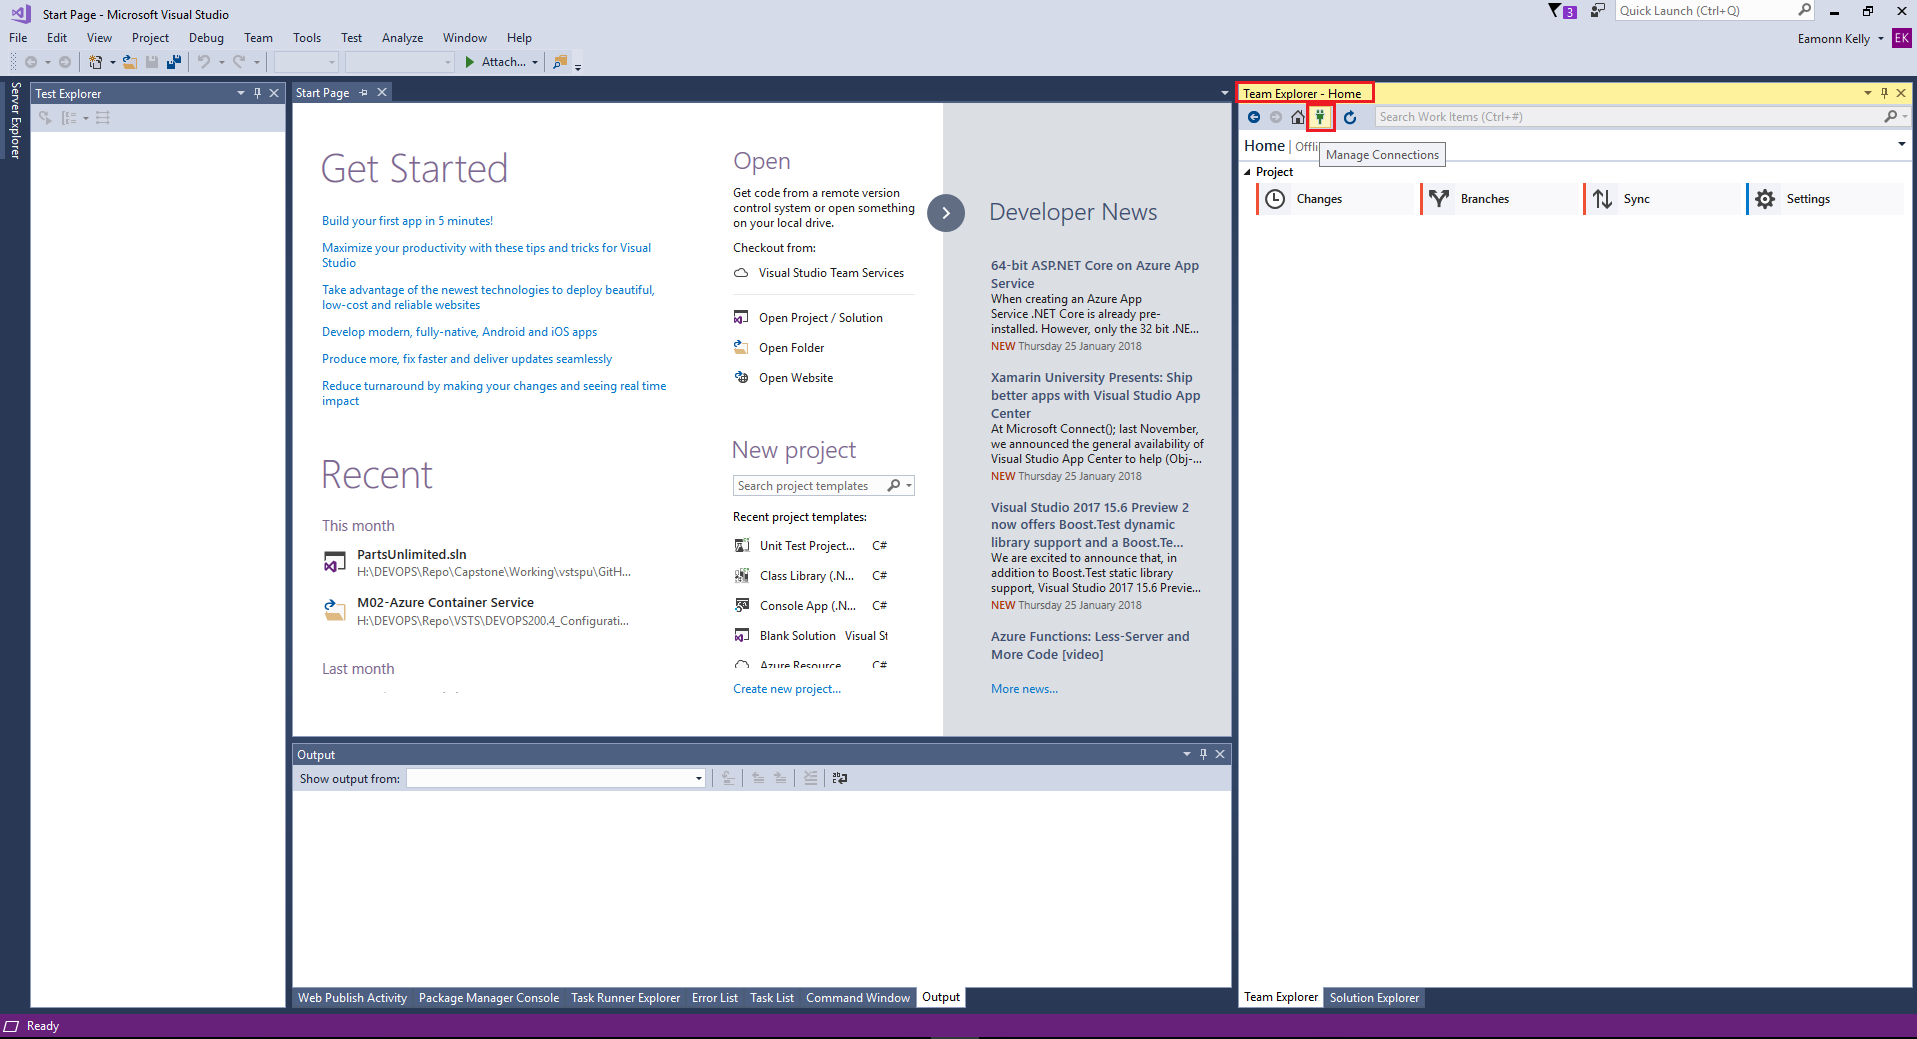
- Go to View > Team Explorer
-
In the Team Explorer - Home window on thr right hand side, click Manage Connections
-
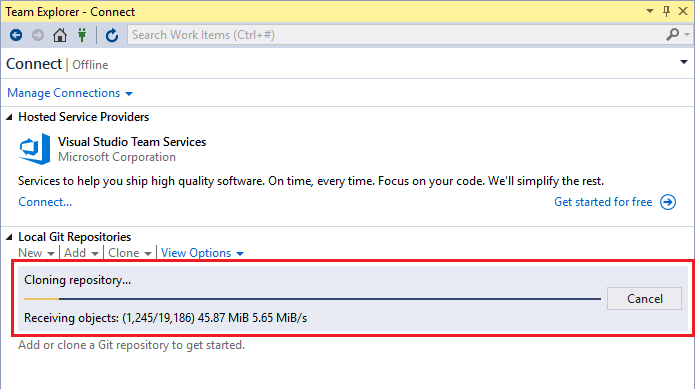
Under the Local Git Repositories section click Clone and enter the values and click Clone
- URL of reop to clone: https://github.com/Microsoft/PartsUnlimited.git
- Path for local copy of repo to be placed: C:\Repos\VS2017\PartsUnlimited (or any local path you wish to use.)
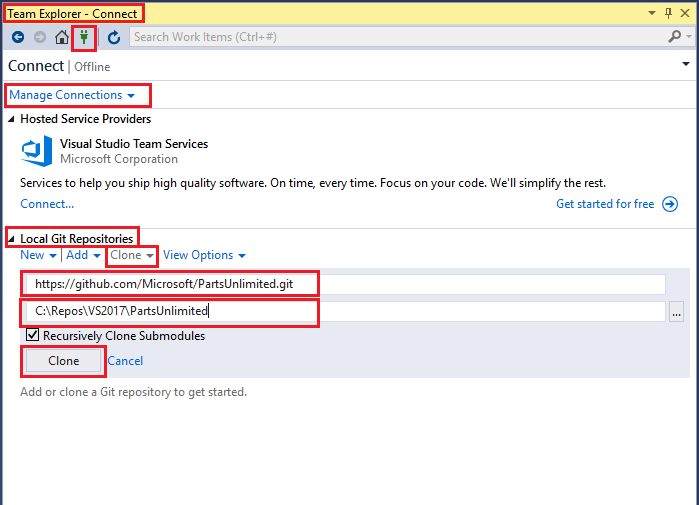
the repo should start to clone, as per below screenshot
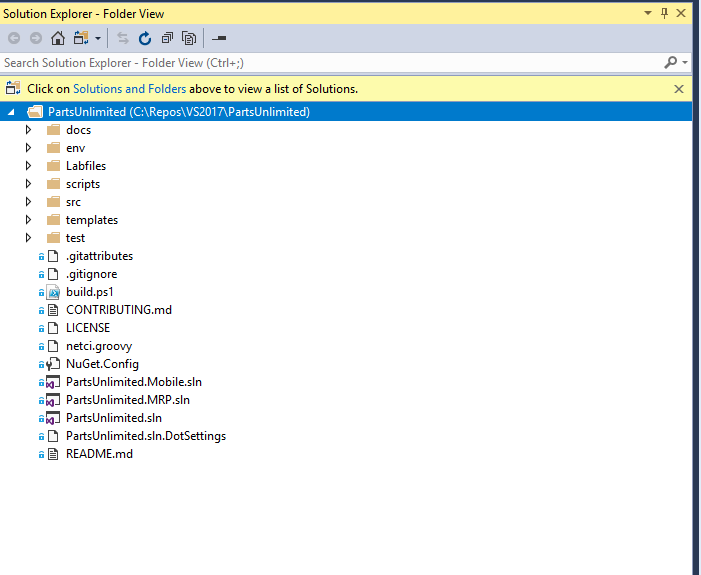
and when complete the repo files should be displayed in Solution Explorer as below.
Task 3: Build the PartsUnlimited solution within Visual Studio
-
On the Home page of the Team Explorer window, open the solution by double-clicking PartsUnlimited.sln.
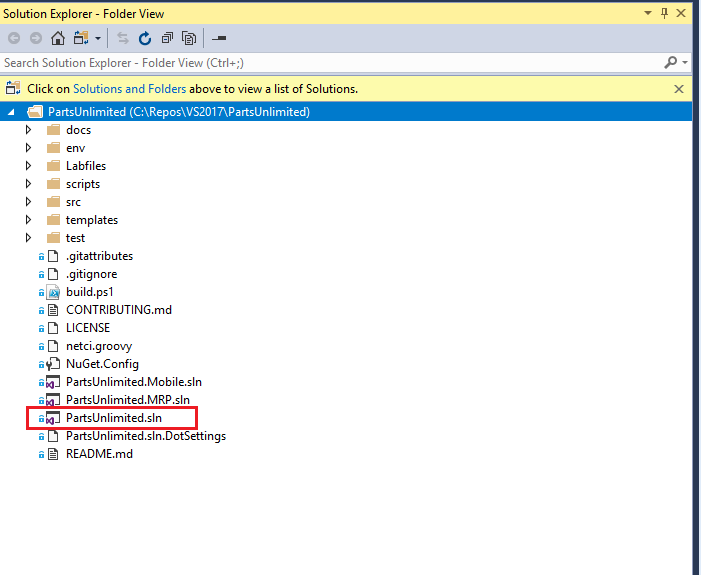
If you do not see it listed in Solution Explorer - Folder View window, go to File > Open > Project/Solution… and navigate the local repository folder to open PartsUnlimited.sln i.e. depending on where you placed your local repo, it will be something like C:\Repos\VS2017\PartsUnlimited\PartsUnlimited.sln
-
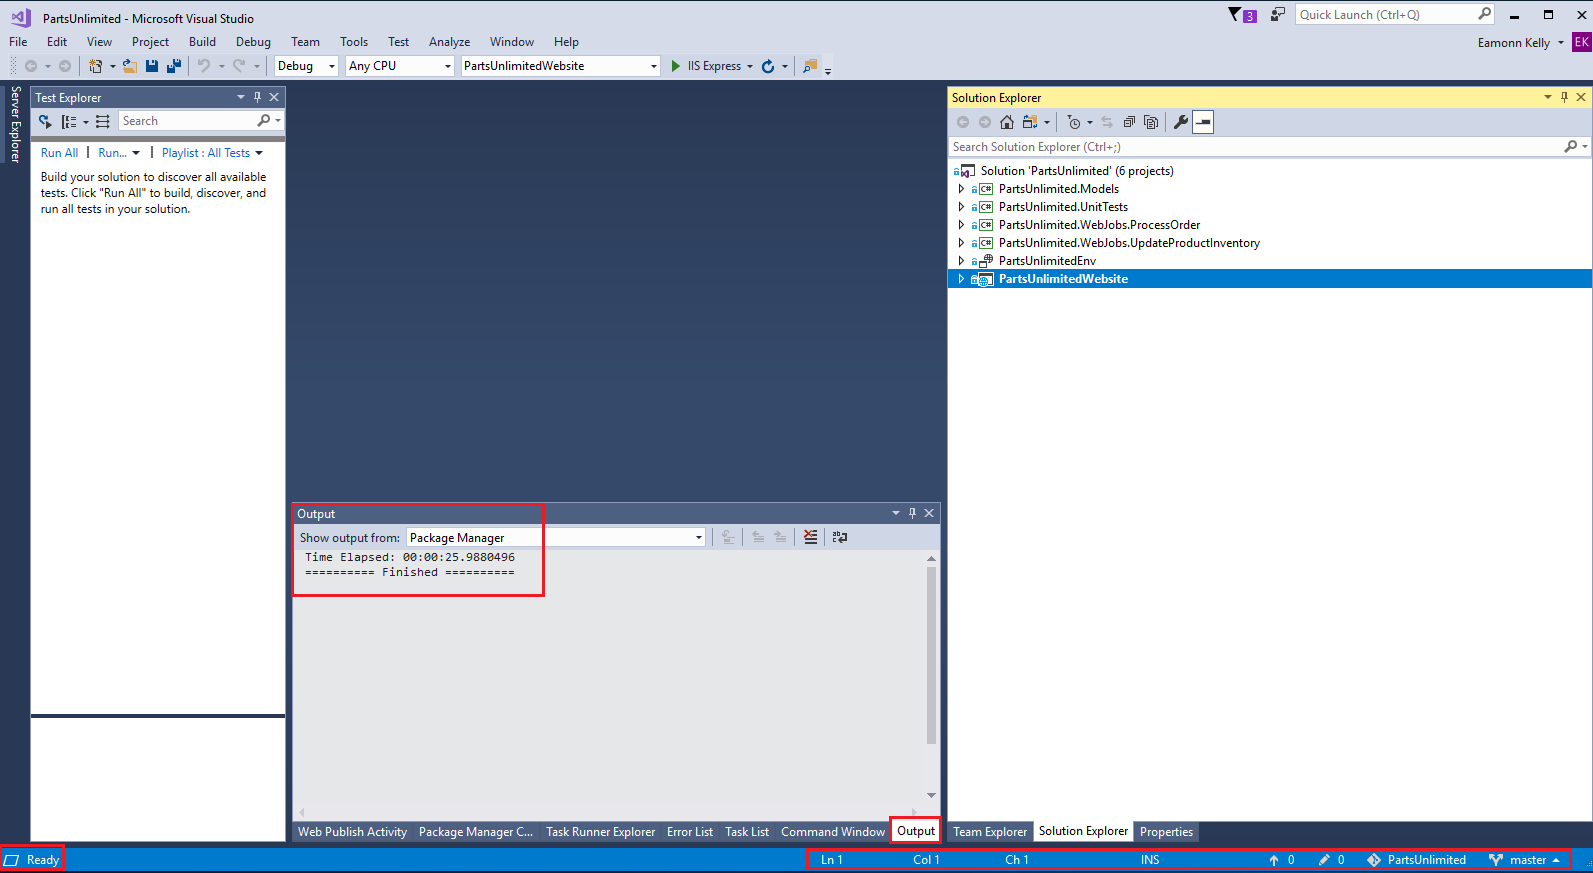
After opening the solution, wait for the Output window Package Manager pane to show “Restore complete” and “Total time” messages.
The solution will go through a series of stages when opening, one of which installing required packages. This can take 5 to 10 minutes to complete on first opening i.e.
Installing packages > displayed in bottom left hand corner of VS2017 window, along with the Line value having moving arrow graphics associatd with it.
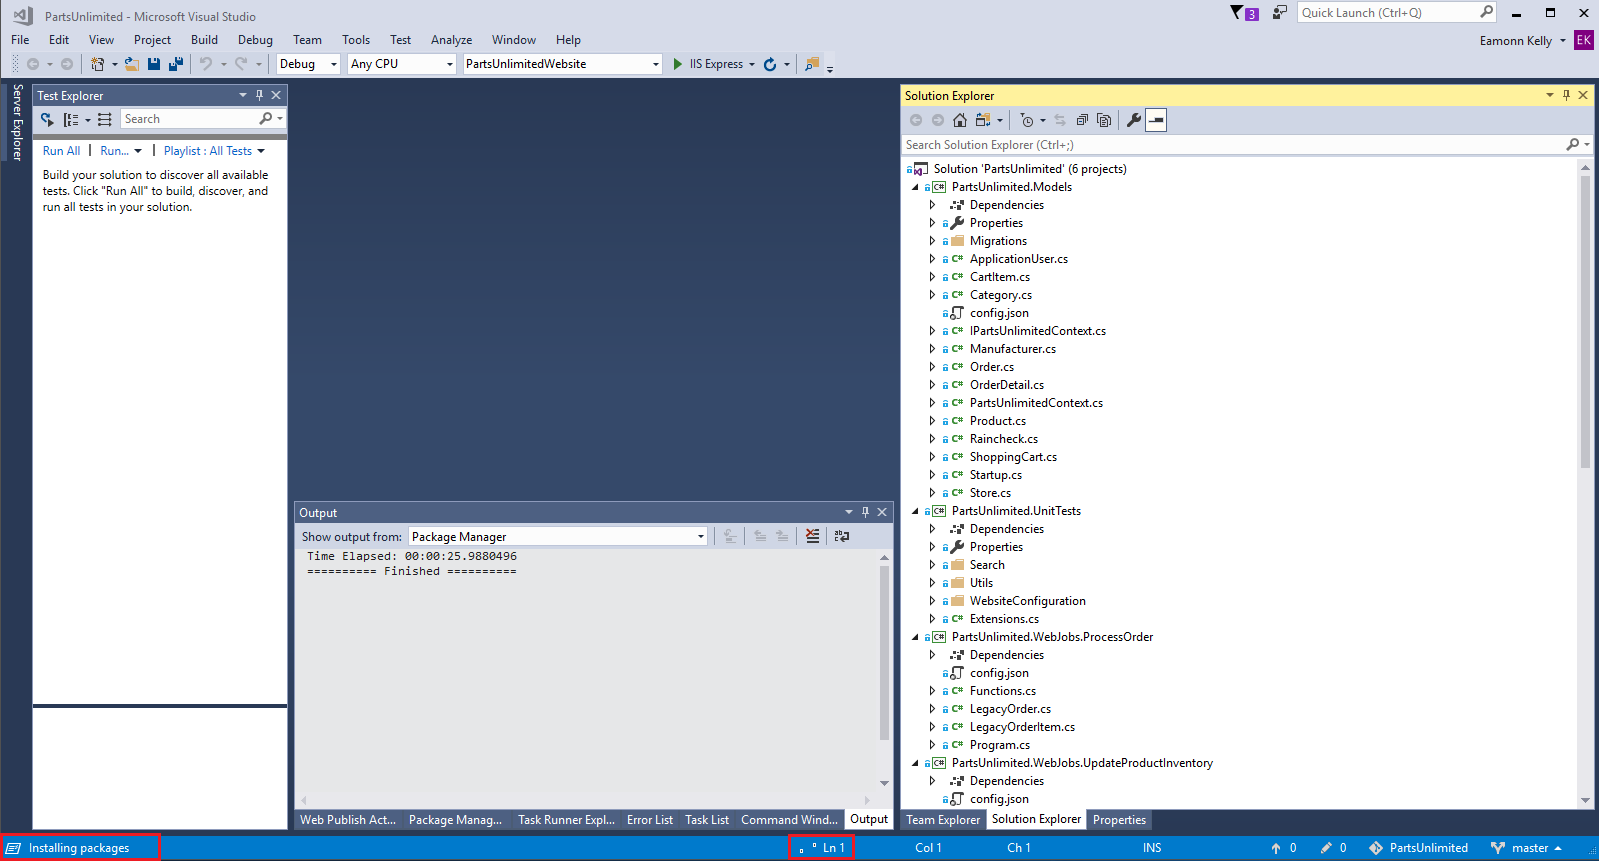
and when complete it will say Ready, the Line value will not have a moving graphic and the Output will say Finished
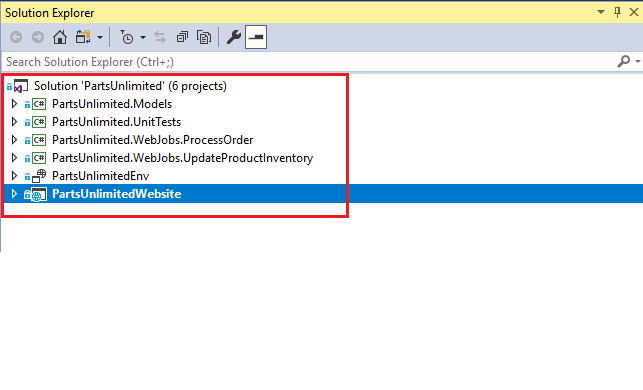
There should be six projects listed under the PartsUnlimited Solution in Solution Explorer
- PartsUnlimited.Models
- PartsUnlimited.UnitTests
- PartsUnlimited.WebJobs.ProcessOrder
- PartsUnlimited.WebJobs.UpdateProductInventory
- PartsUnlimitedEnv
- PartsUnlimitedWebsite
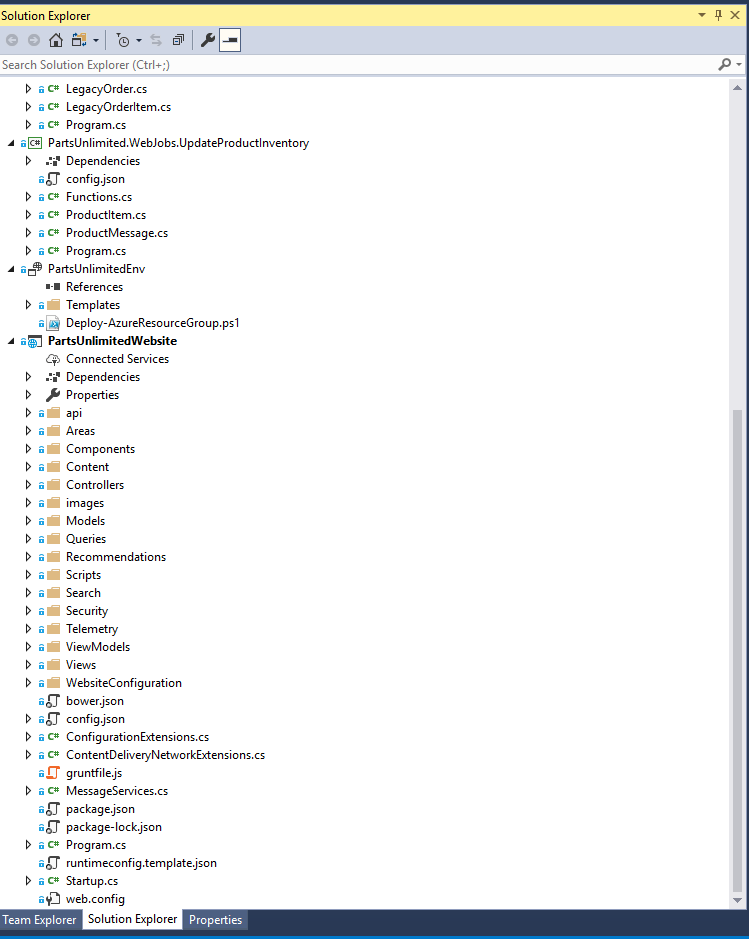
-
Expand the projects and ensure there are no errors listed under them, particularly under dependencies.
-
Go to Build > Build Solution and the solution should build successfully, and display output with no errors as in the screenshot below

-
Build Errors and Solutions
-
If when building you receive an error as per the below
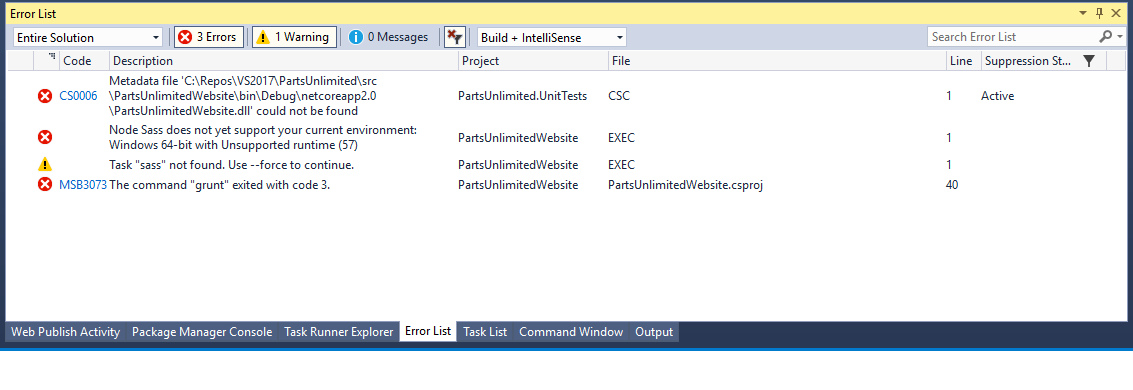
go to the output tab and view the full message output, as per the screenshot below
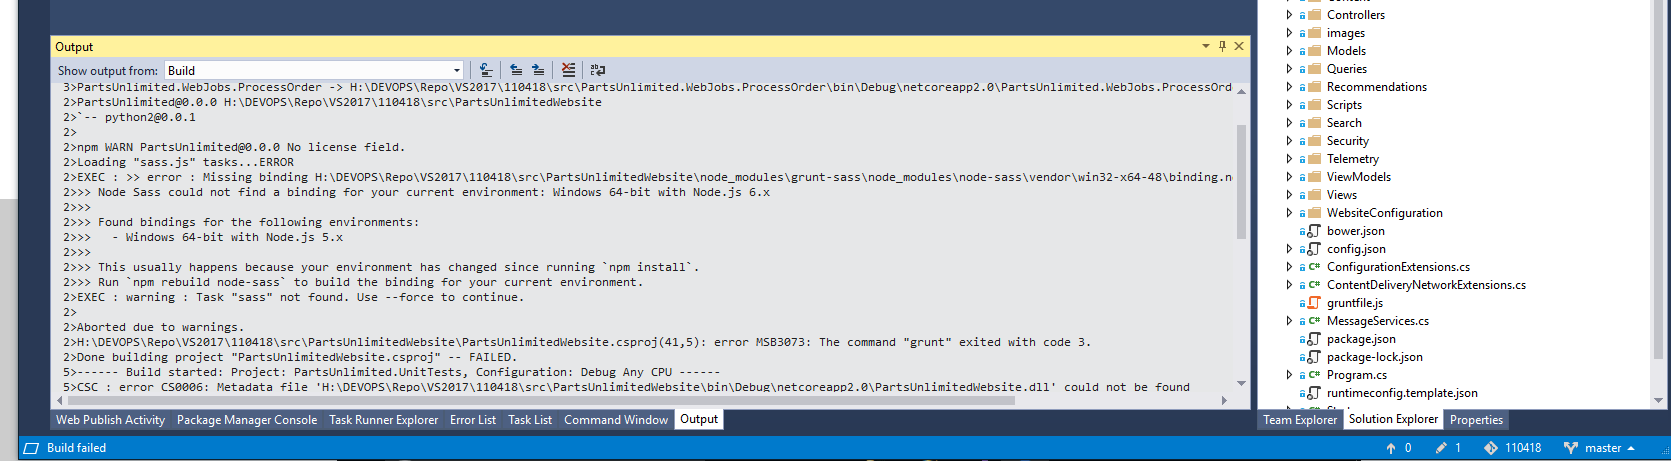
Missing …website.dll or binding errors can usually be addressed by performing the below steps.
Go to your local repo where the PartsUnlimited website source files are located i.e. C:\ < repository path >\PartsUnlimited\src\PartsUnlimitedWebsite and verify that there is Package.json file present in this folder, you can open it and verify it looks normal, no corruption or is not empty.
Then open up a cmd or Powershell window as administrator, go to the same location where the PartsUnlimitedWebsite is located and the Package.json file i.e. C:\ < repository path > \PartsUnlimited\src\PartsUnlimitedWebsite
then run the below command and try again to build the solution.
npm rebuild node-sass -
If you continue to get node-sass errors check the version of nodejs that you have installed by running the command
node- vIf it is not v6x…, but is 8x… unsinstall Node.js.
-
In windows you can do this in Control Panel > Program and Features, right clicking Node.js and selecting uninstall and completing the wizard.
-
Once uninstalled, install version 6.12.3 as outlined in Task 1: Step 4 above.
-
Once installed, try build the solution again.
-
The Node.js 8.9.4 LTS, does not have build tools installed by default as the v6.12.3 does. If you do not wish to uninstall the ver 8x, you can also try to install the windows build tools by running the following command form the command line.
npm install –g windows-build-toolsthis will install the missing build tools. This needs to be run as administrator. Then try to build the solution again.
-
- If you are continuing to get errors, sometimes just closing and then re-opening Visual Studio and re-trying to build the solution can work, otherwise you can also try the following.
- Close Visual Studio.
- Open PowerShell and navigate to the repository folder, usually C:<repo location>\PartsUnlimited.
- Execute the command below
git clean -fdxThis will clean your working directory and make sure your code is in sync with the repository.
Open the solution on Visual Studio and rebuild the application again.
-
If you are continuing to get errors, you can try removing all npm packages or uninstalling and re-installing the node-sass package using the commands
npm uninstall node-sassand then
npm install node-sass -
As a last resport, you could also remove the solution from Visual Studio and delete the repo, then try again from the start. Sometimes errors have been introduced in some form and a clean start will address these.
I have also seen instances where different accounts being used for a local environment and visual studio instances have resulted in access issues to installed files, where no-administrator accounts have been used, or different profiles, so ensure any locally installed files are accessible from the account you are using to run visual studio. Using administrator level accounts or the same account for both could be one solution.
-
Also, You may see an error related to bower being deprecated and prompting you to migrate your application to Yarn. It is fine to ignore that error message for our purposes.
- Finally, You can also view the Issues page on the PartsUnlimited GitHub repo. Issues are reported and discussed here, and those discussions, workarounds or solutions may be of help. You can view open or closed issues but specifically related to this lab at the time of writing, in Aug 2018, would be issues such as #151 , #141 , #134
-
Task 4: Debug the PartsUnlimited website using Visual Studio
-
Go to Debug > Start Debugging to launch the web application and attach the debugger.
-
Perform some actions on the PartsUnlimited website in the actual browser in which it has been launched.
-
Return to the Visual Studio debugger and scroll through the Output on the Output tab. This is the debugger tracking the actions performed on the site by you.
-
In Visual Studio go to Debug > Stop Debugging to stop the debugging and return the Solution Explorer.
Summary
In this lab you completed the following tasks:
- Setup your local machine
- Set up source code within Visual Studio
- Built the PartsUnlimited solution within Visual Studio
- Started debugging PartsUnlimited website.