TIP
💡 Learn more : Create an iOS app (opens new window).
# Create a back end for your next native iOS application
Azure defines a number of services for app developers covering data storage, notifications, authentication, etc. Wouldn't it be great if there was a simple platform-as-a-service (PaaS) offering that tied all these together to quickly build a back end for your app? Good news. That offering already exists: the Mobile Apps (opens new window) feature in Azure App Service.
# Start my app
From the Azure portal, select Create a resource, search for Mobile, and you'll find the Mobile App item. To create a new app, you'll need a unique name and you can select an app service plan. For development, there is a free tier that allows you to get started.
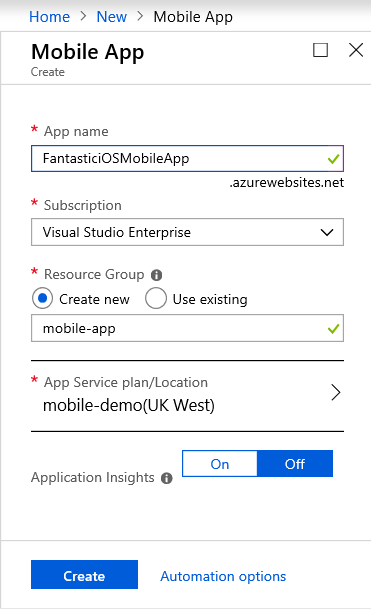
Once created you can view the settings for the app via All resources in the Azure portal. The unique URL that you specified on creation will open in a browser and show a placeholder webpage.
# Off to a quick start
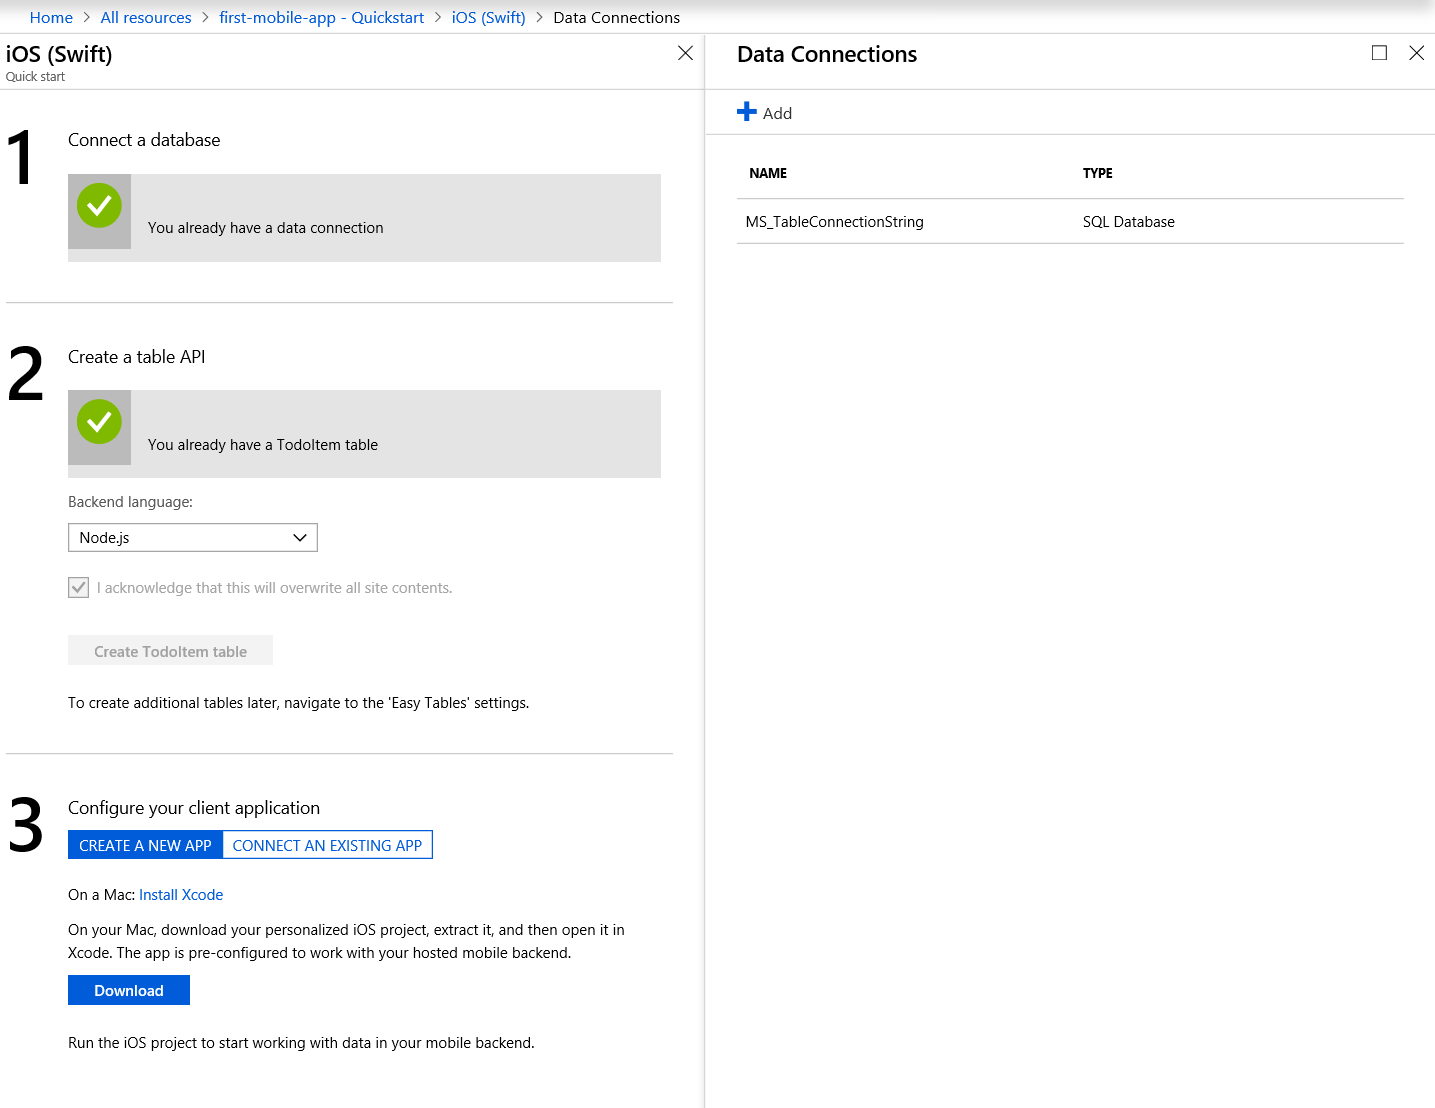
Looking at all the options available in the Azure portal might seem overwhelming, but luckily there is a quick way to get started. Click Quickstart to set up a simple database back end and generate a sample project.
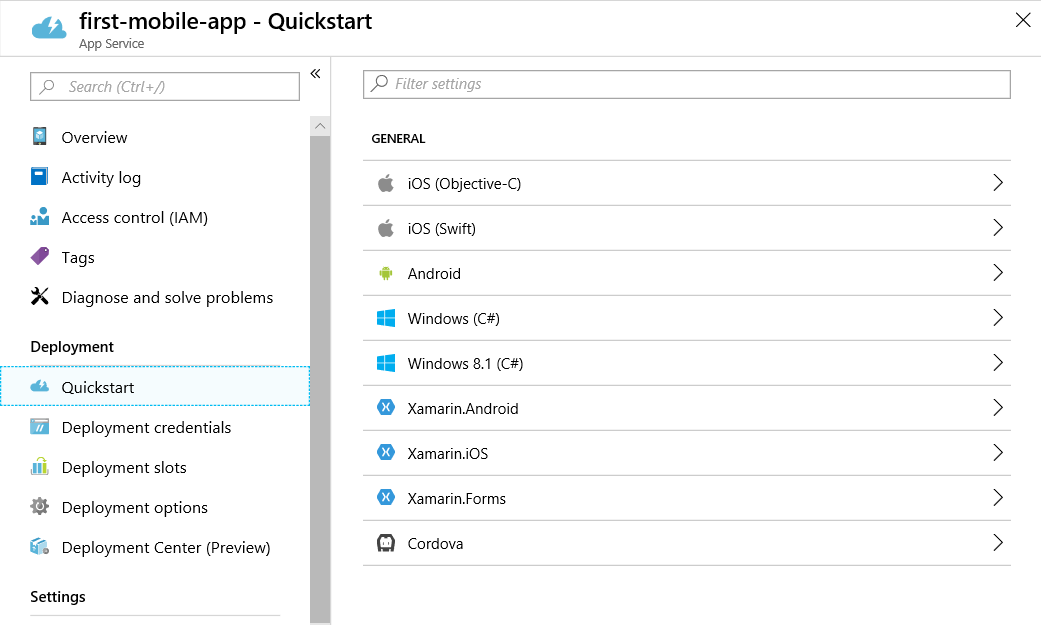
For native iOS apps, you can choose either Objective-C or, as in this example, Swift to create a ready-made project configured to talk to your newly created back end.
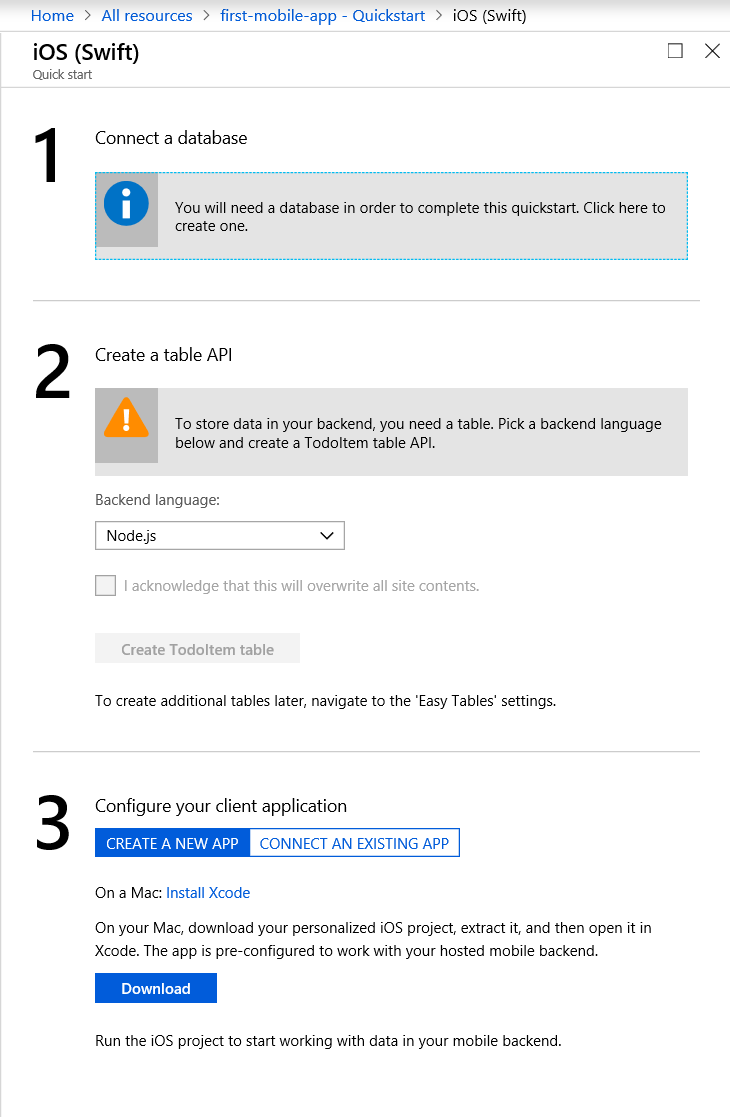
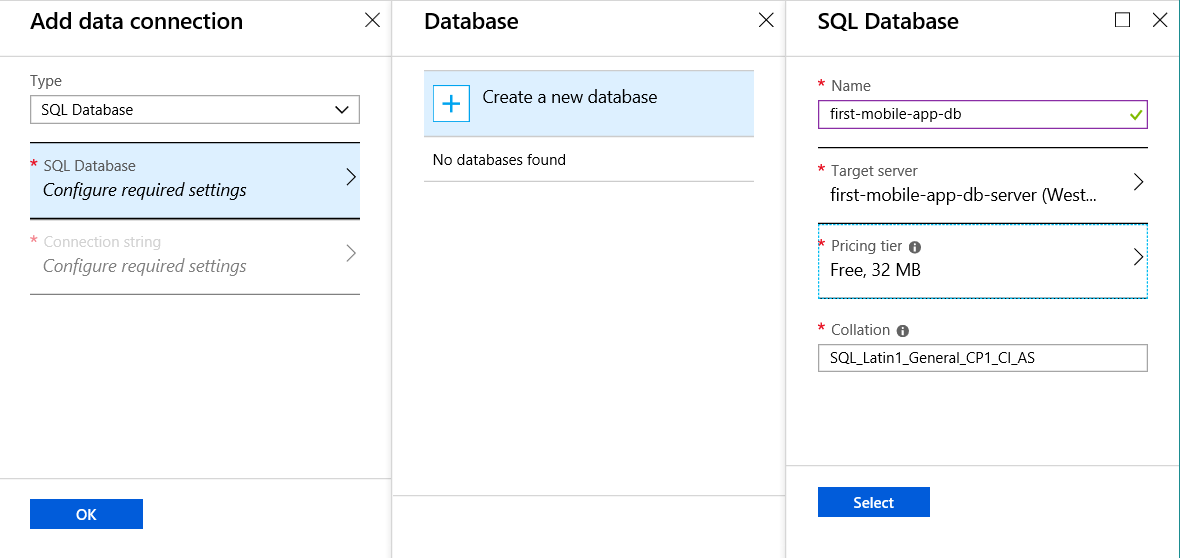
You'll need to select an Azure SQL database connection or create a new one. Again, there is a free tier to get started with development.
For the second step, the Quickstart will generate a TodoItem table for the app. As we'll see later, you can manage this table through the Easy tables settings for the Mobile app.
The third step is to decide whether to generate a new generic app or to receive instructions to integrate with an existing app.
The downloaded Xcode project can be deployed and run on a device or simulator. The Quickstart code is for a generic To-do app and the code creates the QSTodoDataModel and related UI code.

In the ToDoTableViewController class, you'll see that your application URL is pre-populated in the viewDidLoad method. Before you can build and deploy, you'll need to pick a development team in the Code Signing properties for the project.

When you deploy and run the app you'll see a simple clear list interface with the ability to add a new item and pull-to-refresh on the list. You can view the contents of the database from the app entry in the Azure portal under Easy tables.

The sample app is very basic, but you can easily see how it works from the generated code. It's very easy to create tables and edit their schema to fit your app requirements.
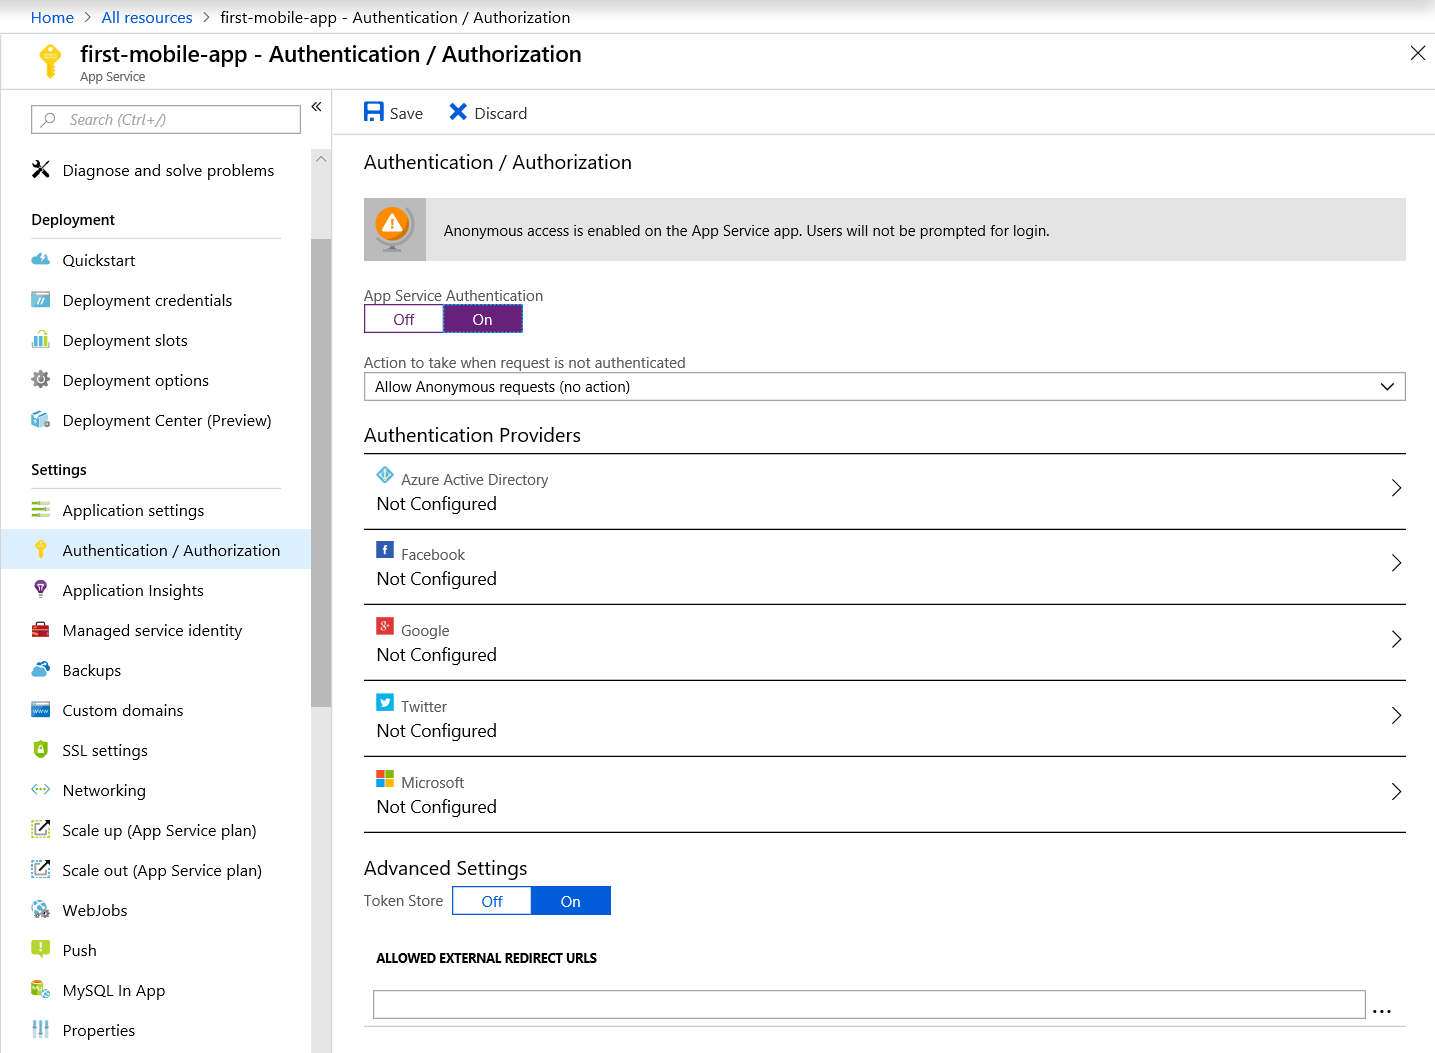
A limitation of the Quickstart code is that it uses anonymous access. From the Authentication / Authorization tab you can turn on Authentication and link to ready-made configuration providers for Azure AD and a number of social and online networks.
# Go your own way
For detailed instructions on building your own Azure Mobile App, you can follow this Quickstart (opens new window). You can also find more details about adding authentication and configuring your tables (opens new window). Support for authentication is already in the MicrosoftAzureMobile.framework, so it only requires a few additional lines of code. The Mobile App can easily be extended with push notification support using Azure Notification Hubs (opens new window), but that warrants a separate blog post.
