
TIP
💡 Learn more : Create an iOS app (opens new window).
# Work with Notification Hubs on your next Native iOS application
Azure Notification Hubs (opens new window) provides an integrated back end capable of pushing notifications to all the major mobile platforms through their different cloud services. iOS apps use the Apple Push Notification Service (opens new window) (APNS), and Notification Hubs can push messages through this service either directly or via an Azure Mobile App (opens new window) back end. Notification Hubs allows you to push messages to millions of devices across platforms with a single API call. These can be to all users, or to particular segments of your customers using tags.
# Get certified
Before you can start using APNS, you need to set up a certificate with your Apple developer account. Launch Keychain Access from a Mac, select Certificate Assistant from the Keychain Access menu and then "Request a Certificate From a Certificate Authority". Fill in your email address and a name, select Saved to disk, and store the .CSR file somewhere convenient.
Next, you will need to set up your app ID with the Apple Developer Program. Sign in and then click Identifiers and App IDs. Click the + button to create a new entry. You'll need to provide a friendly name for the app, a unique Bundle Identifier (normally in reverse DNS notation). In the list of App Services checkboxes, make sure you check Push Notifications.
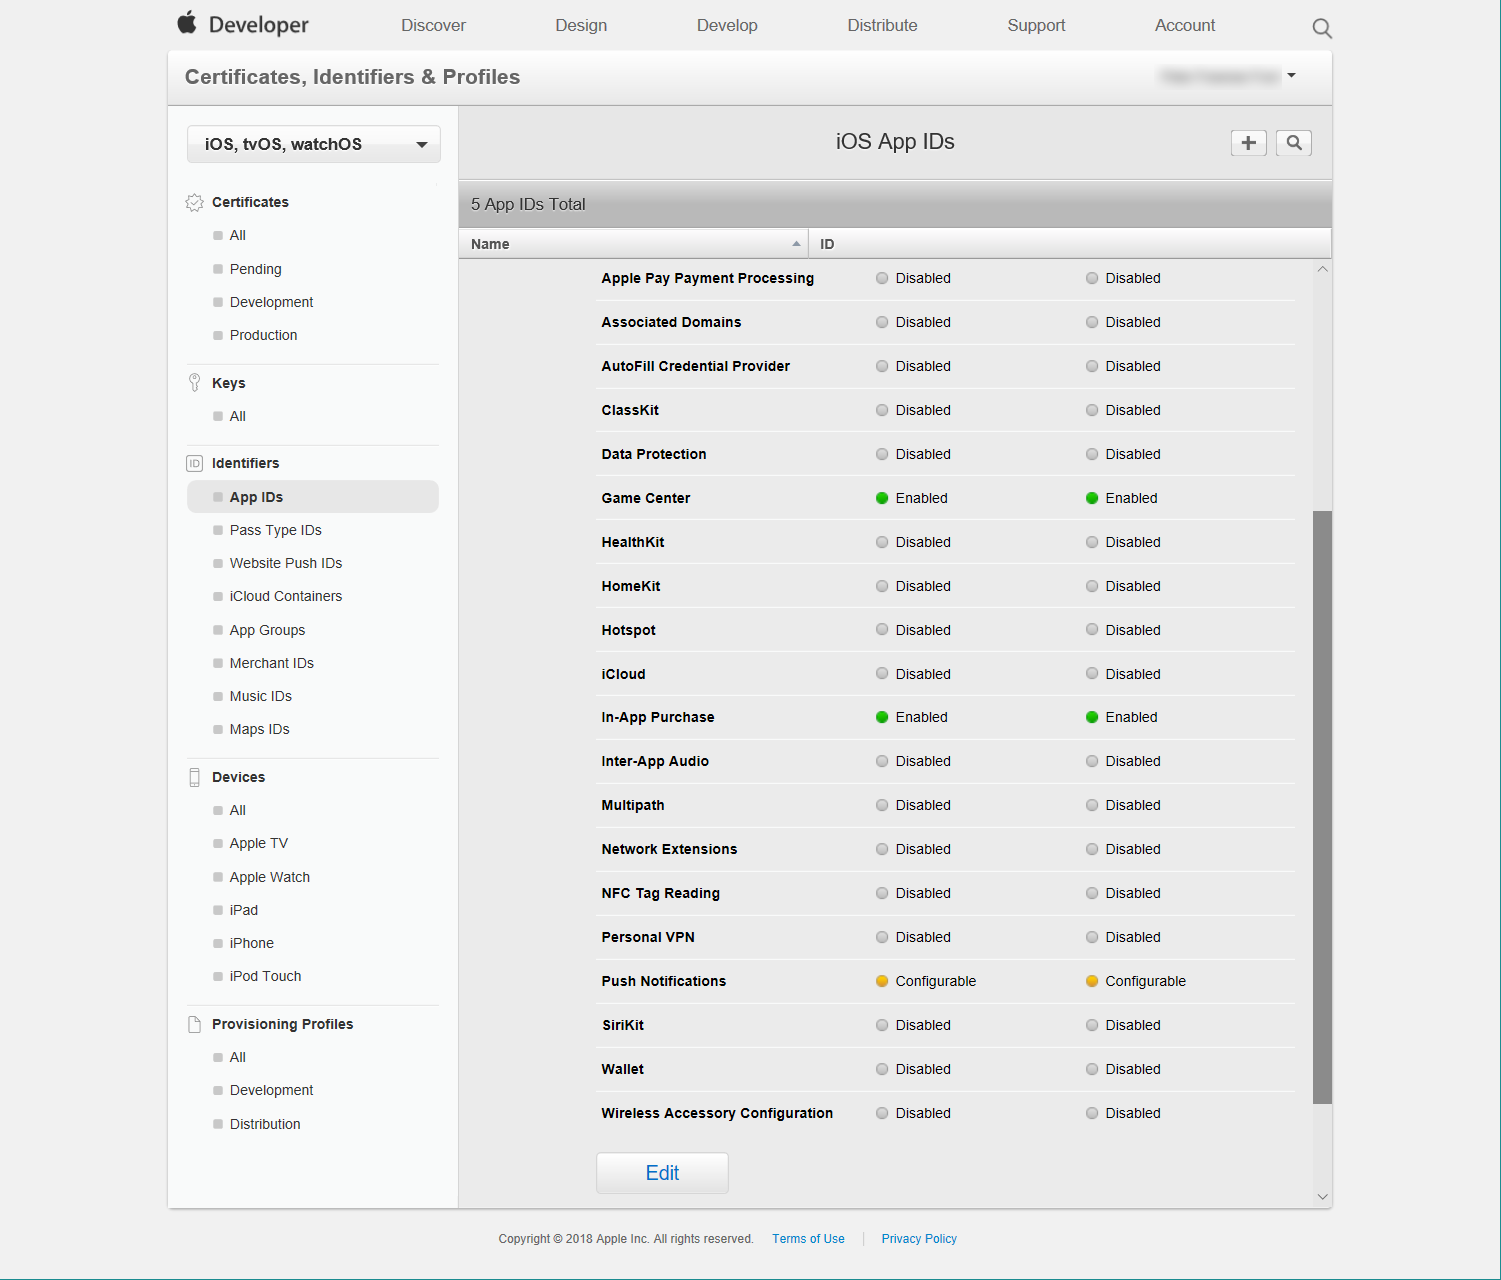
Once you've confirmed the registration, you'll see Push Notifications is highlighted in amber because it requires further configuration. From the App ID list, you can edit this new entry, and then you'll see buttons next to Push Notifications with options to create certificates for development and production use. Click Create Certificate against Development. Here, you'll be prompted to upload the .CSR file you created earlier. From this, a certificate will be created and you can download it and install it on your development Mac. For Azure Notification Hubs, you need to export this new certificate as a .p12 file.
# Set up Notification Hubs
When you create a new Notification Hub in the Azure portal, you'll also create a new Notification Hubs namespace. Multiple pricing tiers are available, but you can start with the free tier and upgrade as you scale up your app.

To send messages, you'll need to configure the hub with one or more services. For iOS, you use the Apple (APNS) service. Here, you select the Certificate authentication mode and upload the certificate .p12 file to provide a link to your App ID. You can toggle the setting between Production and Sandbox, and you should make sure this is set to Sandbox for development. Once that configuration is done, the Notification Hub is ready to use.
# Hooking up the app
iOS apps can request a unique token for APNS and this must be registered with the Notification Hub. You can download the WindowsAzureMessaging.framework (opens new window) and add it to your app. This has the functionality to call Azure Notification Hubs, you just need to add the endpoint connection string and hub name. The hub name is the unique name you gave the Notification Hub when you created it. The connection string can be found in the "Access Policies" section of the Notification Hub settings. By default, there are two levels of access and you need the DefaultListenSharedAccessSignature for a client app. The other full-access connection string has other permissions on the Notification Hub.
In order for the app to support alert notifications the Info.plist for the app will need editing to add the remote-notification entry to the UIBackgroundModes key. This allows the system to wake up your app in the background when a remote notification is received.
From iOS 10, all user notification is handled through the UserNotification framework. To respond to a request to display a notification while your app is running, you must implement the UNUserNotificationCenterDelegate protocol in your AppDelegate. You also need to request permission from the user to present notifications.
func application(_ application: UIApplication, didFinishLaunchingWithOptions launchOptions: [UIApplication.LaunchOptionsKey: Any]?) -> Bool {
   // Override point for customization after application launch.
   UNUserNotificationCenter.current().delegate = self
   UNUserNotificationCenter.current().requestAuthorization(options: UNAuthorizationOptions.alert, completionHandler: { _,_ in })
   application.registerForRemoteNotifications()
   return true
}
2
3
4
5
6
7
The first line requests a token for the app to hook up to the APNS. You receive a callback when a token is assigned, and this must be sent to the Azure Notification Hub.
func application(_ application: UIApplication, didRegisterForRemoteNotificationsWithDeviceToken deviceToken: Data) {
   hub = SBNotificationHub(connectionString: HubInfo.HUBLISTENACCESS, notificationHubPath: HubInfo.HUBNAME)
   hub?.registerNative(withDeviceToken: deviceToken, tags: nil, completion: { _ in })
}
2
3
4
Every time a remote notification is received, didReceiveRemoteNotification is called, so this is overridden to display a notification.
func application(_ application: UIApplication, didReceiveRemoteNotification userInfo: [AnyHashable : Any], fetchCompletionHandler completionHandler: @escaping (UIBackgroundFetchResult) -> Void) {
   completionHandler(UIBackgroundFetchResult.newData)
}
2
3
If a UserNotification is requested while the app is running, it won't by default show any alert. You can either request a default alert or implement your own UI to match your app style. For simplicity, this code requests a default alert here.
func userNotificationCenter(_ center: UNUserNotificationCenter, willPresent notification: UNNotification, withCompletionHandler completionHandler: @escaping (UNNotificationPresentationOptions) -> Void) {
   completionHandler(UNNotificationPresentationOptions.alert)
}
2
3
# Pushing back
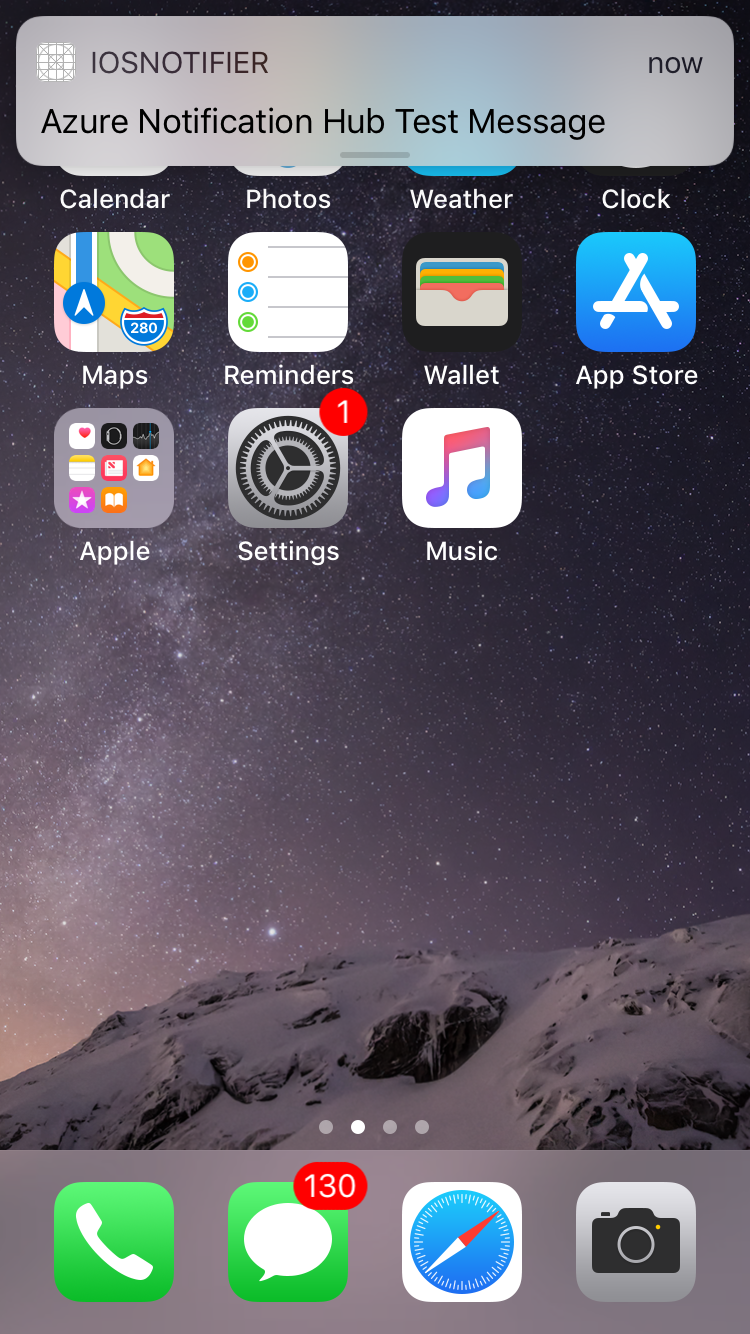
Once configured, you can test that it's working from the Azure portal. The "Test Send" item is near the bottom of the service page. Select the Apple platform. Notice that all the services are listed here, even if you've not yet configured them. Attempting to send to a service that is not configured will fail with an error. You can directly edit the default payload to replace with whatever you require. If you want your message to wake your app in the background, you have to include the property "content-available:1".

On success, you'll see a list of device registrations and status of the sent message. At this point, you can verify on your development device that the message is displayed as expected.
# Pushing ahead
You've seen that it's very easy to create and use Notification Hubs as long as you work through each of the configuration steps so Notification Hubs has the right certificate and your app is configured correctly. Once that is done, you have a permanent communication channel between your app and your back-end service to keep your app alive. To explore further, you can view documentation (opens new window) that will give you more details on targeting individuals and groups of users for a more personal experience.