Challenge 0: Setup & Authentication
Time: ~20 minutes
Objectives
By the end of this challenge, you will have:
- ✅ A fully provisioned Microsoft Foundry project with a deployed model
- ✅ Application Insights provisioned and connection string available
- ✅ Verified authentication from your local machine to Foundry
- ✅ Confirmed your agent endpoint is working
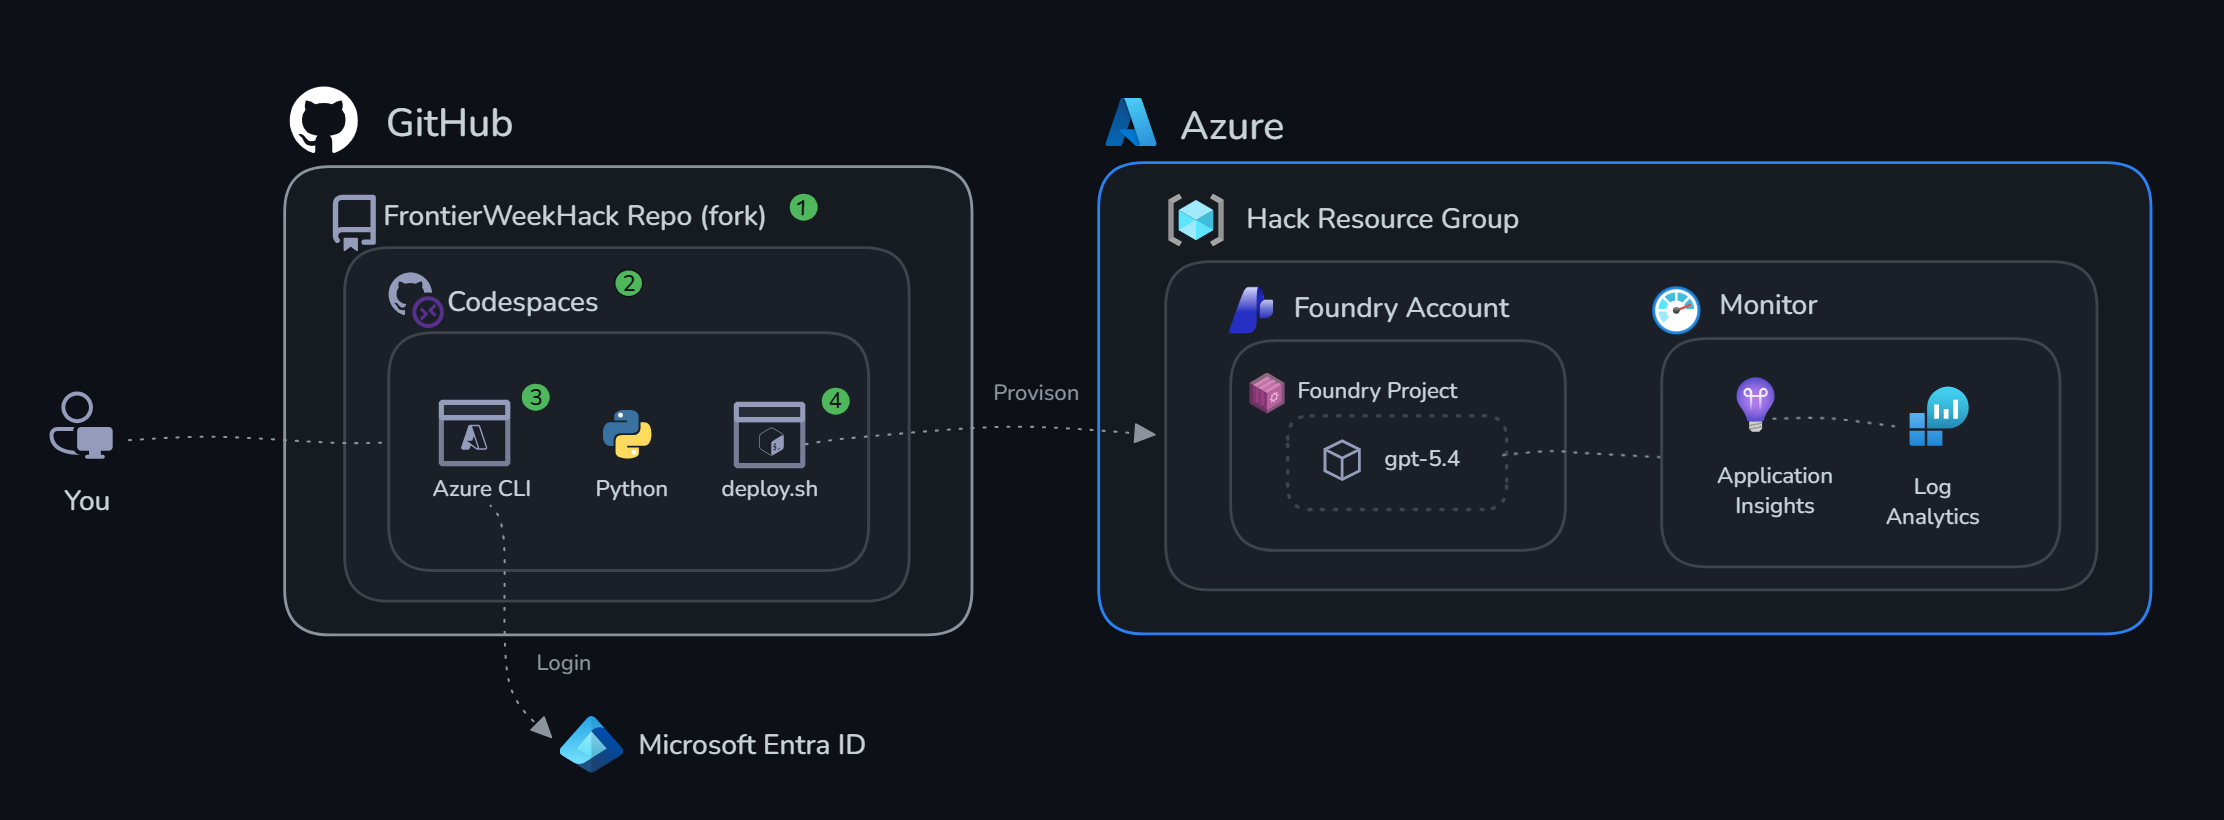
Get Started
[!NOTE] Before you begin, make sure you have: - An Azure subscription where you hold both the Contributor role (to deploy the infrastructure) and the Foundry User role (to build, evaluate, and run agents in Challenges 1–4). - A GitHub handle (account) to fork this repository and run it in GitHub Codespaces.
Subscription Owner (or Contributor) rights alone are not sufficient. Those grant control-plane access to create and manage resources, but building and running agents are data-plane operations that require the separate Foundry User role assigned on the Foundry account. An Owner can self-assign it; a Contributor must ask an admin to assign it after deployment.
There are two ways to get started — pick one:
First step for both options: Fork this repository to your own GitHub account.
Option A: GitHub Codespaces (recommended)
No local installs needed. Everything runs in a cloud dev environment.

- Click the badge above (select your fork if applicable)
- Wait for the Codespace to build (~2 min)
- In the terminal, log in to Azure:
- Continue to Deploy Infrastructure below.
Option B: Local environment
Run everything on your own machine. Requires Python 3.10+ and Azure CLI.
# 1. Clone this repo
git clone https://github.com/microsoft/FrontierWeekHack.git
cd FrontierWeekHack

# 2. Create and activate a virtual environment
python3 -m venv .venv
source .venv/bin/activate  # On Windows: .venv\Scripts\activate

# 3. Install Python dependencies
pip install -r requirements.txt

# 4. Log in to Azure
az login
- Continue to Deploy Infrastructure below.
Deploy Infrastructure
From the callcenter folder, run the deploy script:
This will provision all resources and automatically write your .env file to the repository root as .env. The deployment will take a couple of minutes to complete.
Verify the creation of your resources
Go to the Azure Portal and find your resource group, which should now contain resources like this:
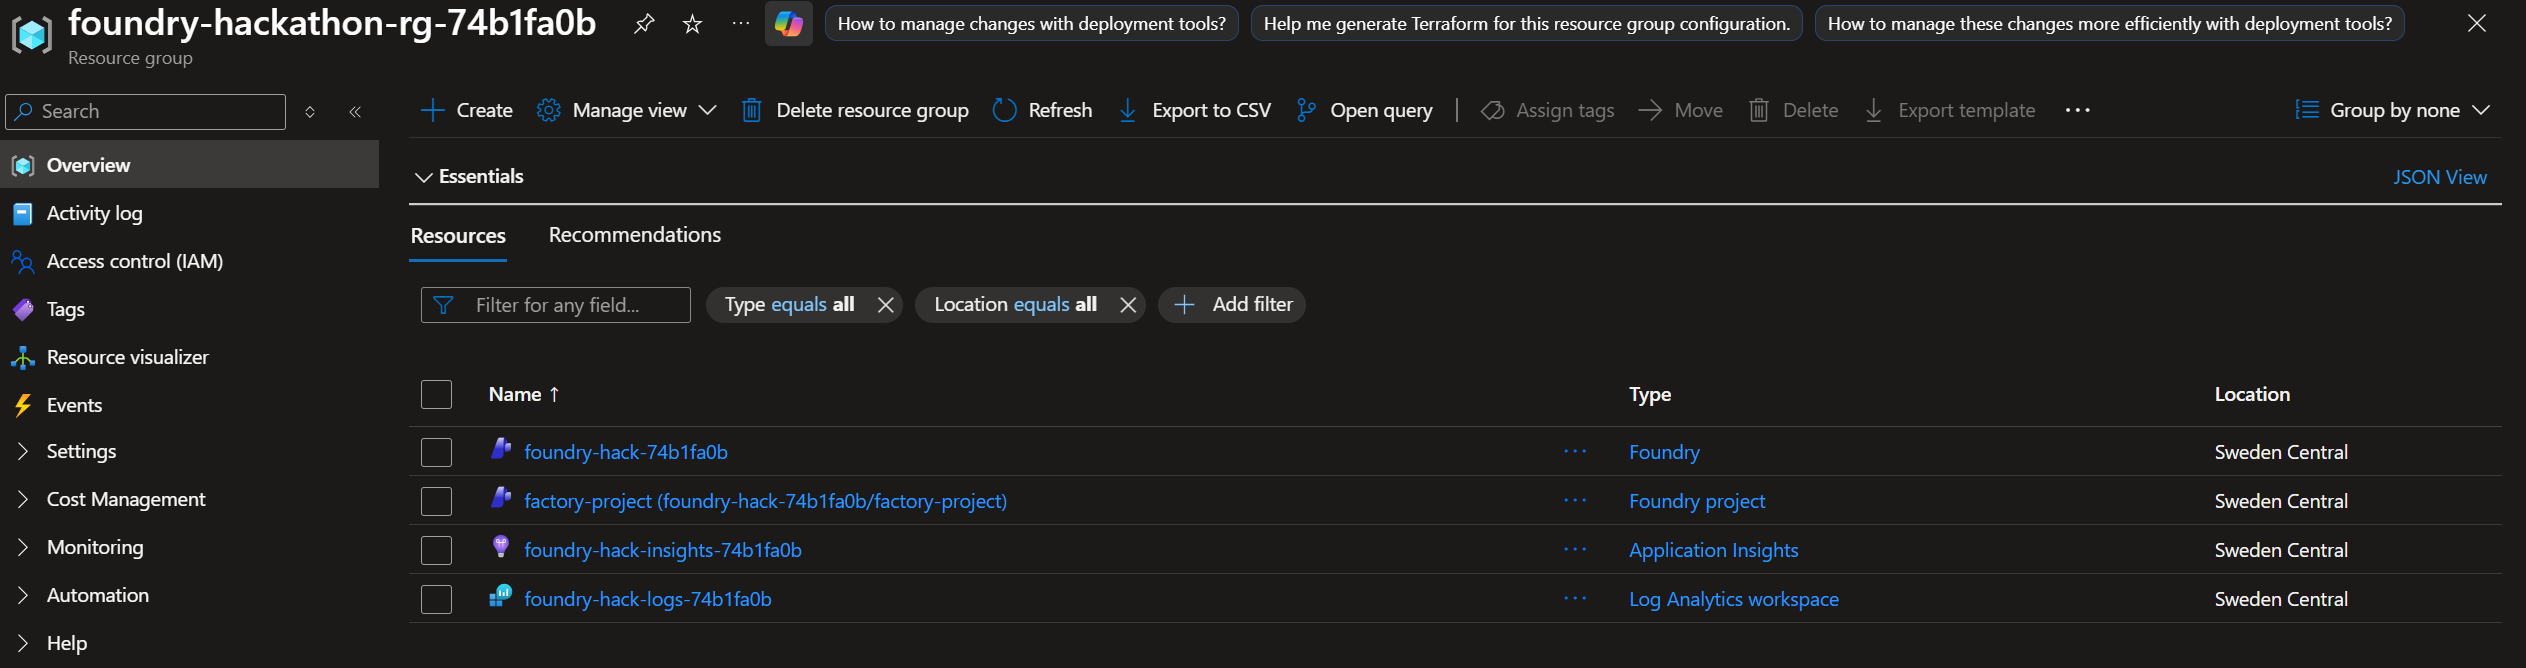
[!NOTE] The resource name prefixes vary by scenario and the suffixes are unique for each deployment
Go to the Microsoft Foundry Portal and verify that you can access the Foundry project.
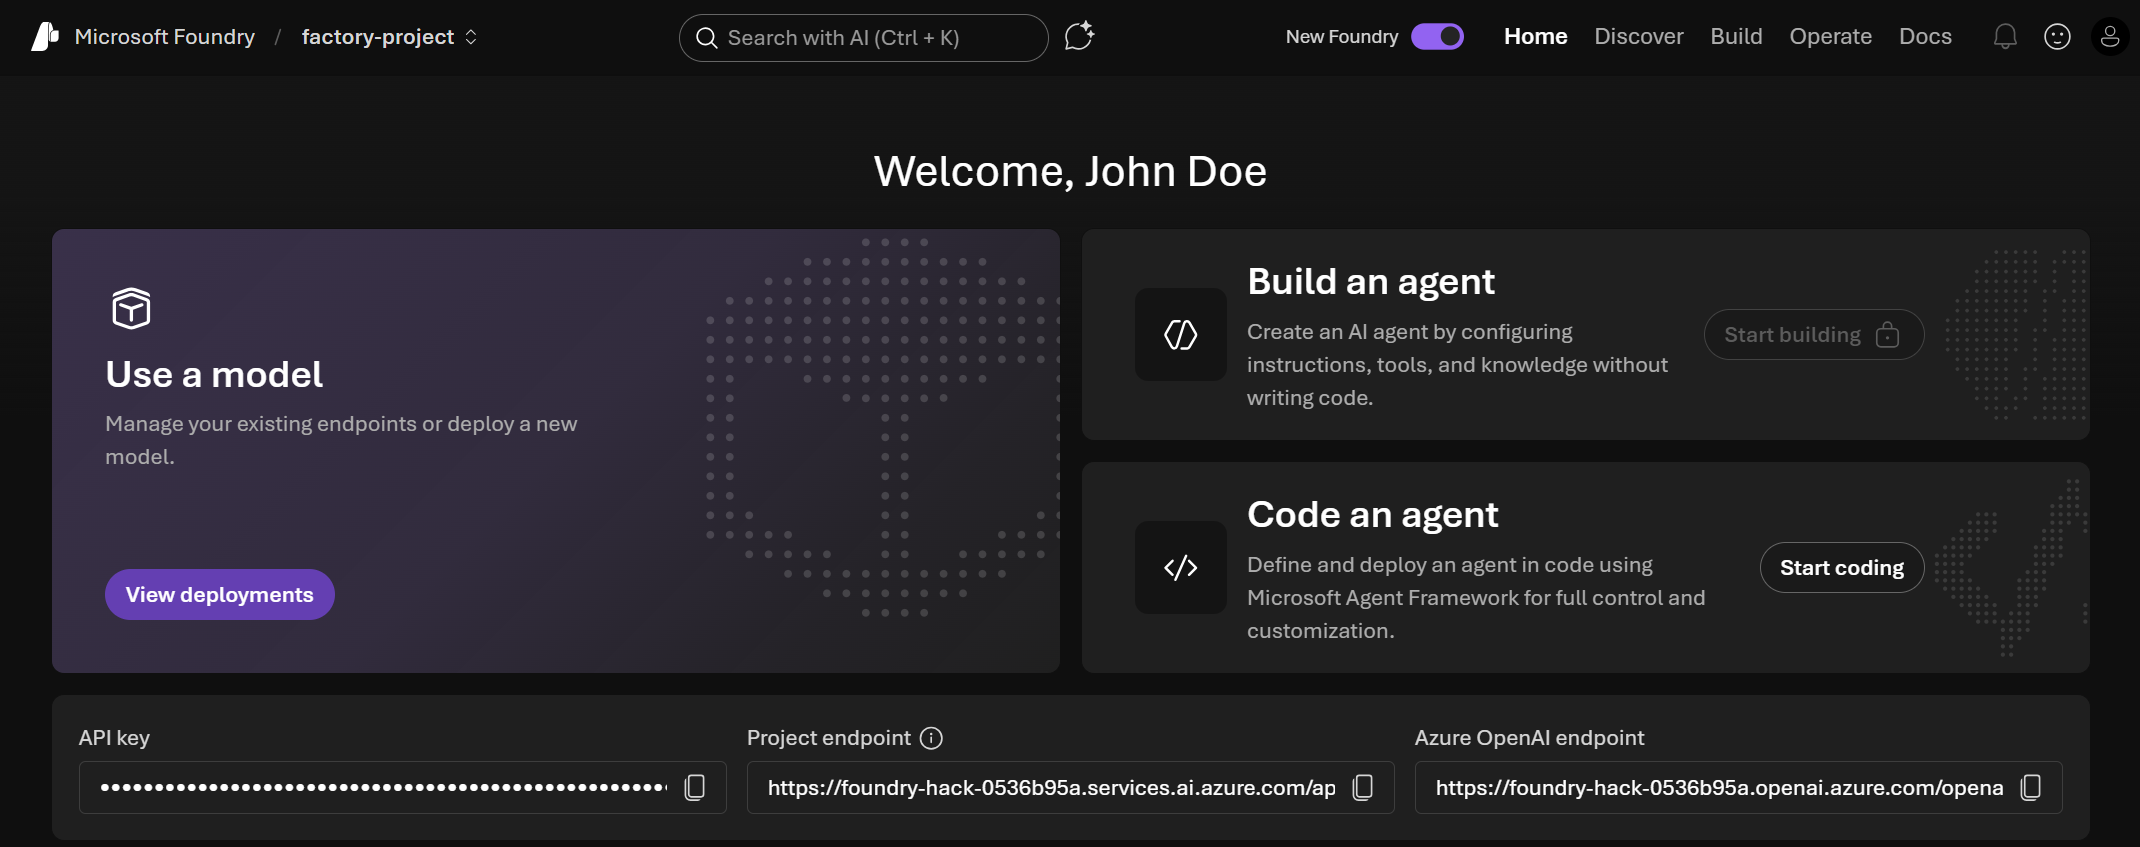
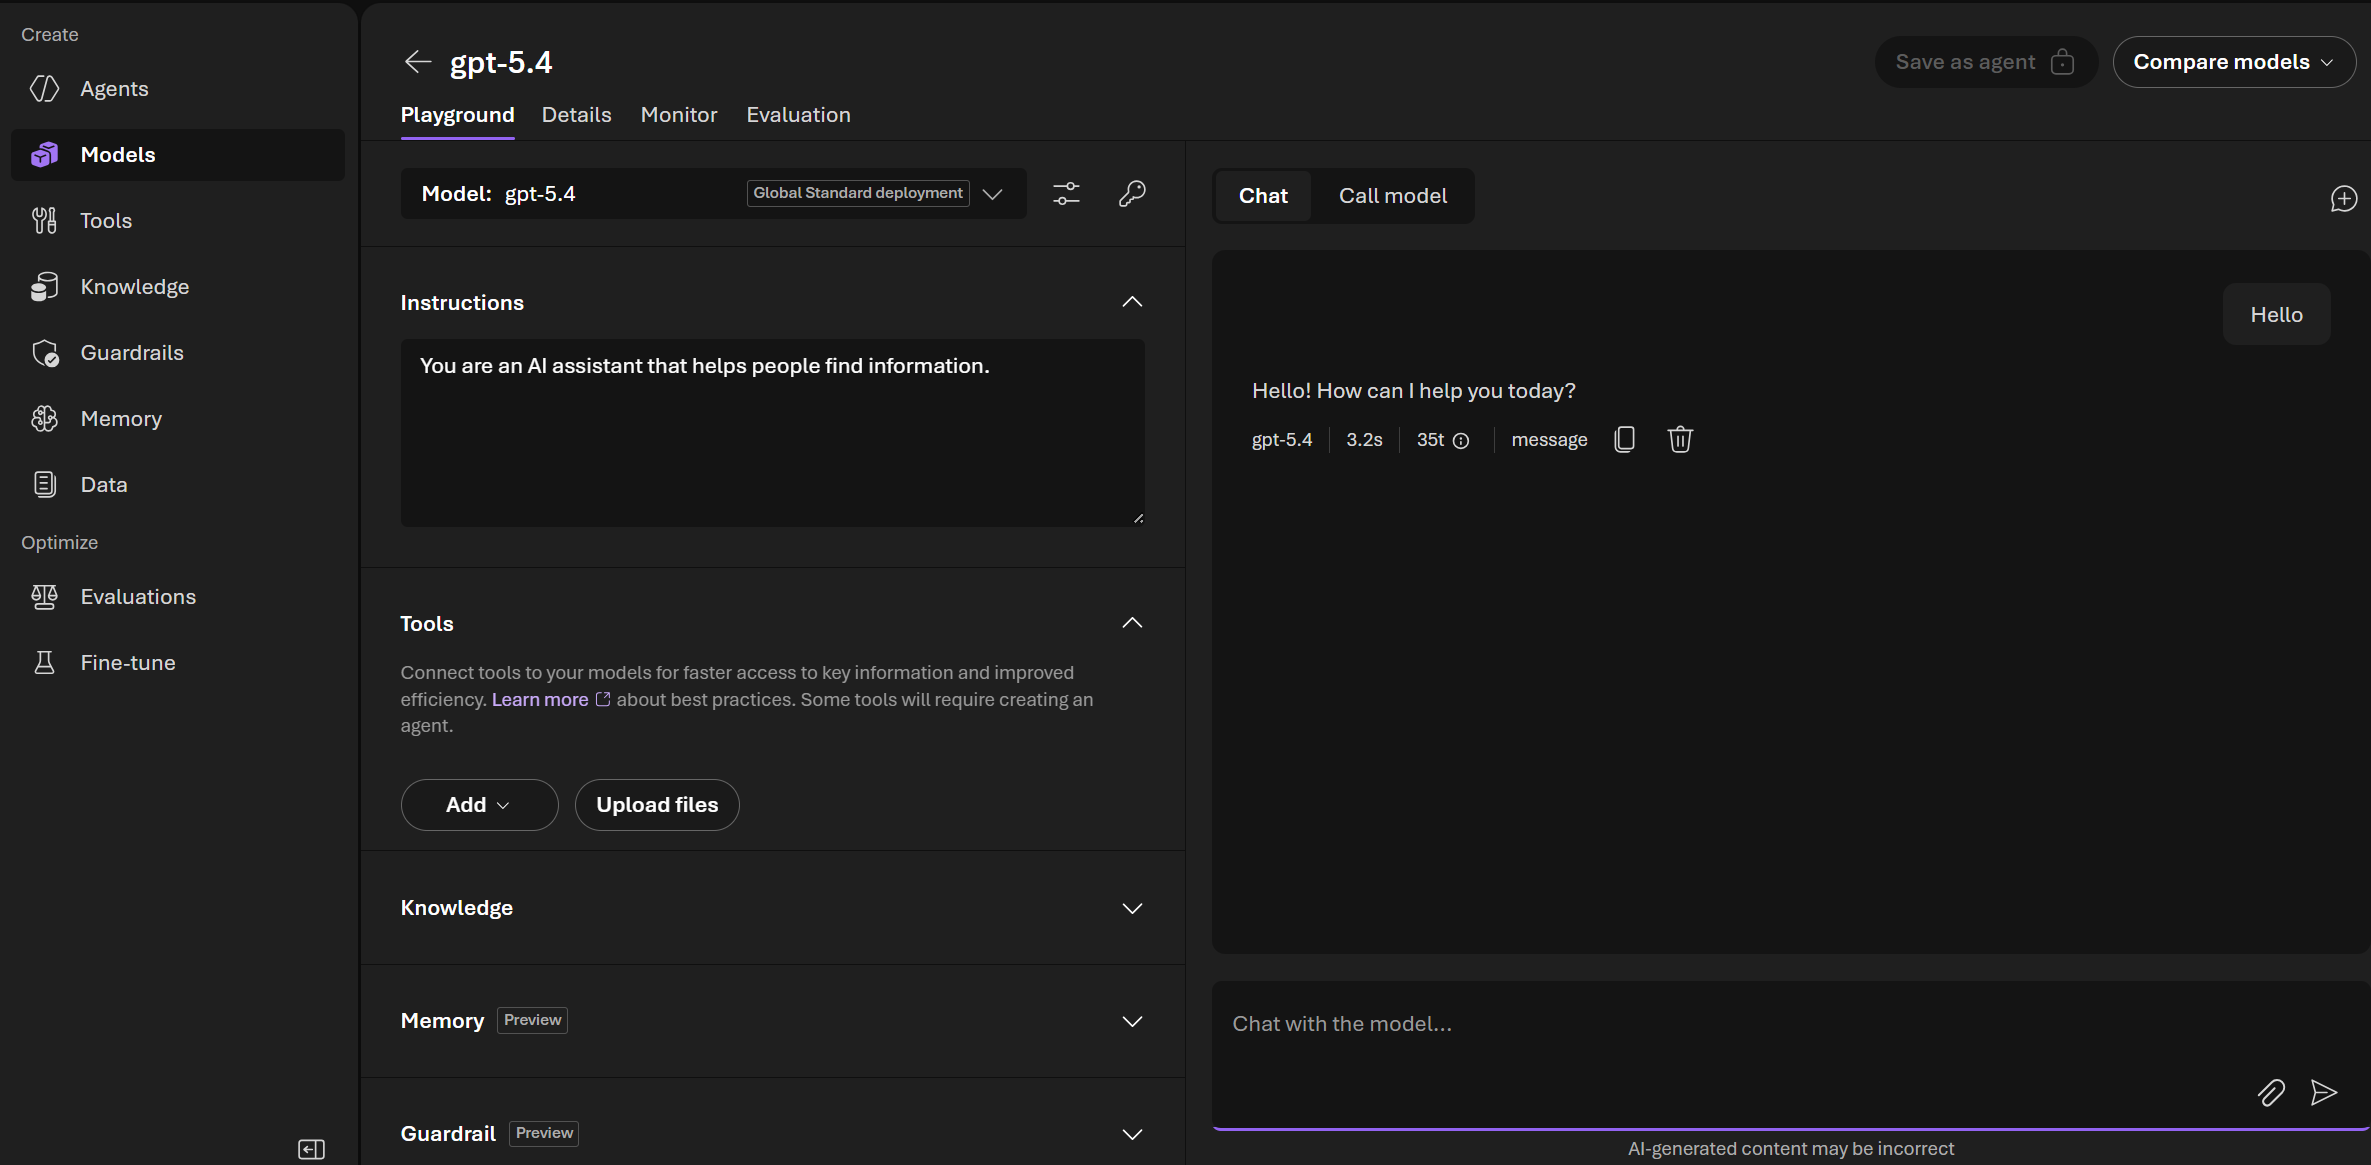
Select Build in the top navigation, then Models, and verify that the gpt-5.4 model is deployed.
[!NOTE] In some versions of the Foundry Portal the Models tab is rebranded to Deployments but they serve the same purpose.
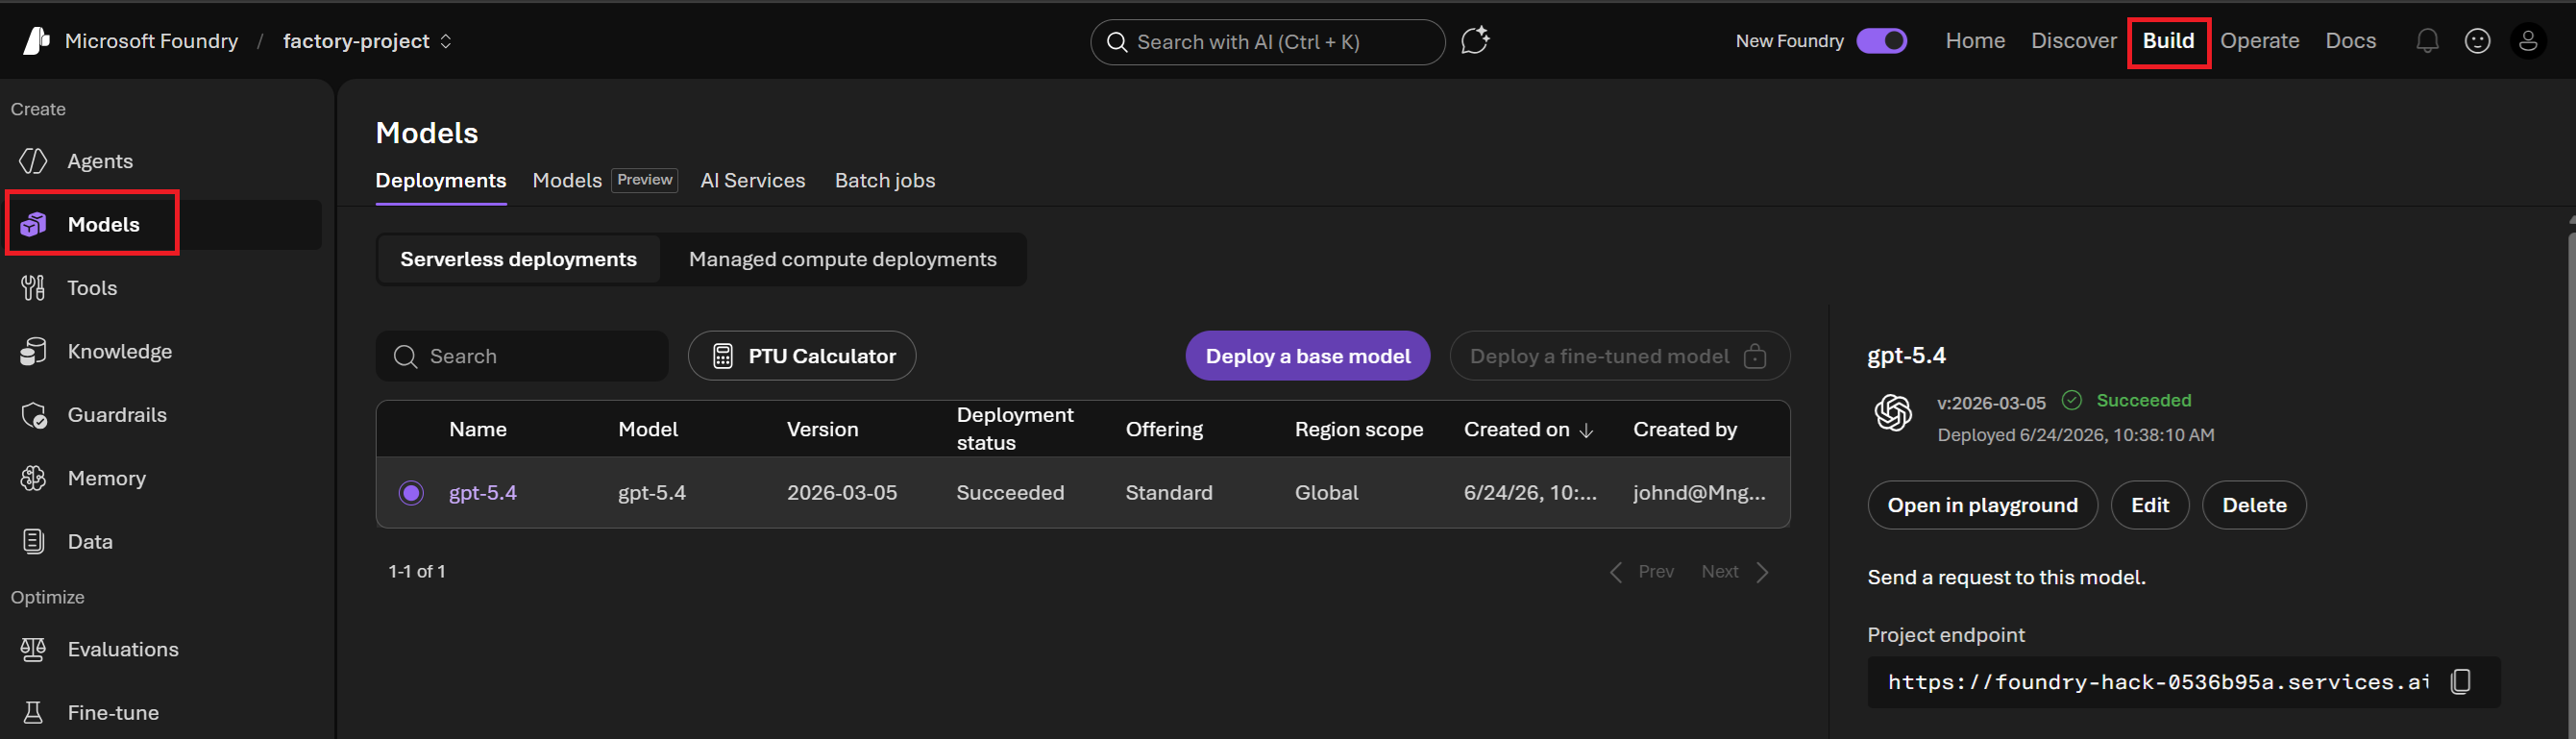
Select gpt-5.4, enter a test message in the model playground, and verify that you get a response.
Success Criteria
- [ ] You can see your Microsoft Foundry project in the Azure Portal
- [ ] A model deployment for gpt-5.4 shows "Succeeded" status
- [ ] You can send a test message in the Foundry Model Playground