Challenge 4: Production Workflow
Time: ~20 minutes
Build a multi-agent orchestration workflow for ClaimSight Insurance and take it to production.
Scenario
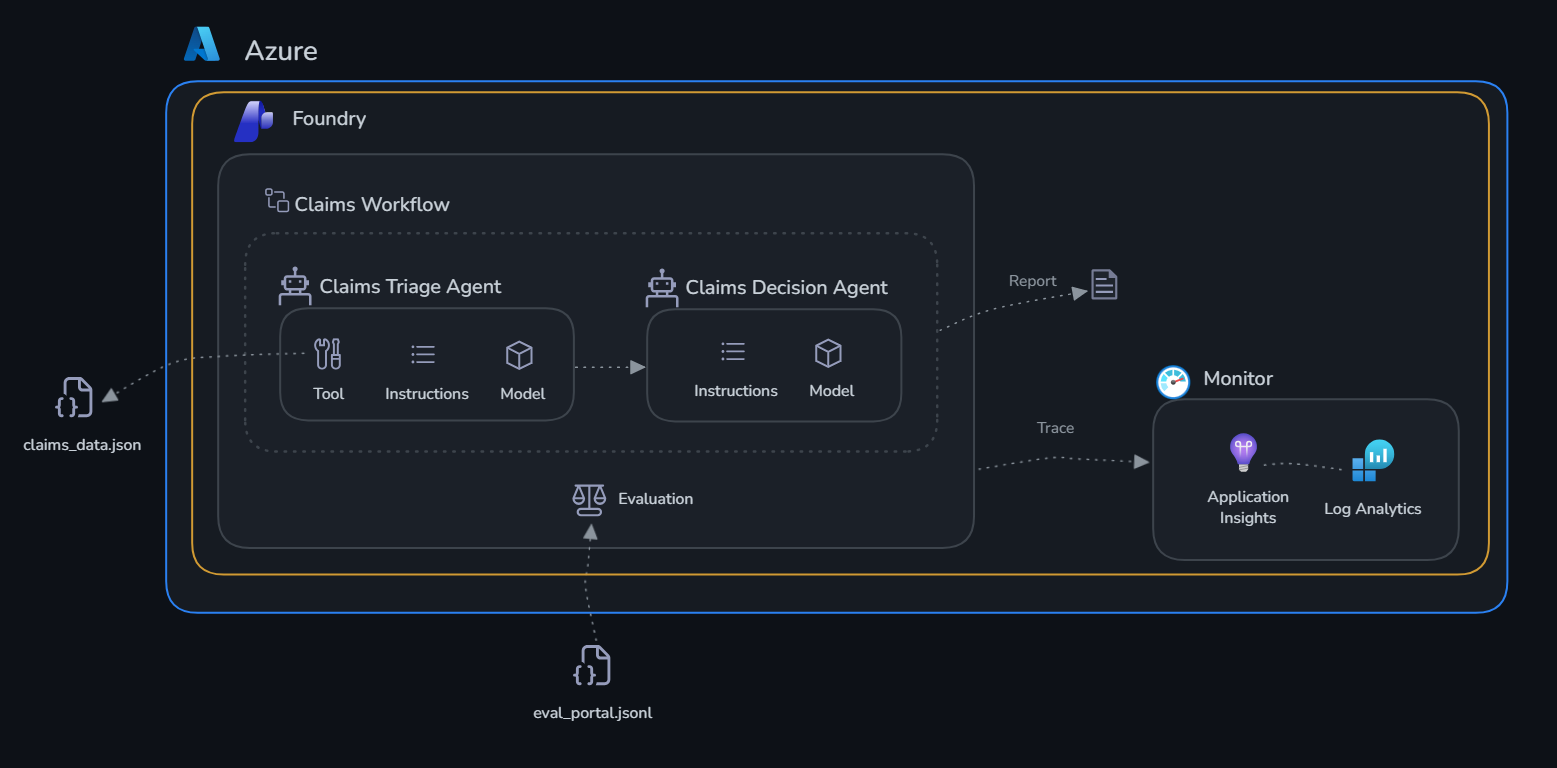
The individual agents you built in Challenge 1 are valuable — but in production, agents need to work together as an automated pipeline. In this challenge you wire the two agents into a full claims processing workflow, run it from code, then build and test it visually in the Foundry portal.
Learning Objectives
- Deploy persistent production agents (create once, reuse forever)
- Orchestrate multiple agents step-by-step in a Python workflow
- Build the same workflow visually in the Foundry portal
- Invoke the portal workflow from Python with live streaming
- View run history and traces in the portal
The Workflow
ensure_agents_deployed()
        |
        v
run_claims_triage()             <-- Claims Triage Agent assesses all 5 claims
        |
        v (for each flagged claim)
run_claims_decision()           <-- Claims Decision Agent recommends action
        |
        v
print_claims_report()           <-- Consolidated Claims Processing Report
Part 1 — SDK: Build and Run the Python Workflow
Step 1: Review the implementation
Open deploy.py and review:
ensure_agents_deployed()— lists existing agents, createsclaims-triage-agentandclaims-decision-agentif not presentrun_claims_triage()— calls the triage agent, handles theassess_claimfunction call looprun_claims_decision()— calls the decision agent for each flagged claimrun_claims_workflow()— orchestrates all steps and returns the consolidated report
Step 2: Run the workflow
Expected output:
=== Step 1: Ensure Agents Are Deployed ===
  Found existing: claims-triage-agent
  Found existing: claims-decision-agent

=== Step 2a: Claims Triage ===
  CLM-001 CRITICAL: fraud_risk_score 64% above max, damage_vs_estimate_match 25.7% below min
  CLM-003 WARNING: completeness 25% below min
  CLM-005 WARNING: fraud_risk_score 16% above max, damage_vs_estimate_match 8.6% below min
  ...

=== Step 2b: Claims Decisions ===
  Deciding on CLM-001...
  Deciding on CLM-003...
  Deciding on CLM-005...

CLAIMSIGHT INSURANCE — CLAIMS PROCESSING REPORT
  Claims assessed    : 5
  Claims flagged     : 3
  ...
Part 2 — Portal: Build and Test the Visual Workflow
Step 3: Verify agents are deployed in the portal
- Open the Microsoft Foundry portal
- Select your project
- Select Build → Agents in the top bar
- Confirm both agents appear:
claims-triage-agentclaims-decision-agent
Step 4: Build the workflow in the portal designer
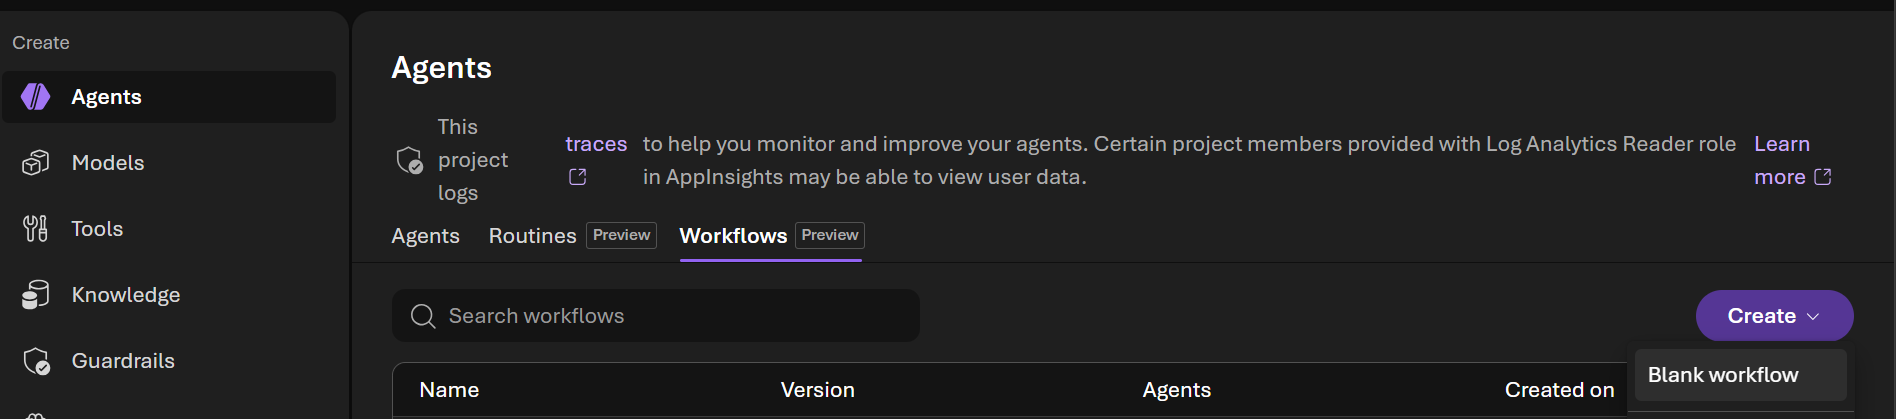
- Select Build → Agents → Workflows
- Notice that the workflow created using the SDK in Part 1 is listed. Let's create a new workflow by selecting Create → Blank workflow
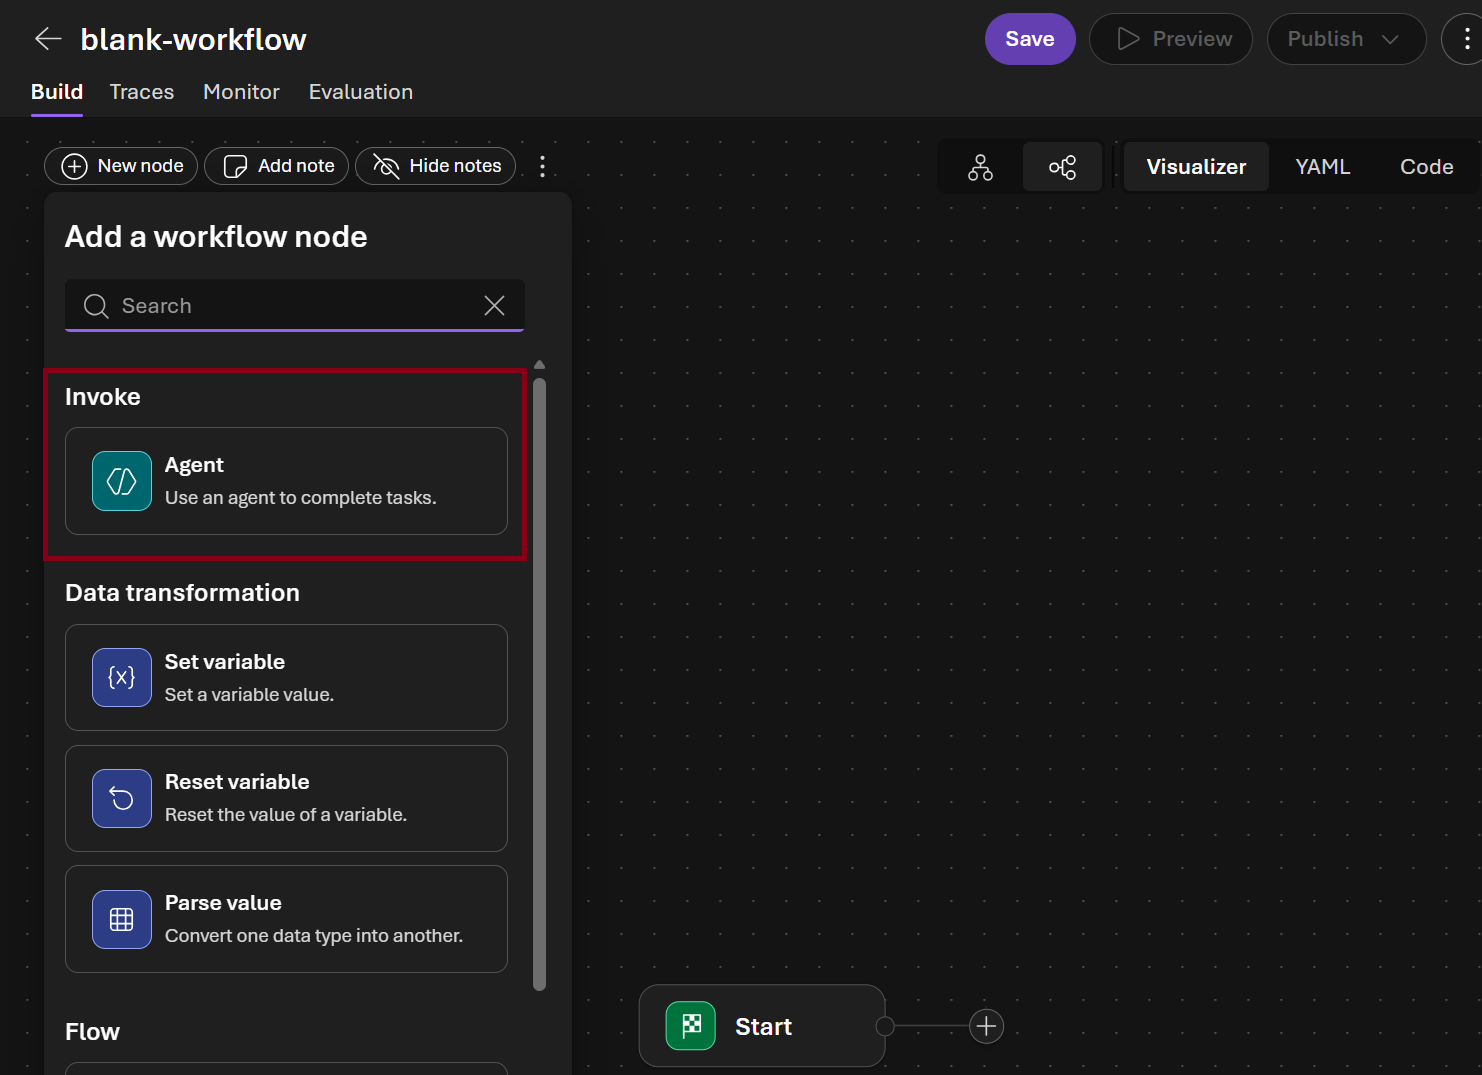
- In the visual designer Add a workflow node dialog choose Agent
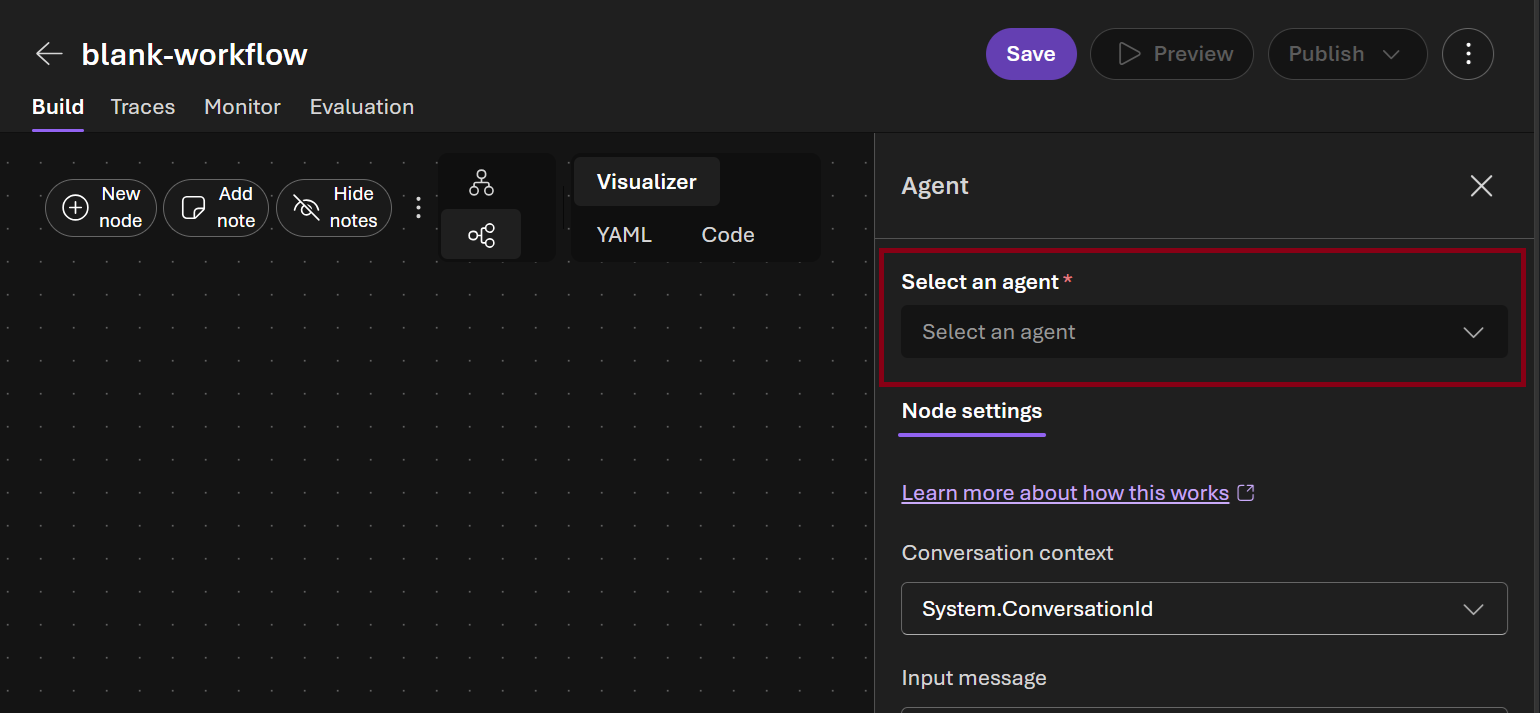
- In the Select an agent picker select
claims-triage-agent
-
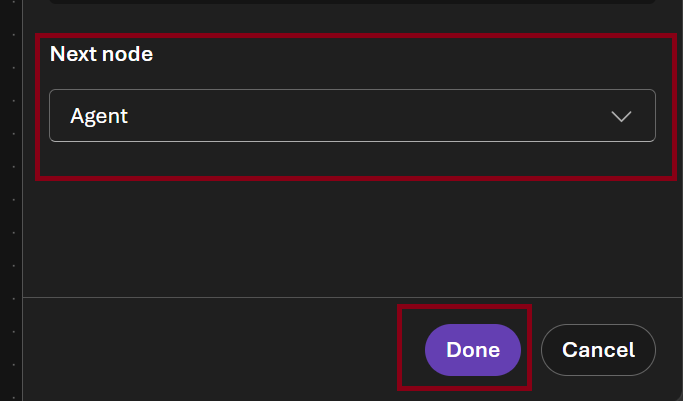
In the Next node picker select Agent and click Done button \
-
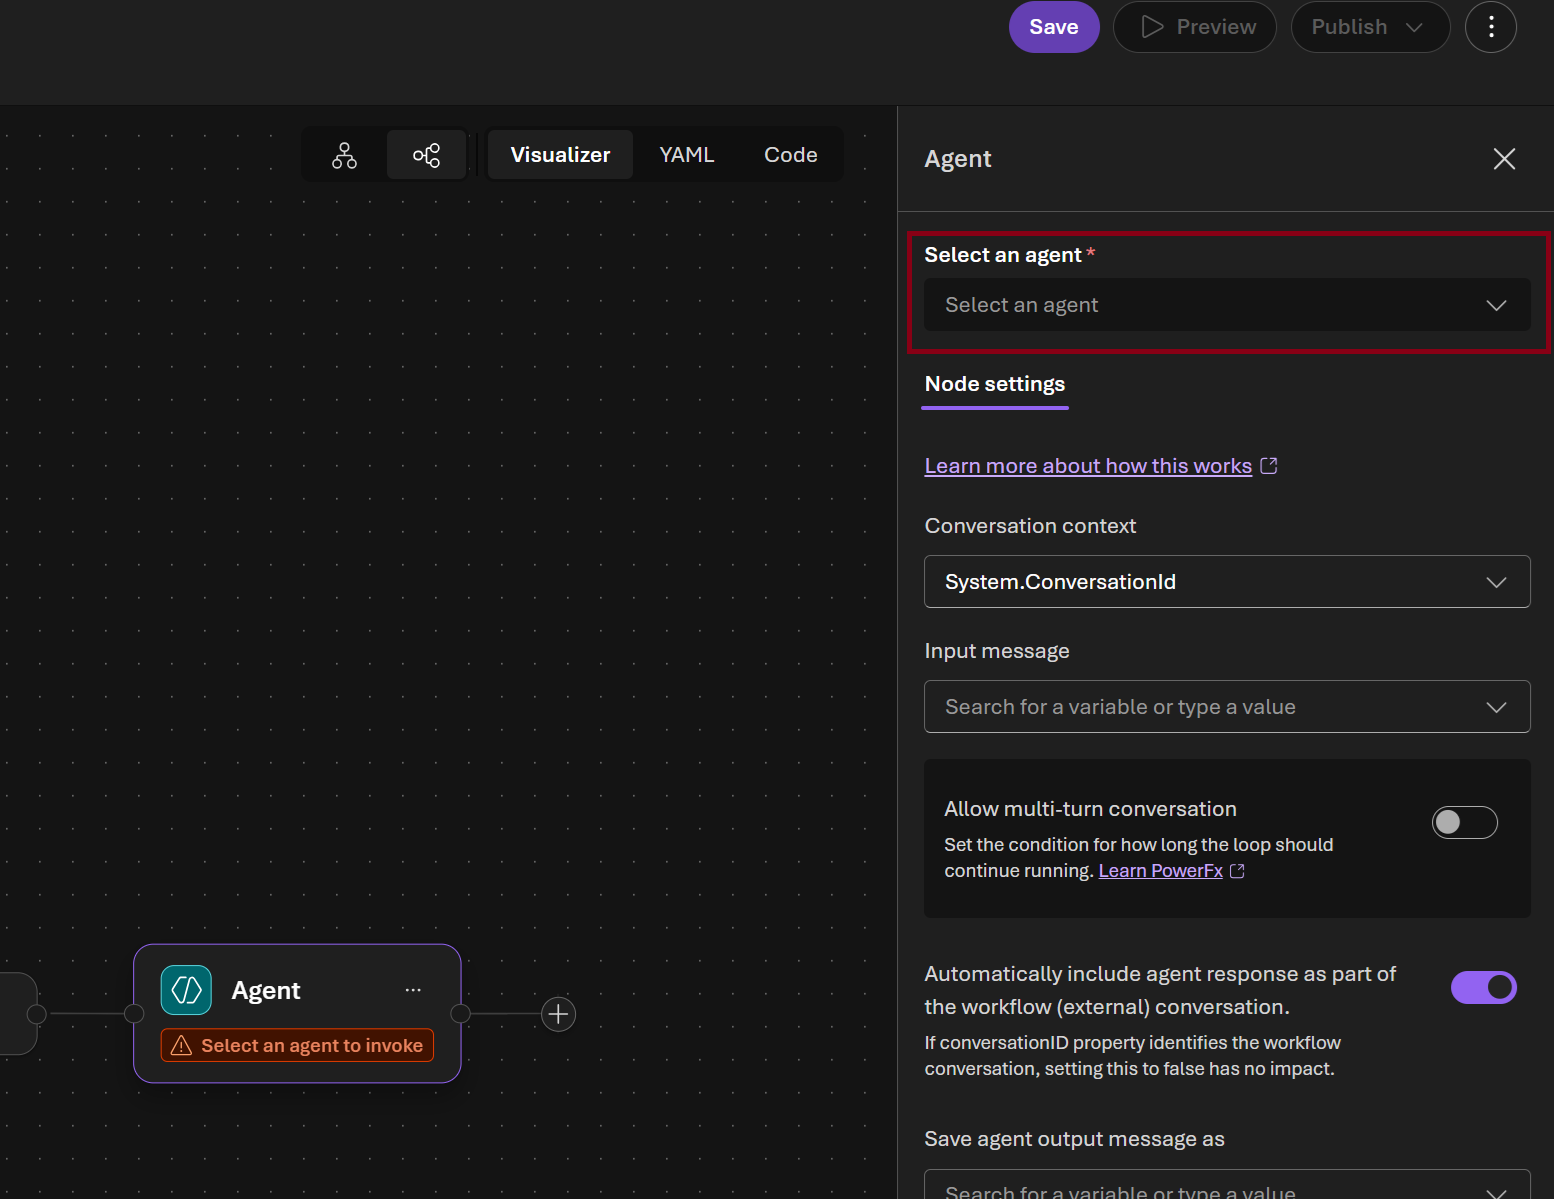
Select the new agent node in the canvas and in the Select and agent picker select
claims-decision-agent
-
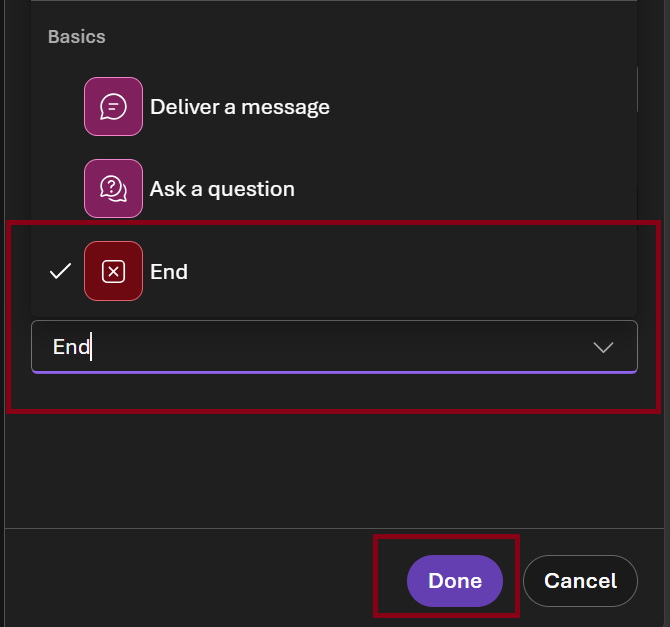
In the Next node picker select End and click Done button
-
Select Save and name it
claims-processing-workflow-portal

Step 5: Test the workflow in the portal playground
Why you must include the claims data in your message
The agents use an
assess_claimtool that reads from a local Python file. The portal playground cannot execute Python functions — if you send a generic prompt, the agent will try to call the tool and stall waiting for a result that never arrives. Paste the claims data directly into your message so the agents can work without needing the tool.
- Open claims-processing-workflow-portal → Preview

- Paste the following message (data is pre-embedded so no tool calls are needed):
All claims data for today is below — analyse it directly, do not call assess_claim.

CLM-001 | Maria Torres | auto_collision | filed 2026-05-01 | status: critical
  completeness: 100%  [min 80%] ✅
  damage_vs_estimate_match: 52%  [min 70%] 🔴 BELOW MIN
  fraud_risk_score: 82  [max 50] 🔴 ABOVE MAX
  policy_coverage_match: 95%  [min 85%] ✅
  documents: police_report, photos, repair_estimate, medical_report

CLM-002 | James Chen | property_water_damage | filed 2026-04-28 | status: normal
  completeness: 100%  [min 80%] ✅
  damage_vs_estimate_match: 88%  [min 70%] ✅
  fraud_risk_score: 15  [max 50] ✅
  policy_coverage_match: 98%  [min 85%] ✅
  documents: photos, plumber_report, repair_estimate, inventory_list

CLM-003 | Robert Kim | auto_theft | filed 2026-05-03 | status: warning
  completeness: 60%  [min 80%] ⚠️ BELOW MIN
  damage_vs_estimate_match: 0%  [min 70%] ⚠️ BELOW MIN
  fraud_risk_score: 45  [max 50] ✅
  policy_coverage_match: 90%  [min 85%] ✅
  documents: police_report, vehicle_registration

CLM-004 | Sarah Williams | property_fire | filed 2026-04-25 | status: normal
  completeness: 100%  [min 80%] ✅
  damage_vs_estimate_match: 91%  [min 70%] ✅
  fraud_risk_score: 12  [max 50] ✅
  policy_coverage_match: 100%  [min 85%] ✅
  documents: fire_department_report, photos, repair_estimate, inventory_list

CLM-005 | David Okafor | auto_collision | filed 2026-05-05 | status: warning
  completeness: 85%  [min 80%] ✅
  damage_vs_estimate_match: 64%  [min 70%] ⚠️ BELOW MIN
  fraud_risk_score: 58  [max 50] ⚠️ ABOVE MAX
  policy_coverage_match: 92%  [min 85%] ✅
  documents: police_report, photos, repair_estimate

Triage each claim for completeness and fraud indicators, then make an approval or denial decision for each with clear justification.
- Watch the steps execute in sequence — triage first, then decisions
- Review the approval/denial decisions with justifications
Step 6: View run history and traces
- In the claims-processing-workflow-portal workflow click Traces
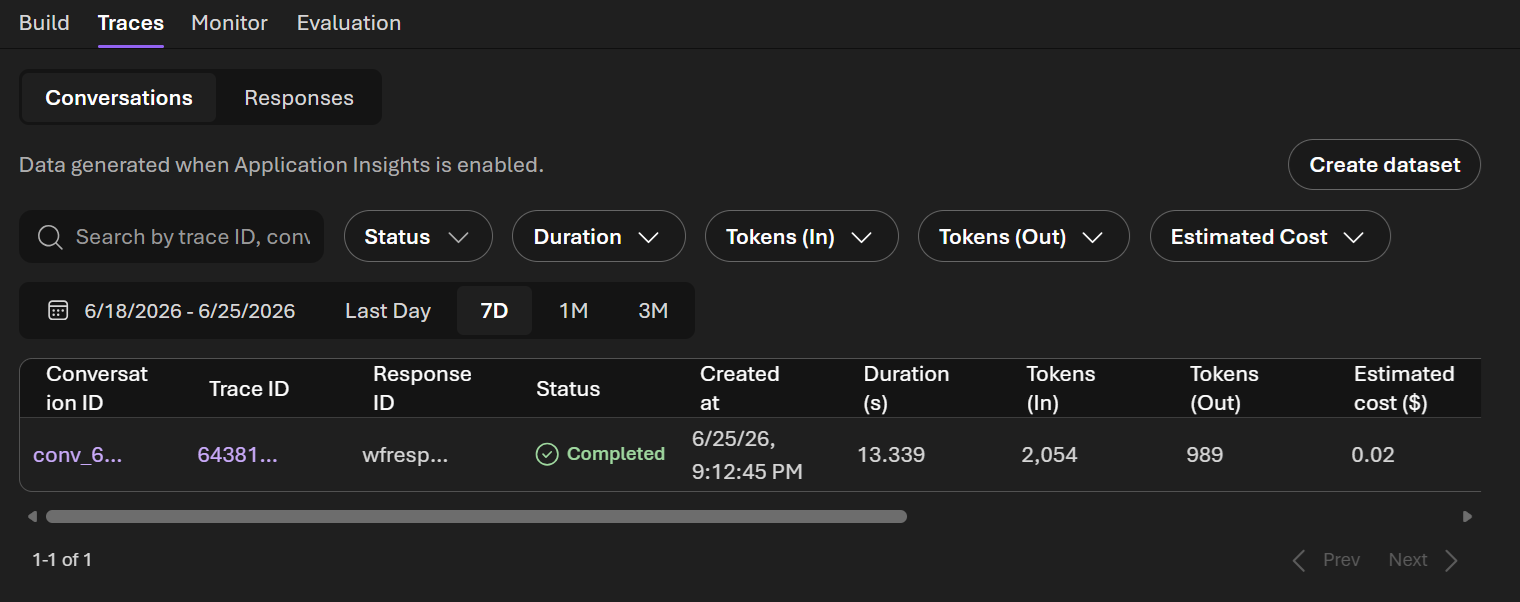
- Click the latest run to see the execution timeline — each step, duration, and output
Success Criteria
- [ ] Python workflow runs end-to-end: triage → decisions → claims report
- [ ] Both agents visible in the Foundry portal as persistent assets
- [ ] Visual workflow created in the portal and tested in its playground
Beyond the Lab: Production Deployment Options
You've built and tested your agents locally. Here's how to take them to production:
Option 1: Hosted Agents (What You Already Have)
Your agents created with agents.create_version() are already production-ready hosted agents. They live in Foundry indefinitely — any client can invoke them by name via the Responses API. No infrastructure to manage; Foundry handles scaling, versioning, and availability.
- Versioning: Each
create_version()produces an immutable version. Roll back by referencing an older version. - Multi-tenant: Multiple users/apps can call the same agent simultaneously.
- Portal visibility: Agents appear under Build → Agents with playground, run history, and tracing.
Option 2: Foundry Workflows (Visual Orchestration)
What you built in Part 2 — wire multiple hosted agents into a DAG using the portal designer. The workflow becomes a deployable agent invoked via the same Responses API.
- Step sequencing with automatic output passing
- Streaming
workflow_actionevents showing progress - Run history with per-step timing
Option 3: Azure App Service / Container Apps
Wrap your Python workflow in a FastAPI/Flask app for custom middleware, auth, or business logic:
# Example: FastAPI endpoint that calls your Foundry agents
@app.post("/process-claims")
async def process_claims():
    report = run_claims_workflow(triage_agent, decision_agent)
    return report
Deploy to App Service (managed PaaS) or Container Apps (auto-scaling containers).
Option 4: Azure Functions (Event-Driven)
Trigger agent workflows from events:
- Blob trigger: Process each new claim document as it's uploaded
- Service Bus trigger: Handle claims from a message queue
- HTTP trigger: On-demand endpoint for claims adjusters
Pay-per-execution, scales to zero when idle.
Option 5: CI/CD Quality Gates
Integrate evaluation into your deployment pipeline:
- Run
evaluate.pyon every PR — block merge if quality drops below threshold - Promote agent versions:
v1-dev→v1-staging→v1-prodafter evaluation passes - Blue/green: Deploy new version to 10% traffic, compare metrics, then promote
Summary
| Pattern | Best For |
|---|---|
| Hosted Agents | Always-on, invoke by name, no infra management |
| Foundry Workflows | Multi-agent orchestration without code |
| App Service / Containers | Custom auth, middleware, webhooks |
| Azure Functions | Event-driven, pay-per-use, document processing |
| CI/CD Gates | Automated quality assurance before promotion |