Task 02 - Import and configure a flow
Introduction
A flow encapsulates the logic that tells the chatbot what it can do and how to do things. Creating a flow can be complicated. For this lab, you’ll use a pre-built flow. The flow uses the OpenAI API to directly query the Azure Search index.
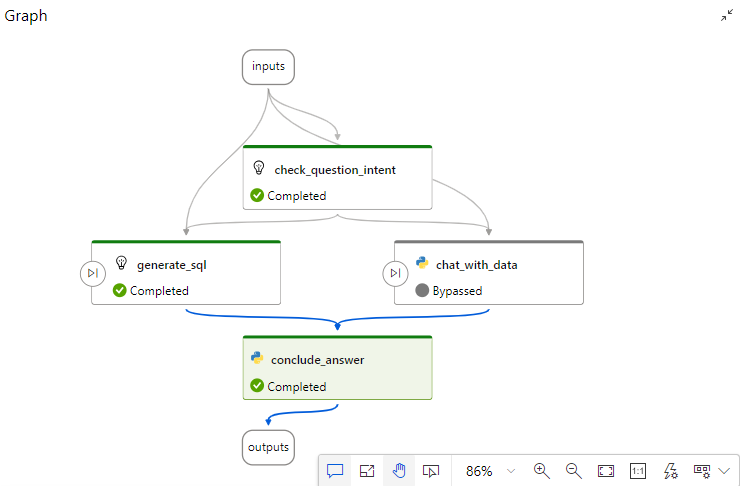
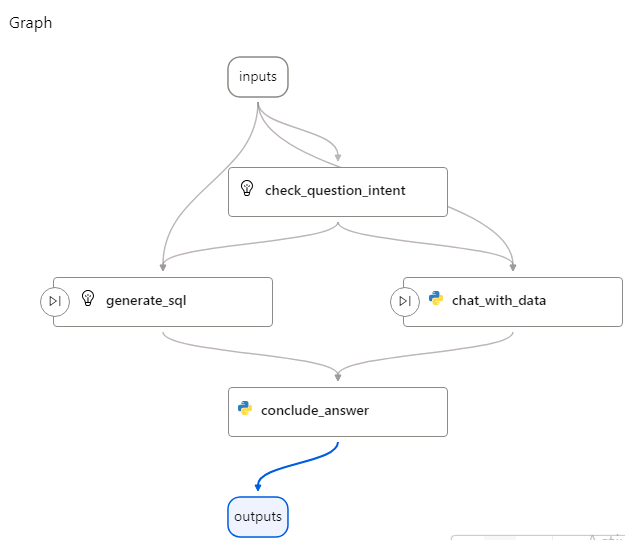
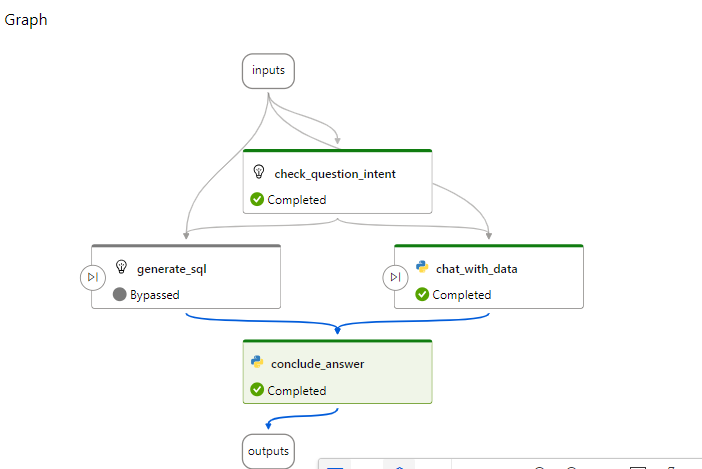
The flow collects inputs and performs several steps. The diagram below depicts the logical operations that the flow performs.
AI Studio also includes an integrated vector search feature. We didn’t specify the use of the integrated vector search feature for this lab because we can’t deploy a flow that uses the feature to a container at this time.
Description
In this task, you’ll import a pre-built flow, configure flow settings, and then test the flow.
The key steps are as follows:
- Import a pre-built flow into the project.
- Configure the flow.
- Test the flow.
Success Criteria
- You’ve imported and configured a pre-built flow.
- You’ve tested the flow and confirmed that the flow returns appropriate results.
Learning Resources
- Develop your own custom copilots with Azure AI Studio
- Get started with prompt flow
- Prompt flow in Azure AI Studio
- Add a new connection in Azure AI Studio
Solution
Expand this section to view the solution
-
Return to the Azure AI Studio browser window.
If you closed the window, go to Azure AI Studio.
-
In the left navigation pane for the hub, select Hub Overview.
-
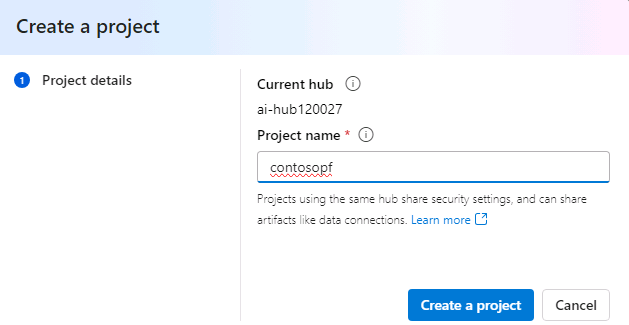
On the Overview page for the hub, locate the Projects section and select + New project.
-
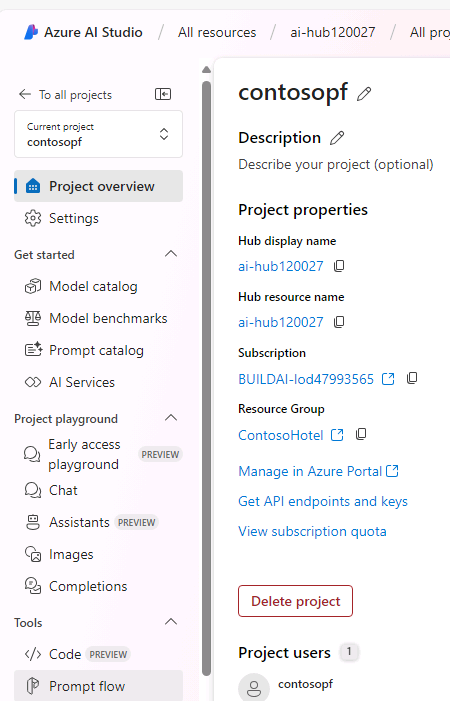
In the Project name field, enter contosopf and then select Create a project. Wait for the project to be created.
-
In the left navigation pane for the project page, in the Tools section, select Prompt flow.
-
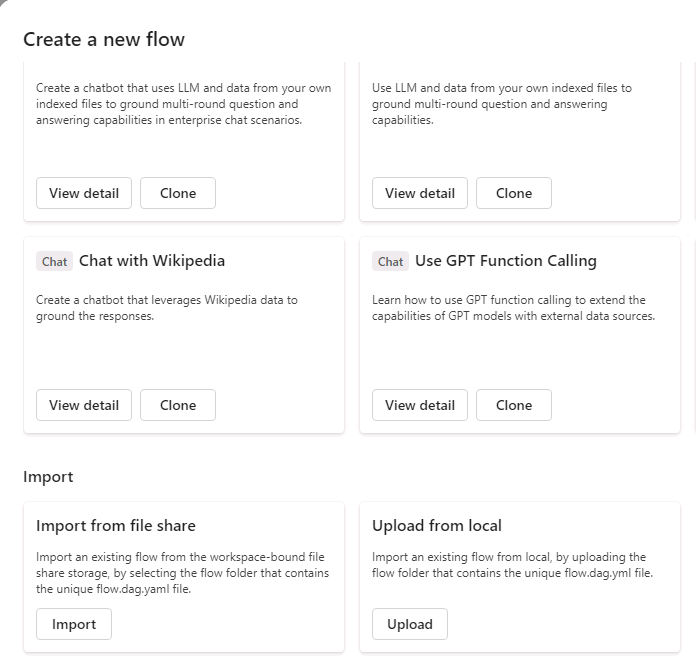
On the Create, iterate, and debug your orchestration flows page, select +Create.
-
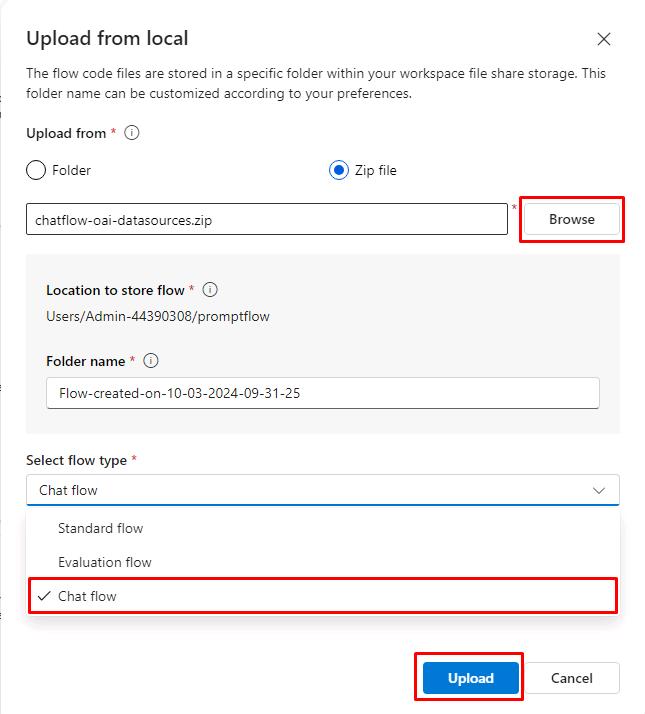
On the Create a new flow page, in the Upload from local section, select Upload.
-
On the Upload from local page, select Zip file and then select Browse. Go to the Downloads\AssetsRepo\Assets folder.
You created this folder in Exercise 04 Task 01 when you cloned the GitHub repository to acquire the hotel brochures.
-
Select chatflow-oai-datasources..zip and then select Open.
-
Under Select flow type, select Chat flow. Then select Upload to import the zip file into the project.
It may take several minutes to upload the flow. Separately, if you receive the following error or the Upload button becomes available again, wait a few minutes and try again.

-
This will load the prompt flow once uploaded. In the middle pane for the flow, you’ll see one flow for each of the four logical steps in the flow. Review the information in each tile. This will help you understand how the flow functions.
-
Open a new browser window and go to Azure portal.
-
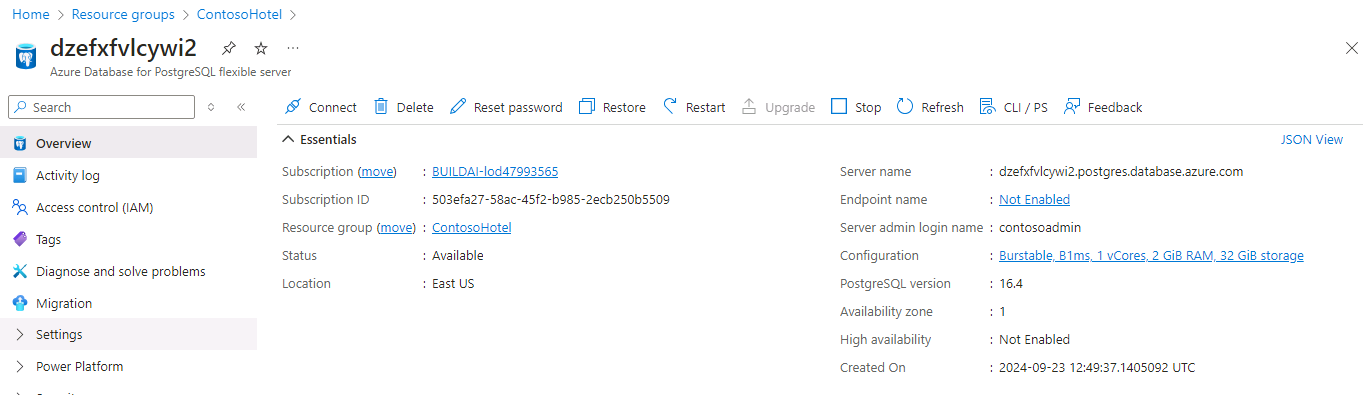
Search for and select the PostgreSQL database that you created in a previous exercise.
-
In the Overview section for the database, copy the value for Server name. You’ll pass the value into a field in Step 18 of this task.
-
In the left navigation pane for the flow, select Settings and then select + New connection.
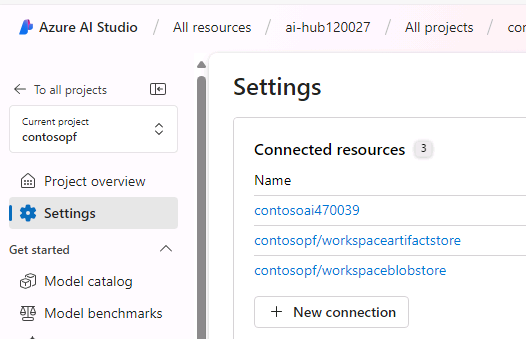
-
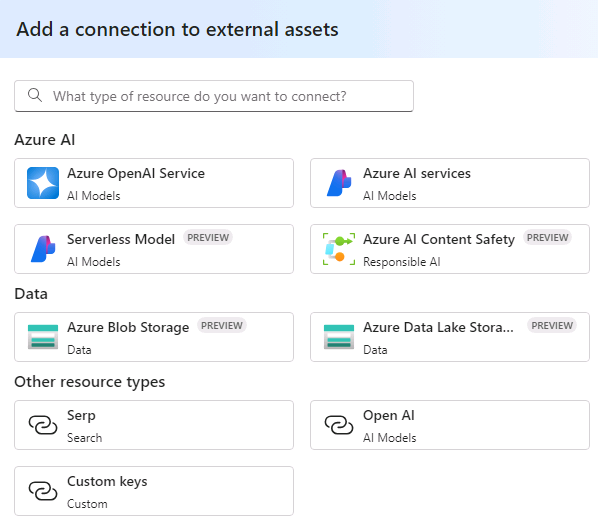
On the Add a connection to external assets page, select Custom keys.
-
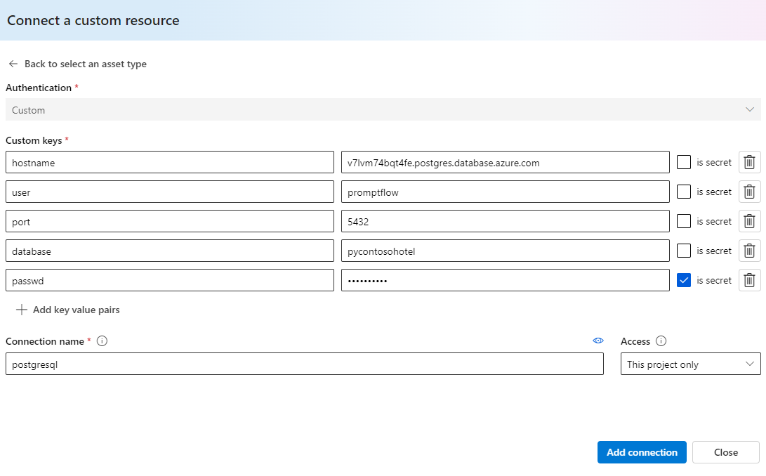
Select + Add key value pairs.
-
Enter the following information.
Field Value Custom keys hostname Value Use the server name you copied in Step 14 of this lab -
Select + Add key value pairs.
-
Enter the following information.
Field Value Custom keys user Value promptflow -
Select + Add key value pairs.
-
Enter the following information.
Field Value Custom keys port Value 5432 -
Select + Add key value pairs.
-
Enter the following information.
Field Value Custom keys database Value pycontosohotel -
Select + Add key value pairs.
-
Enter the following information.
Field Value Custom keys passwd Value 1234ABCD! Is Secret Selected -
In the Connection name field, enter postgresql and then select Add connection. Wait while the connection is created. The connection should resemble the following screenshot:
-
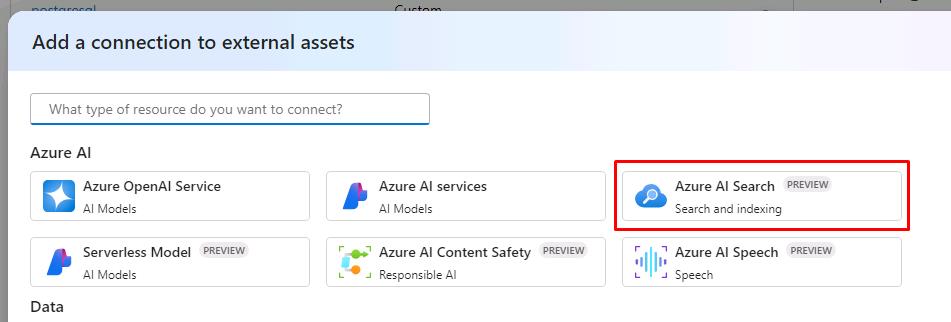
From Settings, select + New Connection again.
-
Select Azure AI Search.
-
Select Add connection to the right of your Azure AI Search Service.
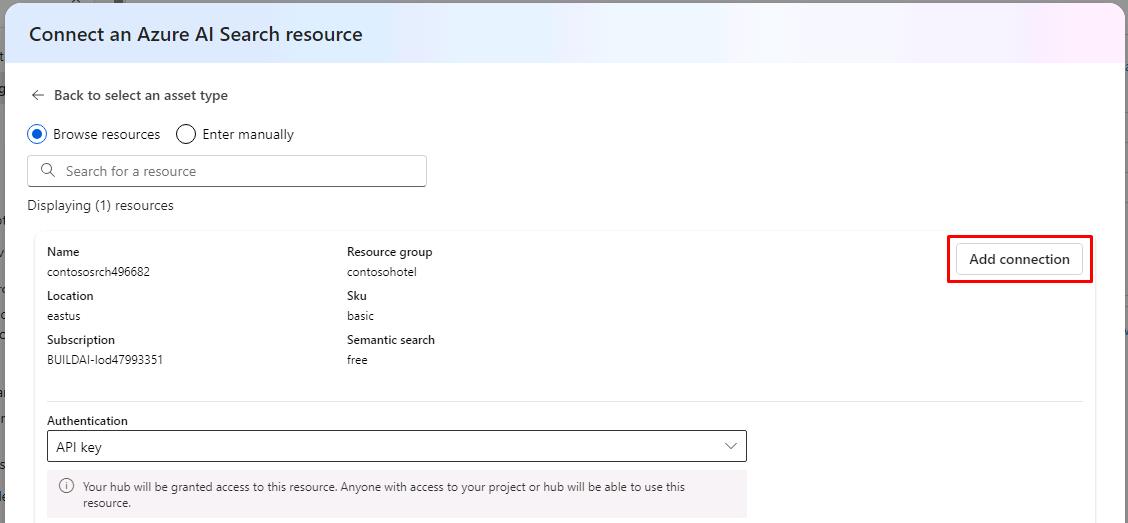
-
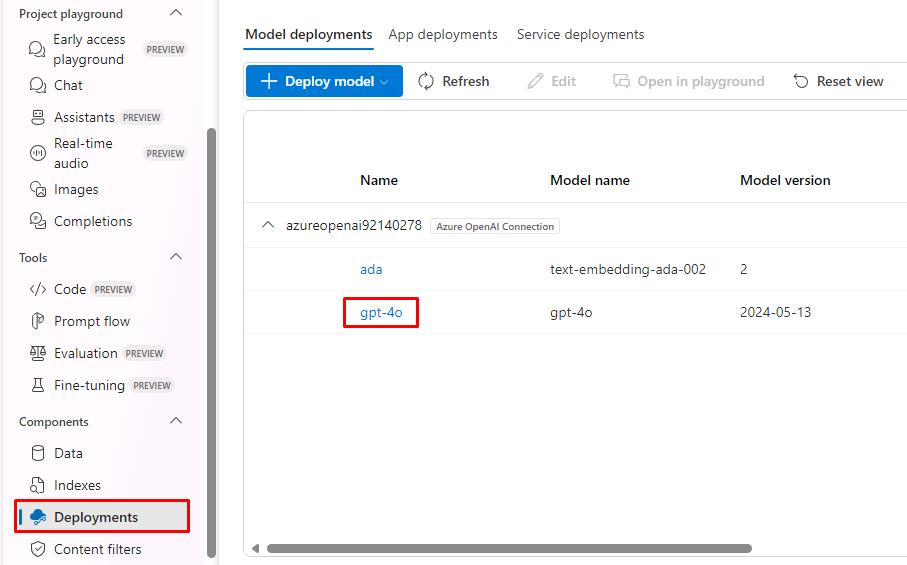
In the left navigation pane, under the Components section, select Deployments, and then select your gpt-4o model.
-
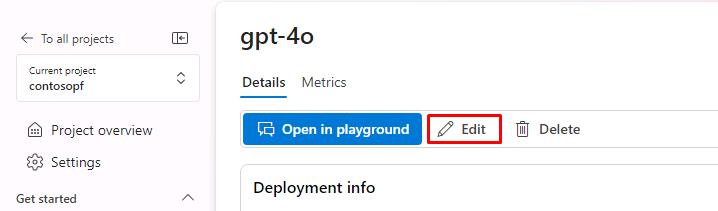
Select Edit.
-
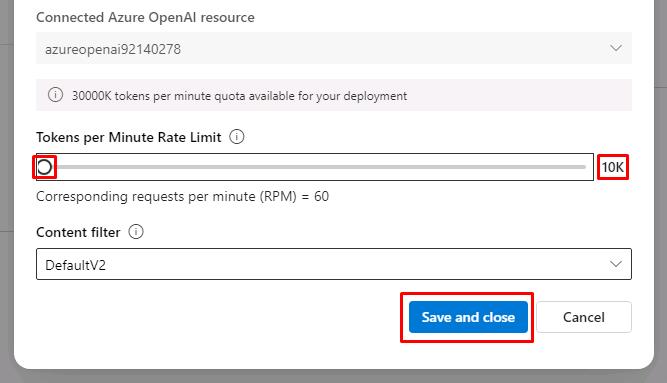
The Tokens per Minute Rate Limit needs to be increased from the default for the chatbot to function.
- Change the value to 10K.
- Select Save and close.
Dragging the slider does not allow for small increments. Select the white dot on the slider, then use Left/Right Arrow Keys to change the value.
-
In the left navigation pane for the flow, in the Tools section, select Prompt flow and then select the prompt flow that you created.
-
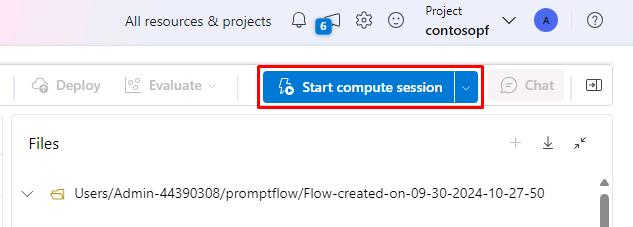
Select Start compute session. This allows you to run and test the chatbot. Continue to the next steps to finish configurations while this starts.
-
Locate the check_question_intent tile. In the Connection field, select the connection that displays.

-
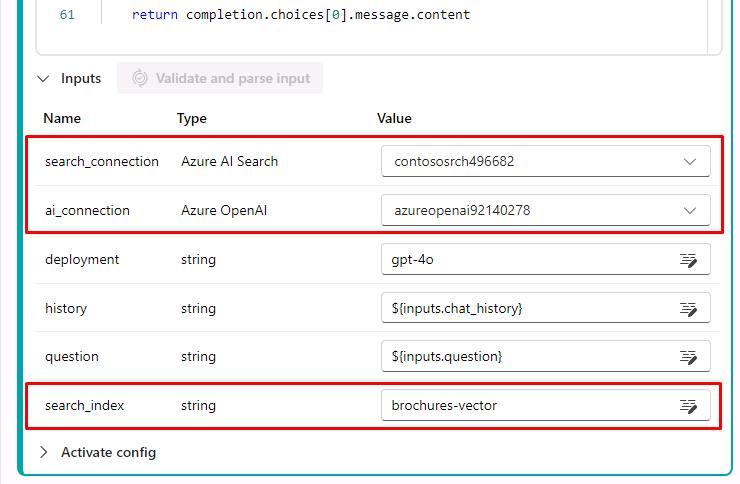
Scroll down to the chat_with_data tile and below the Inputs section.
- Select Value of search_connection and then select your Azure AI Search Service from the dropdown list.
- Select Value of ai_connection and then select your Azure OpenAI resource from the dropdown list.
- Change the Value of search_index to brochures-vector.
-
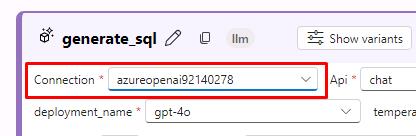
Scroll down to the generate_sql tile. In the Connection field, select the connection that displays.
-
Scroll down to the bottom of the conclude_answer tile. We’ll input a value into the field that will populate after testing the next steps.
-
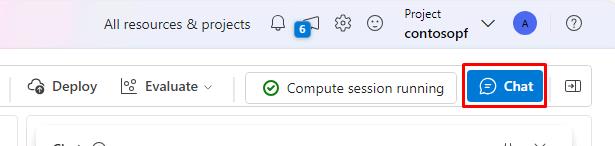
If the compute session has started, select Chat to test the flow.
-
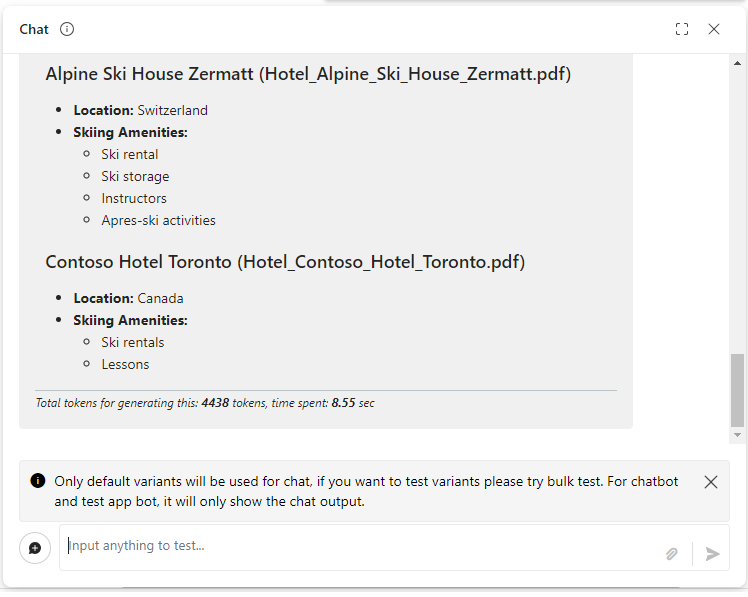
Enter Where can I ski? in the chat prompt and select Enter. This will give you a warning and populate the PostgreSQL property at the bottom of the conclude_answer tile.

-
Select Value of PostgreSQL and then select postgresql from the dropdown list.

-
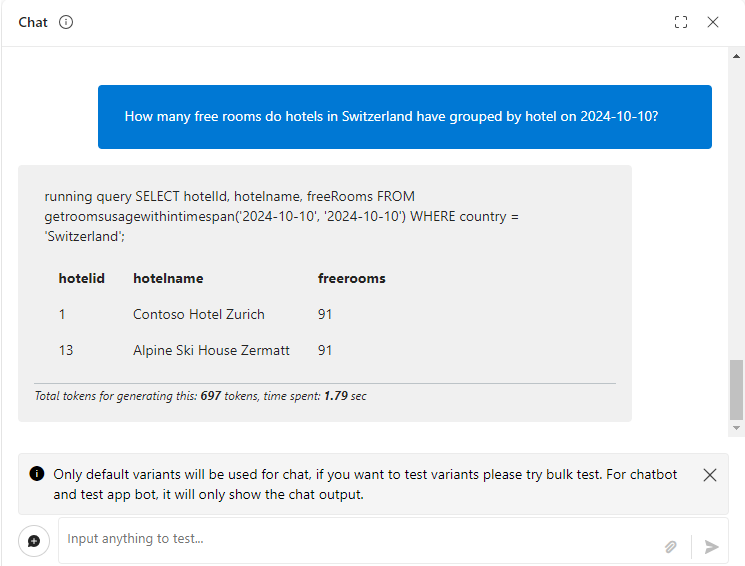
Select the X on the warning in the Chat, then send Where can I ski? again. Your results should resemble the following:
-
Start a new conversation and enter How many free rooms do hotels in Switzerland have grouped by hotel on 2024-10-10?. Your results should resemble the following: