Task 03 - Install necessary software
Introduction
Before you clone the repository you just forked, you will set up your development environment and install the components that will be needed for this training lab.
Description
To work through this training lab, you will need .NET 6 to support the lab starting point, and .NET LTS to support the target state of the solution. In addition, you will need other tools and extensions for Visual Studio Code in order to complete step in later exercises. In this task you will install the necessary software to complete the work.
Success Criteria
- You have installed .NET 6 and .NET LTS
- You have set up your Visual Studio Code environment and installed necessary extensions for this lab
Learning Resources
Key Tasks
01: Install .NET 6 and .NET LTS
The lab solution is based on .NET 6 and will later be upgraded to .NET LTS. In this step you will install the two SDKs if they are not already on your machine.
Expand this section for detailed steps
-
Install .NET 6 SDK
- macOS:
- Download and install from https://dotnet.microsoft.com/en-us/download/dotnet/6.0
- Or use Homebrew:
brew install --cask dotnet-sdk
- Windows:
- Download and run the installer from https://dotnet.microsoft.com/en-us/download/dotnet/6.0
- Linux:
- Follow the instructions for your distribution at https://docs.microsoft.com/en-us/dotnet/core/install/linux
- macOS:
-
Install .NET LTS SDK
Navigate to https://dotnet.microsoft.com/en-us/download/dotnet and select the correct LTS version of .NET to be installed. This task instructs you to install .NET 8 however if .NET 10 is released (for example) you can change the URLs referenced below.
- macOS:
- Download and install from https://dotnet.microsoft.com/en-us/download/dotnet/8.0
- Or use Homebrew:
brew install --cask dotnet-sdk
- Windows:
- Download and run the installer from https://dotnet.microsoft.com/en-us/download/dotnet/8.0
- Linux:
- Follow the instructions for your distribution at https://docs.microsoft.com/en-us/dotnet/core/install/linux
- macOS:
02: Install Azure CLI tools
You will install the following Azure CLI tools:
- Azure CLI
- Azure Developer CLI (also known as AZD or azd)
Expand this section for detailed steps
-
Install Azure CLI
- macOS:
brew update && brew install azure-cli - Windows:
- Download and run the installer from https://aka.ms/installazurecliwindows
- Linux:
- Run:
curl -sL https://aka.ms/InstallAzureCLIDeb | sudo bash - For other distros, see official docs
- Run:
- macOS:
-
Install Azure Developer CLI (azd)
- macOS:
brew update && brew install azure/azd/azd - Windows:
- Download and run the installer from https://aka.ms/azd-install
- Linux:
- Run:
curl -fsSL https://aka.ms/install-azd.sh | bash
- Run:
- macOS:
03: Install Git Tools
You will install Git tools to support development tasks.
Expand this section for detailed steps
-
Install Git
- macOS:
brew install git - Windows:
- Download and run the installer from https://git-scm.com/download/win
- Linux:
- Run:
sudo apt-get update && sudo apt-get install git - Or use your distro’s package manager
- Run:
- macOS:
04: Install Visual Studio Code
You will install Visual Studio Code to complete development work for this lab.
Expand this section for detailed steps
-
Install Visual Studio Code
- macOS:
- Download and install from https://code.visualstudio.com/download
- Or use Homebrew:
brew install --cask visual-studio-code
- Windows:
- Download and run the installer from https://code.visualstudio.com/download
- Linux:
- Download the .deb or .rpm package from https://code.visualstudio.com/download and install using your package manager
- macOS:
05: Install Visual Studio Code Extensions
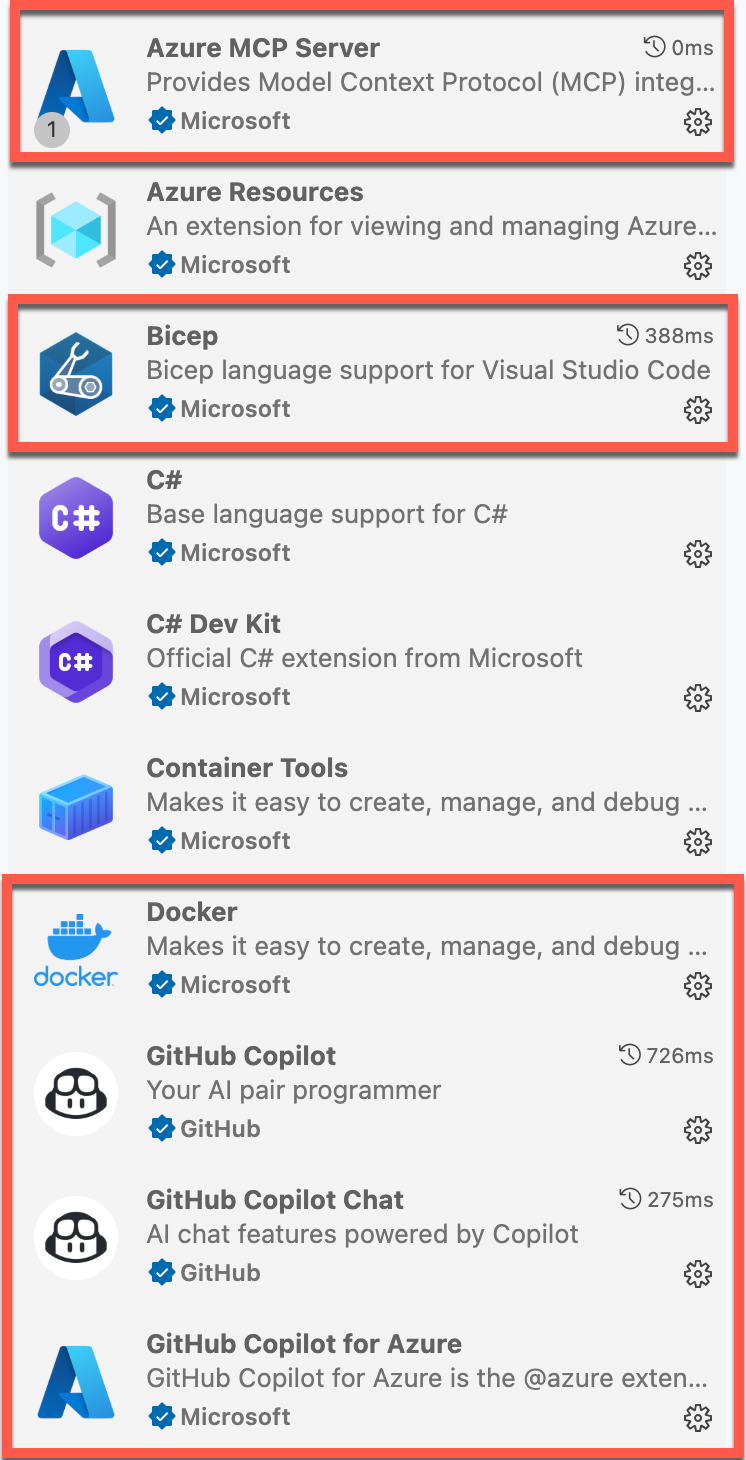
You will install several Visual Studio Code extensions to support this lab including:
- GitHub Copilot
- GitHub Copilot Chat
- GitHub Copilot for Azure
- GitHub MCP Server
- Azure MCP Server
- Bicep
- Docker
Expand this section to view the detailed steps
-
From Visual Studio Code, select the Extensions tab on the left.
-
Enable the MCP Servers Marketplace. Type
@mcpin the extensions search and click Enable MCP Servers Marketplace.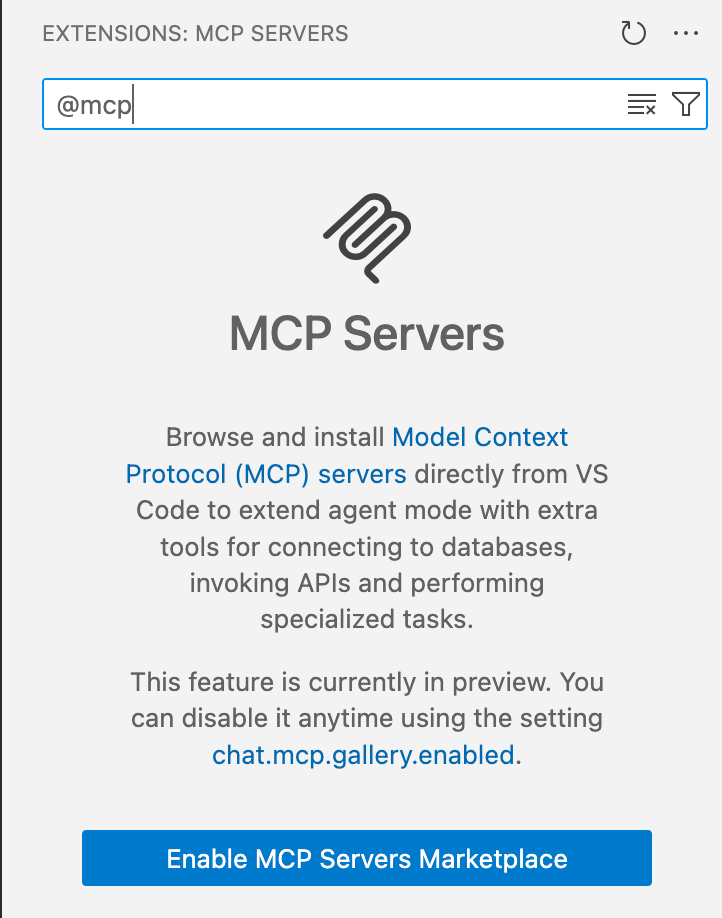
-
Search for the following highlighted extensions and install them:
06: Install Docker Desktop
The solution will be deployed as a container, therefore you will need Docker Desktop installed.
Expand this section for detailed steps
-
Install Docker Desktop
Follow the links below to install Docker Desktop:
- macOS:
- Download and install from https://www.docker.com/products/docker-desktop/
- Windows:
-
Download and install from https://www.docker.com/products/docker-desktop/
-
It is possible that you don’t have the latest version of WSL (Windows Subsystem for Linux) that is required by Docker. Run the following command in an elevated PowerShell window, to ensure you have the latest version of WSL.
wsl --update
-
- Linux:
- Follow instructions for your distribution at https://docs.docker.com/desktop/install/linux-install/
- macOS:
Summary
You’ve completed this task. You have installed .NET 6 and .NET LTS, set up your Visual Studio Code environment with necessary extensions, and installed Docker Desktop for this lab.