Task 01 - Create and run a GitHub Actions workflow
Introduction
Now that the infrastructure for the Zava Storefront solution is deployed, you will be automating the deployment of the solution using GitHub Actions.
Description
In this task you will automate the deployment of Zava’s .NET app to Azure App Service for Containers using GitHub Actions.
Success Criteria
- You have created and executed a GitHub Actions workflow
- The workflow results have completed the following steps:
- Built and containerized the solution
- Pushed the image to the Azure Container Registry (ACR)
- Deployed the application to the App Service
Key Tasks
01: Ask Copilot to create a GitHub Actions Workflow
Use GitHub Copilot Chat in Visual Studio Code to generate a GitHub Actions workflow that builds and deploys the Zava application as a container to Azure App Service.
Expand this section for detailed steps
-
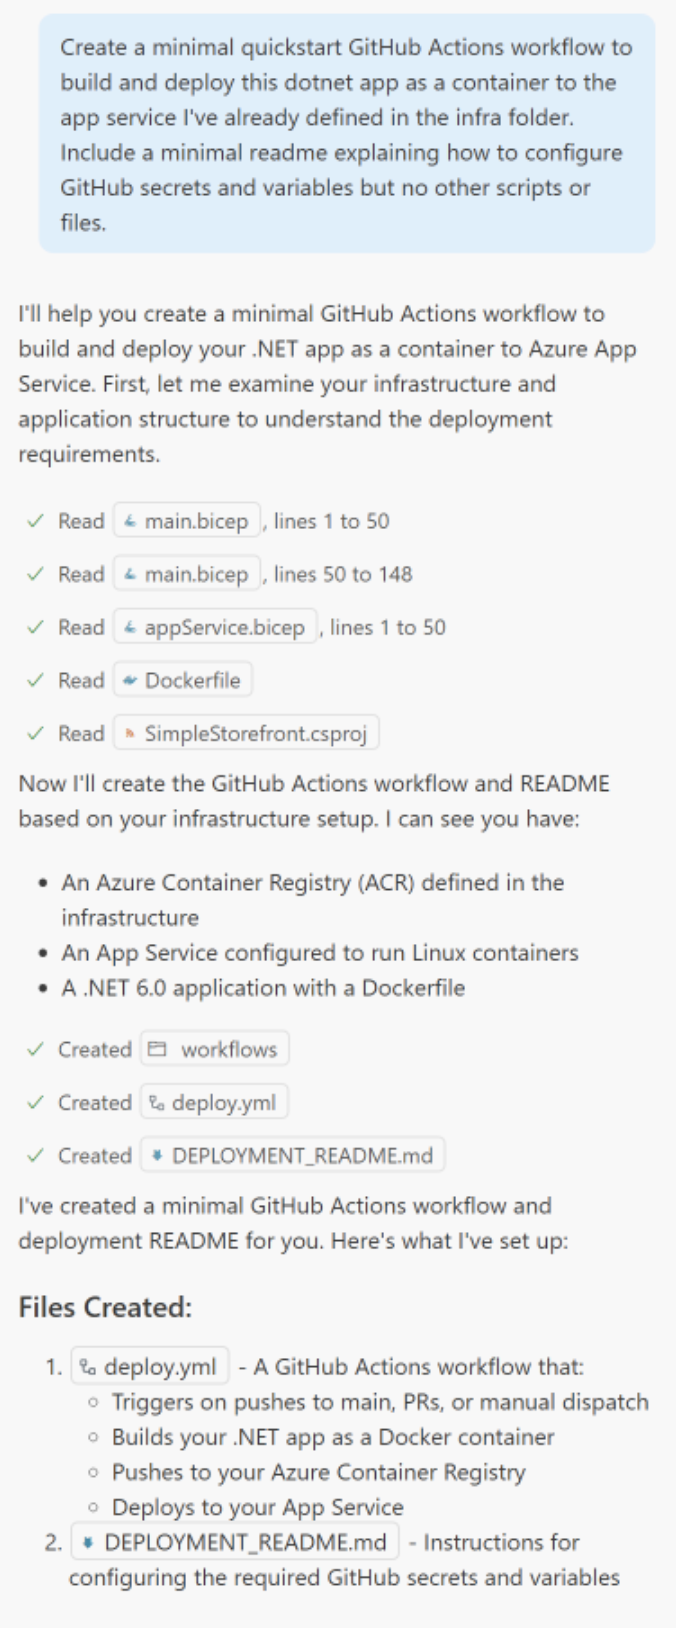
In Visual Studio Code → Copilot Chat, type a prompt such as the following:
Create a minimal quickstart GitHub Actions workflow to build and deploy this dotnet app as a container to the app service I've already defined in the infra folder. Include a minimal readme explaining how to configure GitHub secrets and variables but no other scripts or files. -
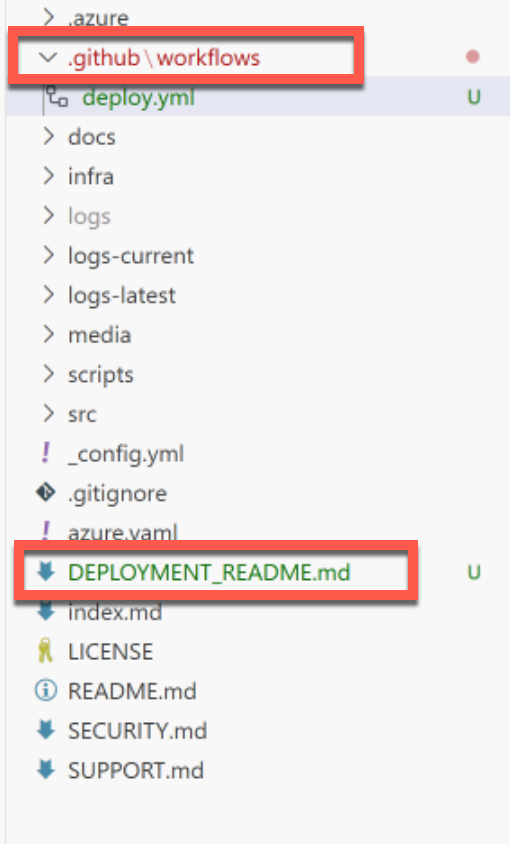
Copilot should create a workflow YAML file in the folder
.github/workflows. The file name may vary but it might be something likedeploy-dotnet-app.yml.The following image illustrates an example Copilot interaction for this step.
-
Verify the resulting folders and files that should be created:
02: Add the Workflow to GitHub Actions
Add a Pull Request trigger to the workflow YAML so you can test the workflow via a Pull Request before merging to the default branch.
Expand this section for detailed steps
-
Review the workflow YAML file and check if a
pull_requesttrigger exists (Copilot may have added it already). -
If the trigger is missing, find the triggers at the top of the file and add it. See the example below:
on: push: branches: [ main ] paths: [ 'src/**' ] pull_request: branches: [ '*' ] workflow_dispatch: -
The full view of a workflow YAML output is shown here:
name: Build and Deploy to Azure App Service

on:
push:
   branches: [ main ]
pull_request:
   branches: [ main ]
workflow_dispatch:

env:
REGISTRY: ${{ vars.AZURE_CONTAINER_REGISTRY_NAME }}.azurecr.io
IMAGE_NAME: simplestore
APP_NAME: ${{ vars.AZURE_APP_SERVICE_NAME }}

jobs:
build-and-deploy:
   runs-on: ubuntu-latest

   steps:
   - name: Checkout code
      uses: actions/checkout@v4

   - name: Log in to Azure
      uses: azure/login@v2
      with:
      creds: ${{ secrets.AZURE_CREDENTIALS }}

   - name: Log in to Azure Container Registry
      run: az acr login --name ${{ vars.AZURE_CONTAINER_REGISTRY_NAME }}

   - name: Build and push Docker image
      run: |
      # Build the Docker image
      docker build -t ${{ env.REGISTRY }}/${{ env.IMAGE_NAME }}:${{ github.sha }} -t ${{ env.REGISTRY }}/${{ env.IMAGE_NAME }}:latest ./src

      # Push both tags to registry
      docker push ${{ env.REGISTRY }}/${{ env.IMAGE_NAME }}:${{ github.sha }}
      docker push ${{ env.REGISTRY }}/${{ env.IMAGE_NAME }}:latest

   - name: Deploy to Azure App Service
      uses: azure/webapps-deploy@v3
      with:
      app-name: ${{ env.APP_NAME }}
      images: ${{ env.REGISTRY }}/${{ env.IMAGE_NAME }}:${{ github.sha }}
03: Review the generated deployment README file
Review the deployment README file generated by Copilot and configure the required GitHub secrets and variables as documented.
NOTE Based on the choices Copilot makes during the generation of the workflow YAML, specific secret and variable names may differ for each person. In addition, there may be more or less details depending on the approach Copilot took to generate the results.
Expand this section for detailed steps
- Find your deployment README and review the steps inside to setup your GitHub secrets and variables. These will typically include:
- Azure Credentials
- Azure Container Registry Name
- Azure App Service Name
- Follow the instructions in the README to configure all required secrets and variables.
NOTE The following example is AI-generated content, and your README will vary based on the choices Copilot makes during the generation of the README. Specific secret and variable names may differ for each person, and steps may appear in a different order. The amount of detail may also vary depending on the approach Copilot took to generate the results. Make sure you follow your own generated README so that the steps you take match the workflow Copilot generated.
Expand this section to view a sample README
GitHub Actions Deployment Setup
This repository contains a GitHub Actions workflow that automatically builds and deploys your .NET application as a container to Azure App Service.
Prerequisites
Before the workflow can run successfully, you need to configure the following GitHub secrets and variables:
Required GitHub secrets
-
AZURE_CREDENTIALS - Azure service principal credentials for authentication
To create this secret:
# Create a service principal with contributor access to your resource group
az ad sp create-for-rbac --name "github-actions-sp" \
  --role contributor \
  --scopes /subscriptions/{subscription-id}/resourceGroups/{resource-group-name} \
  --json-auth
Copy the entire JSON output and paste it as the value for the
AZURE_CREDENTIALSsecret.
Required GitHub variables
- AZURE_CONTAINER_REGISTRY_NAME - The name of your Azure Container Registry (without .azurecr.io)
- AZURE_APP_SERVICE_NAME - The name of your Azure App Service
How to configure secrets and variables
- Go to your GitHub repository
- Click on Settings → Secrets and variables → Actions
- Add the secret under the Secrets tab
- Add the variables under the Variables tab
Service principal permissions
The service principal needs the following permissions:
- Contributor role on the resource group (for App Service deployment)
- AcrPush role on the Azure Container Registry (for pushing container images)
To assign the ACR role:
az role assignment create \
  --assignee {service-principal-client-id} \
  --role AcrPush \
  --scope /subscriptions/{subscription-id}/resourceGroups/{resource-group-name}/providers/Microsoft.ContainerRegistry/registries/{acr-name}
Workflow Behavior
The workflow triggers on:
- Push to
mainbranch - Pull requests to
mainbranch - Manual trigger via GitHub UI
The workflow will:
- Build your .NET application as a Docker container
- Push the container to your Azure Container Registry
- Deploy the container to your Azure App Service
Finding Your Resource Names
You can find your resource names by running:
# List your resource groups
az group list --output table

# List resources in your resource group
az resource list --resource-group {your-resource-group-name} --output table
Look for resources with types:
Microsoft.ContainerRegistry/registries(for ACR name)Microsoft.Web/sites(for App Service name)
04: Commit and push your workflow file
Commit and push the workflow file to your feature branch so you can create a Pull Request to test the workflow.
NOTE Make sure you’re pushing to the correct branch. You should have a feature branch created in Exercise 2. This will support the next step where you will create a Pull Request to test this workflow before merging to main.
Expand this section for detailed steps using Terminal
- Check Current Status
- Open the integrated terminal in Visual Studio Code (Terminal → New Terminal)
- Check what files have been modified:
git status
- Add the Workflow File
- Add your new workflow file to the staging area:
git add .github/workflows/ - Or add all modified files:
git add .
- Add your new workflow file to the staging area:
- Commit Your Changes
- Create a commit with a descriptive message:
git commit -m "Add GitHub Actions workflow for .NET app deployment to Azure"
- Create a commit with a descriptive message:
- Push to Your Branch
- If you’re on a feature branch (like
dev):git push origin dev - If you’re on the main branch:
git push origin main
- If you’re on a feature branch (like
- Verify the Push
- Check that your changes were pushed successfully:
git log --oneline -5 - You should see your commit at the top of the list
- Check that your changes were pushed successfully:
Expand this section for detailed steps using Git integration
- Open Source Control Panel
- Click the Source Control icon in the left sidebar (or press
Ctrl+Shift+G)
- Click the Source Control icon in the left sidebar (or press
- Review Changes
- You’ll see your modified files listed under “Changes”
- Review the workflow file to ensure it’s correct
- Stage Changes
- Click the
+button next to each file to stage it - Or click the
+button next to “Changes” to stage all files
- Click the
- Commit Changes
- Enter a commit message in the text box: “Add GitHub Actions workflow for .NET app deployment to Azure”
- Press
Ctrl+Enteror click the checkmark button to commit
- Push Changes
- Click the “…” menu in the Source Control panel
- Select “Push” to push your changes to the remote repository
05: Create a Pull Request to test the workflow
Create a Pull Request to merge the changes. This will trigger the workflow.
Expand this section for detailed steps
- Navigate to Your Repository
- Go to your GitHub repository in a web browser
- Make sure you can see your recently pushed branch (e.g.,
dev)
- Create Pull Request
- You should see a yellow banner saying “Your recently pushed branches” with a Compare & pull request button
- Click Compare & pull request
- If you don’t see the banner, click the Pull requests tab, then New pull request
- Configure the Pull Request
- Base branch: Select
main(the branch you want to merge into) - Compare branch: Select your feature branch (e.g.,
dev) - Title: Enter something like “Add GitHub Actions workflow for Azure deployment”
- Description: Add details about what the workflow does: ``` This PR adds a GitHub Actions workflow that:
- Builds and containerizes the .NET app
- Pushes images to Azure Container Registry
- Deploys to Azure App Service for Containers
- Includes proper authentication and variable configuration ```
- Base branch: Select
- Create the Pull Request
- Click Create pull request (don’t click “Create draft pull request”)
- The workflow should automatically trigger due to the
pull_requesttrigger in your YAML
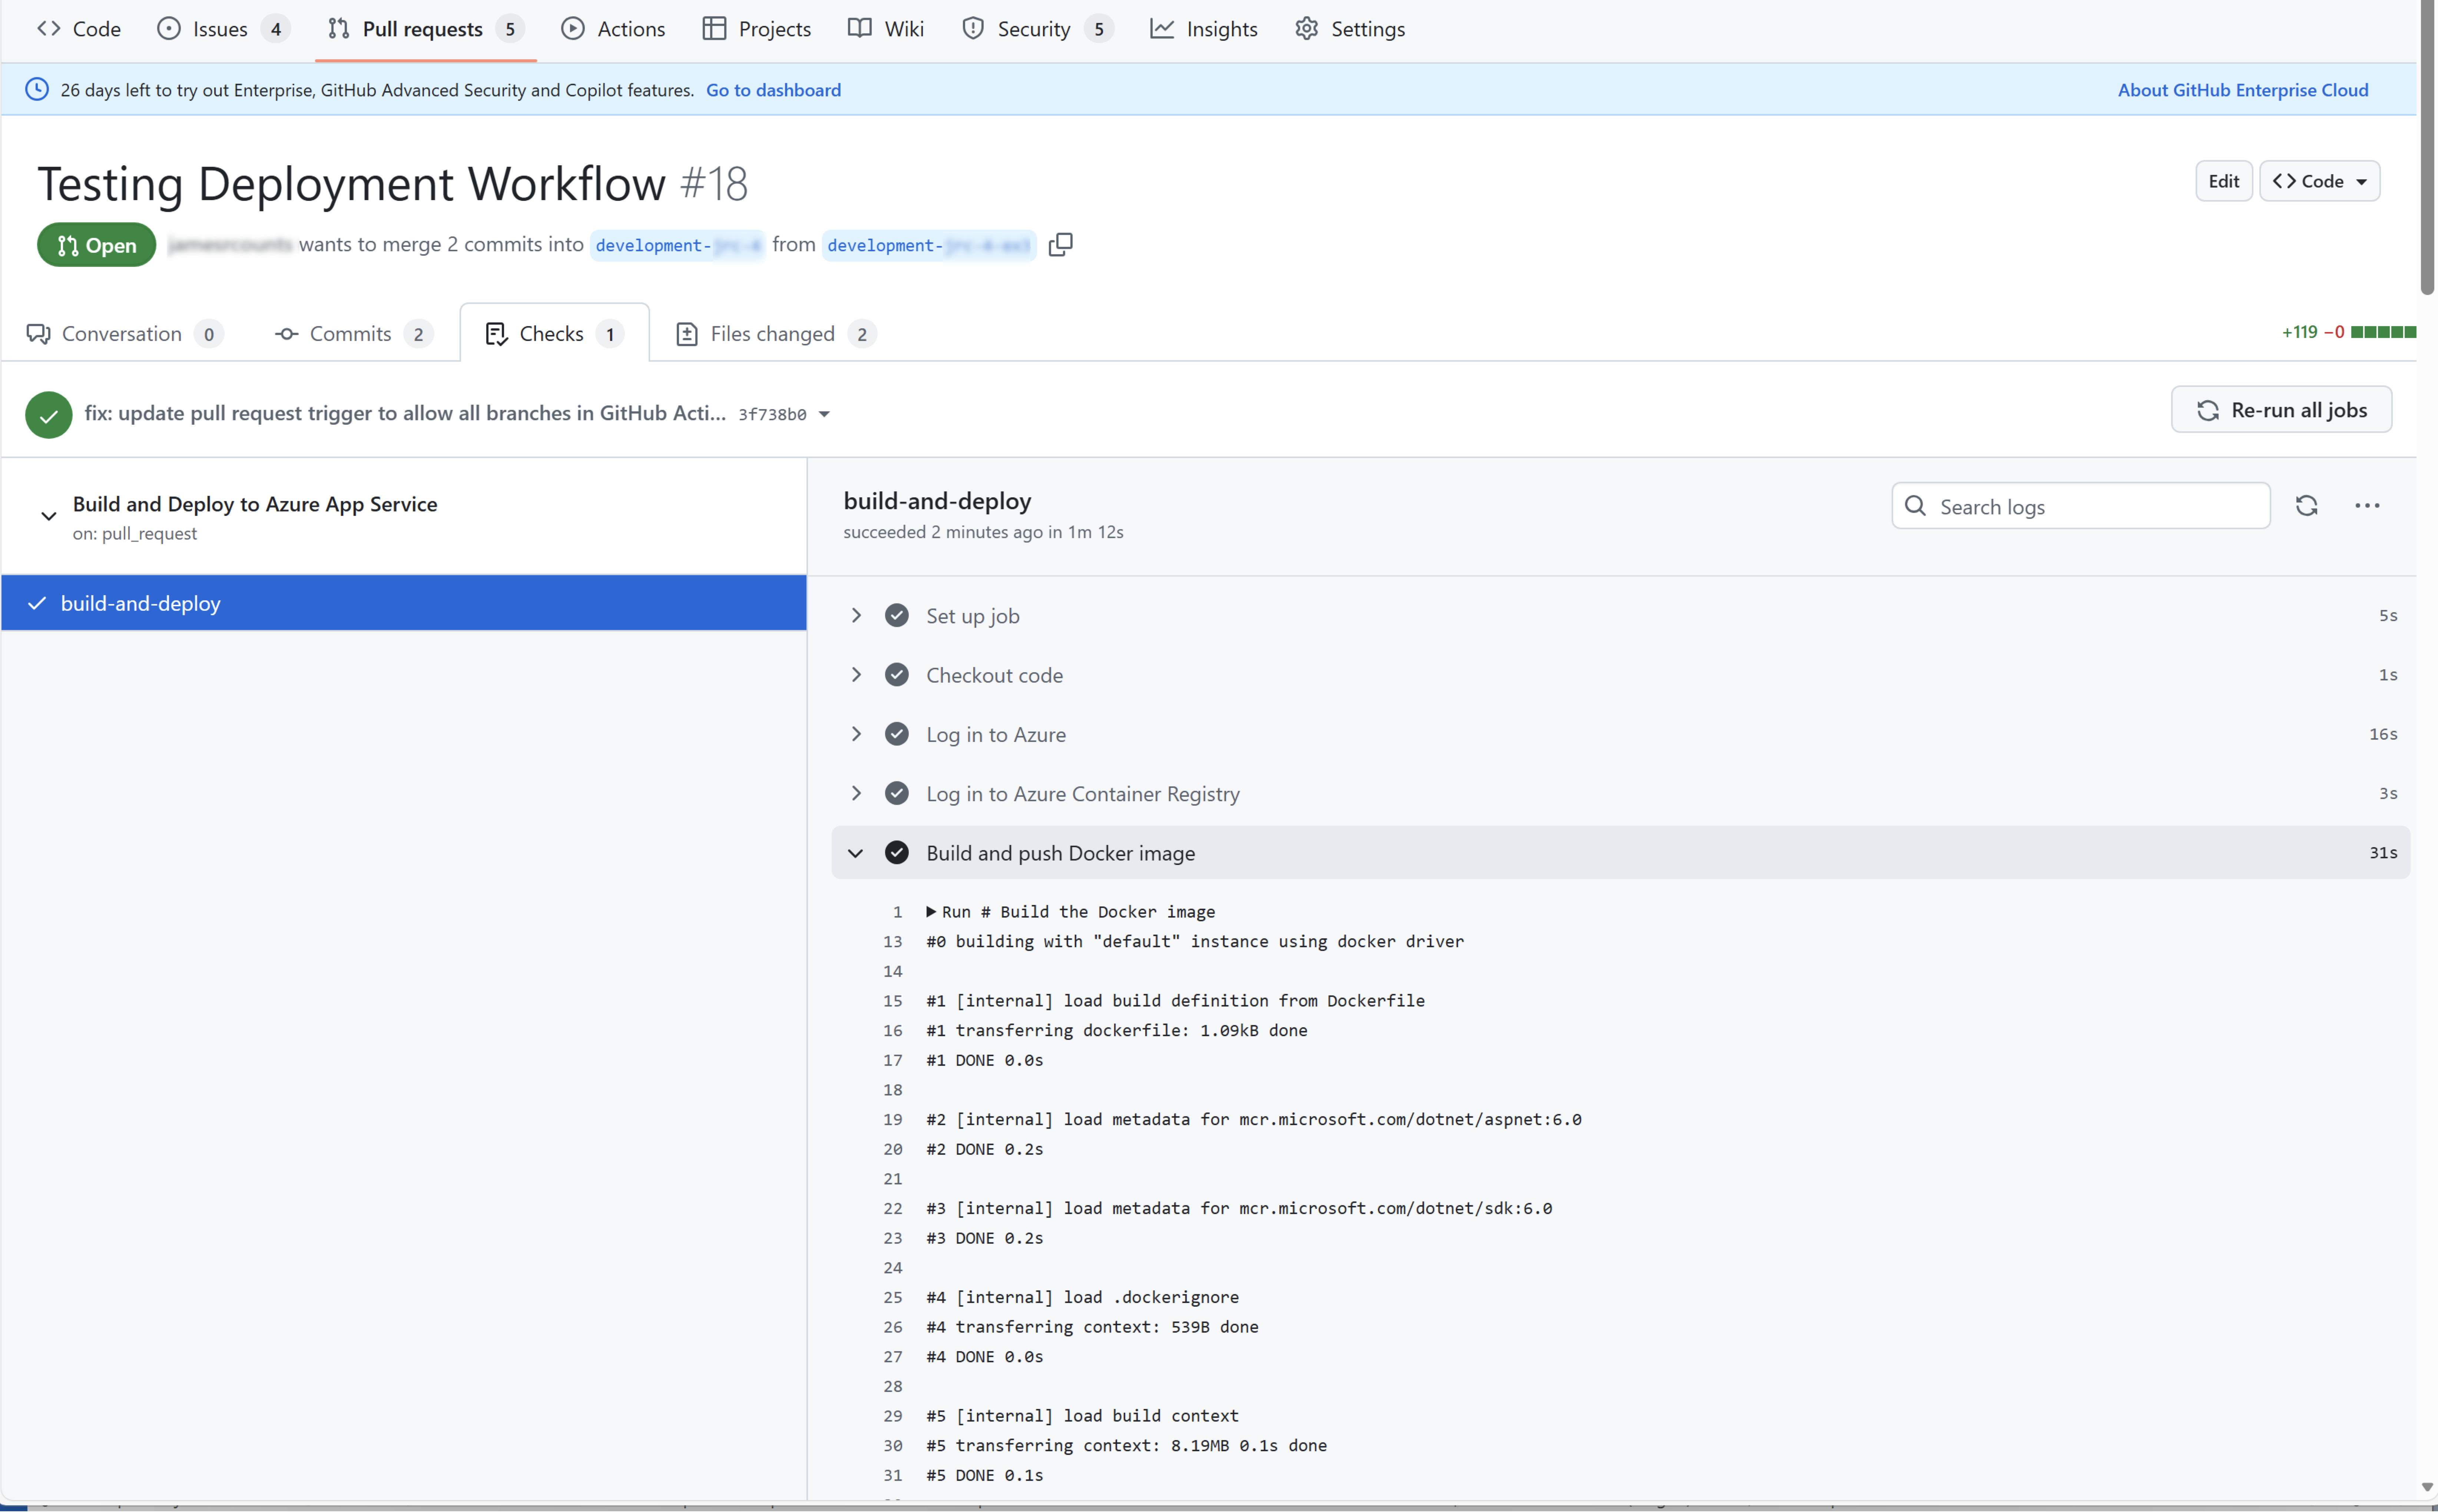
06: Verify workflow execution
Monitor the workflow execution in the GitHub Actions tab to verify it completes successfully and identify any issues.
Expand this section for detailed steps
- Check Actions Tab
- Go to your repository on GitHub
- Click the Actions tab
- You should see your workflow running (it will show as “in progress” with a yellow circle)
- Monitor the Workflow
- Click on the workflow run to see detailed logs
- Watch each step execute:
- Checkout code
- Log in to Azure
- Build and push Docker image
- Deploy to Azure App Service
- Check Pull Request Status
- Return to your Pull Request
- You’ll see a status check showing the workflow progress
- Green checkmark = success, Red X = failure
-
Check the results of the workflow
View your workflow in action. Does it succeed or fail?
If your workflow fails it could be a problem with the workflow YAML itself, the secrets and variables configuration, or even due to infrastructure configuration problems that only present at application deploy time rather than provisioning time.
NOTE You can execute the workflow on the Pull Request without impacting the main branch.
- Don’t merge yet: The workflow will run on the PR, allowing you to test without affecting the main branch
- Multiple runs: You can push additional commits to your branch to trigger more workflow runs
- Debugging: If the workflow fails, check the logs in the Actions tab for detailed error messages
The
pull_requesttrigger in your workflow YAML is what makes this possible. This allows you to test deployments safely before merging to main.
Expand this section for additional workflow monitoring tips
The following describes additional tips for monitoring workflow execution.
- Access GitHub Actions
- Go to your GitHub repository in a web browser
- Click the Actions tab in the top navigation
- You should see your workflow run listed with a status indicator:
- 🟡 Yellow circle = In progress
- ✅ Green checkmark = Success
- ❌ Red X = Failed
- ⏸️ Gray circle = Queued/waiting
- View Workflow Details
- Click on the workflow run name (e.g., “Add GitHub Actions workflow for Azure deployment”)
- This opens the workflow run summary page showing:
- Overall status
- Duration
- Jobs and their status
- Triggered by information
- Examine Job Steps
- Click on the job name (e.g., “build-and-deploy”)
- This shows all individual steps with their status:
- Checkout code
- Log in to Azure
- Log in to Azure Container Registry
- Build and push Docker image
- Deploy to Azure App Service
- Restart App Service
- Review Step Logs
- Click on any step to expand its logs
- Look for error messages, warnings, or success confirmations
- Pay special attention to the output of each command
07: Success Indicators
Verify that your workflow has completed successfully by checking that all steps completed, the container was built and pushed, deployment succeeded, and the application responds.
Expand this section for detailed success criteria
Your workflow has succeeded when:
- All Steps Complete Successfully
- Each step shows a green checkmark
- No error messages in the logs
- Container Image Built and Pushed
- Docker build completes without errors
- Images pushed to Azure Container Registry
- App Service Deployment Successful
- Deployment action completes
- App service restart succeeds
- Application Responds
- Visit your app URL:
https://<your-app-name>.azurewebsites.net - App loads without errors (may take a few minutes after deployment)
- Visit your app URL:
08: Next Steps After Success
After your workflow succeeds, test your application, monitor for issues, and merge your Pull Request.
Expand this section for detailed steps
- Test Your Application
- Browse to your app URL
- Verify all functionality works as expected
- Monitor Application Insights
- Check for any runtime errors or performance issues
- Merge Your Pull Request
- If everything works correctly, merge your PR to main
- This will trigger the workflow on the main branch
09: Next Steps After Failure
If your workflow fails, review the error messages, apply fixes, and iterate until the workflow succeeds.
Expand this section for detailed steps
- Review Error Messages
- Identify the specific step that failed
- Note the exact error message
- Apply Fixes
- Make necessary changes to workflow YAML, secrets, or variables
- Commit and push changes to trigger a new workflow run
- Iterate Until Success
- Repeat the process until your workflow succeeds
- Use Copilot Chat to help diagnose complex issues
NOTE Keep workflow runs for future reference. GitHub retains workflow run logs for 90 days, which can be helpful for debugging similar issues later.
NOTE The next two tasks in this exercise will explain additional troubleshooting methods.
Summary
You’ve completed this task. You have created and executed a GitHub Actions workflow that builds and containerizes the solution, pushes the image to the Azure Container Registry, and deploys the application to the App Service.