Task 02 - Create Bicep scripts in Visual Studio Code
Introduction
Now that you have created an issue for implementing the necessary infrastructure to deploy the solution, you can use GitHub Copilot to generate scripts that will be used for the deployment.
Description
Use GitHub Copilot Chat (with GitHub MCP and Azure MCP) to plan, design, and deploy Azure infrastructure for the ZavaStorefront web application based on the GitHub issue you created in the previous task. Copilot will generate Bicep + Azure Developer CLI (AZD) infrastructure, help debug issues, and guide fixes when errors occur.
Success Criteria
- Plan & generate infrastructure with Copilot + MCP
- Validate with azd provision –preview
- Handle non-deterministic AI errors via Copilot
- Deploy successfully with azd up + azd deploy
- Close GitHub issue via Copilot Chat
- Verify resources in Azure Portal
Learning Resources
Key Tasks
01: Create Infrastructure scripts in Visual Studio Code using GitHub Copilot
Use GitHub Copilot Chat to generate Bicep infrastructure scripts based on the GitHub issue you created in the previous task.
Expand this section for detailed steps
-
Go to Visual Studio code where you have the solution folder open.
-
Create a working branch
From the command line in Visual Studio Code type the following:
git checkout -b dev -
Launch Copilot Chat and confirm workspace context
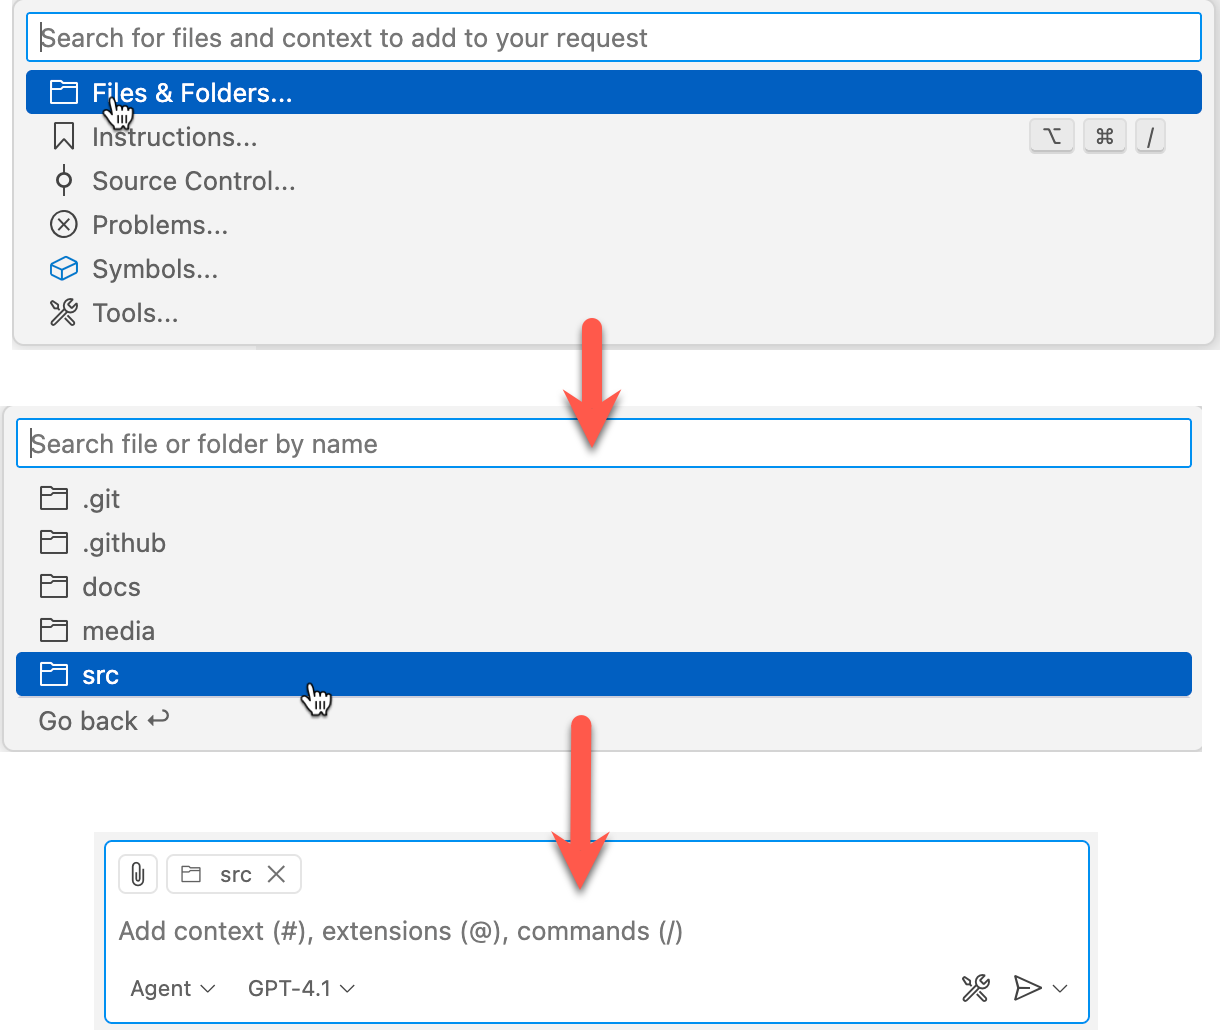
-
Prompt Copilot to generate the script
From Copilot type the following to reference the repository issue created earlier. Replace
with the number assigned to the issue you created. plan azure infrastructure for the github issue <issue-number>With this command, Copilot retrieves the issue via GitHub MCP, pulls best practices from Azure MCP. It may ask you to proceed. If you reply “yes” it will scaffold the infrastructure automatically.
Every interaction with Copilot may produce unique results, however the generated files should include something like:
- .dockerignore - Docker ignore list
- Dockerfile - Container definition
- infra/main.bicep - Root orchestration template
- infra/modules/acr.bicep - Container Registry module
- infra/modules/logAnalytics.bicep - Log Analytics module
- infra/modules/appService.bicep - App Service + Plan module
- infra/main.parameters.json - Parameters (image placeholder)
- infra/README.md - Auto-generated documentation
- azure.yaml - AZD configuration referencing infra
Remember Copilot is non-deterministic and may produce more files than these or leave some of these files out. If you need some of them later you can use Copilot to generate them at that time.
AZD Sanity Check
Before executing any Azure Developer CLI commands in the next step, take a moment to validate that GitHub Copilot generated the infrastructure in a structure that AZD expects.
Confirm the following:
-
azure.yaml exists at the repository root
-
An infra/ folder exists at the repository root
-
infra/main.bicep exists and acts as the root orchestration template
-
Any Bicep modules (for example, under infra/modules/) are referenced from main.bicep
-
azure.yaml references the infra/ folder directly (not a nested path)
-
Application source code remains outside the infra/ folder
Azure Developer CLI is convention-driven and relies on this structure to function correctly. GitHub Copilot is non-deterministic and may occasionally place files in unexpected locations.
If any of the checks above fail, stop and correct the structure before continuing. You can ask Copilot to fix the layout, for example:
The AZD infrastructure files are not in the expected locations.
Please move all infrastructure into /infra, ensure azure.yaml is at the
repository root, and update any paths accordingly.
Completing this sanity check now will prevent confusing AZD errors later in the workflow.
02: Execute the Infrastructure scripts
Initialize Azure Developer CLI, preview the infrastructure deployment, and then deploy the resources to Azure.
Expand this section for detailed steps
-
From the command line, navigate to the repository and initialize Azure Developer CLI:
 cd <path-to-this repo>
 azd init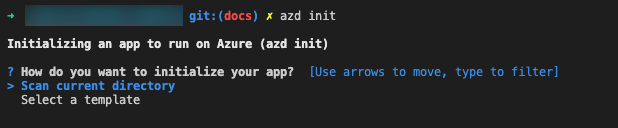
-
Select the default option to scan the current directory.
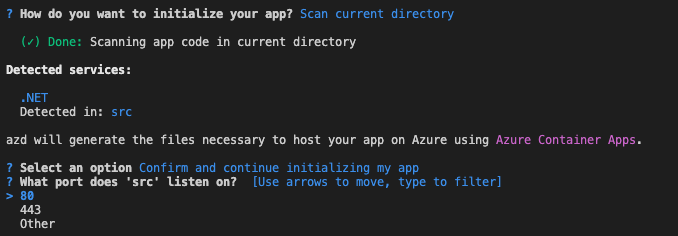
-
The .NET application will be detected in folder src. Click enter to confirm and continue initializing the app, then confirm the port.
-
After choosing the port, the
azure.yamland thenext-step.mdfiles will be generated with instructions for the next step.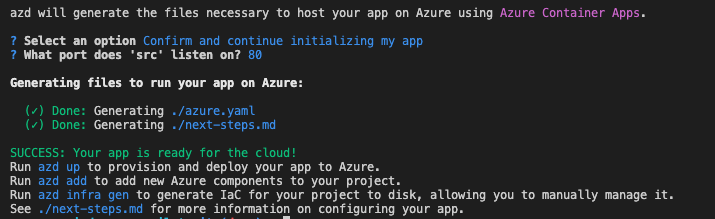
-
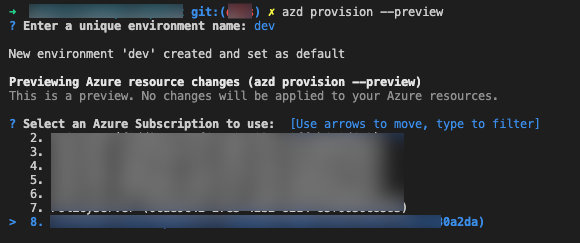
After the initialization is finished, run the provision command with preview option to validate the created resources:
azd provision --preview -
If it’s the first time running the provision command, you will be asked to provide a unique environment name.

-
If the az command is authenticated, it will retrieve all the available Azure subscriptions for you to select one.
-
Next, a list of existing resource groups will be listed. Select one of them, or create a new one.

-
Next, choose the region for your resource group (in case of a new resource group).

-
Next, provide the resource group name (in case of a new resource group).

-
Finally, the provisioning will start according to the provided information and the result will be the list of resources that will be created on Azure as follows:

The results should show:
- Selected subscription
- Created resource group
- Selected region
- Planned resources including
- ACR
- App Service Plan
- App Service
- App Insights
- Log Analytics
- (and maybe more depending on your GitHub issue specification)
- Preview completed successfully
-
Now you can execute the script:
azd upWhat Happens:
- Packages the source code
- Creates or updates Azure resources
- Deploys through ARM / Bicep
⚠️ AI-Generated Code Is Not Deterministic — Expect Possible Errors
When you run azd up, your experience may differ. AI output is non-deterministic, meaning Copilot can generate slightly different infrastructure code each time.
What This Means
- Some users see a clean deployment on the first try.
- Others may encounter provisioning errors depending on template variations, API versions, or region timing.
- Azure’s evolving APIs may trigger new validation checks over time.
If you see an error — don’t panic. Follow this workflow.
Expand this section to view troubleshooting techniques if you have issues
-
Read the error carefully and note the resource type.
-
Ask Copilot directly in context:
Can you explain and fix the latest provision error? -
Review the suggested fix before accepting it. Copilot typically explains why it happened and applies a minimal change.
-
Re-run
azd provisionorazd upto verify. -
If the fix fails or a new error occurs, continue to collaborate with Copilot. Copilot is your research and best practices partner, helping accelerate you through the debugging process to find a resolution.
This is the essence of AI-human collaboration: Copilot provides reasoning + draft fixes; you validate correctness and security.
Summary
You’ve completed this task. You have planned and generated infrastructure with Copilot and MCP, validated it with azd provision --preview, and deployed successfully with azd up and azd deploy. You have also learned techniques for improving scripts iteratively with Copilot prompts.