
TIP
🔥 Help shape the future of Azure Tips and Tricks by telling what you'd like for us to write about here (opens new window).
💡 Learn more : Azure Digital Twins Overview (opens new window).
📺 Watch the video : How to get started with Azure Digital Twins (opens new window).
# How to get started with Azure Digital Twins
# Model your environment in a digital world
When you have a complex environment made up of structures and IoT sensors and devices, it can become difficult to keep track of the infrastructure and make plans to maintain and expand it. With Azure Digital Twins (opens new window), you can model your (planned) real-world environment and keep track of it. Digital Twins enables you to create models of devices, places, people and processes. This provides context for your IoT devices and data within the physical environments that they work in, including rooms and people. And because Digital Twins connects to your IoT devices and data, the modelled environment comes to life and can be used to simulate and predict future situations.
In this post, we'll take a look at how to use Azure Digital Twins (opens new window) in a simple example.
# Prerequisites
If you want to follow along, you'll need the following:
- Node.js, which you can download here (opens new window)
- An Azure subscription (If you don't have an Azure subscription, create a free account (opens new window) before you begin)
- The Azure Digital Twins Explorer sample application, which you can download here (opens new window)
- The Azure CLI (opens new window). You can download it for Windows, Linux or Mac (opens new window)
# Use Azure Digital Twins Explorer to model an environment
We'll use Azure Digital Twins to create a simple scenario with some predefined models that you can find in the files of the Azure Digital Twins Explorer. To start, we first need to create a Digital Twins instance.
- Go to the Azure portal (opens new window)
- Click the Create a resource button (the plus-sign in the top left corner)
- Search for digital twins, select the result and click Create
- This brings you to the create Azure Digital Twins blade
- Select a Resource Group
- Pick a Location
- Fill in a Name
- Click Review + create and Create after that. This will create the Digital Twins resource
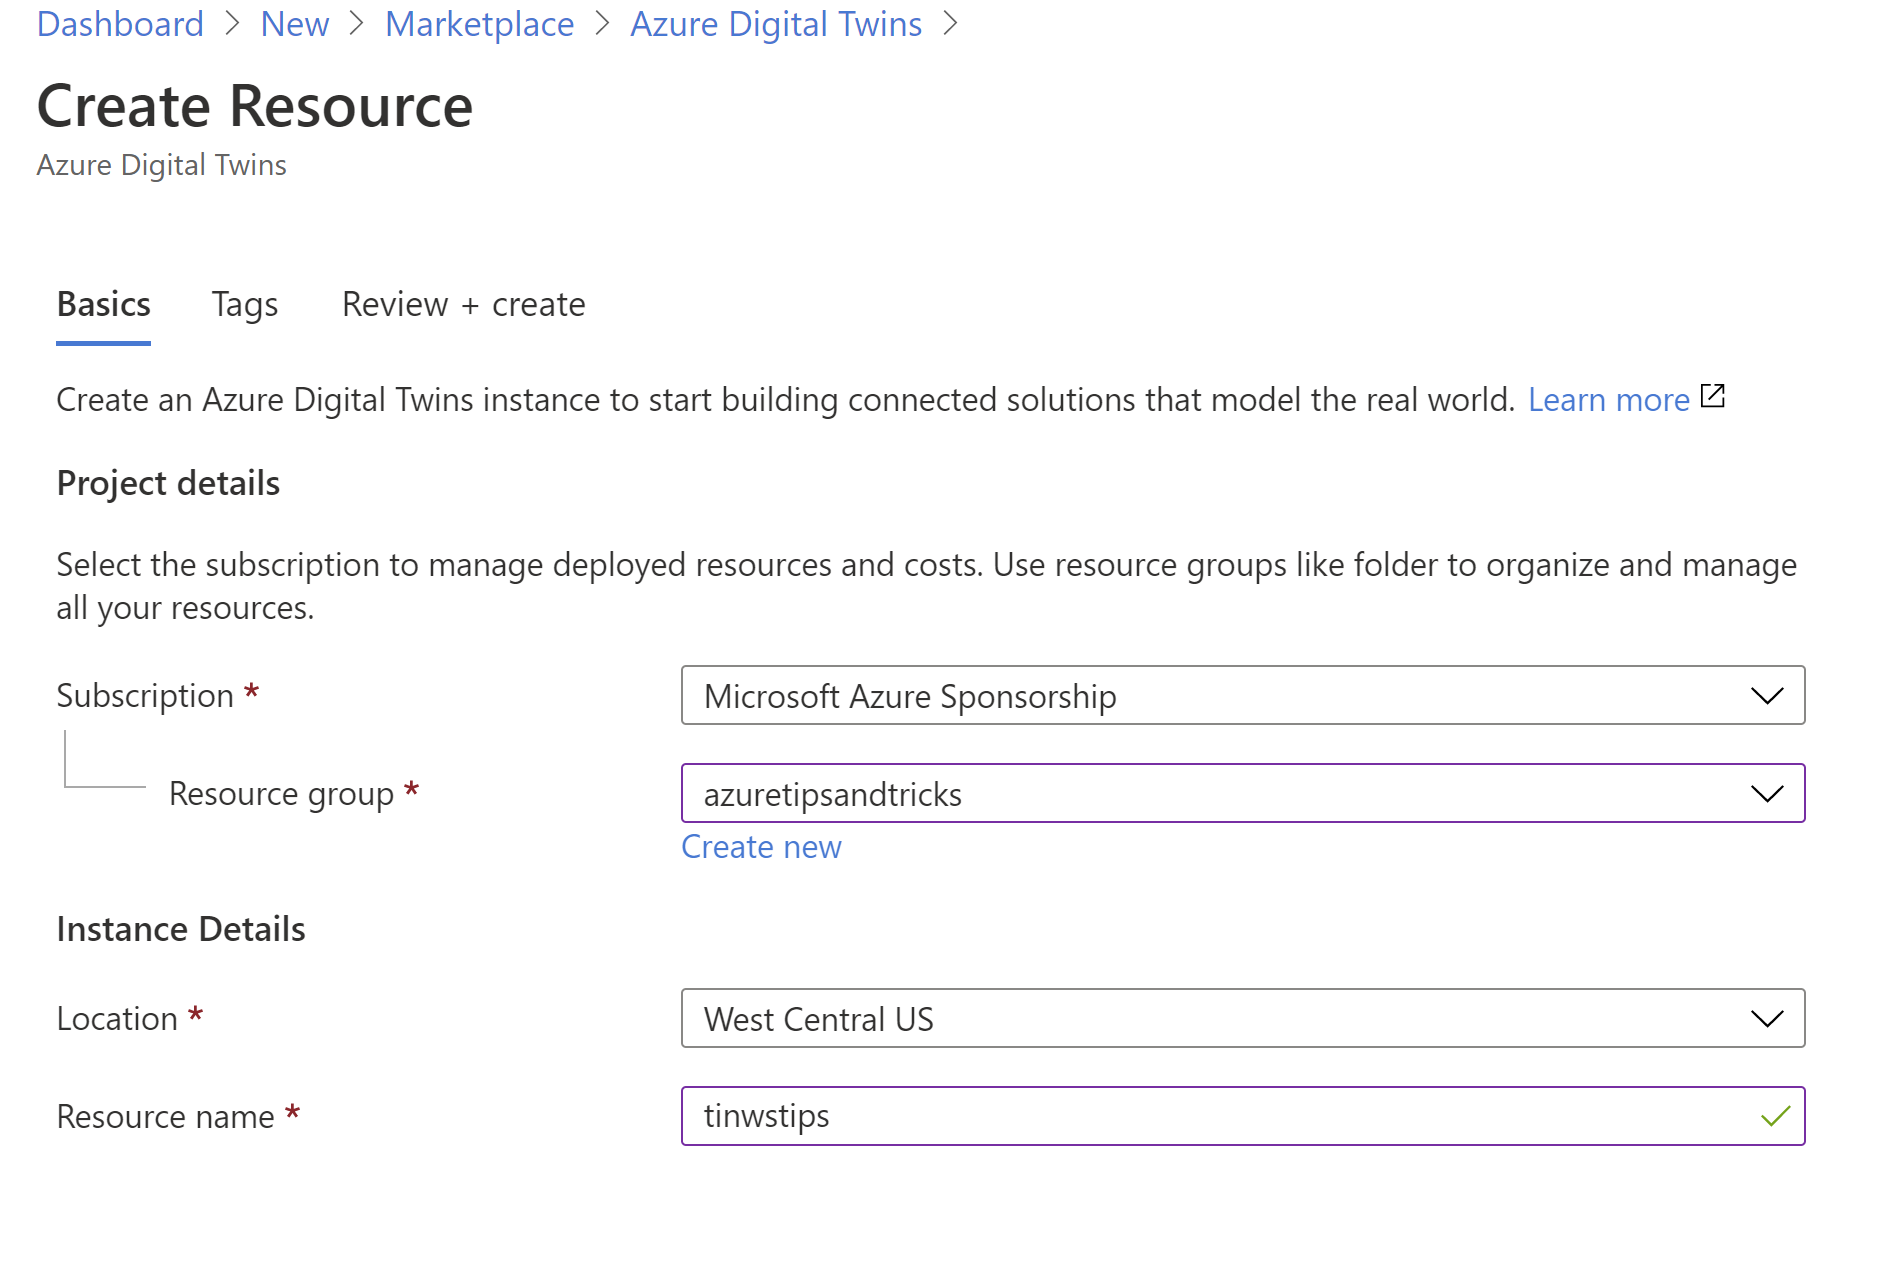
(Create an Azure Digital Twins resource in the Azure portal)
Once the Digital Twins resource is created, you can navigate to it in the Azure portal. Before we can use it with the sample application, we need to grant access to it.
- In the Azure portal, navigate to the Digital Twins resource
- Click on the Access Control (IAM) menu
- Next, select Add role assignment
- Select Azure Digital Twins Data Owner in the Role dropdown listbox
- For the Assign access to setting, select User, group, or service principal
- Now, select the user that you are using in the Azure portal right now and that you'll use on your local machine to authenticate with the sample application
- Click Save to assign the Role
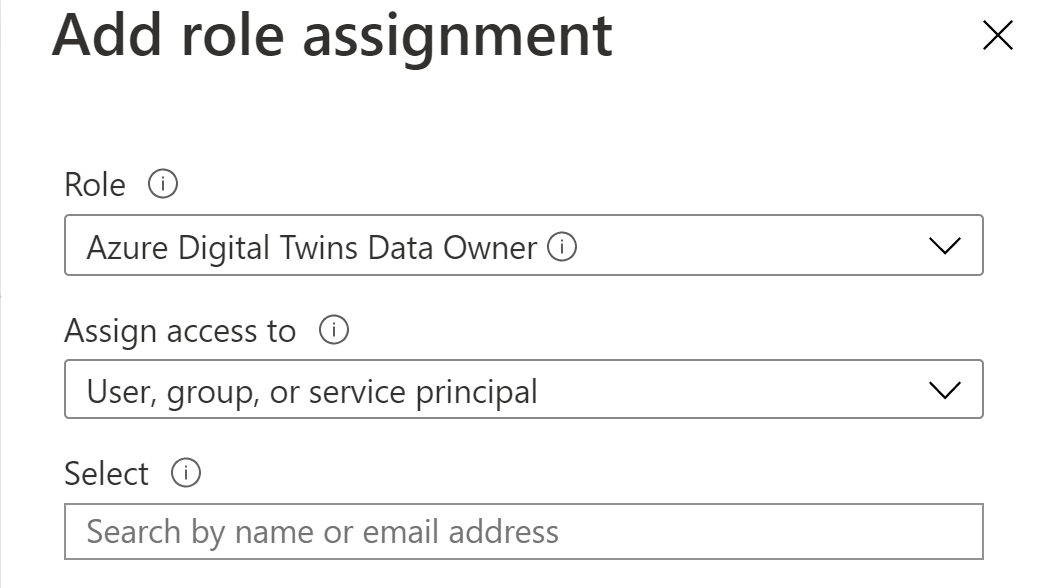
(Assign Role in the Azure portal)
We'll now use the Azure Digital Twins explorer application. You can download it here: https://docs.microsoft.com/samples/azure-samples/digital-twins-explorer/digital-twins-explorer/ (opens new window).
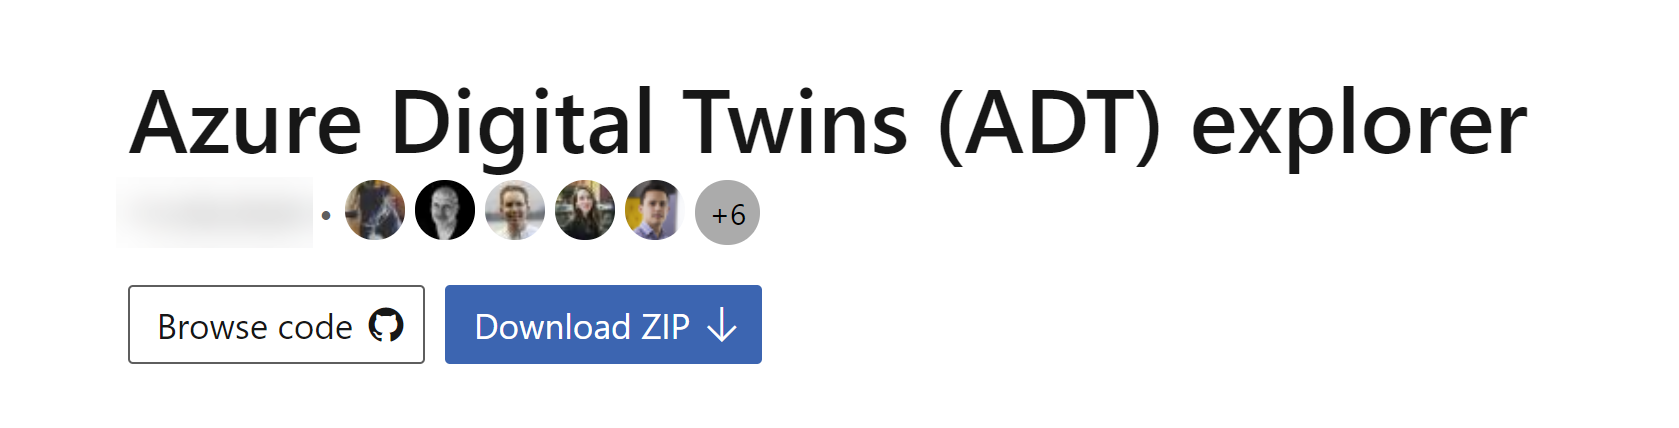
(Azure Digital Twins explorer download)
- When you've downloaded the Azure Digital Twins explorer, unzip the file
- Open a command prompt
- The Azure Digital Twins explorer uses local Azure credentials to authenticate to Azure. Authenticate locally by typing az login and following the steps to log into Azure with the same account that has the Azure Digital Twins Data Owner role
- Navigate to the unzipped Azure Digital Twins explorer folder and to Azure_Digital_Twins__ADT__explorer/client/src
- Now run the following command to restore the NPM modules that are needed to run the app
npm install
- Run the application with
npm run start
- When the Azure Digital Twins explorer starts, it will ask for the Azure Digital Twins URL. You can find this in the Azure portal as the host name of the service. Add https:\\ in front of the hostname and click Save
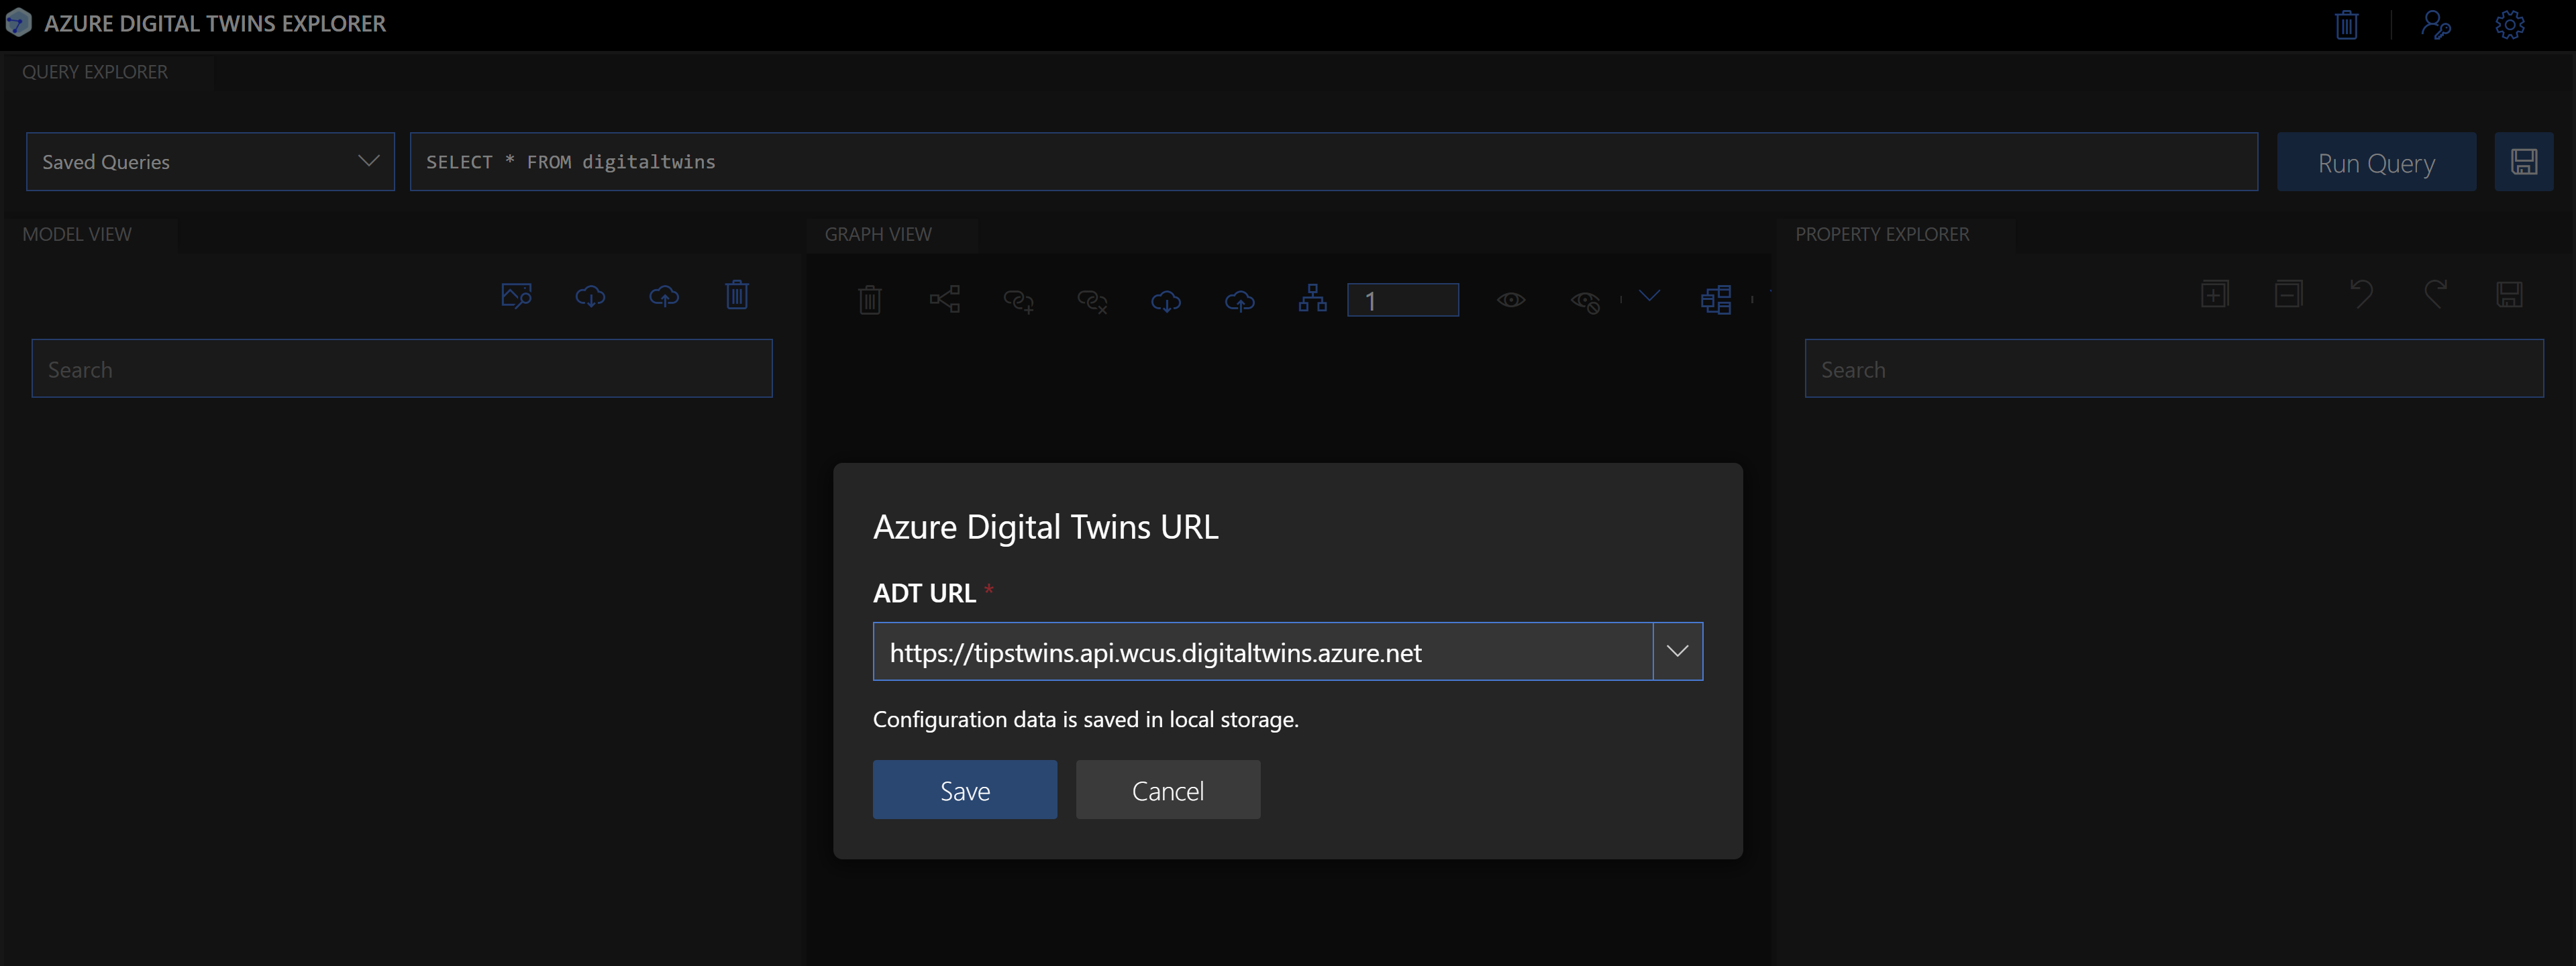
(Enter Azure Digital Twins URL)
- Next, we'll add a sample scenario to the explorer. This is located in the folder of the Azure Digital Twins explorer. First, we'll upload some models. These represent the types of entities that exist in your environment, like rooms and floors, and can be created with a JSON-like language called Digital Twin Definition Language (DTDL). Each model describes a single type of entity in terms of its properties, telemetry, relationships, and components and you can create multiple instances of each model. In a real scenario, you would create custom models, and in our example, we'll use pre-defined models
- In the Model View section of the explorer, click the Upload a model button
- Navigate to Azure_Digital_Twins__ADT__explorer/client/examples and select two models; Floor.json and Room.json
- Click Open to import the models into the explorer. The models are now uploaded to the Azure Digital Twins service, so that you can use and query them
- Now that we have a description of the entities in our environment (model definitions), we can create a representation of the full environment with them. This is called a twin graph and it describes what the environment looks like. It contains instances of the models and relationships between them. We'll use a pre-defined twin graph.
- In the Graph View section of the explorer, click on the Import Graph button
- Navigate to Azure_Digital_Twins__ADT__explorer/client/examples and select buildingScenario.xlsx
- Click Open to open the twin graph in the explorer
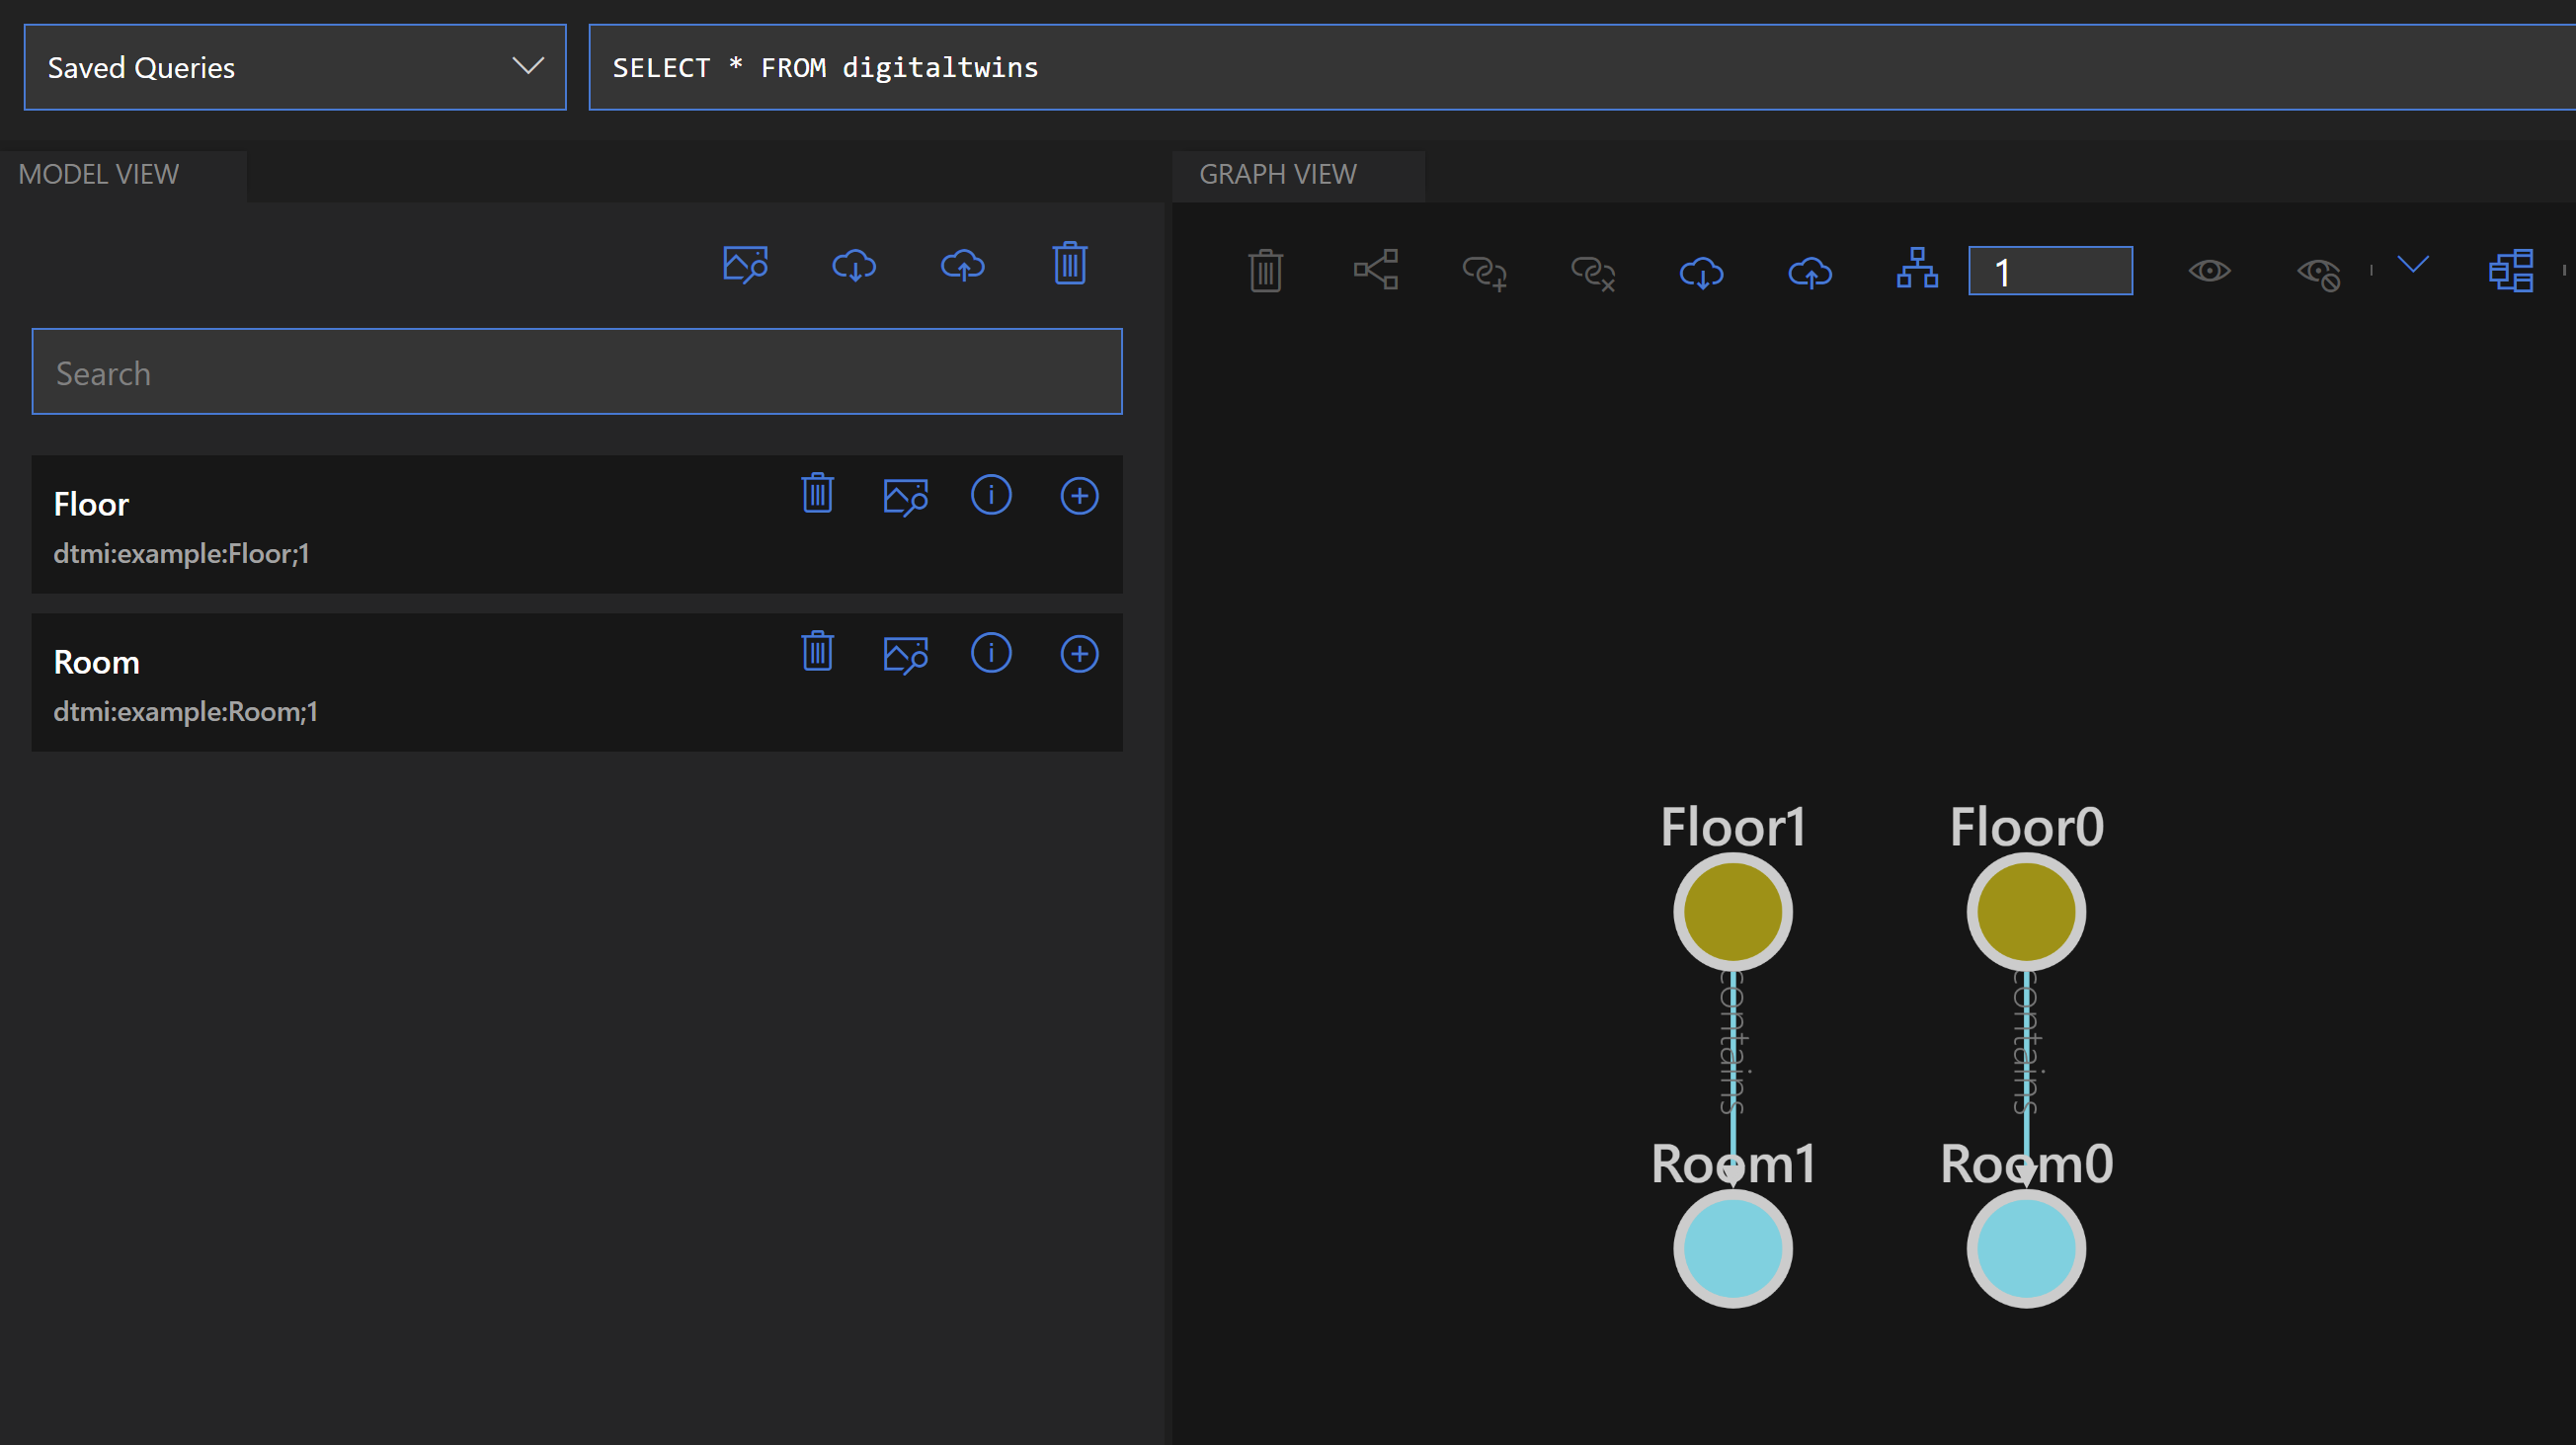
- The graph includes two floors that each contain a room. And it has a relationship between the floor and the room. This twin graph is not uploaded to Azure yet. Click the Save icon to validate it and upload it
- The graph and its information now lives in Azure. You can see it by querying the graph. In the explorer, click the Run Query button, which runs the default query and retrieves the items in the graph
(Twin Graph data after executing a query)
- The items in the graph are digital twins. They represent digital versions of a real-world floor and room. By representing them here, you can model a complete environment and interact with it. For instance, when you select a twin, like a room, you'll see its properties, including its temperature
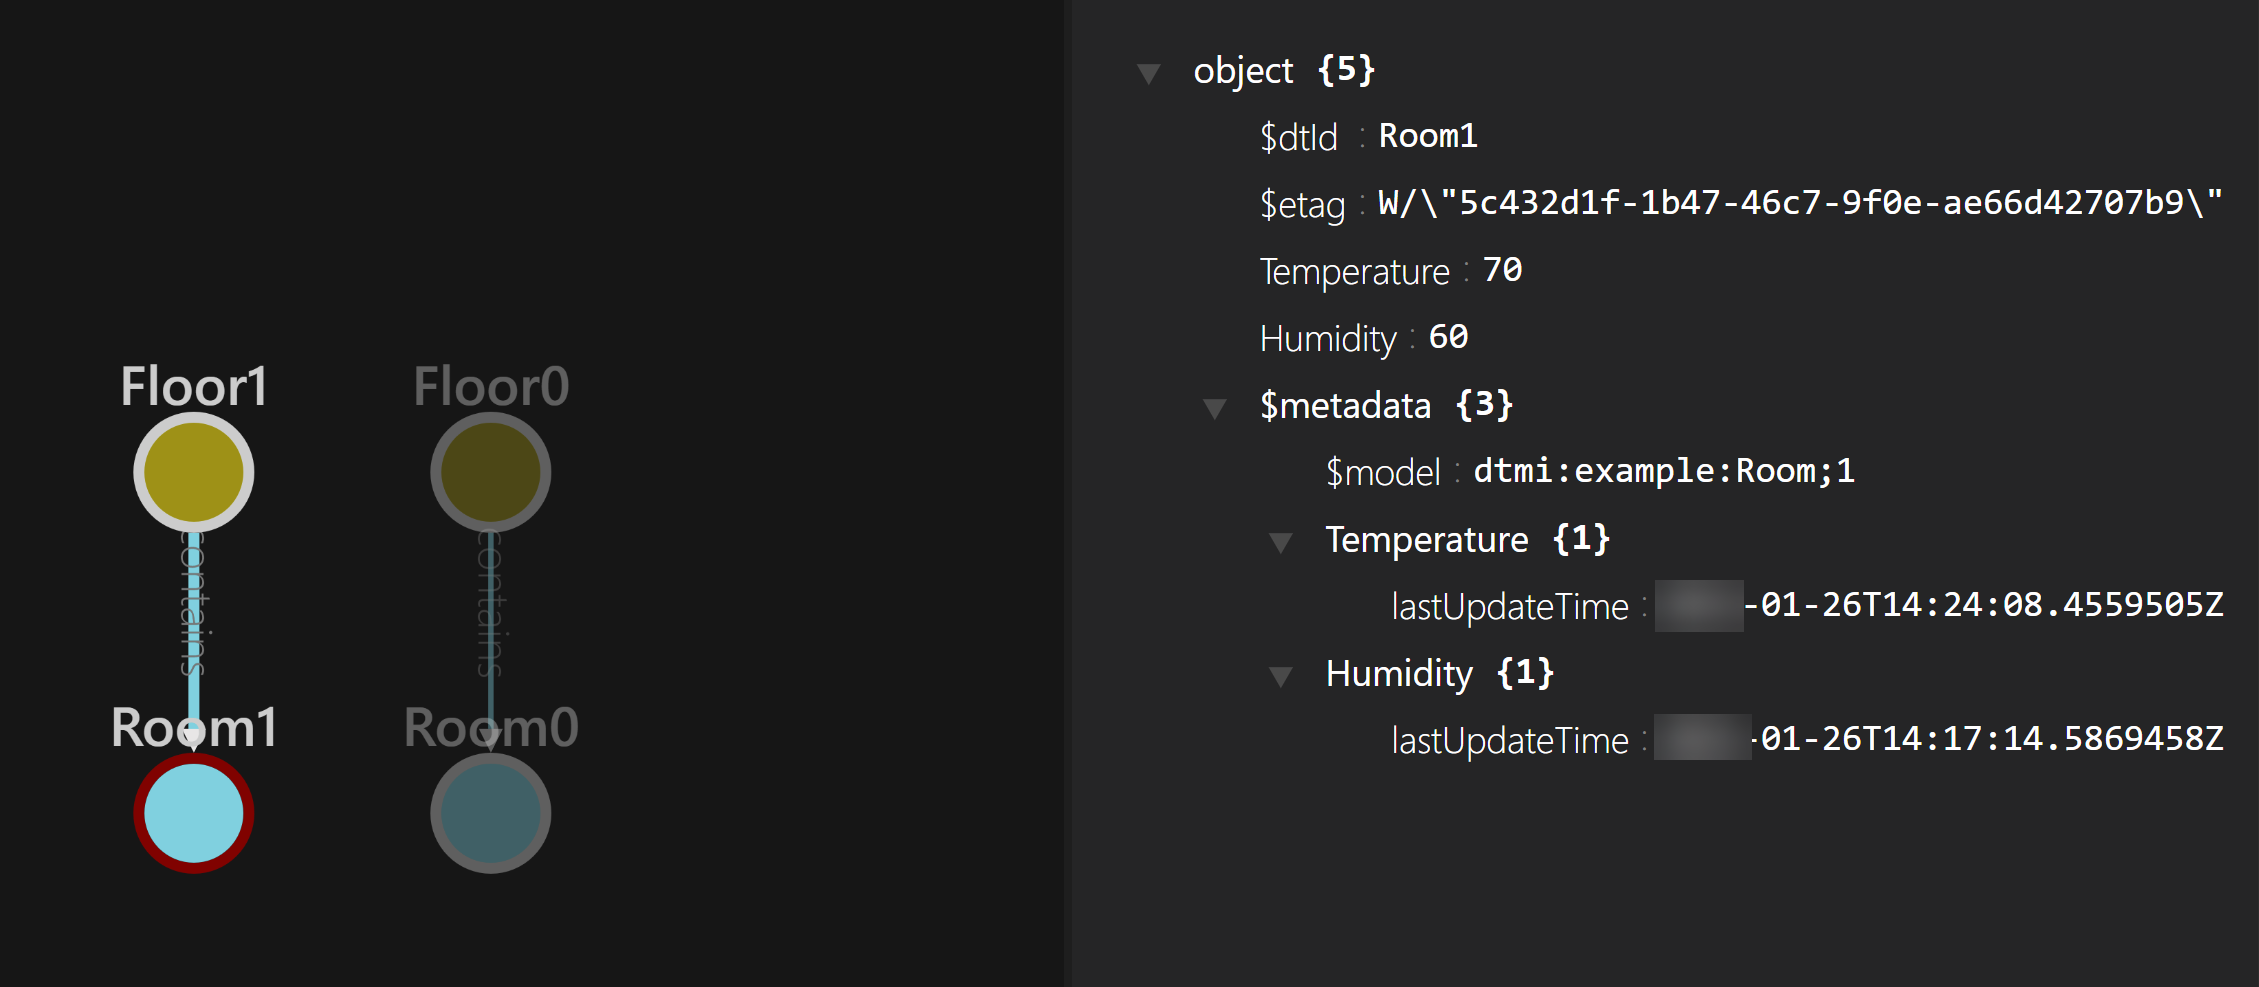
(The properties of a digital twin room)
- In this example, the temperature doesn't come from a real device, but you can integrate real-world data into the graph, so that your graph is up-to-date with the actual environment. You can also edit properties of a digital twin manually.
- Select the digital twin that has a temperature of 80
- Click on the temperature property and change it to 74
- Click the Patch item button in the top-right of the Property explorer
- The patch information comes up and shows the changes that you are about to upload to Azure. Click Close to confirm the changes
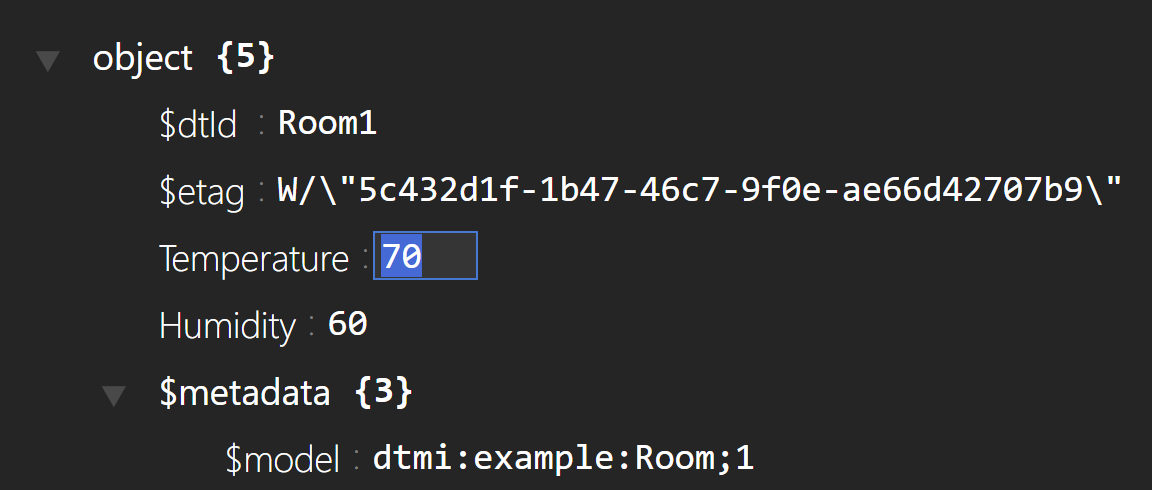
(Edit a digital twin property)
- The twin graph is now changed. You can query it with a more specific query to find answers to questions about your environment. Let's type in the query "SELECT * FROM digitaltwins T WHERE T.Temperature > 73" and click Run Query. The graph data that is returned only contains one of the rooms, as that is the only one that has a temperature above 73
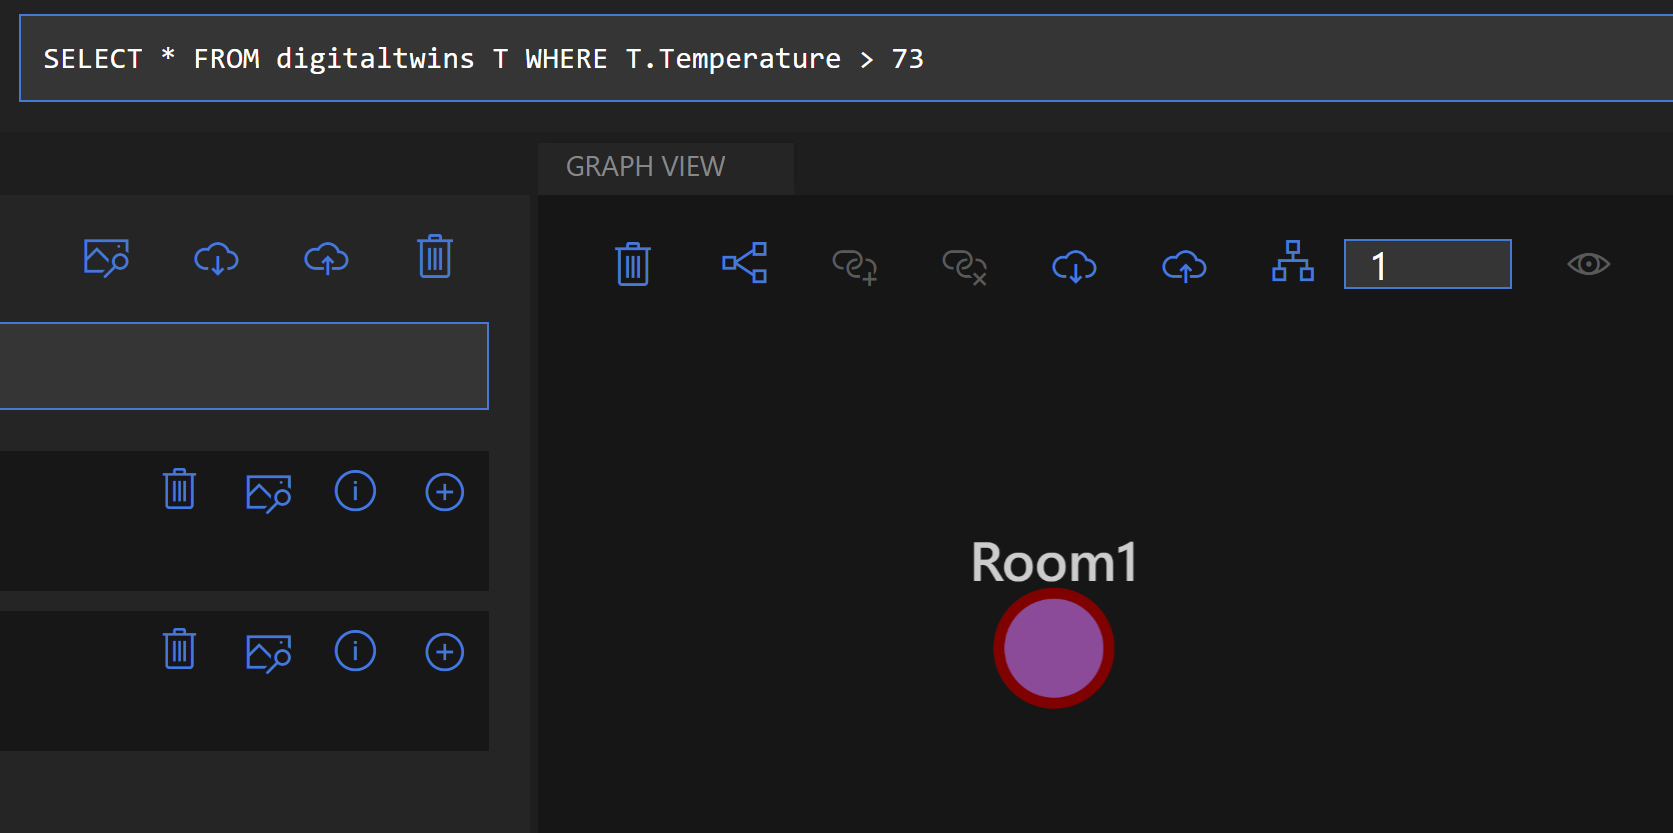
(Filtered twin graph results)
# Conclusion
Azure Digital Twins (opens new window) enables you to create real-time and interactive models of your real-world environment and all the devices, people and structures in it. This enables you to design your environment, monitor it and plan for its future. Go and check it out!