Continuous Deployment with Puppet
In this lab, you will learn how to deploy the Parts Unlimited MRP App in an automated fashion onto a Linux VM with Puppet Enterprise. After this lab, you will have a working continuous deployment environment in Puppet that will deploy the Parts Unlimited MRP app to a Virtual Machine in Azure Stack.
Pre-Requisites:
- Completion of the lab Setup Continuous Deployment with Puppet
Overview:
During this lab, we will finalize configuration of Puppet Enterprise to manage the additional virtual machine that was also deployed in the previous lab, and once under management, deploy the Parts Unlimited MRP app in an automated fashion.
Install Puppet Agent on the Node
First, we need to bring our previously deployed Ubuntu VM under the management of the Puppet Enterprise Master. To do that, you’ll first need to log into the Puppet Enterprise Master.
If it’s not already open, on the Azure Stack Development Kit host, open a browser and navigate to your Puppet Enterprise Master address. The dnsaddress will be of the form machinename.local.cloudapp.azurestack.external. Open a browser to https://dnsaddress. (Make sure you’re going to http__s__, not http). If you followed the steps in the lab, your DNS address will be https://puppetmaster.local.cloudapp.azurestack.external.
You will be prompted about an invalid certificate - it is safe to ignore this for the purposes of this lab. If the Puppet configuration has succeeded, you should see the Puppet Console sign in page:
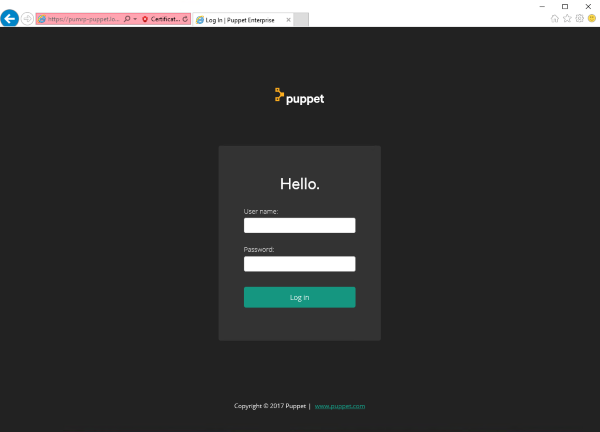
On the Puppet Enterprise sign-in screen, enter the username admin and the password you set during the deployment. When you log in, you should see a page like this:
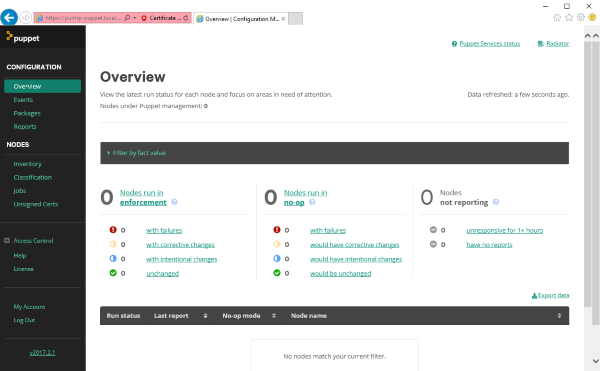
Now that we’re successfully logged into the Puppet Enterprise Master, you are now ready to add the node to the Puppet Master. Once the node is added, the Puppet Master will be able to configure the node.
Before we do that however, we’ll need to connect to our newly deployed puppetnode1 machine, to ensure we can apply any specific commands to it. To get the info we need, perform the following:
-
Open the Azure Stack Admin Portal and navigate to Resource Groups
-
From there, click on your puppet resource group, then click on the puppetnode1 virtual machine in the Essentials blade.
-
The details of puppetnode1 should be displayed, and should look similar to these below:

-
Make a note of the IP and DNS name. If you’ve followed the steps, your DNS name should be puppetnode1.local.cloudapp.azurestack.external.
-
Fire up Putty, or a similar tool of your choice, and connect to the machine, either via IP, or DNS. Login with the credentials you specified when deploying the node.
Once you’re all connected, you’re ready to start connecting this node with the Puppet Enterprise Master.
-
Back in the Puppet Master console, go to Nodes -> Unsigned Certs. The page that loads will show a command that we need to run on the node. In the example below, the puppet master machine name is:
puppetmaster.6786122c-04f9-4ccb-8ff4-21476954ec5f.internal.azurestack.local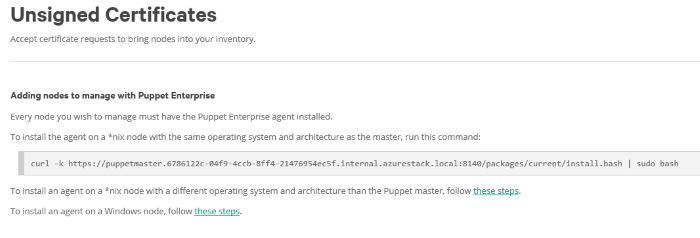
-
Copy the “Add Node” command from the Puppet Console (the one that starts with
curl...), then switch back to your Putty session, and paste the code into the window, then run it. Note, if it appears that nothing is happening, you may need to press Enter after initially running the line of code, to trigger a sudo password prompt. From there, it should run to completion.
The command will take a few moments to complete. From here on, you will configure the node only from the Puppet Master, though you will use the Putty to manually force Puppet to configure it.
-
Return to the Puppet Console and refresh the Unsigned Certificates page (where you previously got the node install command). You should see a pending request. This request has come from the node and will authorize the certificate between the puppet master and the node so that they can communicate securely. Press “Accept” to approve the node:

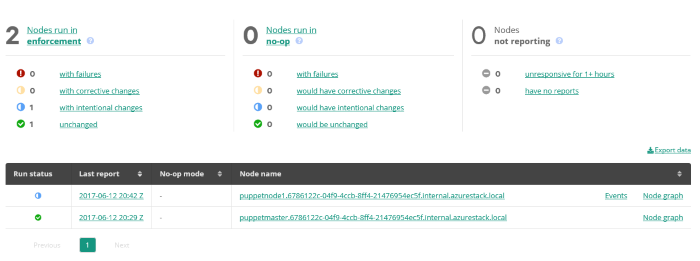
Click on the “Nodes” tab in the Puppet Console to return to the nodes view. You should see 2 nodes listed: the puppet master and the new node (it may take a few minutes for the additional node to finish configuration before it appears)
Configure the Puppet Production Environment
The Parts Unlimited MRP application is a Java application that requires mongodb and tomcat to be installed and configured on the Parts Unlimited MRP machine (the node). Instead of installing and configuring manually, we will now write a puppet program that will instruct the node how to configure itself.
Puppet Programs are stored in a particular folder in the puppet master. Puppet programs are made up of manifests that describe the desired state of the node(s). The manifests can consume modules, which are pre-packaged Puppet Programs. Users can create their own modules or consume modules from a marketplace maintained by PuppetLabs known as the Forge. Some modules on the Forge are official modules that are supported - others are open-source modules uploaded from the community.
Puppet Programs are organized by environment, allowing you to manage different catalogs for different environments such as dev, test and production.
For the purposes of this lab, we will treat the node as if it were in the production environment. We will also need to download a few modules from the Forge which we will consume to configure the node.
When the Puppet Server was installed in Azure Stack, it configured a folder for managing the production environment
in /etc/puppetlabs/code/environments/production.
-
The first thing we need to do is inspect the Production modules. To do so, we’ll establish a Putty SSH session to the Puppet Master, which if you recall, should be puppetmaster.local.cloudapp.azurestack.external assuming you followed the steps exactly. Once connected, cd to that folder now:
cd /etc/puppetlabs/code/environments/productionIf you run
lsyou will see themanifestsandmodulesfolders. Themanifestsfolder contains descriptions of machines that we will later apply to nodes. Themodulesfolder contains any modules that are referenced within the manifests. -
We will now install some modules from the Puppet Forge that we will need to configure the
partsmrpnode. Run the following 3 commands:sudo puppet module install puppetlabs-mongodb sudo puppet module install puppetlabs-tomcat sudo puppet module install maestrodev-wget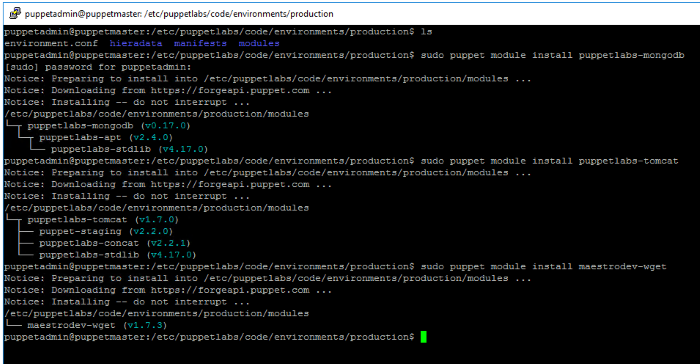
Note: The
mongodbandtomcatmodules are supported modules from the Forge. Thewgetmodule is a user module and so is not officially supported. -
We will now create a custom module that will configure the Parts Unlimited MRP app. Run the following commands to template a module:
 cd modules/
 sudo puppet module generate partsunlimited-mrpapp
This will start a wizard that will ask a series of questions as it scaffolds the module. Simply press
enterfor each question (accepting blank or default) until the wizard completes.Running
ls -lashould list the modules available so far, includingmrpapp: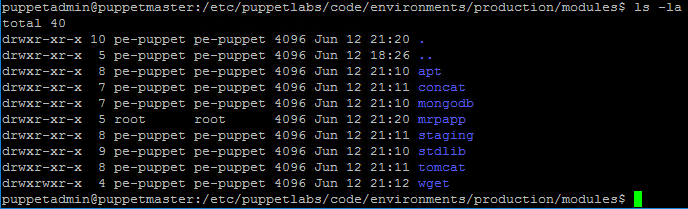
-
We are going to define the node’s configuration in the
mrpappmodule. The configuration of the nodes in the production environment is defined in asite.ppfile in the productionmanifestsfolder (the.ppextension is short for “puppet program”). Let’s edit thesite.ppfile and define the configuration for our node:sudo nano /etc/puppetlabs/code/environments/production/manifests/site.ppScroll to the bottom of the file and edit the
node defaultsection. Edit it to look as follows:node default { class { 'mrpapp': } }Press
ctrl-X, thenythenenterto save the changes to the file.This instructs Puppet to configure the
default(that is, all nodes) with themrpappmodule. The module (though currently empty) is in themodulesfolder of the production environment, so Puppet will know where to find it.
Test the Production Environment Configuration
Before we fully describe the MRP app for the node, let’s test that everything is hooked up correctly by
configuring a “dummy” file in the mrpapp module. If Puppet executes and creates the dummy file, then we can
flesh out the rest of the module properly.
-
Let’s edit the
init.ppfile of themrpappmodule (this is the entry point for the module):sudo nano /etc/puppetlabs/code/environments/production/modules/mrpapp/manifests/init.ppYou can either delete all the boiler-plate comments or just ignore them. Scroll down to the
class mrpappdeclaration and make it look as follows:class mrpapp { file { '/tmp/dummy.txt': ensure => 'present', content => 'Puppet rules!', } }Press
ctrl-X, thenythenenterto save the changes to the file.Note: Classes in Puppet programs are not like classes in Object Oriented Programming. They simply define a “resource” that is configured on a node. In the
mrpappclass (or resource), we have just instructed Puppet to ensure that a file exists at the path/tmp/dummy.txtthat has the content “Puppet rules!”. We will define more advanced resources within themrpappclass as we progress. -
Now, let’s test our setup. Switch to the
puppetnode1Putty terminal and enter the following command:sudo puppet agent --testBy default, the Puppet agents will query the Puppet Master for their configuration every 30 minutes. The command you just entered forces the agent to ask the Puppet Master for its configuration. It then tests itself against the configuration, and does whatever it needs to do in order to make itself match that configuration. In this case, the configuration requires the
/tmp/dummy.txtfile, so the node creates the file accordingly.You should see a successful run on the node.
catthe/tmp/dummy.txtfile to inspect its contents:cat /tmp/dummy.txt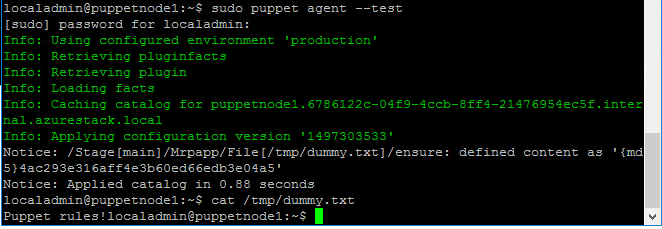
-
Puppet will automatically detect configuration drift and fix it. By default, the agent runs every 30 minutes on the nodes. Each time the agent runs, Puppet will determine if the environment is in the correct state - if it is not, it will reapply classes as necessary.
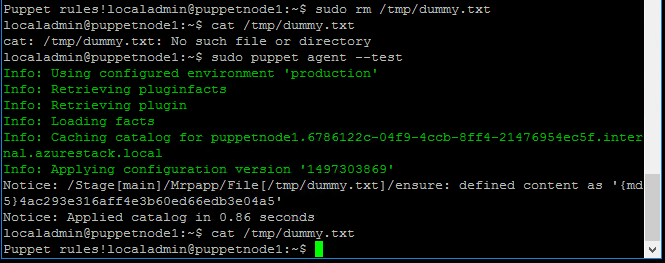
Let’s simulate configuration drift by deleting the dummy file and then re-running the puppet agent:
 sudo rm /tmp/dummy.txt
 cat /tmp/dummy.txt
 sudo puppet agent --test
 cat /tmp/dummy.txt
You should see the run complete successfully and the file should exist again.
You can also try to edit the contents of the file and re-run the
sudo puppet agent --testcommand to see the contents update.
Create a Puppet Program to Describe the Prerequisites for the MRP Application
Now that we have hooked up the node (partsmrp) to the Puppet Master, we can begin to write the Puppet Program that will describe the prerequisites for the Parts Unlimited MRP application.
Note: For simplicity, we will describe the entire configuration in a single Puppet Program (init.pp from the mrpapp module we created earlier). However, the parts of the configuration could be split into multiple manifests or modules as they grow. This would promote reuse - just as in any good programming language.
Note: You can see the complete
init.ppfile here.
Configure MongoDb
Let’s add a class to configure mongodb. Once mongodb is configured, we want Puppet to download a mongo script that contains some data for our application’s database. We’ll include this as part of the mongodb setup.
On the Puppet Master, edit the init.pp file of the mrpapp module:
sudo nano /etc/puppetlabs/code/environments/production/modules/mrpapp/manifests/init.pp
Add the following class at the bottom of the file:
class configuremongodb {
  include wget
  class { 'mongodb': }->

  wget::fetch { 'mongorecords':
    source => 'https://raw.githubusercontent.com/Microsoft/PartsUnlimitedMRP/master/deploy/MongoRecords.js',
    destination => '/tmp/MongoRecords.js',
    timeout => 0,
  }->
  exec { 'insertrecords':
    command => 'mongo ordering /tmp/MongoRecords.js',
    path => '/usr/bin:/usr/sbin',
    unless => 'test -f /tmp/initcomplete'
  }->
  file { '/tmp/initcomplete':
    ensure => 'present',
  }
}
Let’s examine this class:
- Line 1: We create a class (resource) called
configuremongodb - Line 2: We include the
wgetmodule so that we can download files viawget - Line 3: We invoke the
mondodbresource (from themongodbmodule we downloaded earlier). This installs mongodb using defaults defined in the Puppet mongodb module. Believe it or not, that’s all we have to do to install mondodb! - Line 5: We invoke the
fetchresource from thewgetmodule, calling this resourcemongorecords - Line 6: We set the source of the file we need to download
- Line 7: We set the destination where the file must be downloaded to
- Line 10: We use the built-in Puppet resource
execto execute a command - Line 11: We specify the command to execute
- Line 12: We set the path for the command invocation
- Line 13: We specify a condition using the keyword
unless: we only want this command to execute once, so we create a tmp file once we have inserted the records (Line 15). If this file exists, we don’t execute the command again.
Note: The
->notation on Lines 3, 9 and 14 is an “ordering arrow”: it tells Puppet that it must apply the “left” resource before invoking the “right” resource. This allows us to specify order when necessary.
Press ctrl-O, then enter to save the changes to the file without exiting.
Configure Java
Add the following class below the configuremongodb class:
class configurejava {
  include apt
  $packages = ['openjdk-8-jdk', 'openjdk-8-jre']

  apt::ppa { 'ppa:openjdk-r/ppa': }->
  package { $packages:
     ensure => 'installed',
  }
}
Let’s examine this class:
- Line 2: We include the
aptmodule, which will allow us to configure new Personal Package Archives (PPAs) - Line 3: We create an array of packages that we need to install
- Line 5: We add a PPA
- Lines 6 - 8: We tell Puppet to ensure that the package are installed. Puppet expands the array and essentially does a for-each, installing each package in the array.
Note: We can’t use the Puppet
packagetarget to install Java since this will only install Java 7. That’s why we needed to add the PPA using theaptmodule.
Press ctrl-O, then enter to save the changes to the file without exiting.
Configure Tomcat
Let’s add a class below the configurejava class to configure tomcat:
class configuretomcat {
  class { 'tomcat': }

  tomcat::instance { 'default':
    package_name => 'tomcat7',
    install_from_source => false,
  }->
  tomcat::config::server::connector { 'tomcat7-http':
    catalina_base => '/var/lib/tomcat7',
    port => '9080',
    protocol => 'HTTP/1.1',
    connector_ensure => 'present',
    server_config => '/etc/tomcat7/server.xml',
  }->
  tomcat::service { 'default':
    use_jsvc => false,
    use_init => true,
    service_name => 'tomcat7',
  }
}
Let’s examine this class:
- Line 1: We create a class (resource) called
configuretomcat - Line 2: We invoke the
tomcatresource (from the tomcat module we downloaded earlier) - Line 4: We need to override some default properties for the tomcat instance. We specify the tomcat package we need (Line 5) and tell the
tomcatclass not to install from source (Line 6). - Lines 8 - 14: We configure the Tomcat service
- Lines 15 - 19: We need to configure a connector for the Parts Unlimited MRP application. In Lines 9 - 13, we specify the connector properties for Puppet to write to the tomcat server.xml file.
Press ctrl-O, then enter to save the changes to the file without exiting.
Deploy a WAR File
The MRP application is compiled into a WAR file that Tomcat then uses to serve pages.
Let’s specify a resource to deploy the war file for the site. Go back to the Puppet SSH session and edit the init.pp file.
Add the following class at the bottom of the file:
class deploywar {
  require configuretomcat

  tomcat::war { 'mrp.war':
    catalina_base => '/var/lib/tomcat7',
    war_source => 'https://raw.githubusercontent.com/Microsoft/PartsUnlimitedMRP/master/builds/mrp.war',
  }
}
Press ctrl-O, then enter to save the changes to the file without exiting.
Let’s examine this class:
- Line 1: We create a class (resource) called
deploywar - Line 2: We tell Puppet to make sure that
configuretomcatis complete before invoking this class - Line 5: We set the
catalina basedirectory so that Puppet deploys the war to our Tomcat service - Line 6: We use the tomcat module’s
warresource to deploy our war from thewar_source
Start the Ordering Service
The MRP service calls an Ordering Service, which is a REST API managing orders in the MongoDb. This service is compiled to a jar file. We’ll need to copy the jar file to our node and then run it in the background so that it can listen for requests.
Now we need to make sure that the ordering service is running. Again we’ll add a new class at the bottom of the init.pp file:
class orderingservice {

  file { '/opt/mrp':
    ensure => 'directory'
  }->
  wget::fetch { 'orderingsvc':
    source => 'https://raw.githubusercontent.com/Microsoft/PartsUnlimitedMRP/master/builds/ordering-service-0.1.0.jar',
    destination => '/opt/mrp/ordering-service.jar',
    cache_dir => '/var/cache/wget',
    timeout => 0,
  }->
  exec { 'stoporderingservice':
    command => "pkill -f ordering-service",
    path => '/bin:/usr/bin:/usr/sbin',
    onlyif => "pgrep -f ordering-service"
  }->
   exec { 'stoptomcat':
    command => 'service tomcat7 stop',
    path => '/bin:/usr/bin:/usr/sbin',
    onlyif => 'service tomcat7 status',
  }->
  exec { 'orderservice':
    command => 'java -jar /opt/mrp/ordering-service.jar &',
    path => '/usr/bin:/usr/sbin:/usr/lib/jvm/java-8-openjdk-amd64/bin',
  }->
  exec { 'wait':
    command => 'sleep 20',
    path => '/bin',
    notify => Tomcat::Service['default']
  }
}
Press ctrl-O, then enter to save the changes to the file without exiting.
Let’s examine this class:
- Line 1: We create a class (resource) called
orderingservice - Lines 2 - 4: We install the Java JRE required to run the application using Puppet’s
packageresource - Lines 6 - 8: We ensure that the directory
/opt/mrpexists (Puppet creates it if it doesnt) - Lines 9 - 14: We
wgetthe ordering service binary, placing it in/opt/mrp - Line 12: We specify a cache directory to ensure that the file is only downloaded once
- Lines 15 - 19: We stop the
orderingservice, but only if it is running - Lines 20 - 24: We stop the
tomcat7service, but only if it is running - Lines 25 - 28: We start the ordering service
- Lines 29 - 33: We sleep for 20 seconds to give the ordering service time to start up before
notifyingthetomcatservice, which triggers a refresh on the service - Puppet will re-apply the state we defined for the service (i.e. start it if it is not running)
Note: We need to wait after running the
javacommand since this service needs to be running before we start Tomcat, otherwise Tomcat grabs the port that the ordering service needs to listen on.
Complete the mrpapp Resource
Go back to the top of the file and change the mrpapp class to look as follows to run all our resources:
class mrpapp {
  class { 'configuremongodb': }
  class { 'configurejava': }
  class { 'configuretomcat': }
  class { 'deploywar': }
  class { 'orderingservice': }
}
Press ctrl-O, then enter to save the changes to the file without exiting.
Run the Puppet Configuration on the Node
- On the partsmrp SSH session, again force Puppet to update the node’s configuration:
sudo puppet agent --testThis first run will take a few moments - there is lots to download and install for the first run! Next time the Puppet agent runs, it will verify that the existing environment is correctly configured - that should be much quicker since the services will already be installed and configured.
-
We need to check if Tomcat is running, so open a browser and browse to port
9080of the partsmrp machine. You can get the name of the machine by clicking on the Public IP. If you’ve followed the steps exactly, it should be puppetnode1.local.cloudapp.azurestack.external. You can check in the Azure Stack portal (just like you did to get the url of the puppet master earlier). Once you open the browser, you should see the following Tomcat confirmation page: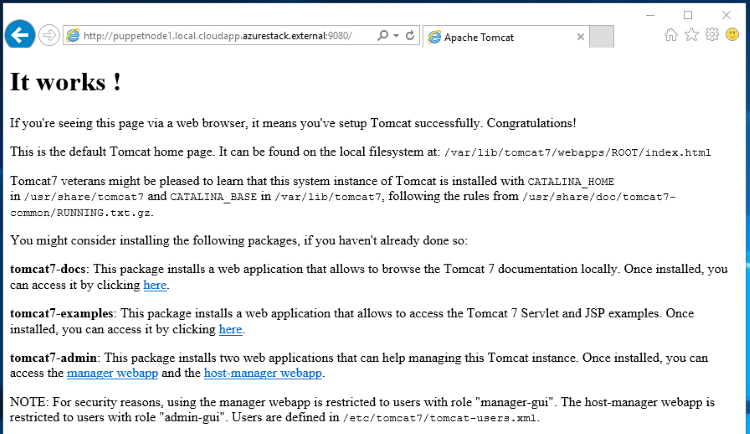
-
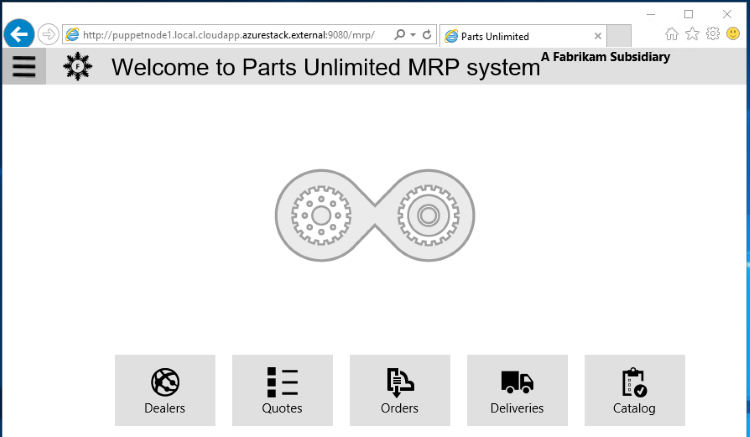
Now you can ensure that the configuration is correct by opening a browser to the Parts Unlimited MRP application. The address will be http://puppetnode1.local.cloudapp.azurestack.external:9080/mrp, assuming you used puppetnode1 as your chosen VM name.
Next steps
In this lab, you learned how to create the Puppet infrastructure and deploy the Parts Unlimited MRP app to the nodes while managing configuration drift. You can follow the steps again to deploy additional nodes under management. Each Puppet Enterprise deployment allows you to manage up to 10 nodes for free - great for learning and development!
If you’re interested in learning more about DevOps tooling on Azure Stack, check out these Hands-On-Labs: