Create CI Infrastructure Using Python, GitHub, and Travis CI
Continuous Integration (CI) is one of the Agile and DevOps software development practices. It helps development teams avoid merge conflicts by setting up a continuous merging of new code updates into a shared central repository.
Automating the build and testing of code each time one of your team members commits a change to your version control is one of the best practices in DevOps. This practice enables the “fail-fast” paradigm for your application development and is an iterative development approach.
Continuous integration is about continuously delivering small chunks of code, which improves development team productivity and helps to fix bugs quickly before the release and deployment phases.
There are several CI tools, like Jenkins, Buildbot, TravisCI, GoCD, and Team Foundation Server.
DevOps MPP Course Source
This lab is used in course DevOps200.1x: DevOps Practices and Principles: Module 3.
Lab Video:

Pre-requisites:
- Access to the software and sites in the steps
Lab Tasks:
- Create an application using Python using Virtualenv for the environment isolation
- Create Unit Tests
- Declare Depenendcies
- Define the continuous build and test in our
travis.ymlfile. - Create a Github repository for this application and link it to our Travis CI account.
- Setup Travis CI
- Managing Pull Requests
Estimated Lab Time:
- approx. 60 minutes
Task 1: Create an application using Python using Virtualenv for the environment isolation
In this practice lab, we are going to work on a Python project. The purpose of this lab is creating a system that triggers a list of tasks once a developer push a code to a share code repository.
We are going to use:
- Python 3.5
- Python Virtualenv to create an isolated environment for our application
- Unittest: A unit testing framework for Python
- Github: A web-based Git version control repository hosting service
- TravisCI: A hosted continuous integration testing tool integrated with code management services such as GitHub
This is the structure of our code:
app/
├── __init__.py
├── src
│   ├── app.py
│   ├── __init__.py
└── tests
    ├── app-test.py
    └── __init__.py
.gitignore
.travisci
__init__.py
README.md
Where app.py is the source of our application, app-test.py is the test case and all of the _init_.py files are empty.
You can also download the .gitignore file from this repository.
You can use Python Virtualenv and create an isolated environment. You can download virtualenv source from here and execute the setup.py script to install it. To activate your virtual environment execute:
python3 -m venv /path/to/new/virtual/environment
If you are using Linux.
c:\>c:\Python35\python -m venv c:\path\to\myenv
If you are using Windows.
If everything is fine, let’s activate it:
. /path/to/new/virtual/environment/bin/activate
Our app.py is a simple application that returns the sum of two numbers:
def my_function(param1, param2):
    return param1 + param2
Task 2: Create Unit Tests
In order to test our application, we are going to write our a test scenario using Python unittest (tests/app-test.py):
import unittest
from app.src.app import my_function


class MyTest(unittest.TestCase):
    def test_my_function(self):
        self.assertEqual(my_function(1, 1), 2)
        self.assertEqual(my_function(1, -1), 0)
        self.assertEqual(my_function(0, 0), 0)
        self.assertEqual(my_function(-1, -1), -2)
        self.assertEqual(my_function(1.0, 1), 2)
        self.assertEqual(my_function(1.1, 1.1), 2.2)


if __name__ == '__main__':
    unittest.main()
In the previous test code, we tested different scenarios like summing up two negative integers or two floats. It is a good practice to think about the best possible scenarios and implement the suitable test cases in order to reduce the number of bugs.
You can execute this test case using the following command:
python app/tests/app-test.py
If tests run without any problem you should see:
.
----------------------------------------------------------------------
Ran 1 test in 0.000s

OK
If you have one or more problems with your test assertions, the test will not pass.
For example:
import unittest
from app.src.app import my_function


class MyTest(unittest.TestCase):
    def test_my_function(self):
        # 1 + 1 = 4
        self.assertEqual(my_function(1, 1), 4)


if __name__ == '__main__':
    unittest.main()
The output of the test execution will be similar to the following:
F
======================================================================
FAIL: test_my_function (__main__.MyTest)
----------------------------------------------------------------------
Traceback (most recent call last):
  File "app/tests/app-test.py", line 7, in test_my_function
    self.assertEqual(my_function(1, 1), 4)
AssertionError: 2 != 4

----------------------------------------------------------------------
Ran 1 test in 0.001s

FAILED (failures=1)
Task 3: Declare Dependencies
When you use a programming language to develop your application, you usually need to install libraries. This is the case for Python and that’s why we need to declare our dependencies. This is done in the requirements.txt file using this command:
pip freeze > requirements.txt
In this project, we are not using any additional library, that’s why our requirements.txt will be empty but always remember this step.
Task 4: Define the continuous build and test in our .travis.yml file.
In order to integrate the Travis CI workflow, we should create the configuration file (.travis.yml). This file will tell Travis CI all details needed.
You can customize your build environment and add the set of steps in this file.
Travis CI uses .travis.yml file in the root of your repository to learn about your project environment, how you want your builds to be executed, what kind of tests to perform and other information like emails, Campfire and IRC rooms to notify about build failures.
This is the file we are going to use:
language: python
python:
  - "3.5"
# command to install dependencies
install:
  - pip install -r requirements.txt
# command to run tests
script:
  - export PYTHONPATH=$PYTHONPATH:$(pwd)
  - python app/tests/app-test.py
Task 5: Create a Github repository for this application and link it to our Travis CI account.
Now that we finished writing our code, the .gitignore file, the test and the Travis CI configuration, we need to create a Github repository and link our Travis CI to our Github account in order to import the new project.
git init
git add .
git commit -m "First commit"
git remote add origin <remote repository URL>
git push origin master
Don’t forget to change the

Task 6: Setup Travis CI
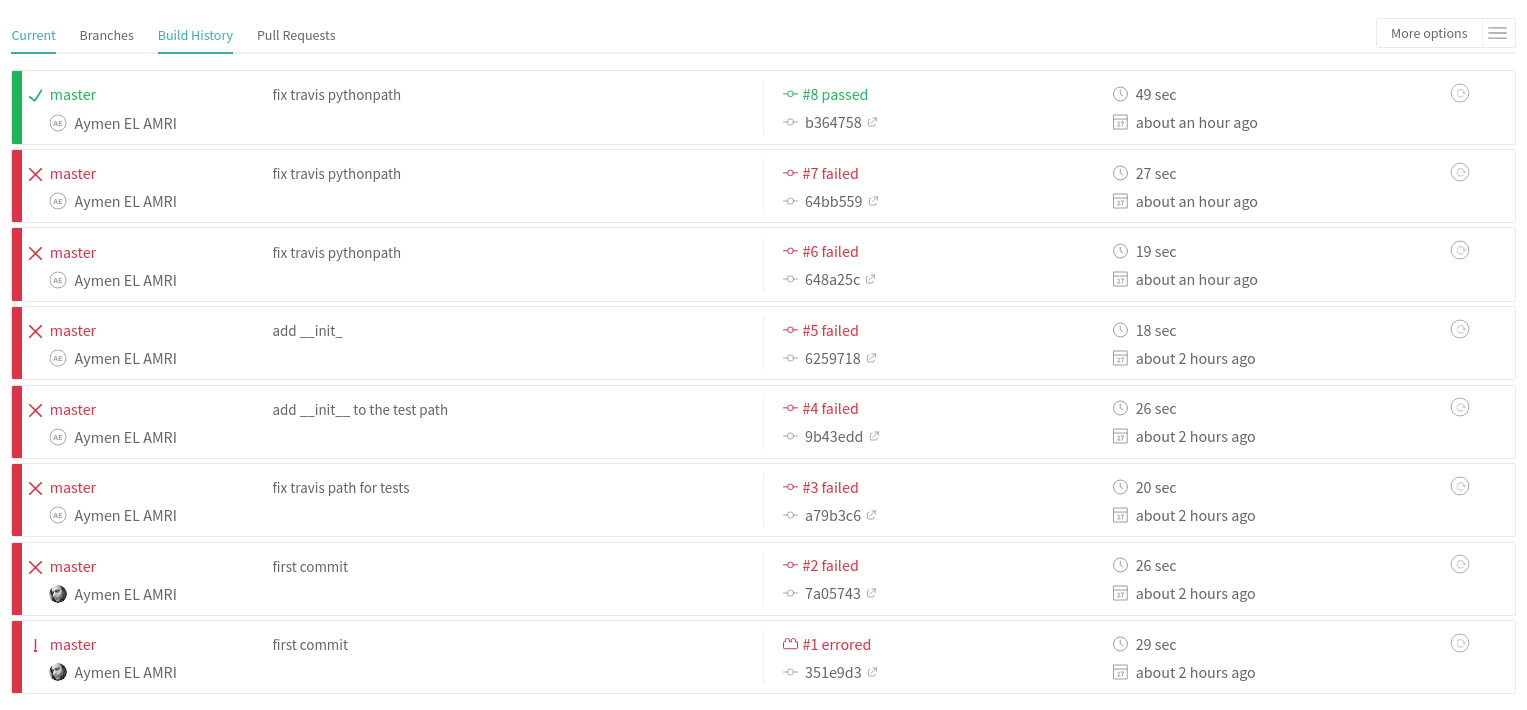
Go to your Travis CI dashboard, connect your Github account then sync your repositories and add the new project. This will generate your first build and you can see whether your build passes or no.

After every code commit, a build will start automatically and you will be notified by email on its status.
Task 7: Managing Pull Requests
Now, if your are working on a different branch than the master, which is the case for all development teams, you need to make a pull request then merge your code. Let’s try to test this:
Create the branch “dev” on your local machine:
git checkout -b dev
Add your modifications then push them to the dev branch:
git push origin dev
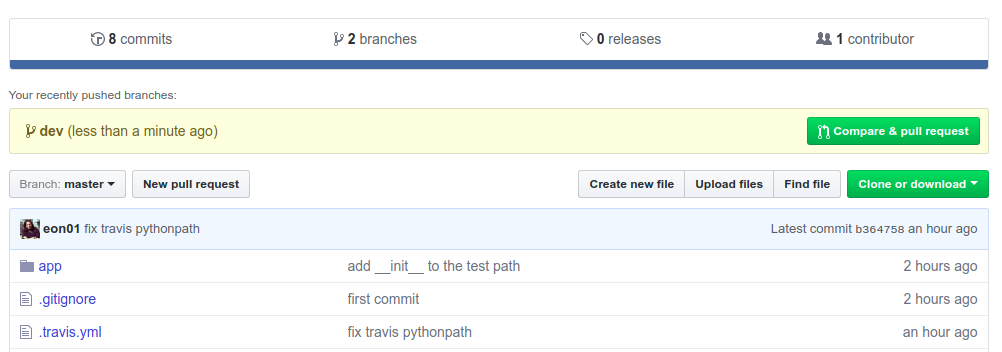
Once your modifications are added to the remote dev branch, Travis CI will trigger a new build for the dev branch and you will notice that you can make a pull request on the master branch:

If the pull request is accepted an merged with the master branch, our CI tool will trigger a new build under the “Pull Requests” tab:

Summary
During this practice lab, we created an application using Python using Virtualenv for the environment isolation then we created a Github repository for this application and linked it to our Travis CI account.
The continuous build and test were described in our .travis.yml file.
It is possible to add more advanced features like ChatOps using Slack, IRC or any alternative, add more steps to your integration pipeline like creating a Docker image or deploying to a Azure Web App.. etc
