Continuous Deployment with VSTS and Local Agent on a Linux VM
In this lab, you will learn how to deploy the Parts Unlimited MRP App in an automated fashion onto a local agent on a Linux VM running in Azure. After this lab, you will have a working, automated build in Visual Studio Team Services that will build, test, and deploy the Parts Unlimited MRP app to a Virtual Machine in Azure.
Note: If you would like to trigger continuous deployments using the VSTS hosted agent instead of a local agent running on a Linux VM in Azure, see the lab Continuous Deployment with VSTS and VSTS Hosted Agent
DevOps MPP Course Source
- This lab is used in course DevOps200.3x: Continuous Integration and Continuous Deployment - Module 4.
Pre-Requisites:
- Completion of the Set up Parts Unlimited MRP with VSTS lab.
- Completion of the lab Continuous Integration with Visual Studio Team Services
- An active Azure Subscription
- An active Visual Studio Team Services (VSTS) account
Lab Tasks:
- Provision a VSTS agent and MRP machine (Ubuntu VM) in Azure using an ARM template.
- Configure the release definition
- Trigger a build for continuous deployment
Estimated Lab Time:
- approx. 70 minutes
Task 1: Provision a VSTS agent and MRP machine (Ubuntu VM) in Azure using an ARM template
In this lab, you will work with one azure virtual machine which will serve as both the deployment agent and the MRP server.
-
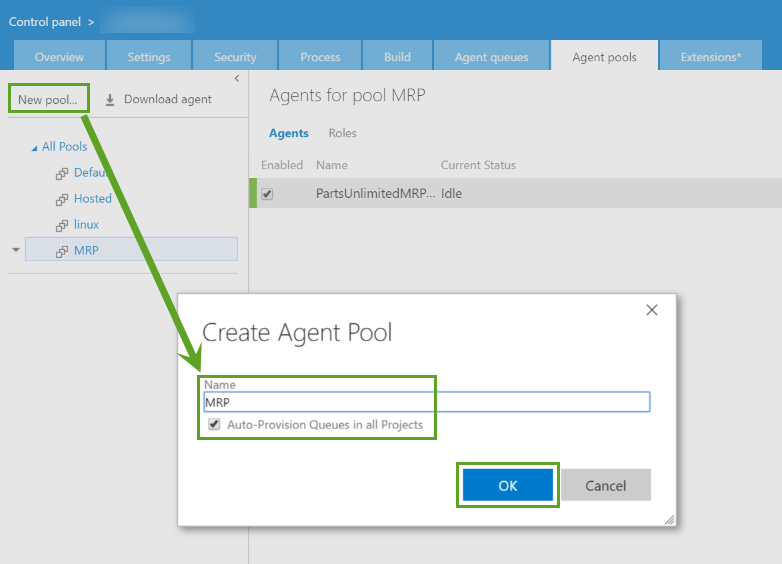
Create the MRP agent pool in Visual Studio Team Services if you do not have one already. Go to the homepage of your VSTS account and clicking on the gear icon in the upper-right corner of the homepage.

-
Then, click on the Agent Pool tab and click on New pool… to create a pool called “MRP.” Keep the checkbox to “Auto-provision Queues in all Projects” checked.
-
Instead of manually creating the VM in Azure, we are going to use an Azure Resource Management (ARM) template. Simply click the Deploy to Azure button below and follow the wizard to deploy the machine. You will need to log in to the Azure Portal.


The VMs will be deployed to a Resource Group along with a virtual network (VNET) and some other required resources. You can delete the resource group in order to remove all the created resources at any time.
-
You will need to select a subscription and region to deploy the Resource Group to and supply an admin username, password, and unique name for the machine. The machine will be a Standard D1_V2.
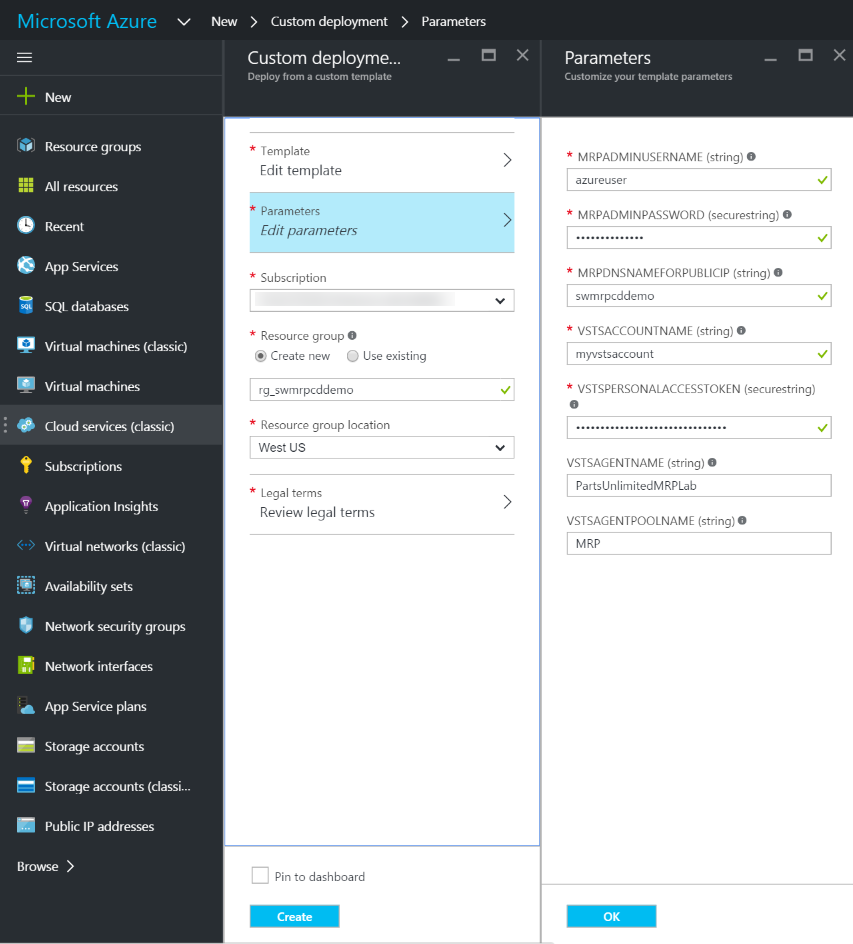
Make sure you make a note of the region as well as the username and password for the machine. Allow about 10 minutes for deployment and then another 10 minutes for the VSTS agent and MRP dependency configuration.
-
You will also need to specify the VSTS account to use (the DNS name before visualstudio.com) and a personal access token. If you don’t have a personal access token, follow this link to create one.
-
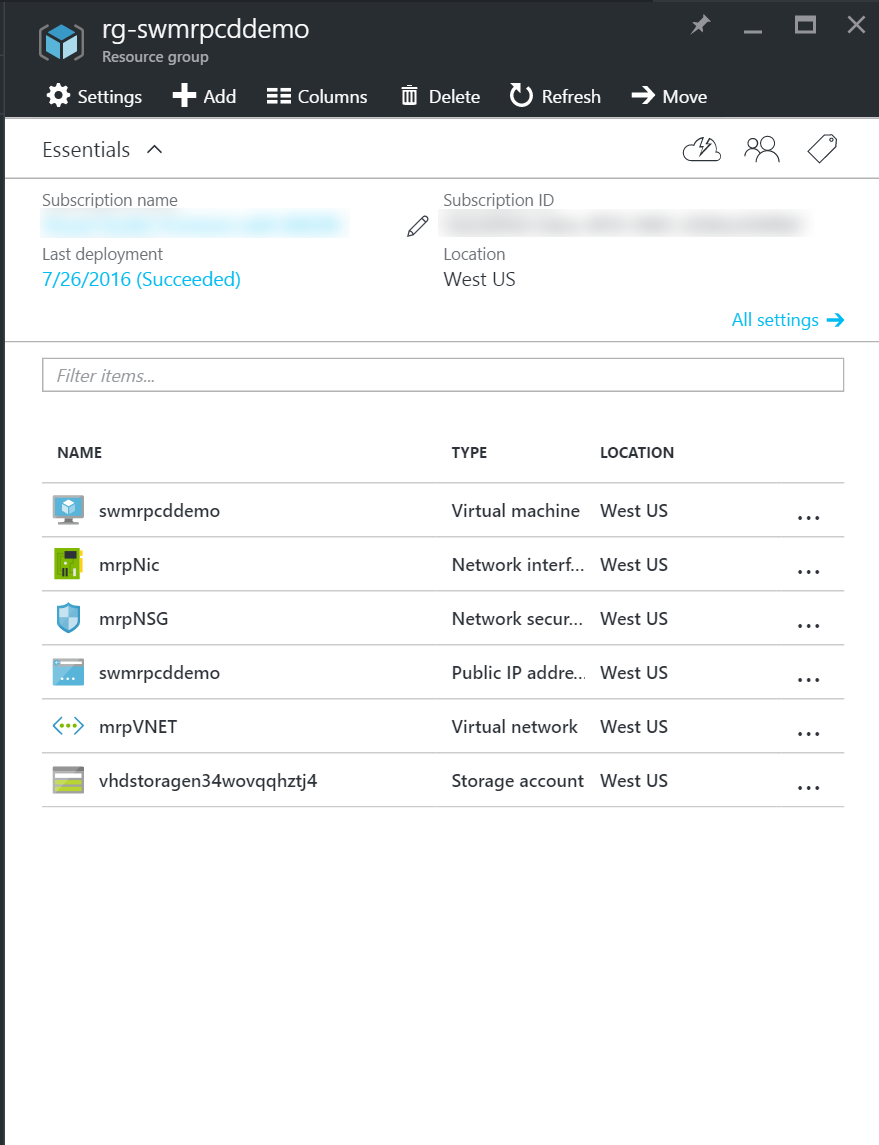
When the deployment completes, you should see the following resources in the Azure Portal:
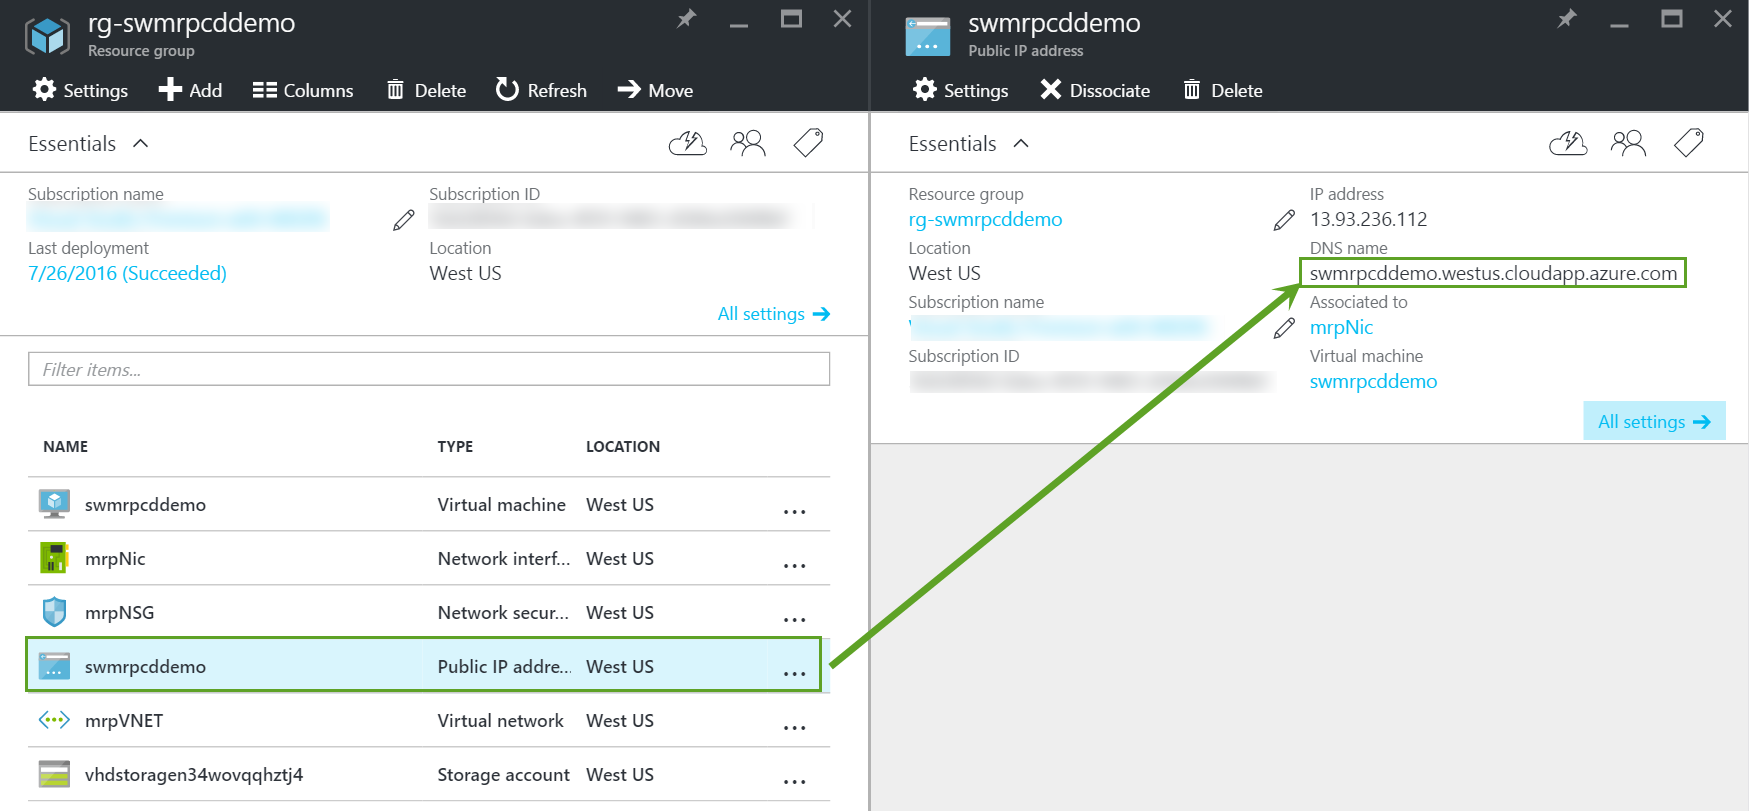
Click on the “partsmrp” Public IP Address. Then make a note of the DNS name:
Note: The lab requires several ports to be open, such as SSH ports and the Parts Unlimited MRP app port on the partsmrp machine. The ARM template opens these ports on the machine for you.
Task 2: Create release definition
Now we will configure a release definition in VSTS that picks up build artifacts and triggers whenever new artifacts are produced.
-
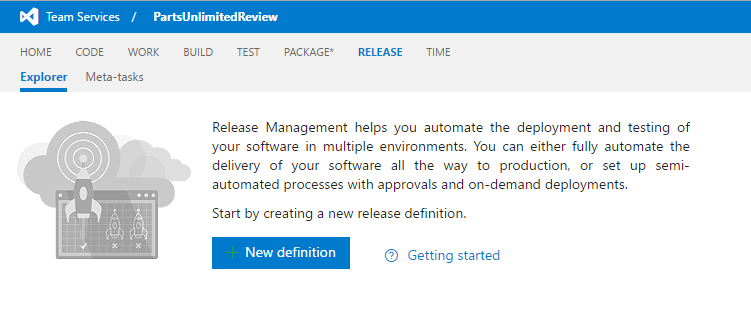
At the homepage of the PartsUnlimitedMRP team project in Visual Studio Team Services, click on the Release tab in the upper-left corner of the page. Then, click the New definition button on the home page.
-
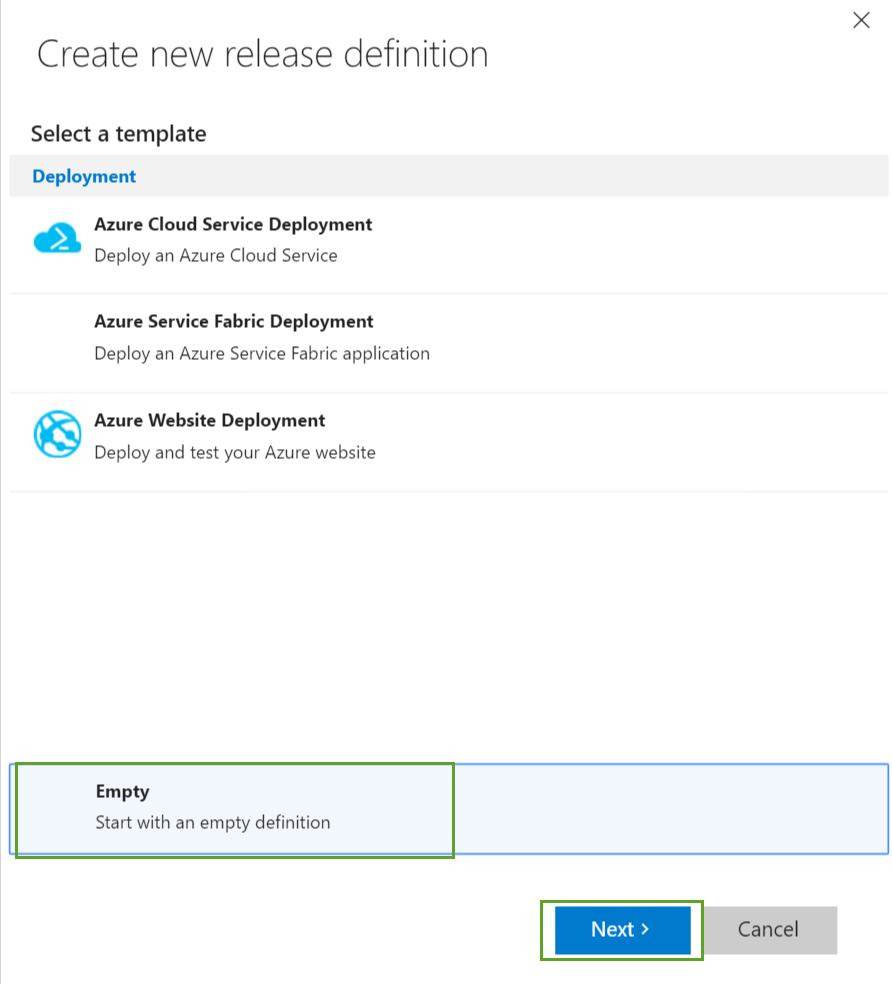
In the Create new release definition dialog, choose an empty template then the OK button.
-
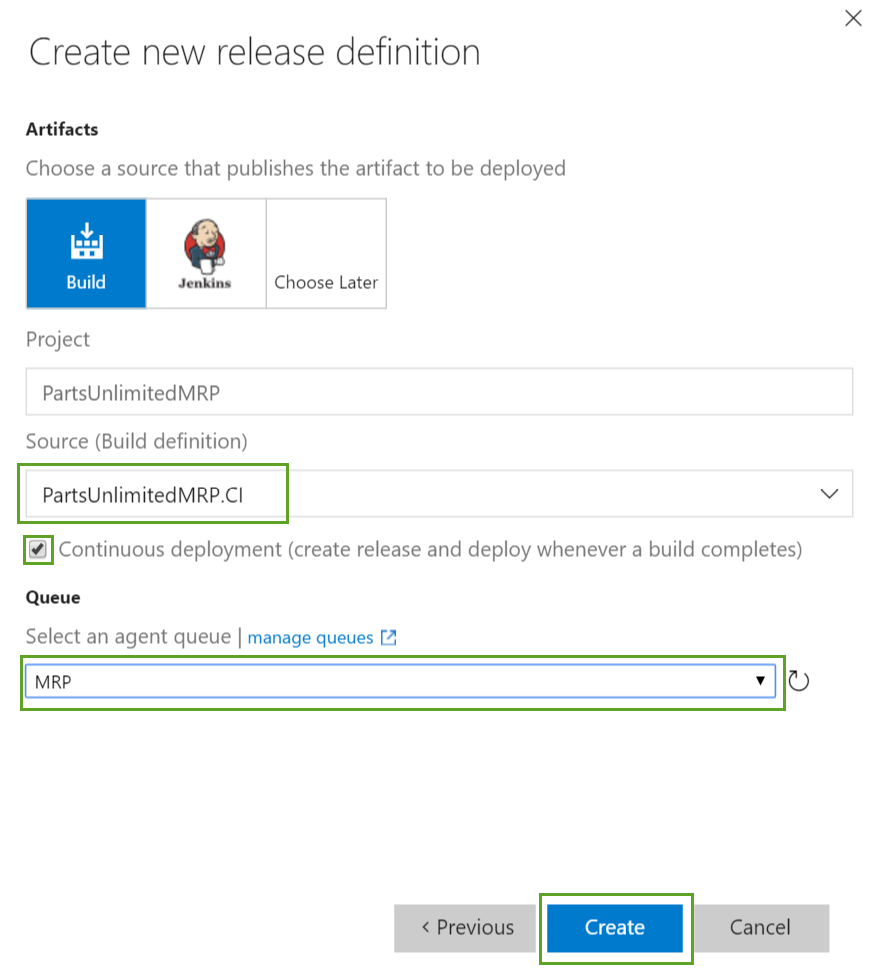
Keep the artifacts as Build, select the CI build definition that you used in the previous lab (such as “PartsUnlimited.CI”), check the checkbox to enable the Continuous Deployment trigger, and choose “MRP” as the agent queue.
-
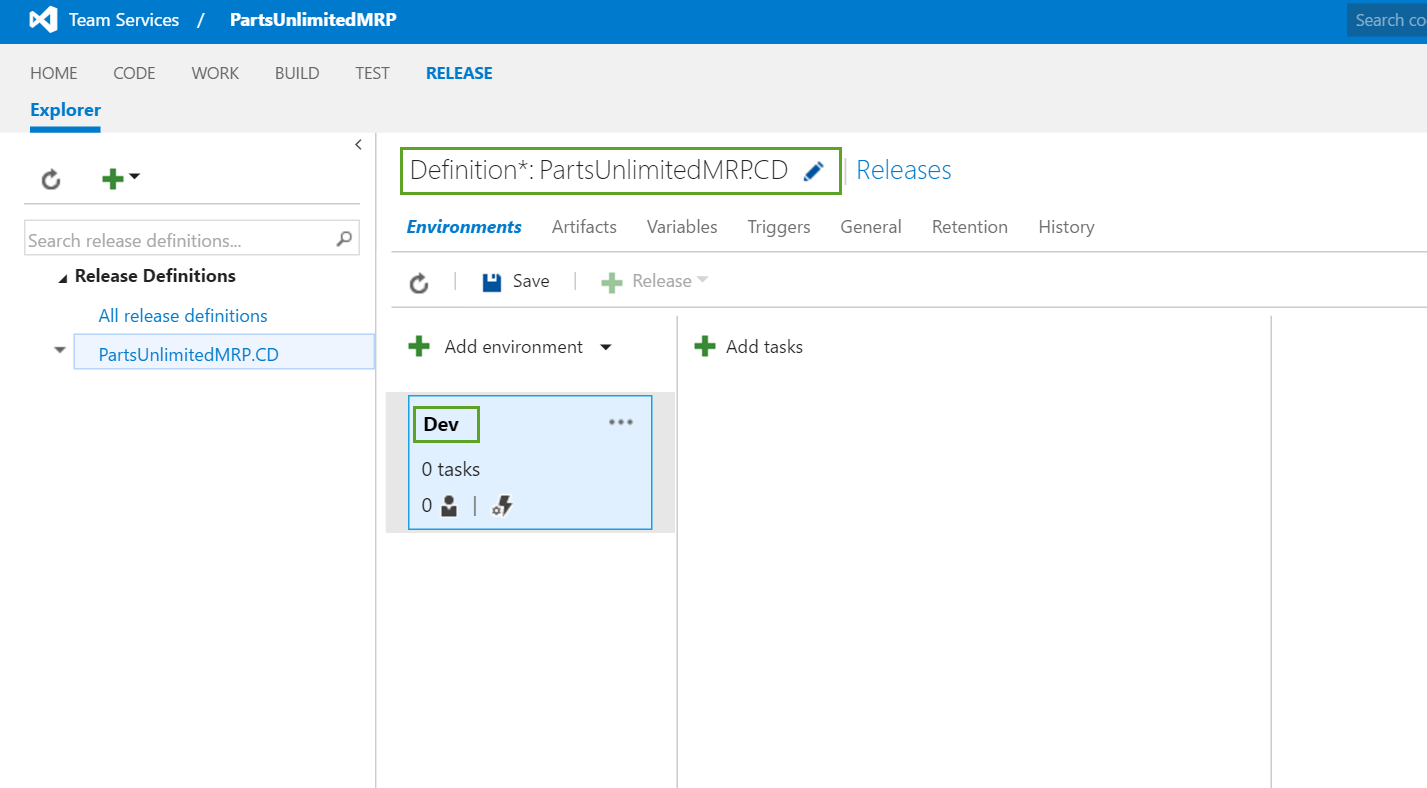
Click on the Environment keyword and rename the environment to be “Dev.” Click on the pencil icon on the top of the definition and rename it to be PartsUnlimitedMRP.CD.
-
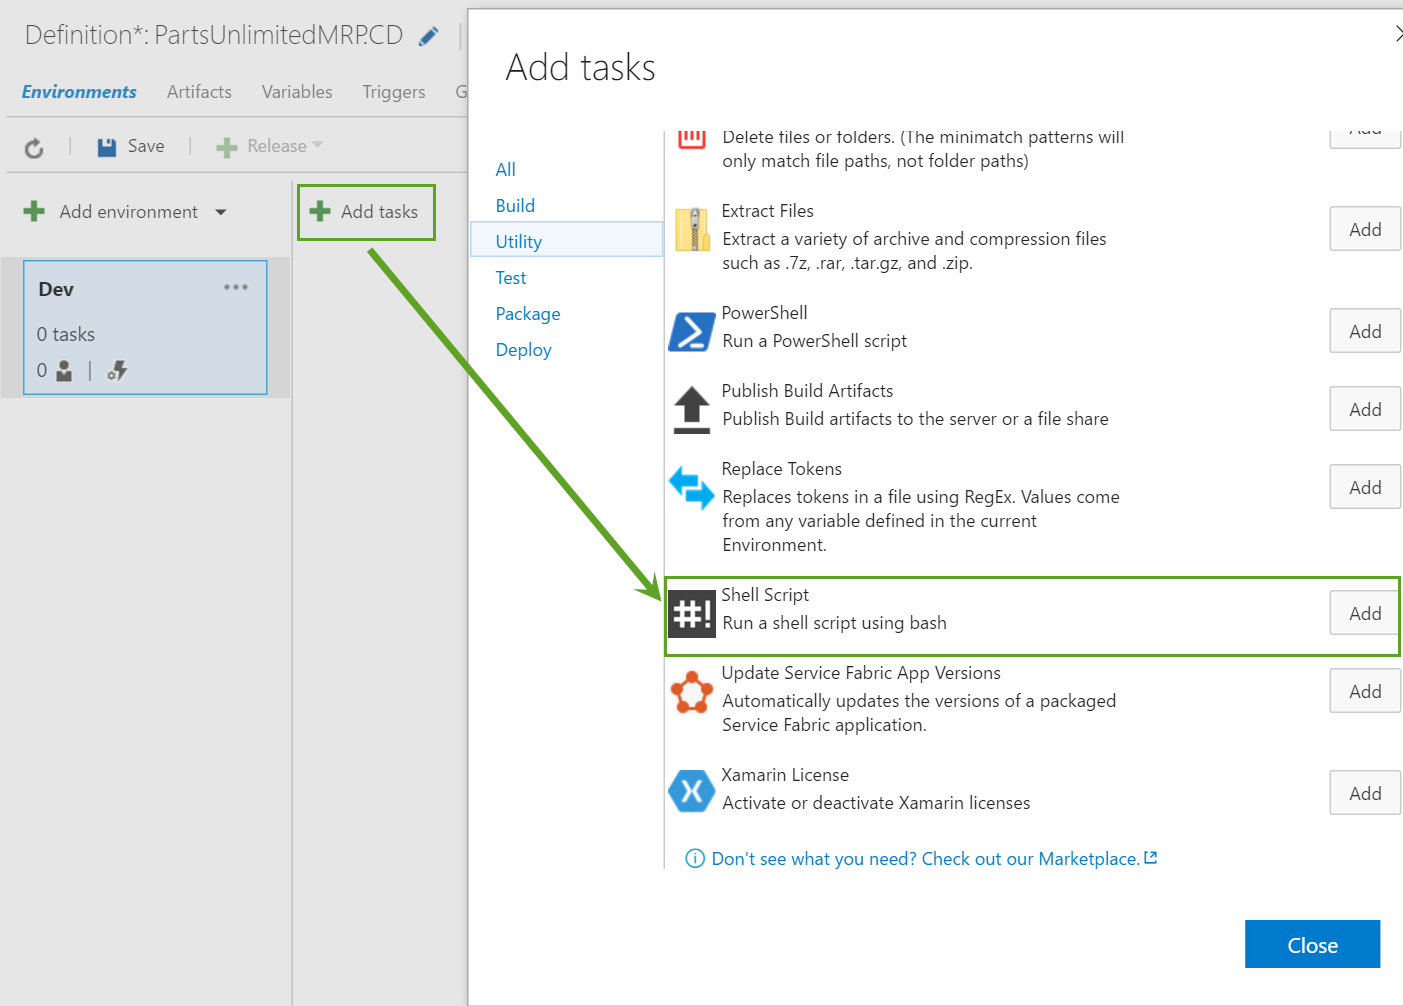
Click on the Add tasks button and add a shell script task (under the Utility category).
-
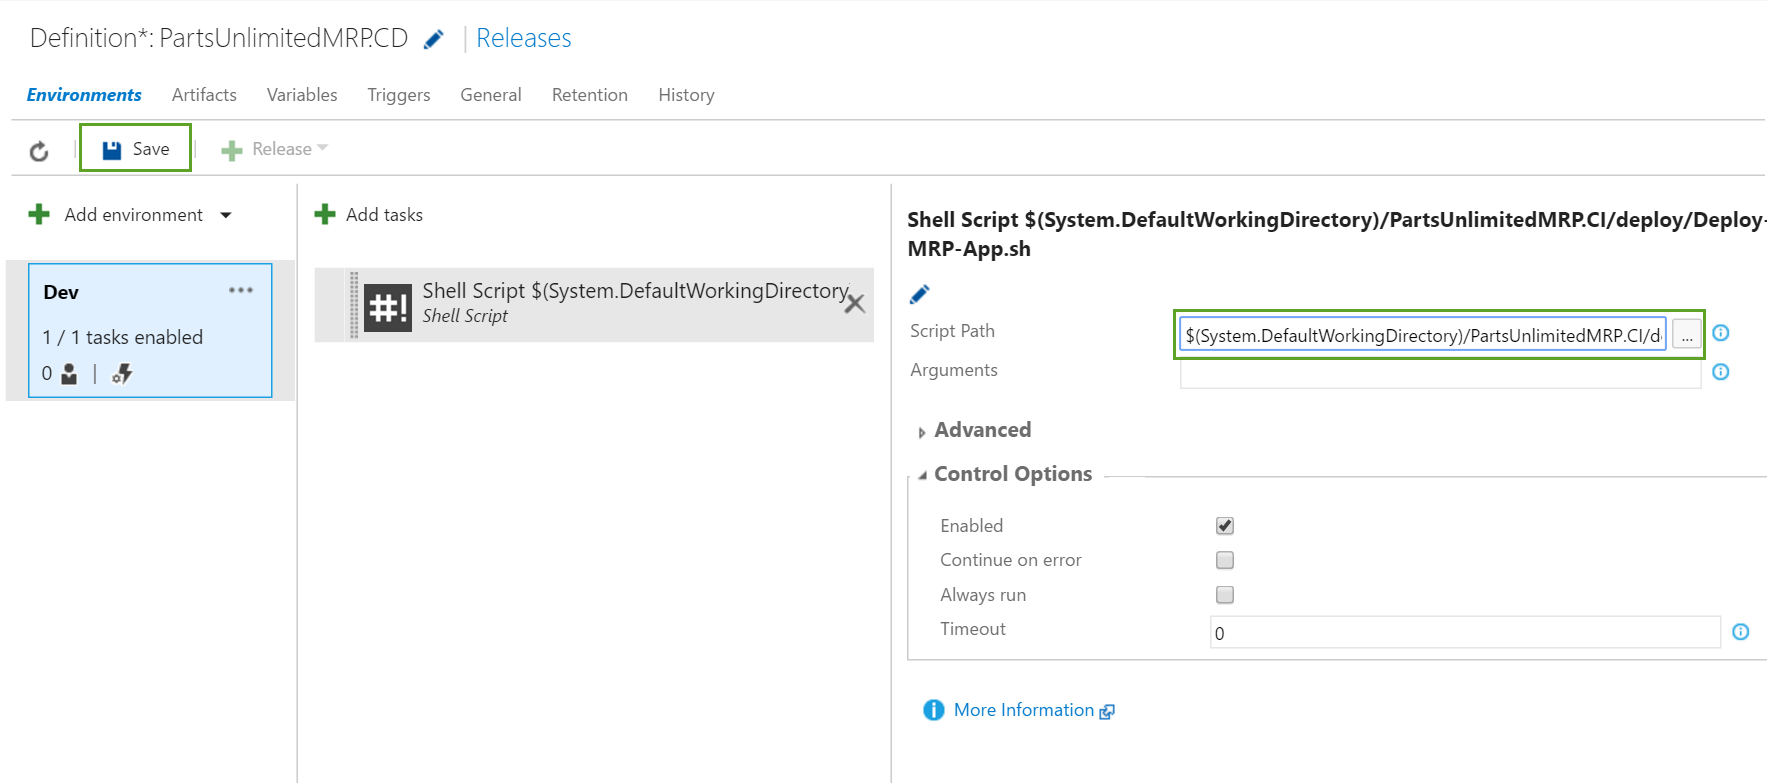
Point to the Deploy-MRP-App.sh build artifact as the script path in the task. Then save the release definition.
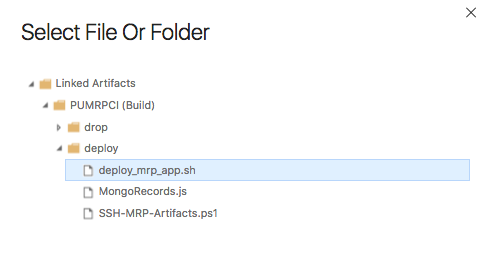
Note : Click on the “…“ to navigate in the folder and find the shell script :
-
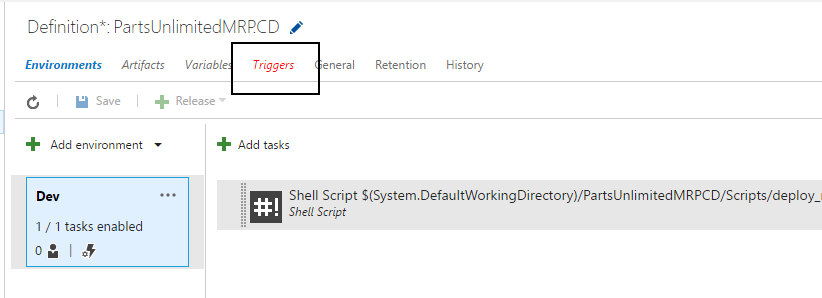
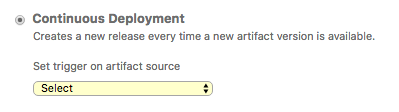
Click on the Triggers tab and set the artifact source by selecting the Build definition that you are created previously.
-
Click on Save
Task 3: Trigger a build for continuous deployment
Now that our release definition is set up, let’s test using Continuous Integration and Continuous Deployment. Now we will trigger a build for continuous deployment by making changes to code and automatically deploying the MRP app to the local agent.
-
Navigate to the code tab and find the index.html page in src/Clients/Web/index.html. Make a change by clicking on the Edit button, then commit the change.

-
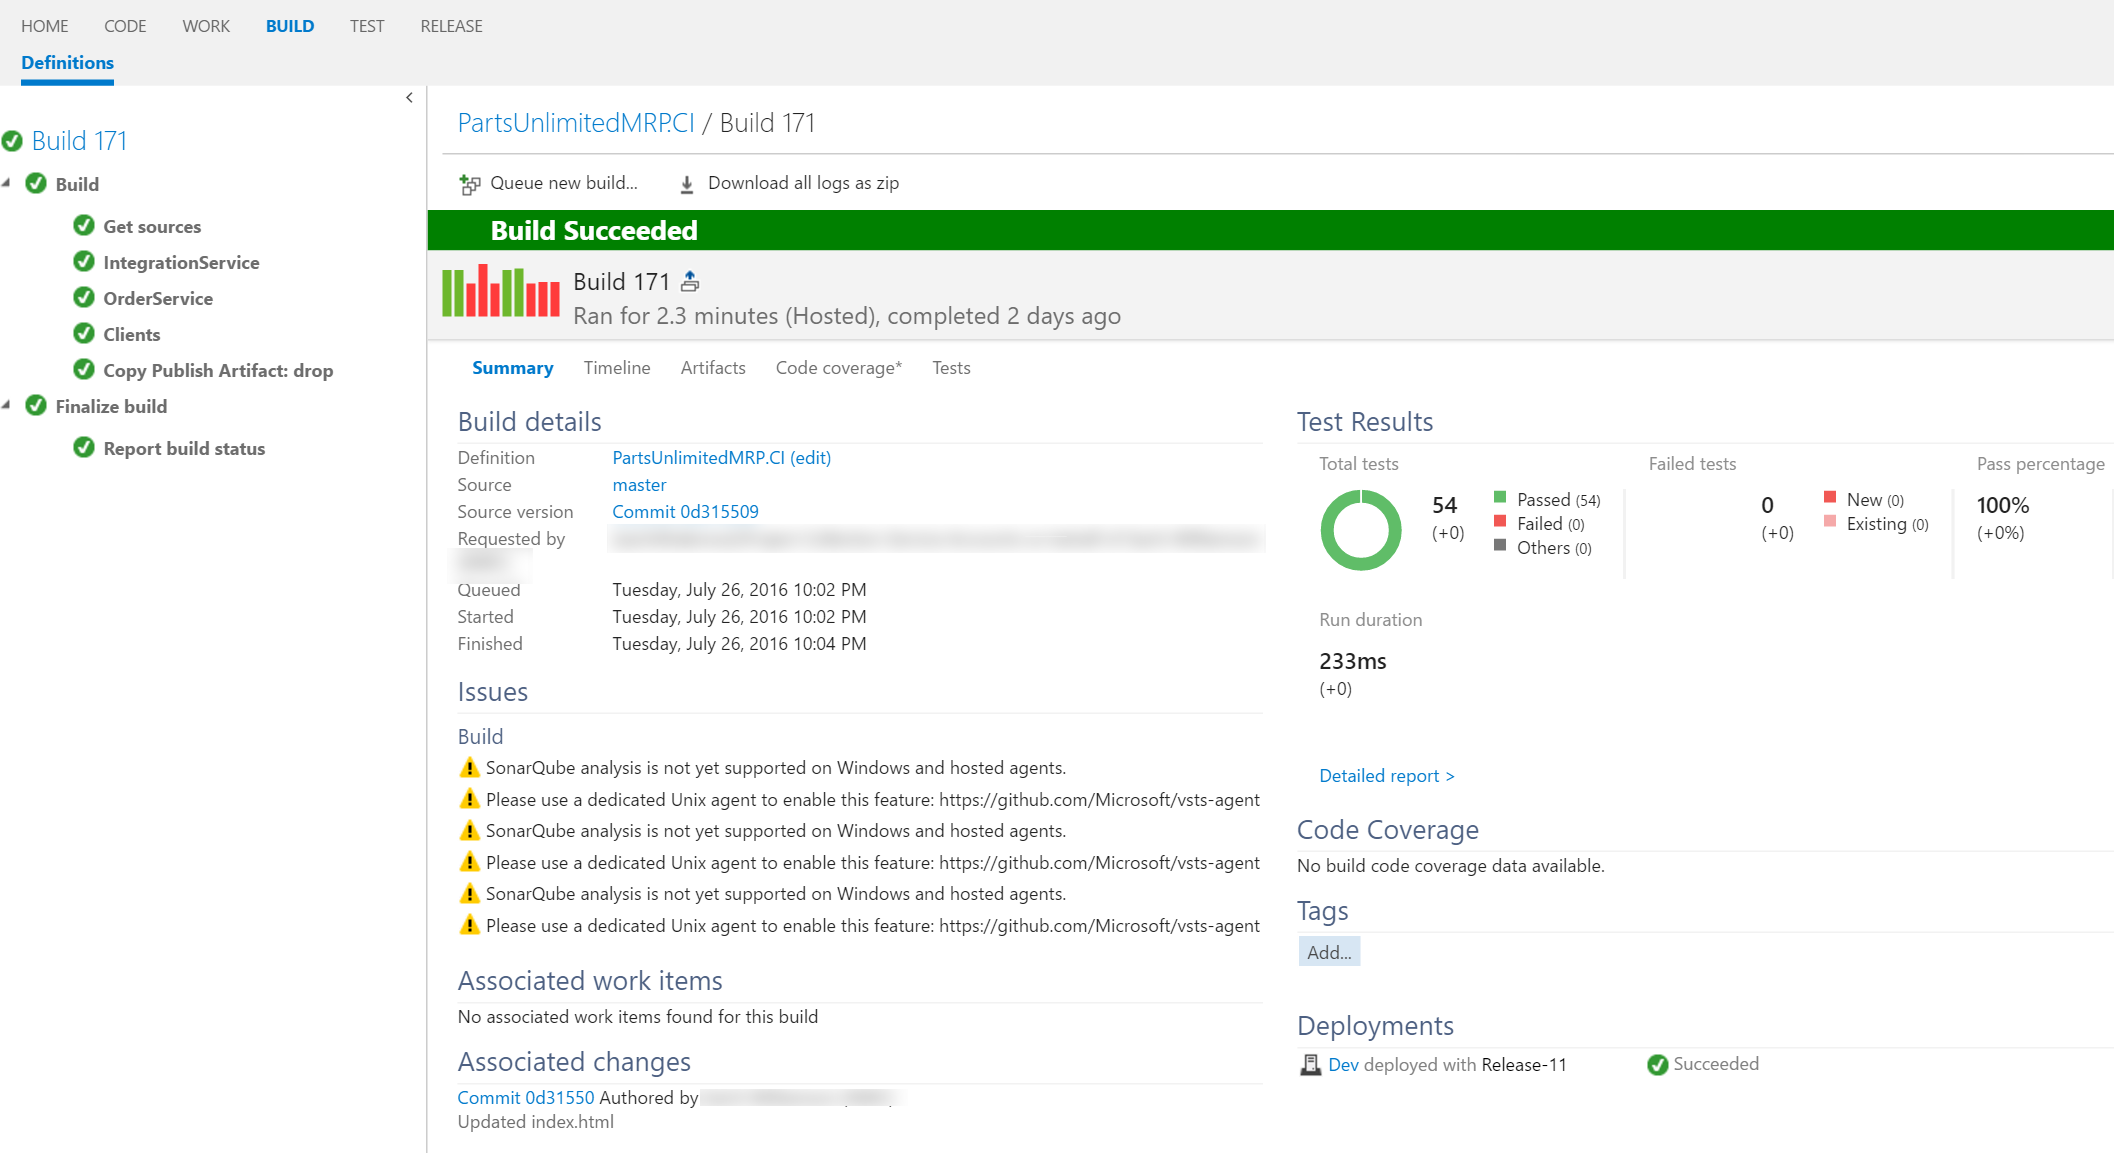
Go to the Build tab and note the running build that was queued by the Continuous Integration trigger.
-
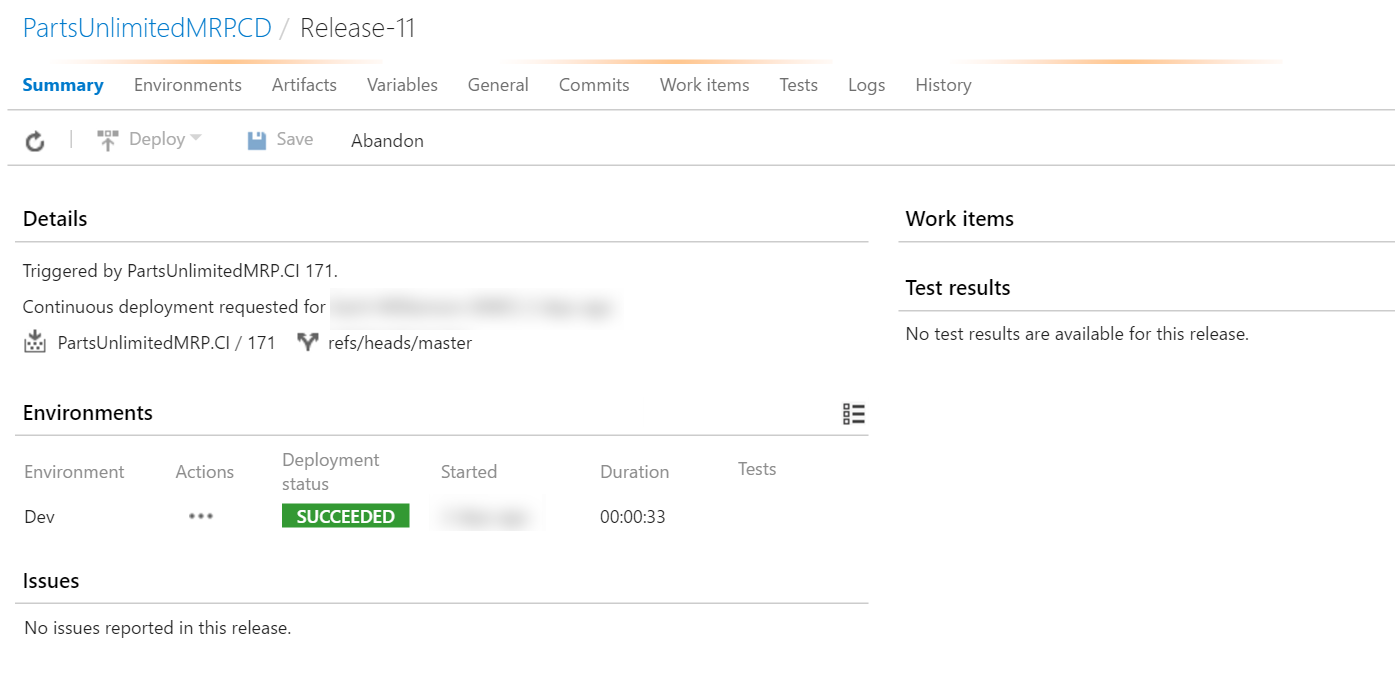
Return to the Release tab and note the running deployment that was queued by the Continuous Deployment trigger.
-
Verify your code change by navigating to the VM’s public IP DNS name, such as
http://mylinuxvm.westus.cloudapp.azure.com:9080/mrp.
Summary
In this lab, you learned how to create deployments automatically after committing changes to code and build automatically. You completed the following tasks:
- Provisioned a VSTS agent and MRP machine (Ubuntu VM) in Azure using an ARM template.
- Configured the release definition
- Triggered a build for continuous deployment
Continuous Feedback - Issues / Questions about this Lab ?
Thanks