
TIP
🔥 The FREE Azure Developer Guide eBook is available here (opens new window).
💡 Learn more : Azure Front Door WAF overview (opens new window).
📺 Watch the video : How to use WAF to protect your web applications with Azure Front Door (opens new window).
# Use WAF to protect your web applications with Azure Front Door
# Securing your application with a Web Application Firewall (WAF)
When you run an application on the web, it is going to be attacked. Your website will be attacked with SQL Injection attacks, Cross-site scripting attacks and every other attack in the OWASP top 10 (opens new window) and beyond. You need to protect your application from these attacks and you can do that with Azure Web Application Firewall (opens new window) and Azure Front Door (opens new window).
In Azure Tip 192 (opens new window), you have learned how to make your website more available and performant with Azure Front Door. In this post, we'll add a Web Application Firewall to protect Azure Front Door and the websites that it serves.
# Prerequisites
If you want to follow along, you'll need the following:
- An Azure subscription (If you don't have an Azure subscription, create a free account (opens new window) before you begin)
- An Azure Front Door that is configured to route traffic to web applications. Follow Azure Tips and Tricks 192 (opens new window) to set it up
# Configure WAF to protect applications with Azure Front Door
Before we create the Web Application Firewall (WAF), I want to show you what an attack could look like. Suppose that my website takes a querystring parameter and does something meaningful with it, like store it in the database. I could create an URL like this to inject a malicious script:
https://frontdoortipsandtricks.azurefd.net/?<script>alert('do something evil')</script>
When I try this on the website that Front Door is serving, without the WAF, the request will go through to the server, which serves the webpage, like normal. Although now, the malicious script is stored in my database.
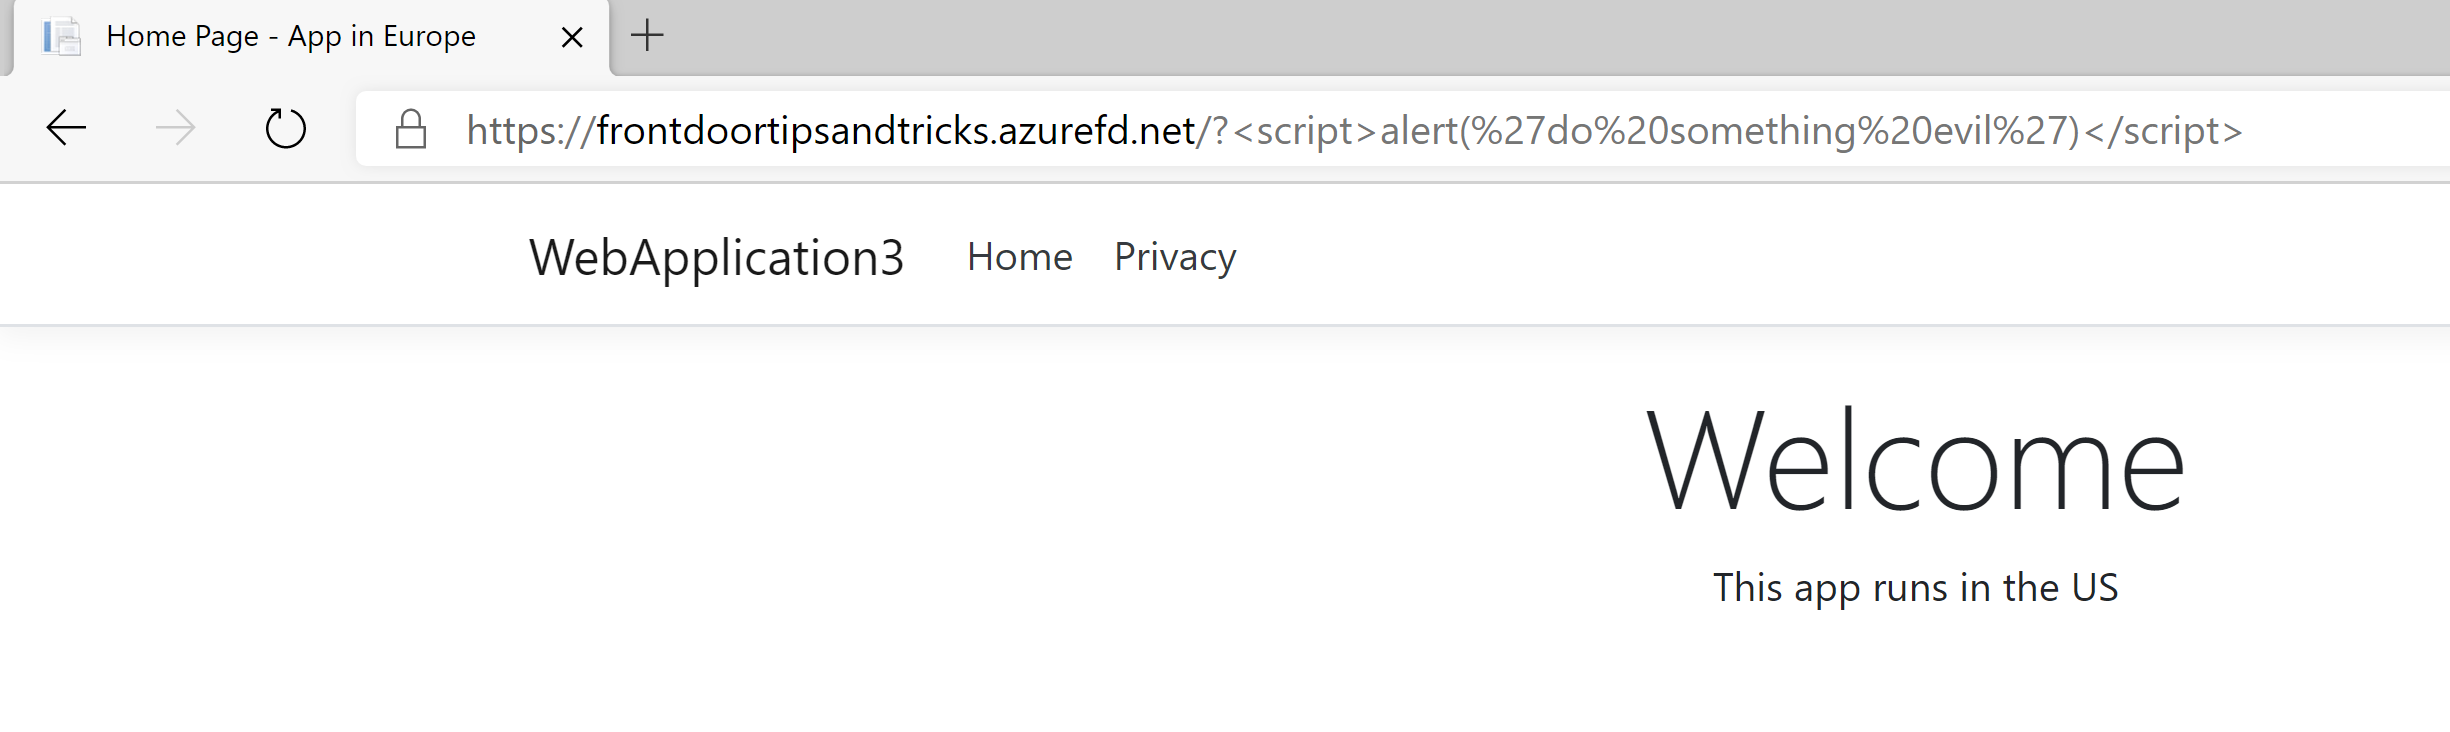
(Attack not blocked)
Web Application Firewall (WAF) can protect your web application against attacks. Let's create one for our Azure Front Door to protect our web application.
Go to the Azure portal (opens new window)
Click the Create a resource button (the plus-sign in the top left corner)
Search for Web Application Firewall and click on the result to start creating a Web Application Firewall.
- This brings you to the create wizard of Web Application Firewall
- Select a Resource Group
- Fill in a Policy Name
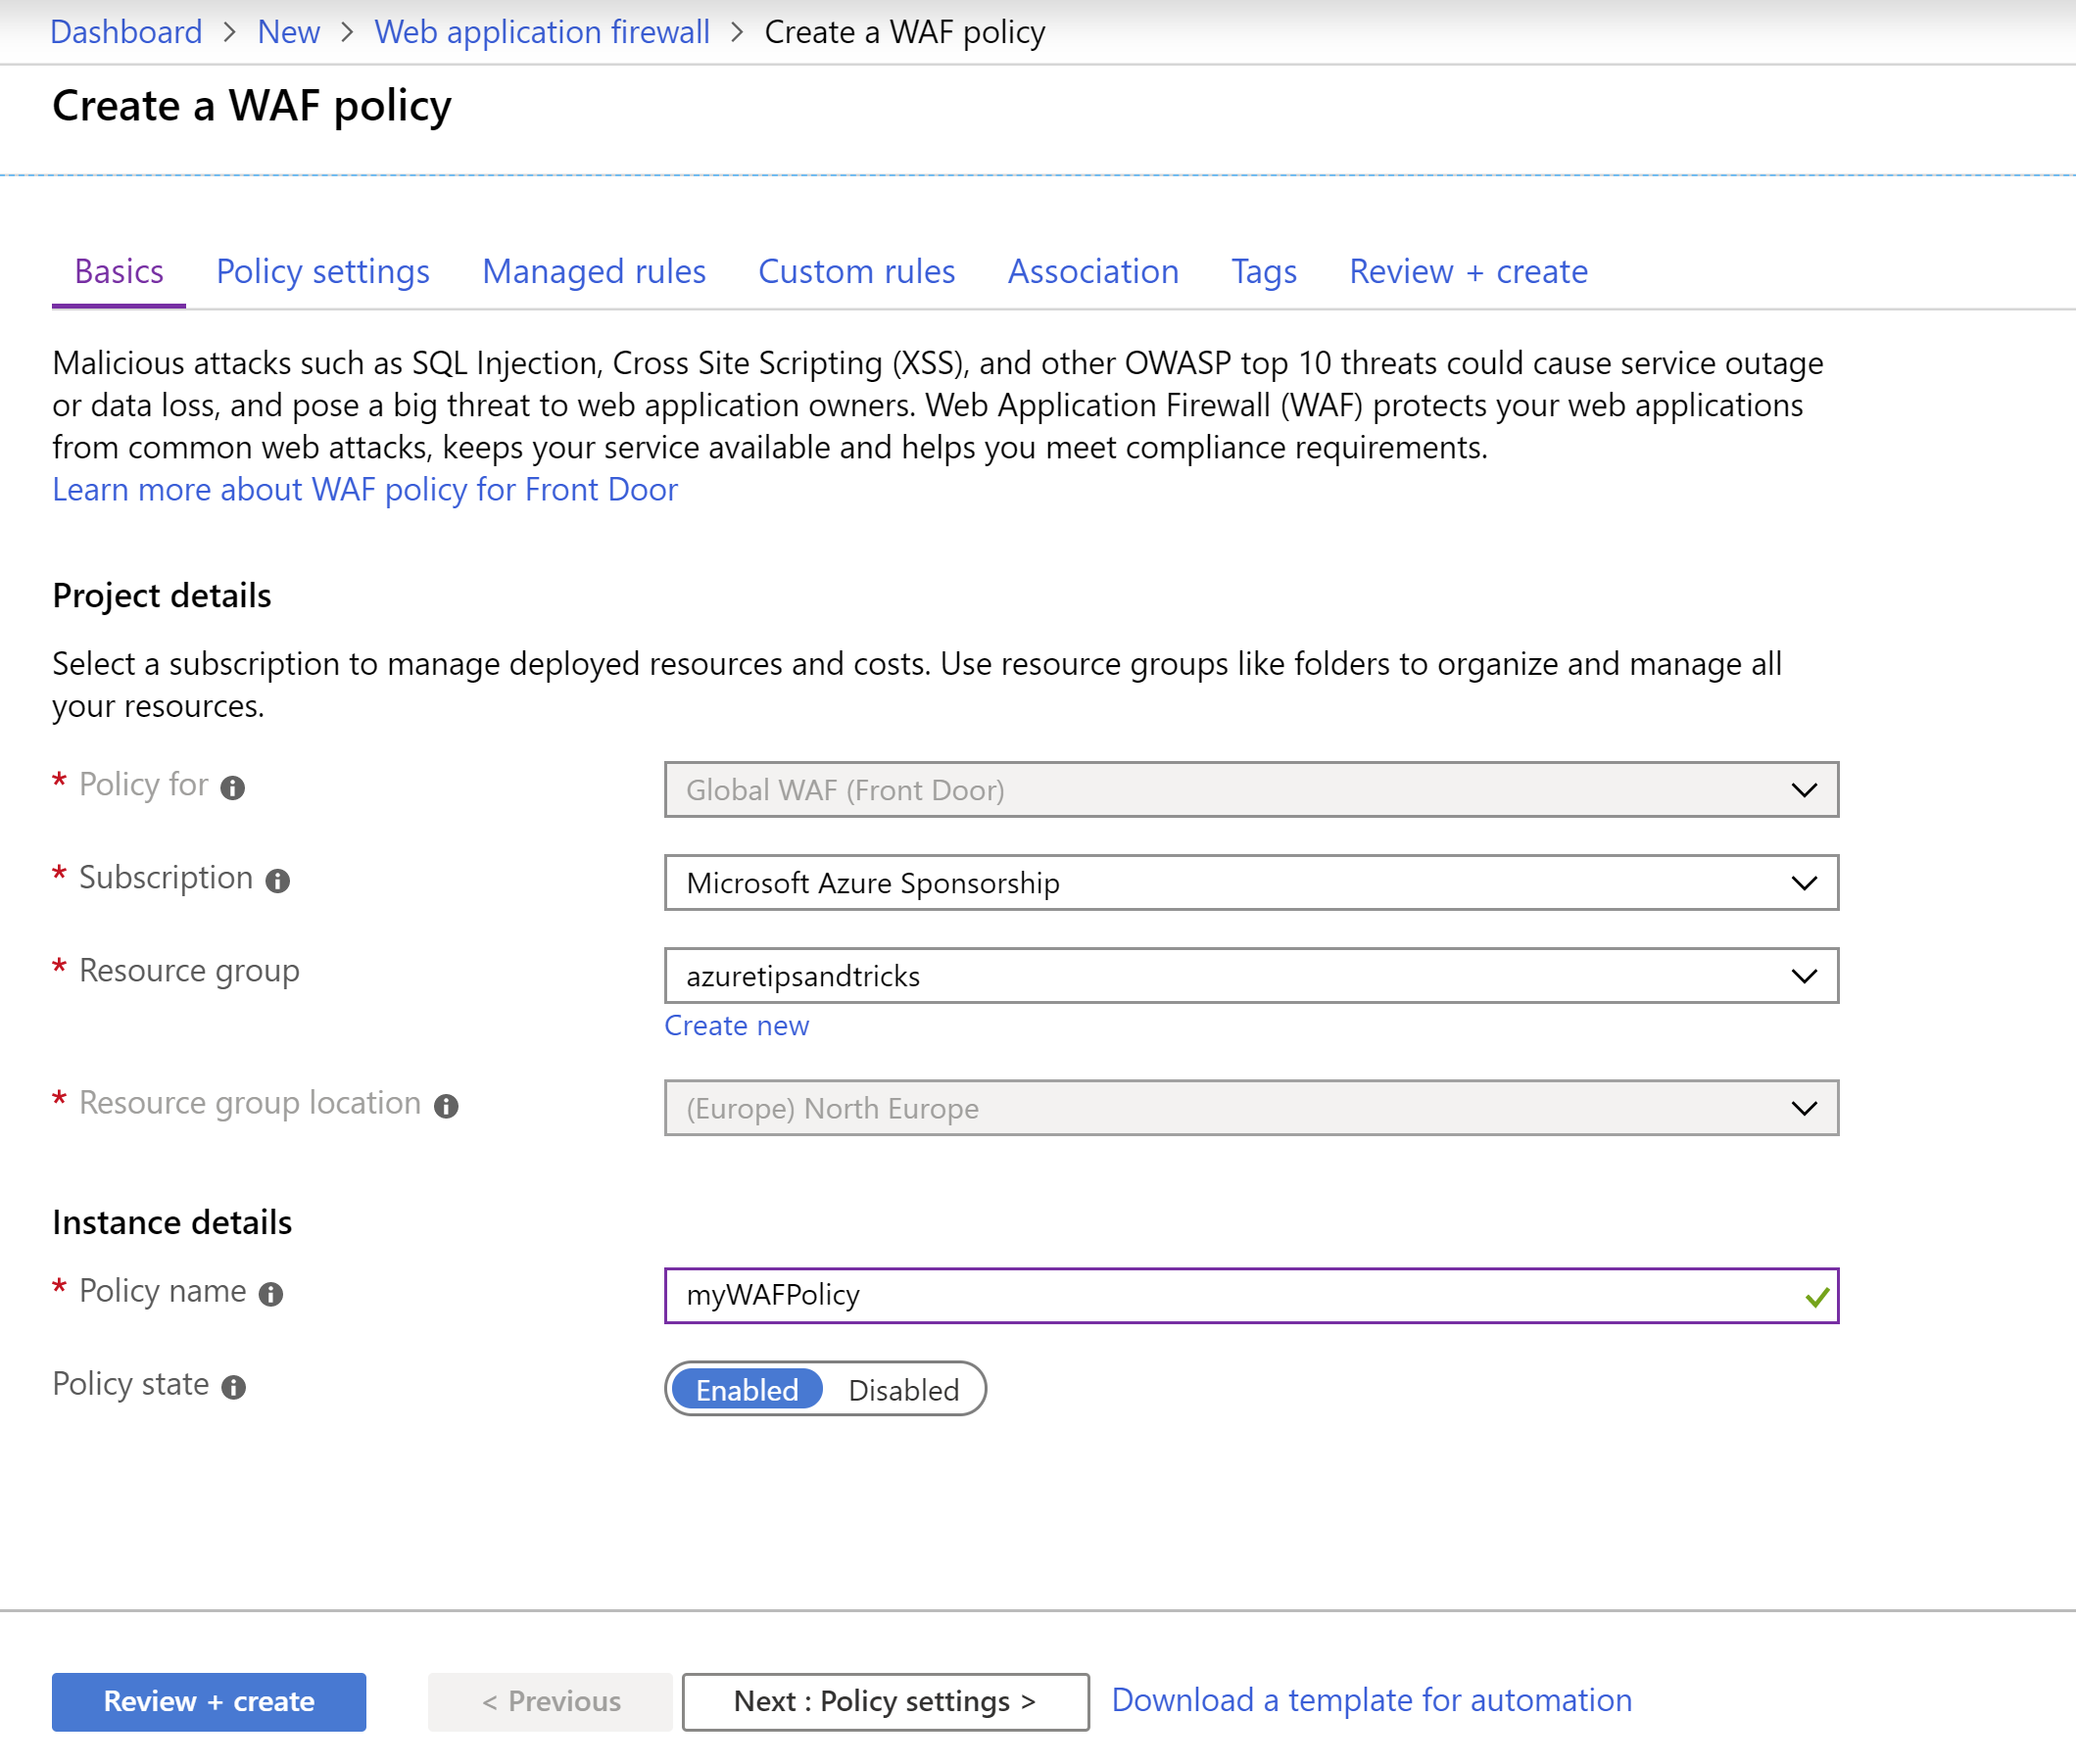
(Create a WAF policy Basics)
- Click Next: Policy settings
- Set the Mode to Prevention. This will block attacks, rather than just detect and log them
- Click Next: Managed rules
- Review the rules that are enabled by default. You can enable more, but you don't have to. Click Next: Custom rules
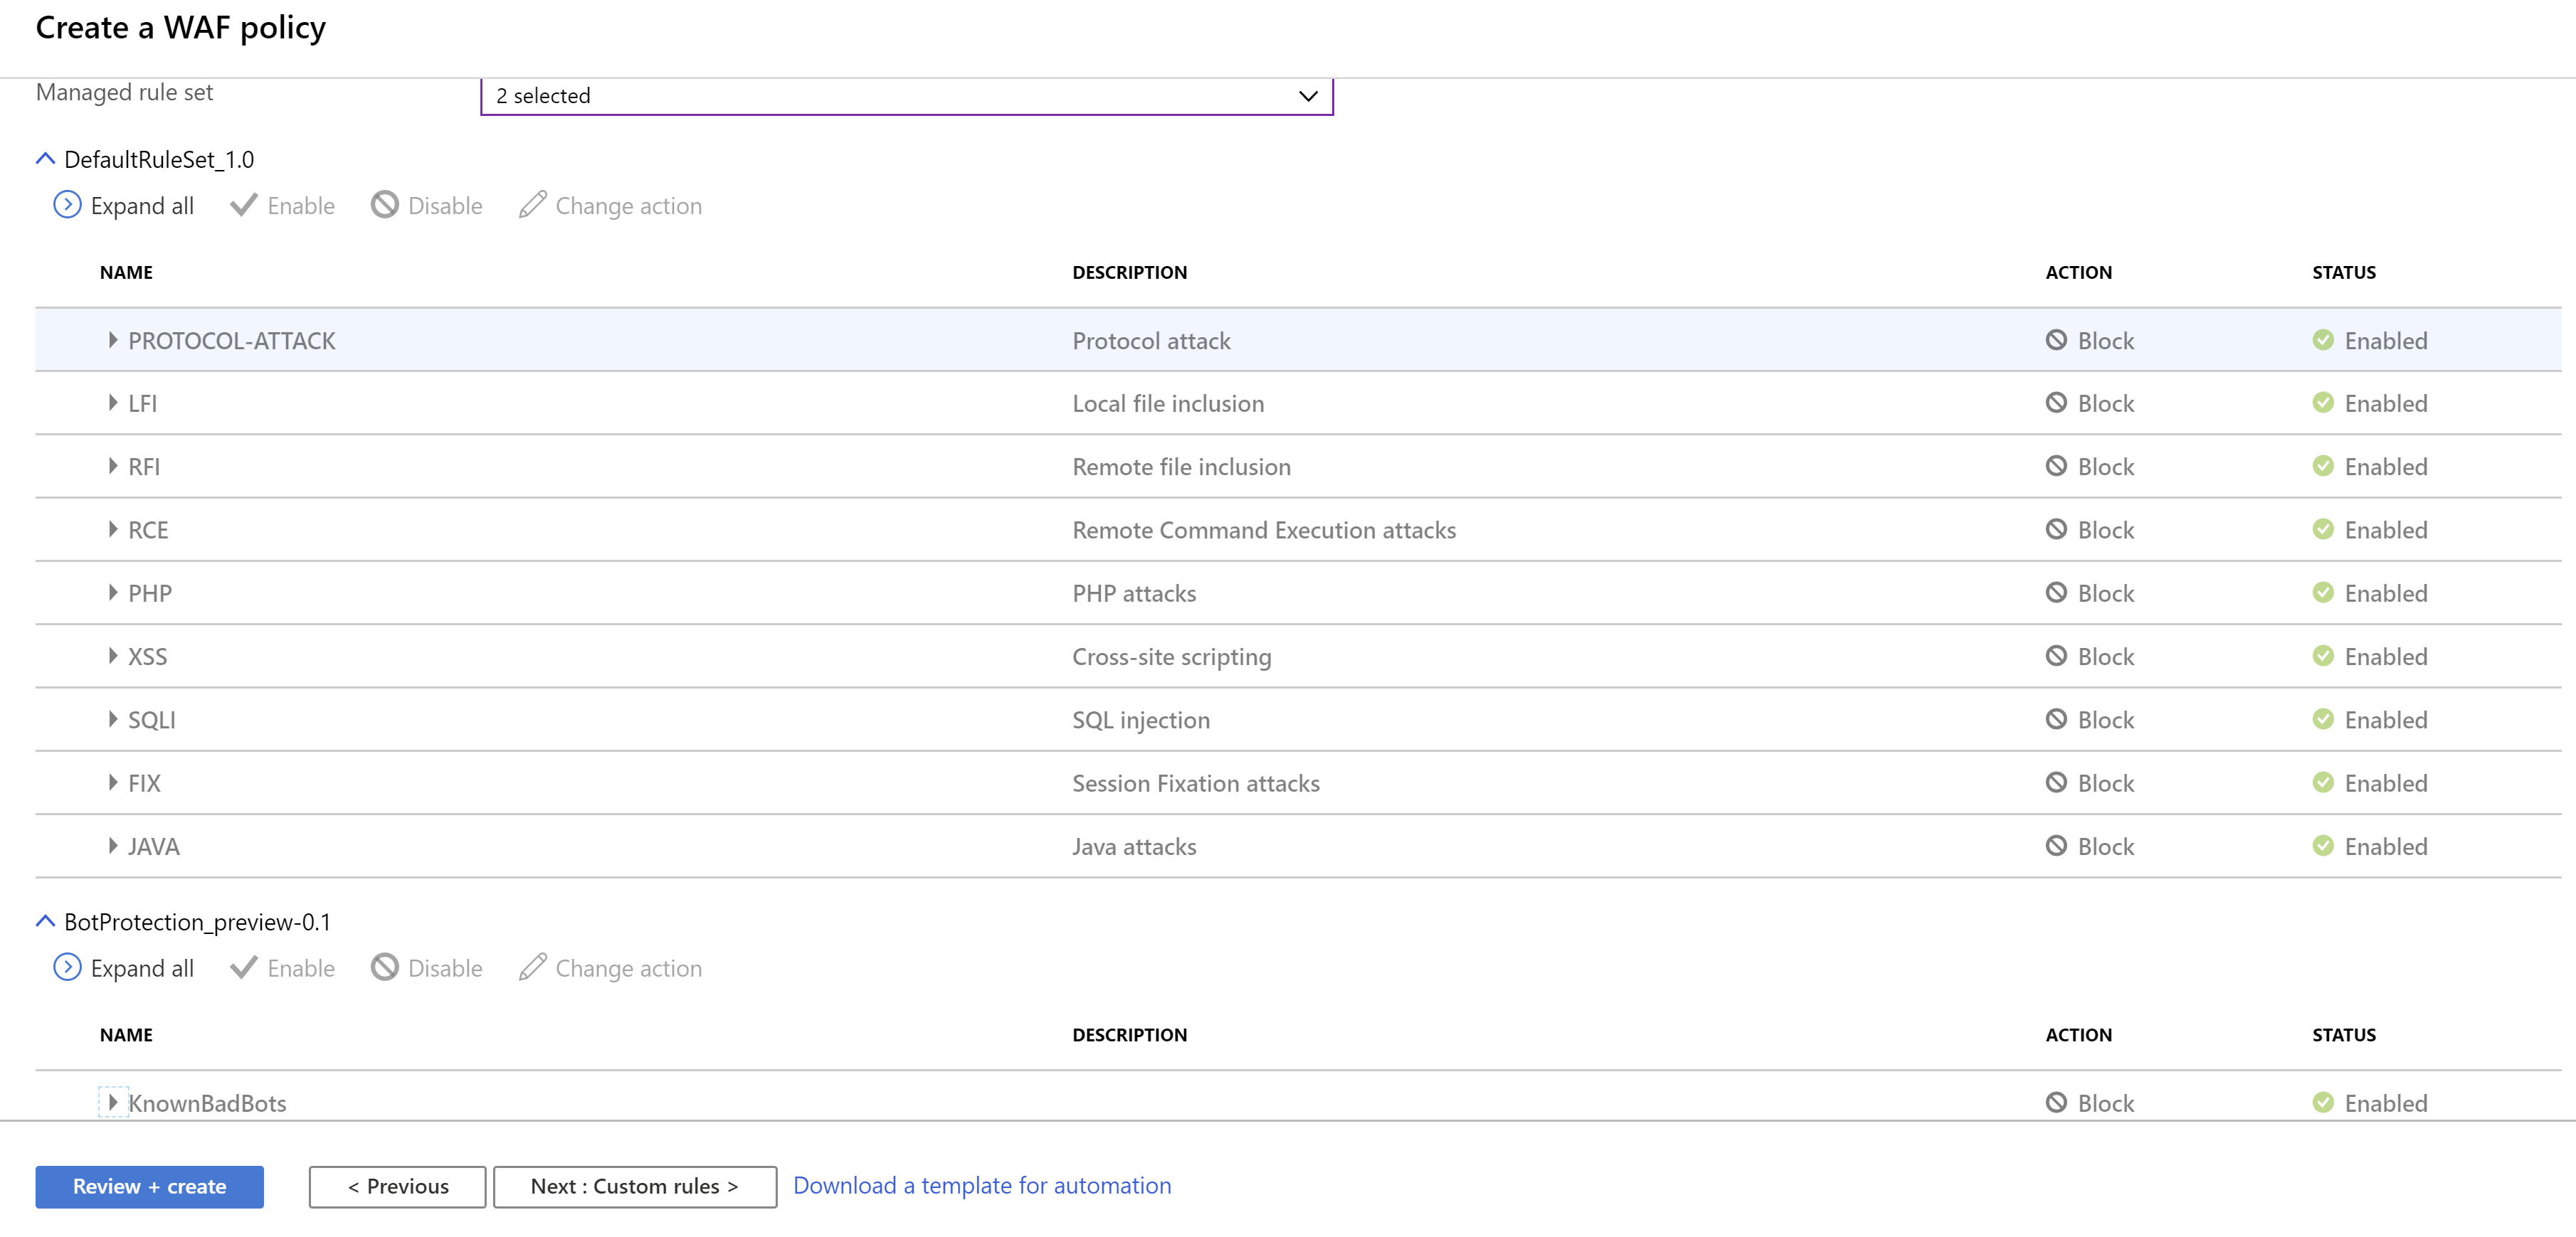
(Create a WAF policy Managed Rules)
- You can add your own rules to detect or prevent attacks. You can create custom rules to filter on IP addresses, block or allow requests from geographic regions, block or allow requests of certain sizes and verbs (such as GET, PUT, HEAD) and more. Don't add one at this time and click Next: Association
- Click Add frontend host
- Select the existing Azure Front Door and click Add
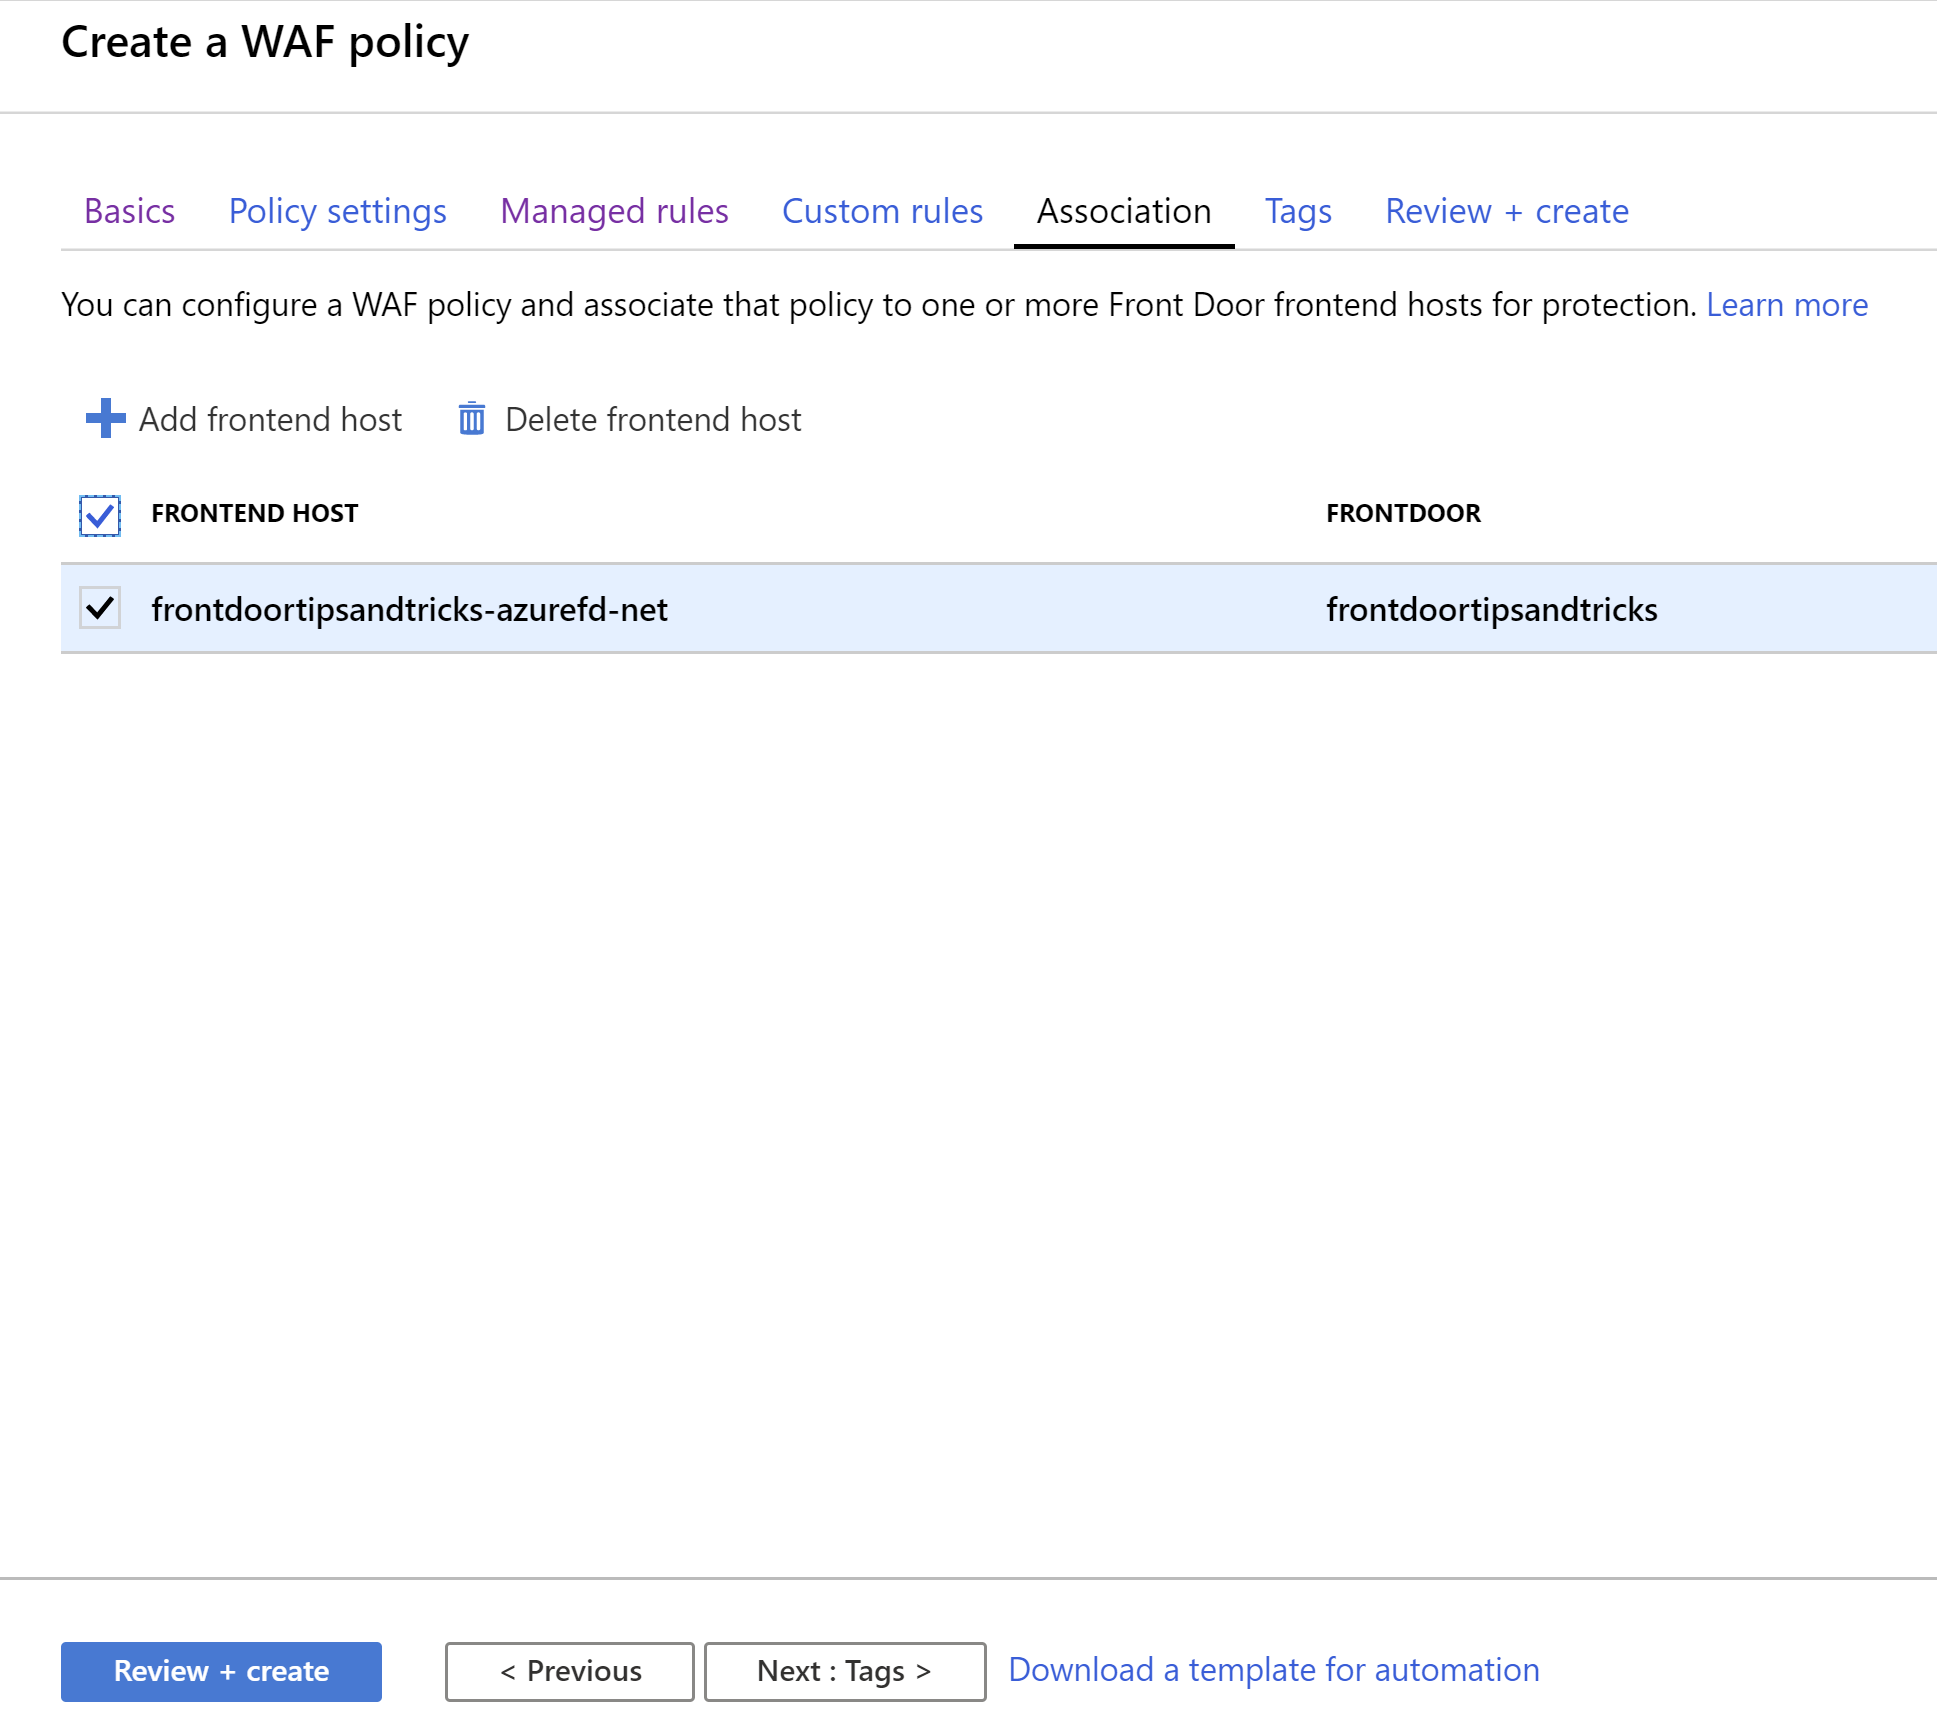
(Create a WAF policy Association)
- Click Review + create and Create after that. This will create the WAF and enable it for the Azure Front Door that we selected
That's it! The web application is now protected by the Web Application Firewall. Try the URL with the malicious script again. The request will be blocked like in the image below.
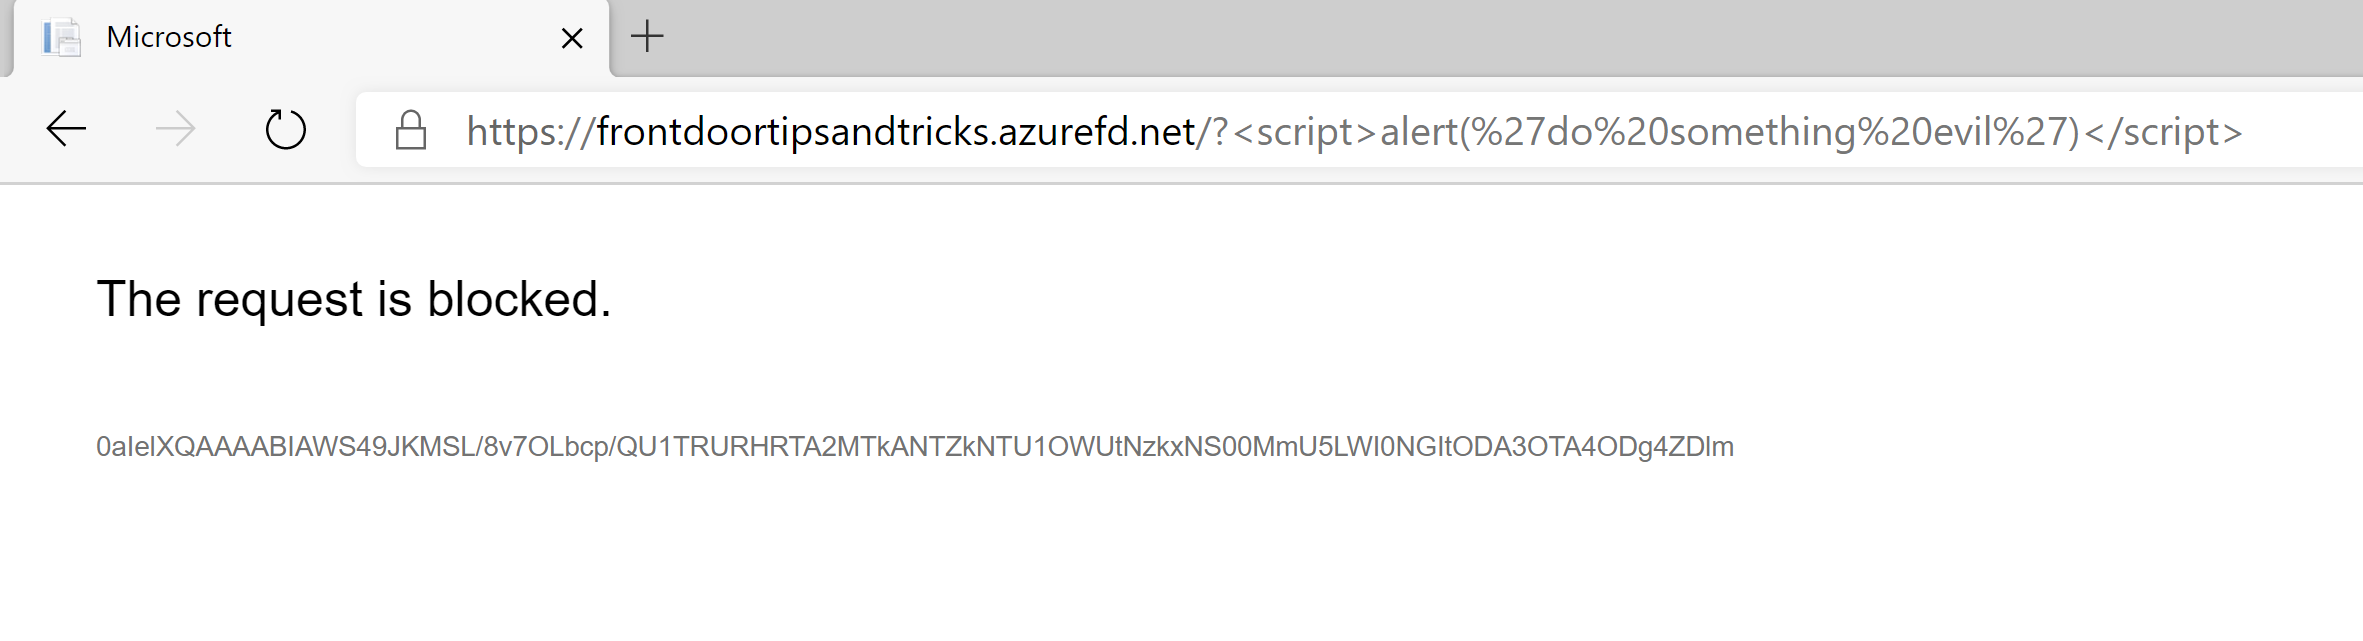
(Attack blocked by WAF)
If you look closely, you see that the title of the web page has changed into Microsoft. The attack doesn't reach your web application. It is blocked at the edge of the Azure cloud, before it can do any harm.
# Conclusion
Protecting your web application with Azure Web Application Firewall (opens new window) in front of Azure Front Door (opens new window) is really powerful. Out-of-the-box, you are protected against hundreds of different common attacks. You can also enable rules to protect your application against bots. And you can also create your own, custom, protection rules (opens new window) ranging from IP filters to rate limits. Go check it out!
# BONUS: Live streaming software development
On a side note - If you like Azure Tips and Tricks, then you might enjoy another project that I'm working on for live streaming. Check out my channel below and hit the follow button to know when I'm live.
Watch live video from mbcrump on www.twitch.tv