
TIP
💡 Learn more : Azure Virtual Networking (opens new window)
This post was brought to you by Kumar Allamraju (opens new window).
# How to add a new CIDR to an existing Virtual Network
Azure Networking (VNet) allows customers to expand their Virtual Networkx by adding secondary IPv4 address ranges (CIDRs) to their VNets. Customers can add the secondary CIDR blocks to the VNet directly from the Azure Portal or by using the Azure CLI, Powershell.
# Adding a new CIDR to an existing Virtual Network
- Sign in to Azure Portal (https://portal.azure.com)
- Navigate to Virtual Network blade. Choose your existing VNet. e.g. myvNet
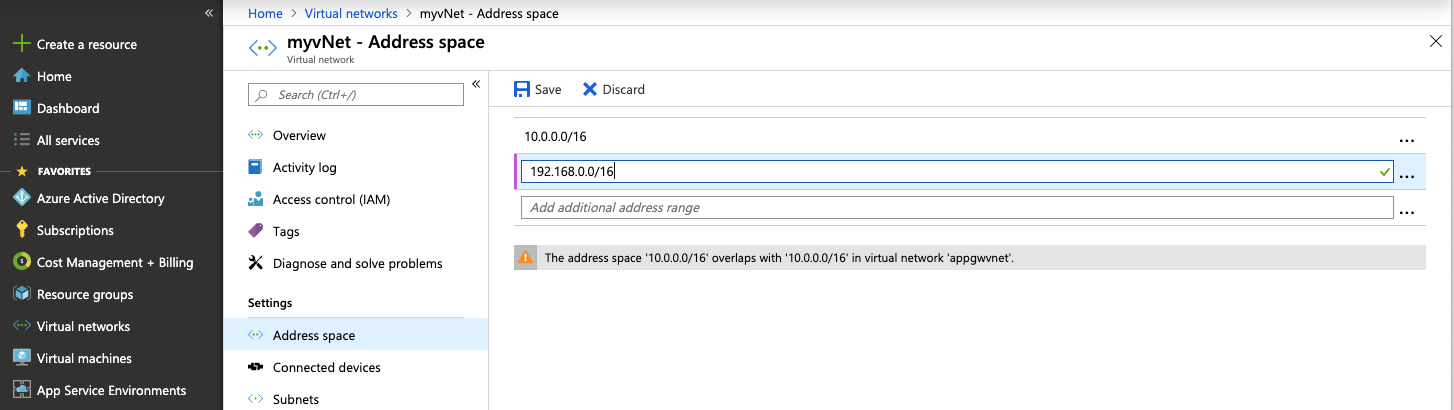
- Click on Settings >> Address Space
- Add a new CIDR space e.g. I already have 10.0.0.0/16 configured as primary CIDR. So I add 192.168.0.0/16 as secondary CIDR block.
- Click Save button to save the changes.
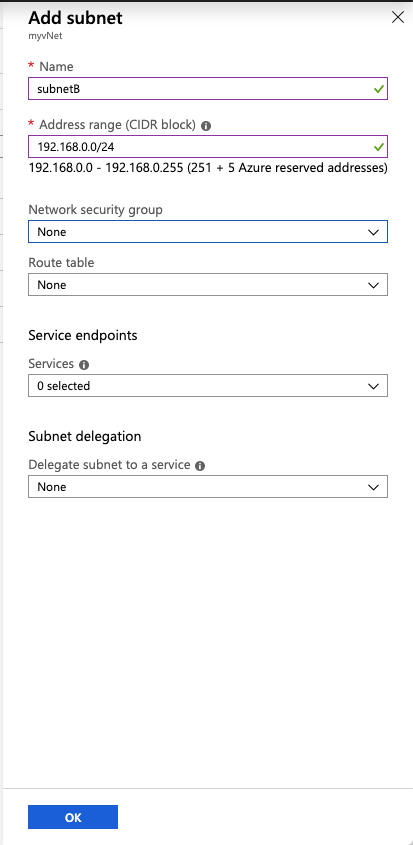
- Click on Settings >> Subnets, +Subnet
- Add a new subnet e.g. Subnet Name: subnetB, enter a new subnet range that falls under the secondary CIDR space i.e. 192.168.0.0/24. Save the changes.
- Now provision a new virtual machine using the subnetB that was created above.
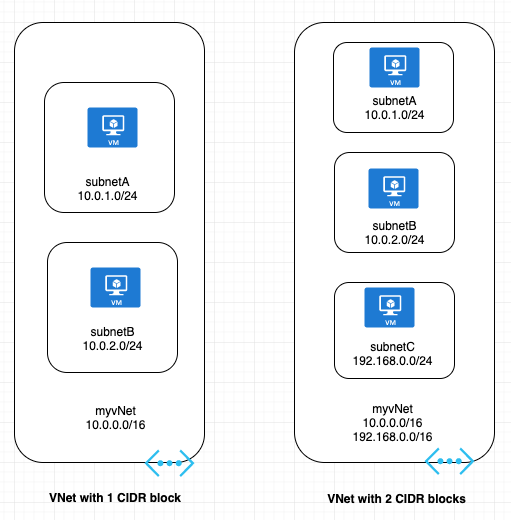
# A sample architecture with one CIDR and two CIDRs is shown below
# Conclusion
Adding a new CIDR to an existing VNet has two key benefits. First, customers, who are launching more and more resources in their VNets, can now scale up their VNets on-demand. Second, customers no longer have to over-allocate private IPv4 space to their VNets - they can allocate only what is required at the VNet creation time, and later expand it as needed. With these benefits, this feature can make it significantly easier for customers to manage their private IPv4 address space. There is no additional charge to use this feature. This feature is available in all Azure regions.