
TIP
🔥 Make sure you star the repo (opens new window) to keep up to date with new tips and tricks.
💡 Learn more : Kubernetes Event-driven Autoscaling (KEDA) (opens new window).
📺 Watch the video : Azure Functions on Kubernetes with KEDA (opens new window).
# Azure Functions on Kubernetes with KEDA Part 1 of 2
# Azure Functions Running in Kubernetes
Azure Functions (opens new window) are great for running tasks on demand, like processing queue messages or resizing images. And Azure Functions can run anywhere. In Azure in a consumption plan (opens new window) or App Service Plan (opens new window). Locally, using the Azure Functions runtime (opens new window). And even in containers, also using the Azure Functions runtime.
Running Azure Functions in containers can be very useful when you want control over your infrastructure. For instance, you can run an Azure Function in a container in Azure Kubernetes Service (opens new window). But how do you get it to scale on demand, just like a Function that runs on a consumption plan? Kubernetes-based Functions provides the Functions runtime in a Docker container (opens new window) with event-driven scaling through KEDA (opens new window). KEDA can scale in to 0 instances (when no events are occurring) and out to n instances. It does this by exposing custom metrics for the Kubernetes autoscaler (Horizontal Pod Autoscaler (opens new window)). Using Function containers with KEDA makes it possible to replicate serverless Function capabilities in any Kubernetes cluster.
In this series of posts, we'll create an Azure Function that is triggered by an Azure Storage Queue (opens new window) and runs in Azure Kubernetes Service. And we'll make the Function scale by using KEDA.
This series contains two posts:
- Azure Functions on Kubernetes with KEDA Part 1 of 2 (this post) - Creating and building a containerized Azure Function
- Azure Functions on Kubernetes with KEDA Part 1 of 2 - Running the Azure Function in AKS with KEDA
# Prerequisites
If you want to follow along, you'll need the following:
- An Azure subscription (If you don't have an Azure subscription, create a free account (opens new window) before you begin)
- You'll need the latest version of Visual Studio (opens new window) with the Azure workload installed. Alternatively, you can use Visual Studio Code (opens new window) with the Azure Function extension (opens new window) installed
- You need Docker on your PC to develop container-based applications. Download it here (opens new window)
- The Azure CLI (opens new window). You can download it for Windows, Linux or Mac (opens new window)
- Node.js, which includes npm that we need to install the Azure Functions Core Tools (opens new window). You can download Node.js here (opens new window)
# Creating a containerized Azure Function with an Azure Storage Queue Trigger
Before we create an Azure Function that gets triggered by a message on an Azure Storage Queue, we need to create that queue. Let's do it:
- Go to the Azure portal (opens new window)
- Click the Create a resource button (the plus-sign in the top left corner)
- Search for Storage and click on the result to start creating an Azure Storage account a. This brings you to the create blade of Azure Storage b. Select a Resource Group (or create a new one) c. Fill in a name for the account in the Storage account name field d. Select a Location e. Leave the rest of the settings as they are and click Review + create and Create after that
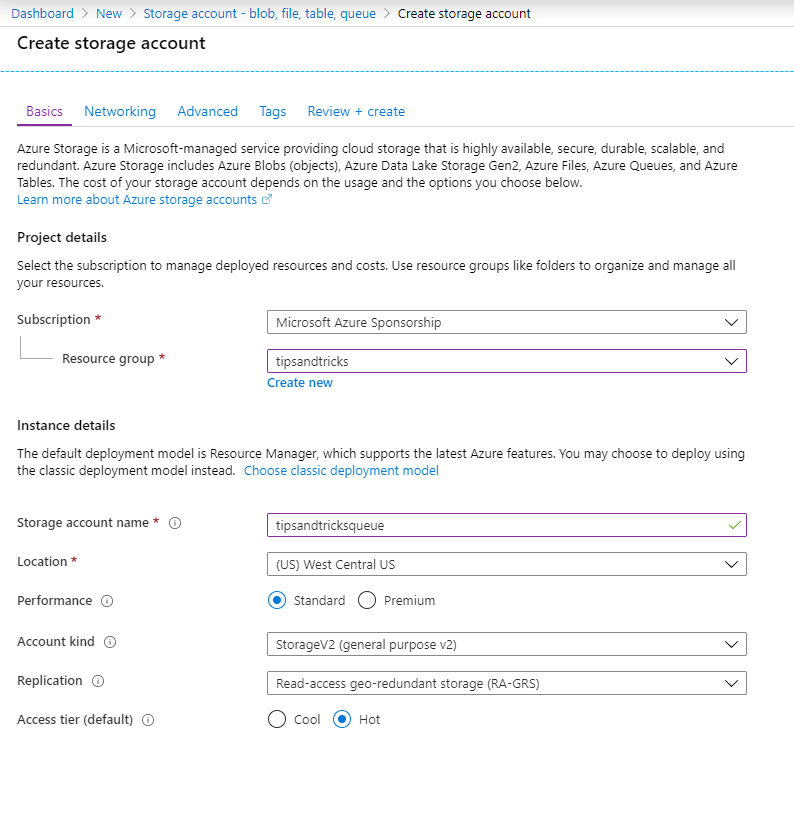
(Create Azure Storage Account in the Azure portal)
Now that we have a storage account, let's create a queue in it:
- In the Azure portal, navigate to the storage account
- Click on Queues to access the Azure Storage Queues feature
- Click Add queue
- Fill in a name for the queue
- Click on OK to create the queue
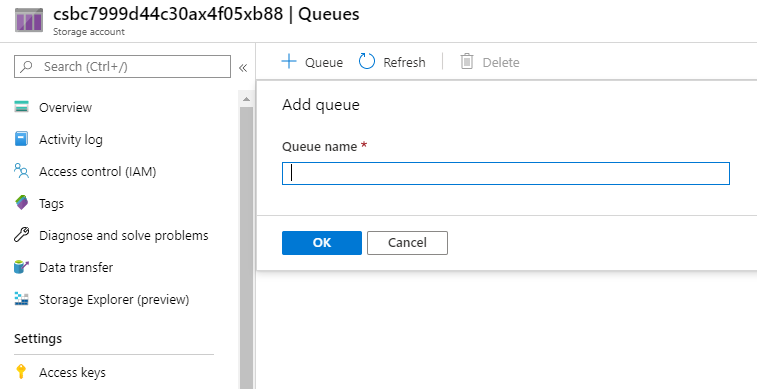
(Create Azure Storage Queue in the Azure portal)
Okay. Now that we have a queue in Azure, we can create the Azure Function. We'll do that with the Azure CLI:
- Open the Azure CLI on your local machine
- We need to install the Azure Functions Core Tools (opens new window) to be able to create functions and deploy them to AKS. You can install the tools with this command:
npm install -g azure-functions-core-tools@3
- Once the tools are installed, we'll create a directory that we will use to create the Azure Function in:
mkdir myfunction
cd myfunction
2
- Alright. The following command creates a containerized Azure Function app in the folder that we've just created, using the Functions Core Tools:
func init --docker
- The process will ask you to select the worker runtime. Select dotnet. This creates the Function app with .NET
- If you run dir, you'll see that we now have Azure Function files and a Docker file for the container
- Next, we'll create a new Function in the Function App that we've just created (Function Apps contain one or more Functions). We can create a new Function with the command:
func new
- You'll be asked what type trigger the Function should have. Select the QueueTrigger
- Next, type in a name for the Function. I'll use QueueFunction. And that's it, the Function is created
Now that we have a containerized Function App with a QueueTrigger Function in it, let's take a look at it in Visual Studio and add a connection string to the Azure Storage Queue:
- Open the myfunction folder that contains the Function App and Function
- In the folder, you'll find a Visual Studio project file. Open it with Visual Studio (or VS Code (opens new window))
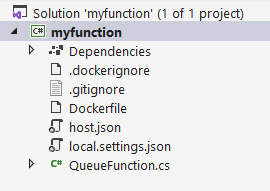
(Azure Function in Visual Studio)
- In Visual Studio, you can see the Docker file of the Function App. This uses the Azure Functions Runtime to run the Function. There is also a local.settings.json file. Open it
- Create a new setting in the local.settings.json file called storageconnection. Make the value of this setting the connection string to Azure Storage. You can find this in the Azure Storage Account in the Azure portal, under the Access Keys menu
- Go to the function code file. In my case, this is QueueFunction.cs. Here, change the values in the QueueTrigger attribute a. Replace the "myqueue-items" string by the name of the queue that we've created in Azure Storage b. Put in the name "storageconnection" for the Connection parameter
That's it. The Function is now connected to the Azure Storage Queue. Let's compile the function using the Azure CLI:
- Open the Azure CLI
- Make sure that you are in the myfunction folder where the Function App is
- Also make sure that you have connected your Docker account to your local machine by using:
docker login
- Now use the following command to build the container with the Function App in it. The myfunctionapp:v1 represents the name of the container and the tag (v1):
docker build -t myfunctionapp:v1 .
The Function App should build and the container should be created now. With this last step, we've made sure that the Function compiles into a container.
# Conclusion
In this post, we've created a containerized Azure Function (opens new window) App with a queue-based trigger in it, on our local machine using the Azure CLI (opens new window) and the Azure Functions Core Tools (opens new window). In the next post, we'll deploy the container with the Azure Function in it to Azure Kubernetes Service (opens new window) and run it at scale with KEDA (opens new window).