TIP
💡 Learn more : Azure DevOps Documentation (opens new window).
📺 Watch the video : Quick tour of Azure DevOps projects using Node.js and AKS: Part 1 (opens new window).
# A quick tour around Azure DevOps Projects using Node.js and AKS - Part 1
In this post, I will walk you through creating a new Azure Kubernetes Service (opens new window) (AKS) cluster using an Azure DevOps Projects (opens new window) and take a look under the hood to help understand how to get started with AKS.
# Hold up - What is Azure DevOps and AKS (in a nutshell)?
Azure DevOps Services is a cloud service for collaborating on code development such as:
- Source control
- CD/CD
- Agile tooling
- A variety of tools to test your apps, including manual/exploratory testing, load testing, and continuous testing
- Dashboards
- Built-in wiki
Azure Kubernetes Service (AKS) manages your hosted Kubernetes environment, making it quick and easy to deploy and manage containerized applications without container orchestration expertise. It also eliminates the burden of ongoing operations and maintenance by provisioning, upgrading, and scaling resources on demand, without taking your applications offline.
# Create the DevOps Project
In the Azure portal, search for DevOps and choose the DevOps Project from the results. Click the Add button, select the Node.js application, click it and then the Next button. Select Express.js for the application framework and click Next. For deploying the application, select Kubernetes Service and click Next. Now just give the DevOps project an Organization name and Project name. Provide a subscription and a cluster name and click the Done button.
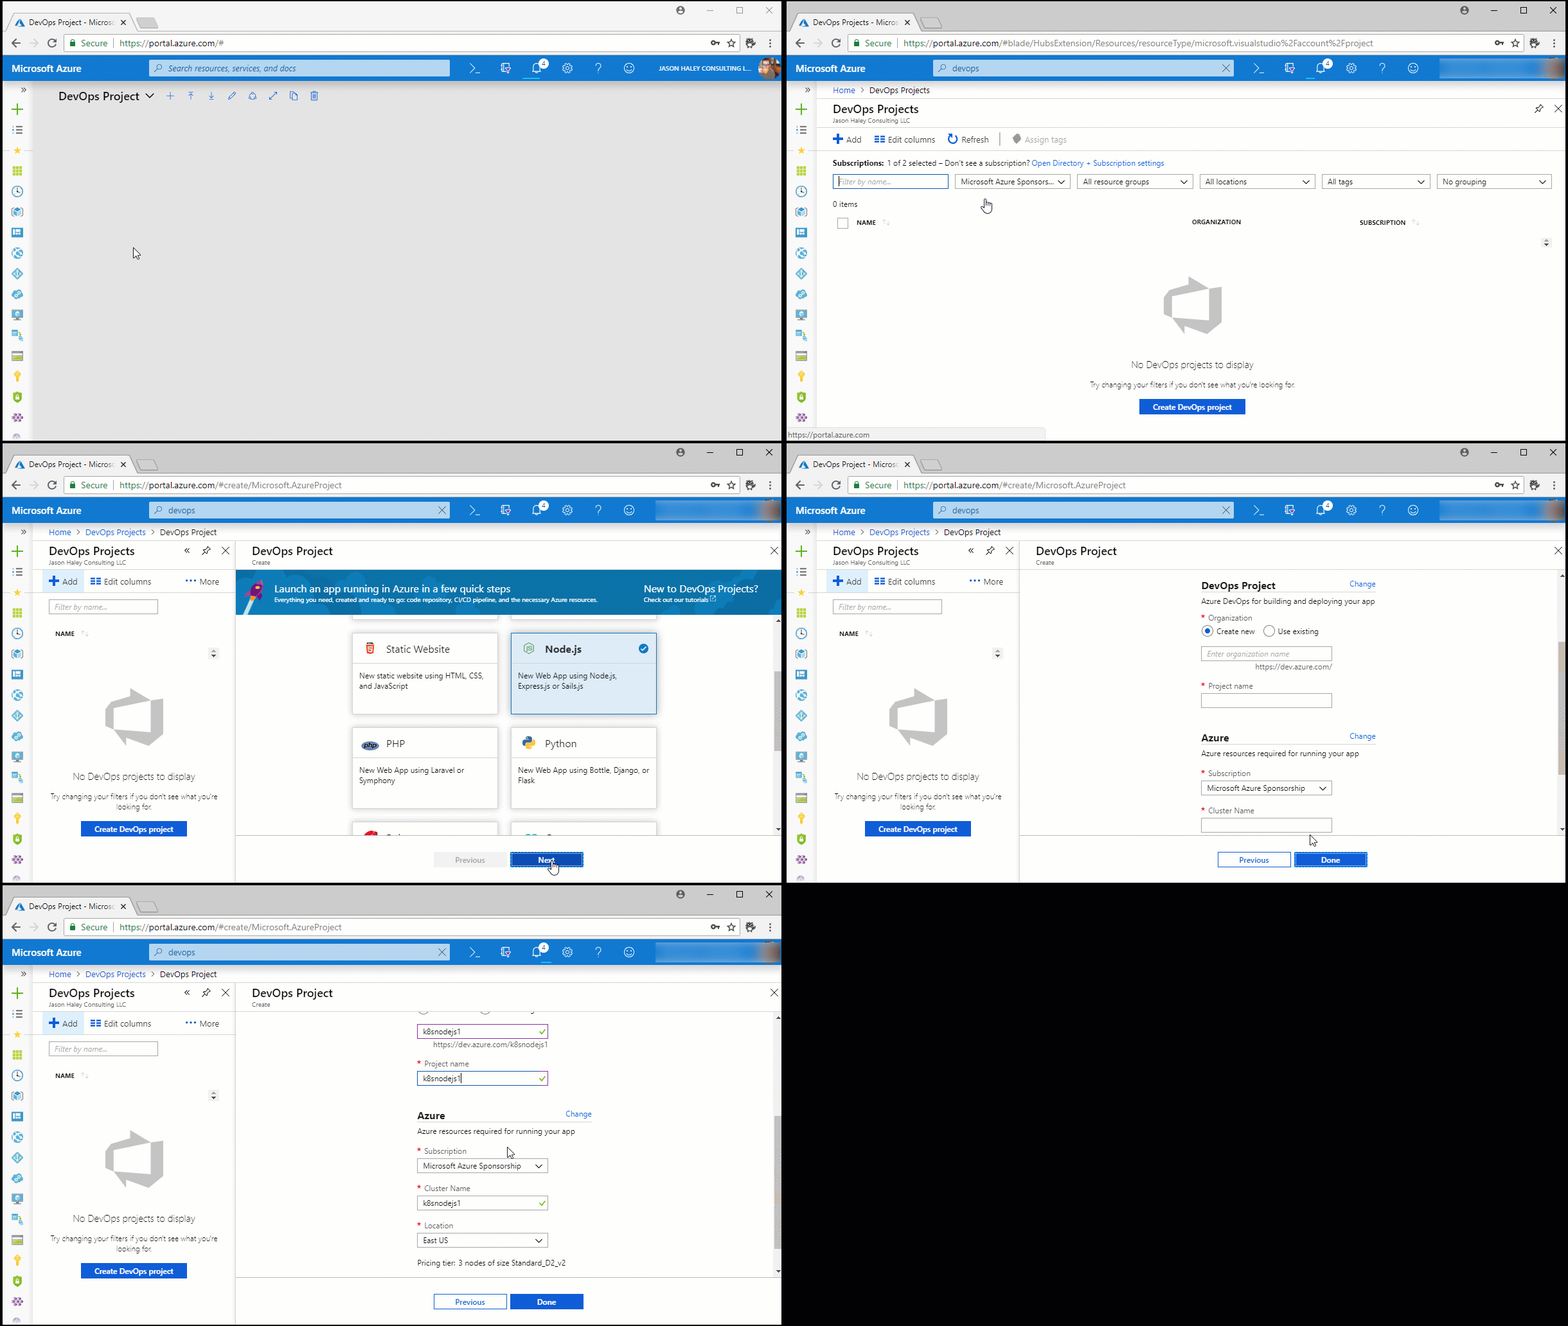
A lot of amazing work is happening in the background, so now is the time to drink a cup of coffee or read my other tips (opens new window) before clicking the refresh button on your DevOps Projects list.

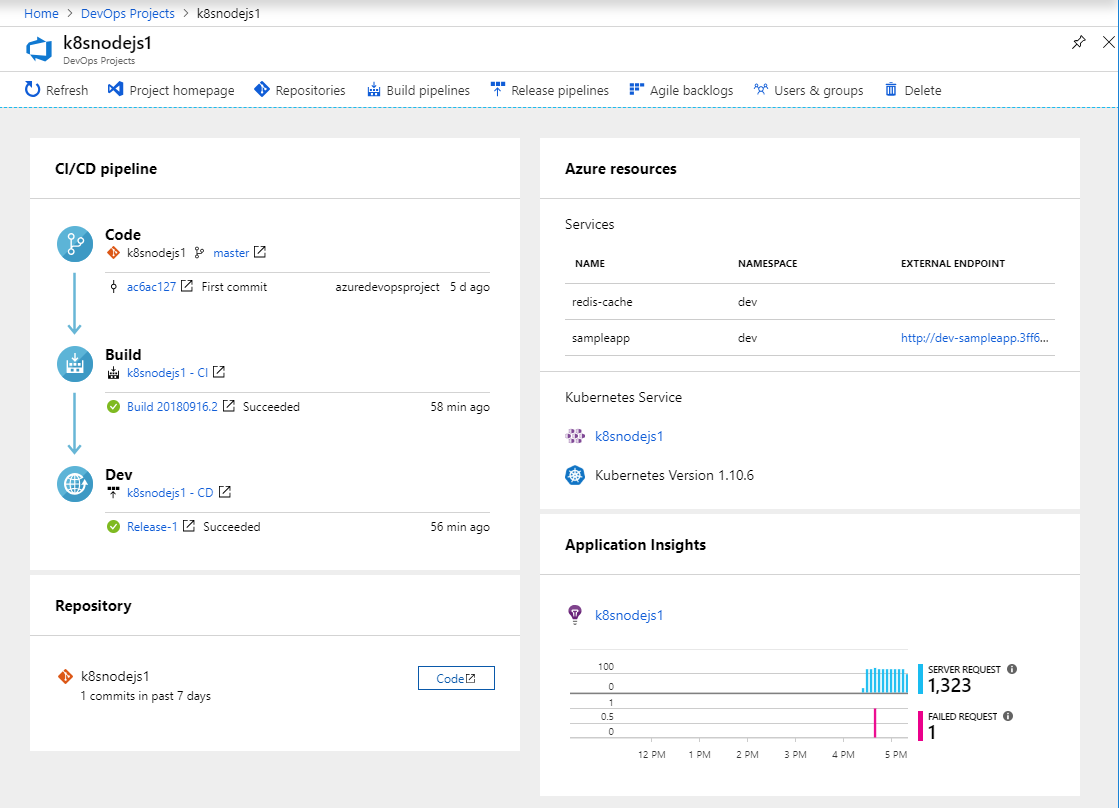
Click on your DevOps project name in the list to go to the DevOps project dashboard. This has everything you need to access the source code repository and the application build and release pipeline (which automates the steps needed to take your code, build it and deploy to a live Kubernetes environment). There are also links to your live deployed application, the Kubernetes cluster and Application Insights (opens new window) (telemetry for your live site).
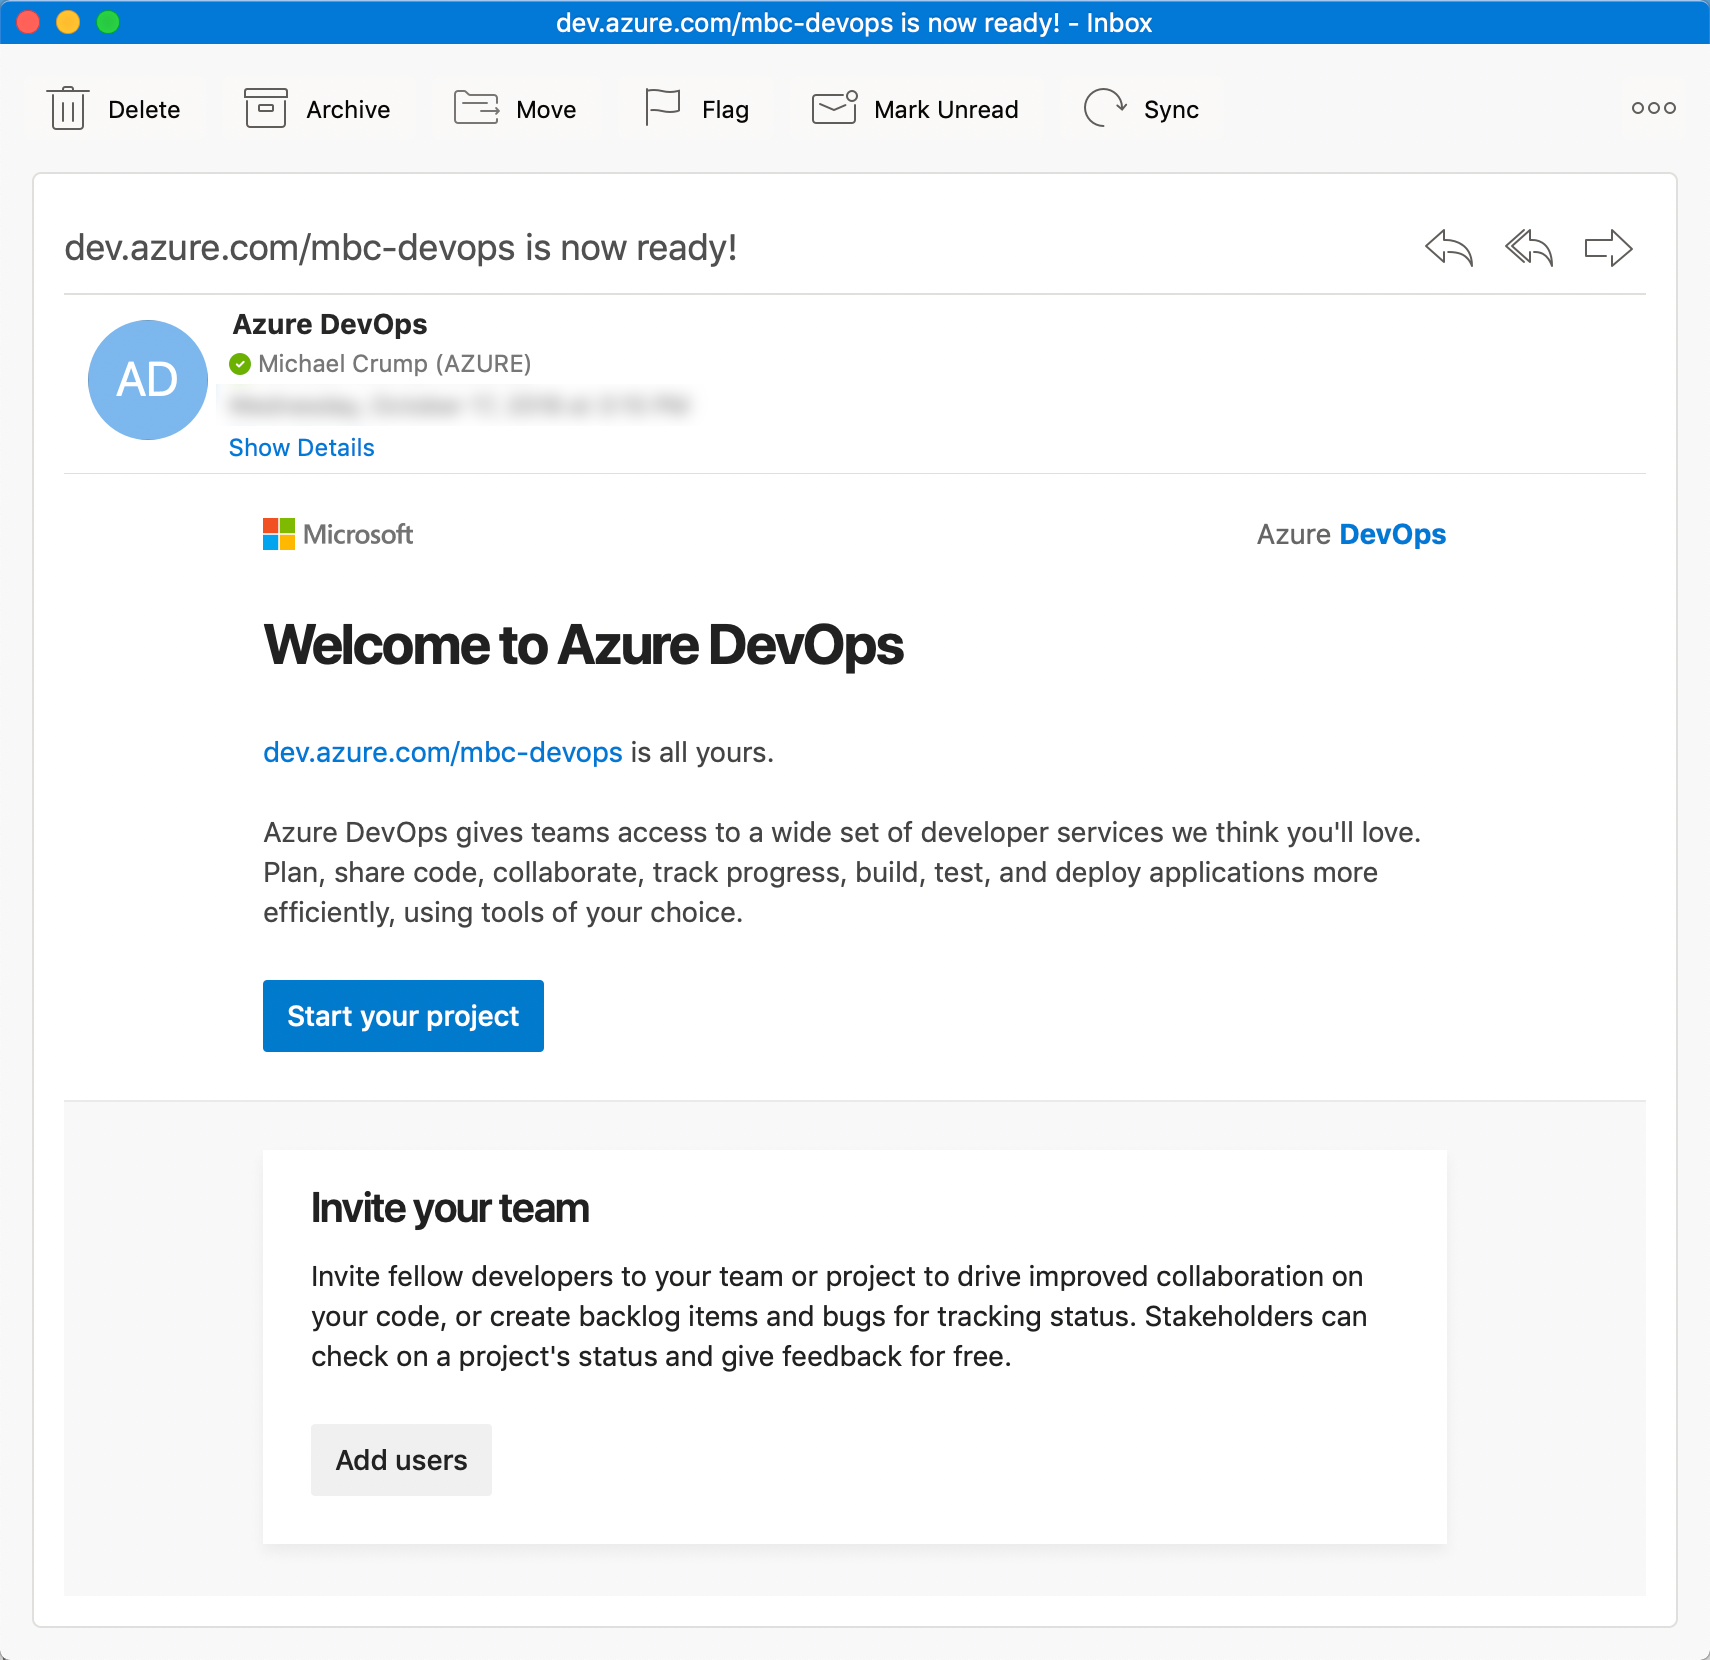
You should also have received an email letting you know the project is ready. You can also start setting up your team members.
# Taking a peek at the code
In the CI/CD pipeline, click on the commit to see the code or you can optionally click on Master to take you to the full file list.

This takes you to the commit for the repo we just deployed containing the deployed sample app.
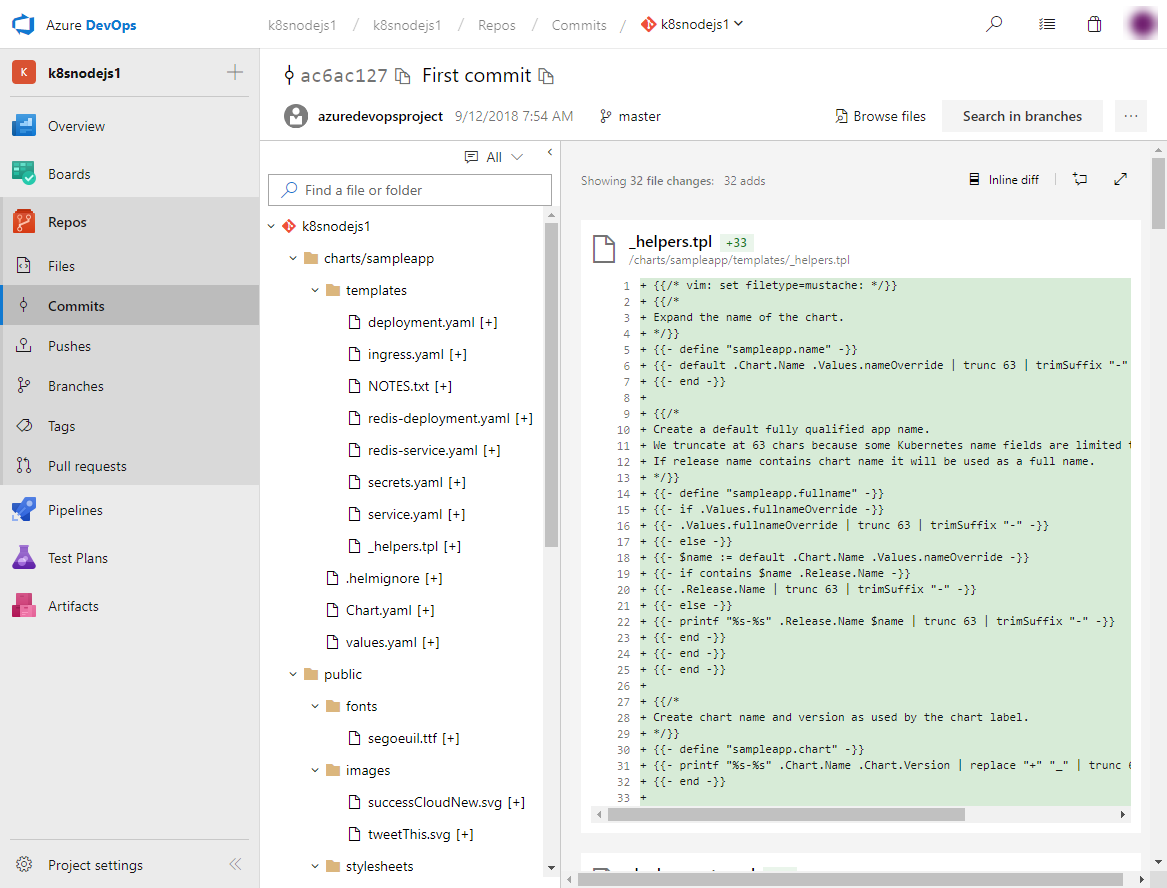
When you created the DevOps project, it cloned the source from the devops-project-samples (opens new window) GitHub project and added it your DevOps projects and did a lot of the initial plumbing for you. How cool is that?
# Taking a look at the Build
Back on the DevOps Project dashboard, click the Build link that has the successful build number.

This takes you to the new Azure DevOps Pipelines build that was created for the project. Now click the Edit button at the top.

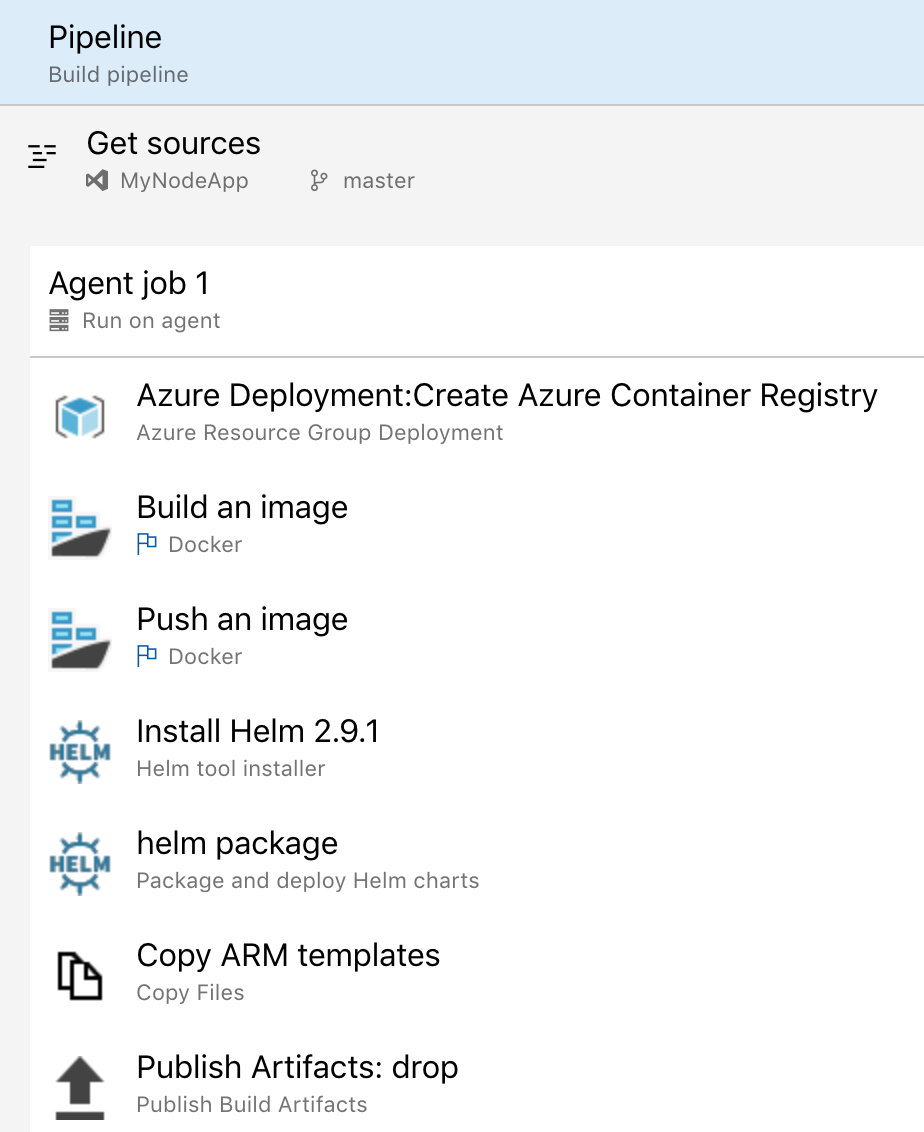
You now see the steps created for building a container image and a Helm package (opens new window). For those that ned a refresher, Helm is used to deploy applications to Kubernetes and it is used by default with the DevOps projects that target Kubernetes.
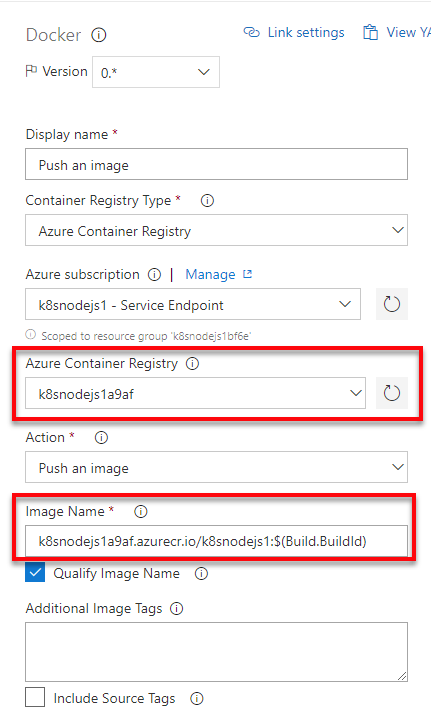
Clicking on either of the Docker tasks will show you the new Azure Container Registry (ACR) that the DevOps project created, along with the image name (plus the build number).
The build creates an ACR, builds and pushes the image using docker, checks to see if Helm is installed begins packaging and deploying the charts/sampleapp directory It also creates the ARM templates and finally publishes the build artifact.
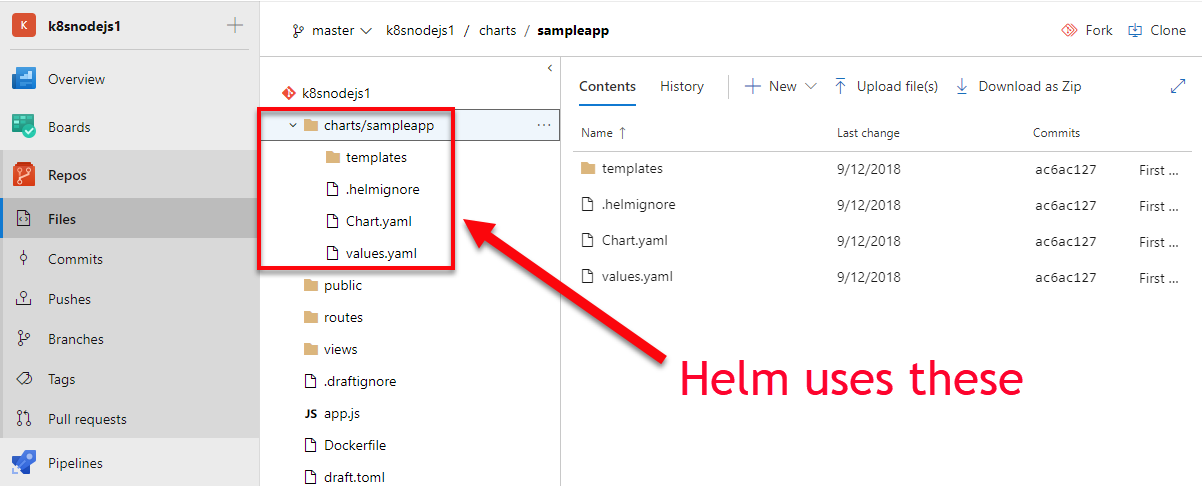
If you switch back over to Repos, then Files then Applications then you can see the charts/sampleapp folder.
I hope that helps and tomorrow we'll take a look at the Dev and Azure Resources portion.
