
TIP
👊 that ⭐️ button on the official GitHub repo (opens new window) to stay up to date.
💡 Learn more : Terraform Image from Azure Marketplace (opens new window)
This post was brought to you by Kumar Allamraju (opens new window).
# Prebuilt Terraform Image for Infrastructure Automation
Microsoft continues to expand support for Infrastructure Automation with the launch of a fully configured version of Terraform (opens new window) in Azure Marketplace. This enables easier adoption for users looking to use Terraform as their primary provisioning tool.
The list includes
- Terraform (latest)
- Azure CLI 2.0
- Managed Service Identity (MSI) VM Extension
In few simple steps, we will learn to provision an Ubuntu VM and allows us to automate the infrastructure deployment using Terraform.
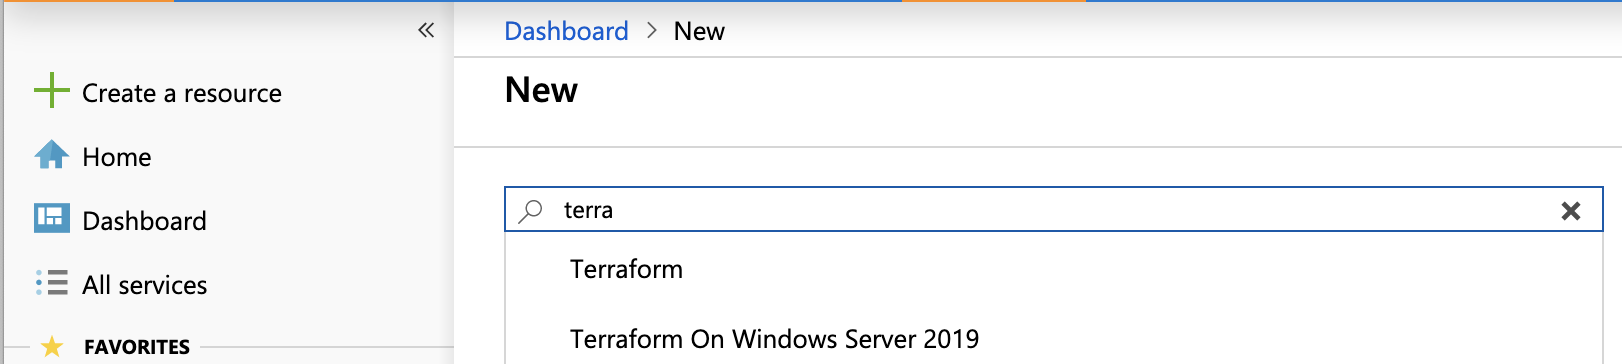
# 1. In the Azure portal, go to + Create a resource and search for "terraform" in the search box.
# 2. Select Terraform and Create
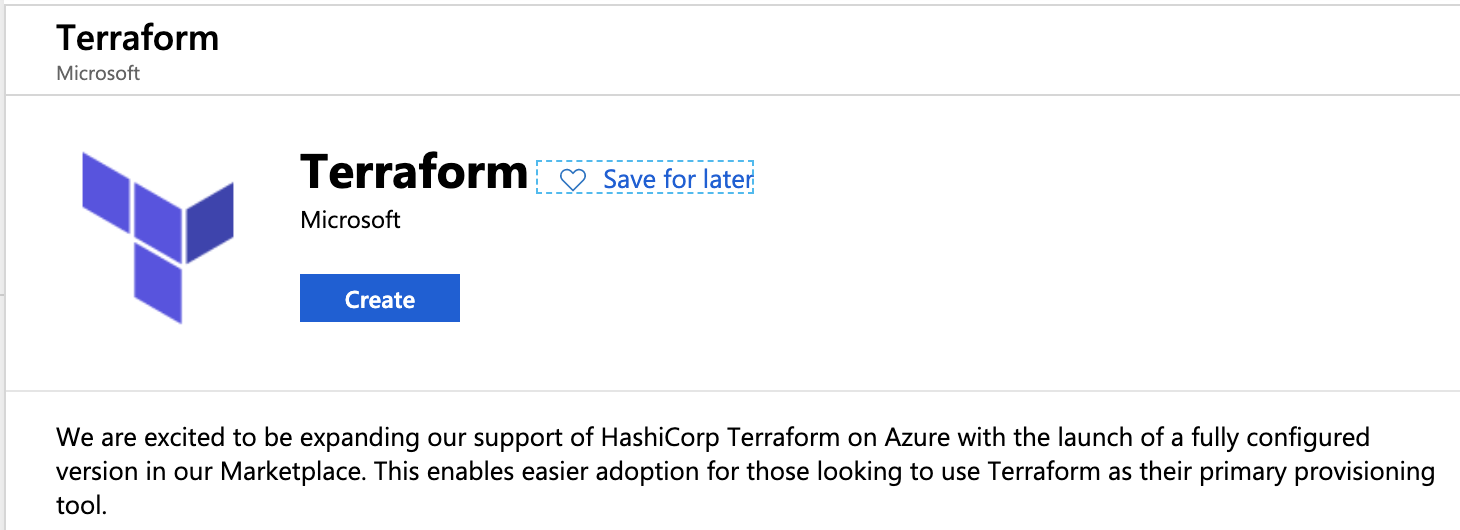
# 3. Complete the provisioning wizard and Buy the virtual machine from Azure marketplace.

# 4. The Terraform VM image:
- Creates a VM with system-assigned identity that's based on the Ubuntu 16.04 LTS image.
- Installs the MSI extension on the VM to allow OAuth tokens to be issued for Azure resources.
- Assigns RBAC permissions to the managed identity, granting owner rights for the resource group.
- Creates a Terraform template folder (tfTemplate). Pre-configures a Terraform remote state with the Azure back end.
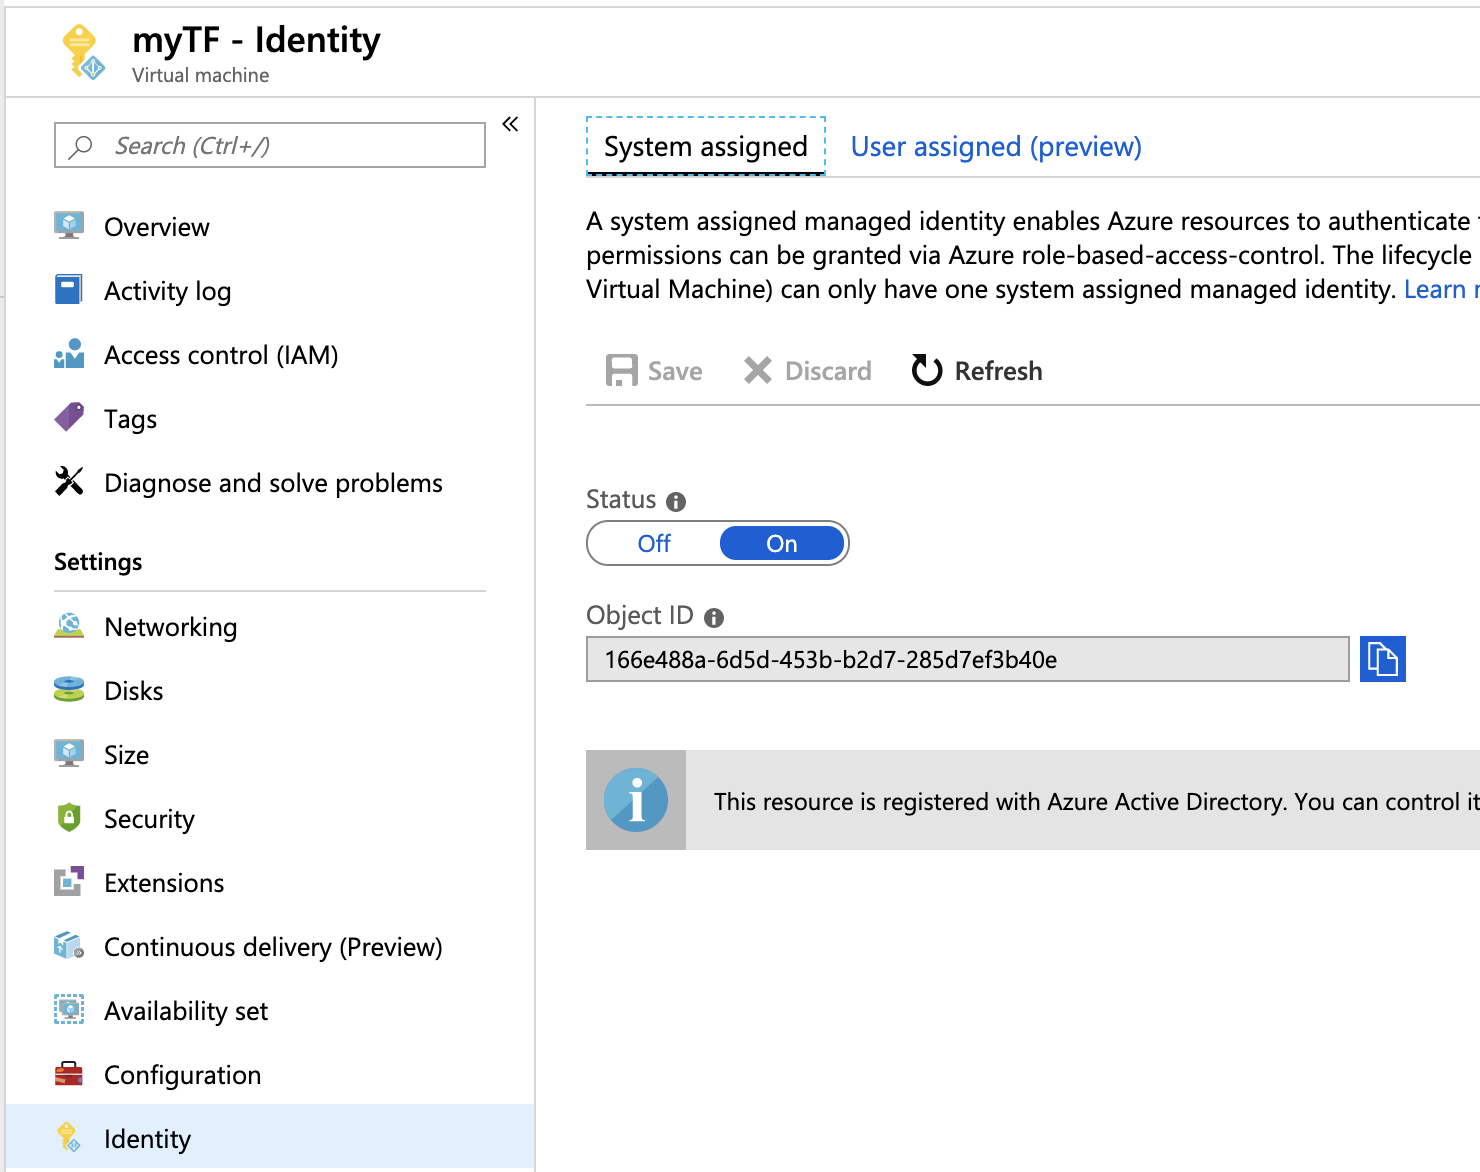
# 5. SSH to the VM and run the below script in your home directory~ . ~/tfEnv.sh
This script uses az CLI to authenticate with Azure and assign the virtual machine Managed Identity contributor permission on your subscription. You can verify this by going in to the VM's Identity page under Settings
# 6. Create a file named azurevm.tf and copy the following code.
Note: SSH key data is provided in the ssh_keys section. Provide a valid public SSH key in the key_data field.
# Create a resource group if it doesn’t exist
resource "azurerm_resource_group" "myterraformgroup" {
    name     = "myResourceGroup"
    location = "eastus"

    tags = {
        environment = "Terraform Demo"
    }
}

# Create virtual network
resource "azurerm_virtual_network" "myterraformnetwork" {
    name                = "myVnet"
    address_space       = ["10.0.0.0/16"]
    location            = "eastus"
    resource_group_name = "${azurerm_resource_group.myterraformgroup.name}"

    tags = {
        environment = "Terraform Demo"
    }
}

# Create subnet
resource "azurerm_subnet" "myterraformsubnet" {
    name                 = "mySubnet"
    resource_group_name  = "${azurerm_resource_group.myterraformgroup.name}"
    virtual_network_name = "${azurerm_virtual_network.myterraformnetwork.name}"
    address_prefix       = "10.0.1.0/24"
}

# Create public IPs
resource "azurerm_public_ip" "myterraformpublicip" {
    name                         = "myPublicIP"
    location                     = "eastus"
    resource_group_name          = "${azurerm_resource_group.myterraformgroup.name}"
    allocation_method            = "Dynamic"

    tags = {
        environment = "Terraform Demo"
    }
}

# Create Network Security Group and rule
resource "azurerm_network_security_group" "myterraformnsg" {
    name                = "myNetworkSecurityGroup"
    location            = "eastus"
    resource_group_name = "${azurerm_resource_group.myterraformgroup.name}"

    security_rule {
        name                       = "SSH"
        priority                   = 1001
        direction                  = "Inbound"
        access                     = "Allow"
        protocol                   = "Tcp"
        source_port_range          = "*"
        destination_port_range     = "22"
        source_address_prefix      = "*"
        destination_address_prefix = "*"
    }

    tags = {
        environment = "Terraform Demo"
    }
}

# Create network interface
resource "azurerm_network_interface" "myterraformnic" {
    name                      = "myNIC"
    location                  = "eastus"
    resource_group_name       = "${azurerm_resource_group.myterraformgroup.name}"
    network_security_group_id = "${azurerm_network_security_group.myterraformnsg.id}"

    ip_configuration {
        name                          = "myNicConfiguration"
        subnet_id                     = "${azurerm_subnet.myterraformsubnet.id}"
        private_ip_address_allocation = "Dynamic"
        public_ip_address_id          = "${azurerm_public_ip.myterraformpublicip.id}"
    }

    tags = {
        environment = "Terraform Demo"
    }
}

# Generate random text for a unique storage account name
resource "random_id" "randomId" {
    keepers = {
        # Generate a new ID only when a new resource group is defined
        resource_group = "${azurerm_resource_group.myterraformgroup.name}"
    }

    byte_length = 8
}

# Create storage account for boot diagnostics
resource "azurerm_storage_account" "mystorageaccount" {
    name                        = "diag${random_id.randomId.hex}"
    resource_group_name         = "${azurerm_resource_group.myterraformgroup.name}"
    location                    = "eastus"
    account_tier                = "Standard"
    account_replication_type    = "LRS"

    tags = {
        environment = "Terraform Demo"
    }
}

# Create virtual machine
resource "azurerm_virtual_machine" "myterraformvm" {
    name                  = "myVM"
    location              = "eastus"
    resource_group_name   = "${azurerm_resource_group.myterraformgroup.name}"
    network_interface_ids = ["${azurerm_network_interface.myterraformnic.id}"]
    vm_size               = "Standard_DS1_v2"

    storage_os_disk {
        name              = "myOsDisk"
        caching           = "ReadWrite"
        create_option     = "FromImage"
        managed_disk_type = "Premium_LRS"
    }

    storage_image_reference {
        publisher = "Canonical"
        offer     = "UbuntuServer"
        sku       = "16.04.0-LTS"
        version   = "latest"
    }

    os_profile {
        computer_name  = "myvm"
        admin_username = "azureuser"
    }

    os_profile_linux_config {
        disable_password_authentication = true
        ssh_keys {
            path     = "/home/azureuser/.ssh/authorized_keys"
            key_data = "ssh-rsa AAAAB3Nz{snip}hwhqT9h"
        }
    }

    boot_diagnostics {
        enabled = "true"
        storage_uri = "${azurerm_storage_account.mystorageaccount.primary_blob_endpoint}"
    }

    tags = {
        environment = "Terraform Demo"
    }
}
2
3
4
5
6
7
8
9
10
11
12
13
14
15
16
17
18
19
20
21
22
23
24
25
26
27
28
29
30
31
32
33
34
35
36
37
38
39
40
41
42
43
44
45
46
47
48
49
50
51
52
53
54
55
56
57
58
59
60
61
62
63
64
65
66
67
68
69
70
71
72
73
74
75
76
77
78
79
80
81
82
83
84
85
86
87
88
89
90
91
92
93
94
95
96
97
98
99
100
101
102
103
104
105
106
107
108
109
110
111
112
113
114
115
116
117
118
119
120
121
122
123
124
125
126
127
128
129
130
131
132
133
134
135
136
137
138
139
140
141
142
143
144
145
146
147
148
149
150
151
# Build and deploy the infrastructure
With your Terraform template created, the first step is to initialize Terraform. This step ensures that Terraform has all the prerequisites to build your template in Azure.
terraform init
The next step is to have Terraform review and validate the template. This step compares the requested resources to the state information saved by Terraform and then outputs the planned execution. Resources are not created in Azure.
terraform plan
After you execute the previous command, you should see something like below:
Refreshing Terraform state in-memory prior to plan...
The refreshed state will be used to calculate this plan, but will not be
persisted to local or remote state storage.
...

Note: You didn’t specify an “-out” parameter to save this plan, so when
“apply” is called, Terraform can’t guarantee this is what will execute.
  + azurerm_resource_group.myterraform
      <snip>
  + azurerm_virtual_network.myterraformnetwork
      <snip>
  + azurerm_network_interface.myterraformnic
      <snip>
  + azurerm_network_security_group.myterraformnsg
      <snip>
  + azurerm_public_ip.myterraformpublicip
      <snip>
  + azurerm_subnet.myterraformsubnet
      <snip>
  + azurerm_virtual_machine.myterraformvm
      <snip>
Plan: 7 to add, 0 to change, 0 to destroy.
2
3
4
5
6
7
8
9
10
11
12
13
14
15
16
17
18
19
20
21
22
# 7. If everything looks correct and you are ready to build the infrastructure in Azure, apply the template in Terraform:
terraform apply
# 8. Once you are done, you can destroy the resources by executing
terraform destroy
# 9. You are free to stop the VM if you wish to save money on Compute costs.
# Conclusion
The Terraform Marketplace image makes it easy for users to get started using Terraform on Azure, without having to install and configure Terraform manually. There are no software charges for this Terraform VM image. You pay only the Azure Compute usage fees that are assessed based on the size of the virtual machine that's provisioned. We encourage you to give it a try and share your experience with us.