
TIP
🦄 Wanna get in on the Live Streaming world? Check out Azure Developer Streaming (opens new window)!
💡 Learn more : GitHub Actions for Azure (opens new window).
📺 Watch the video : How to get started with GitHub Actions for Azure (opens new window).
# Getting started with GitHub Actions
GitHub Actions (opens new window) enable you to execute jobs whenever something happens in a GitHub repository. For instance, you can create an action that builds the code in your repository, every time that you push code to it. With GitHub Actions, you can customize your GitHub workflow to whatever you need it to be.
In this post, we'll take a look at how to get started with GitHub Actions and we'll try out one of the Azure actions (opens new window) that deploys an application to Azure.
# Prerequisites
If you want to follow along, you'll need the following:
- An Azure subscription (If you don't have an Azure subscription, create a free account (opens new window) before you begin)
- A GitHub repository that contains an ASP.NET Core 2.x (opens new window) web application
- An existing Azure App Service Web App (opens new window)
# Deploy applications to Azure with GitHub Actions
GitHub Actions are workflows that run whenever something happens in your GitHub repository. You can create a new GitHub Action workflow in the GitHub website:
- Open the GitHub website (opens new window) and open a GitHub repository that has an ASP.NET Core 2.x application in it
- Click on the Actions tab a. This opens the GitHub Actions page
- Click on Blank workflow file to get started
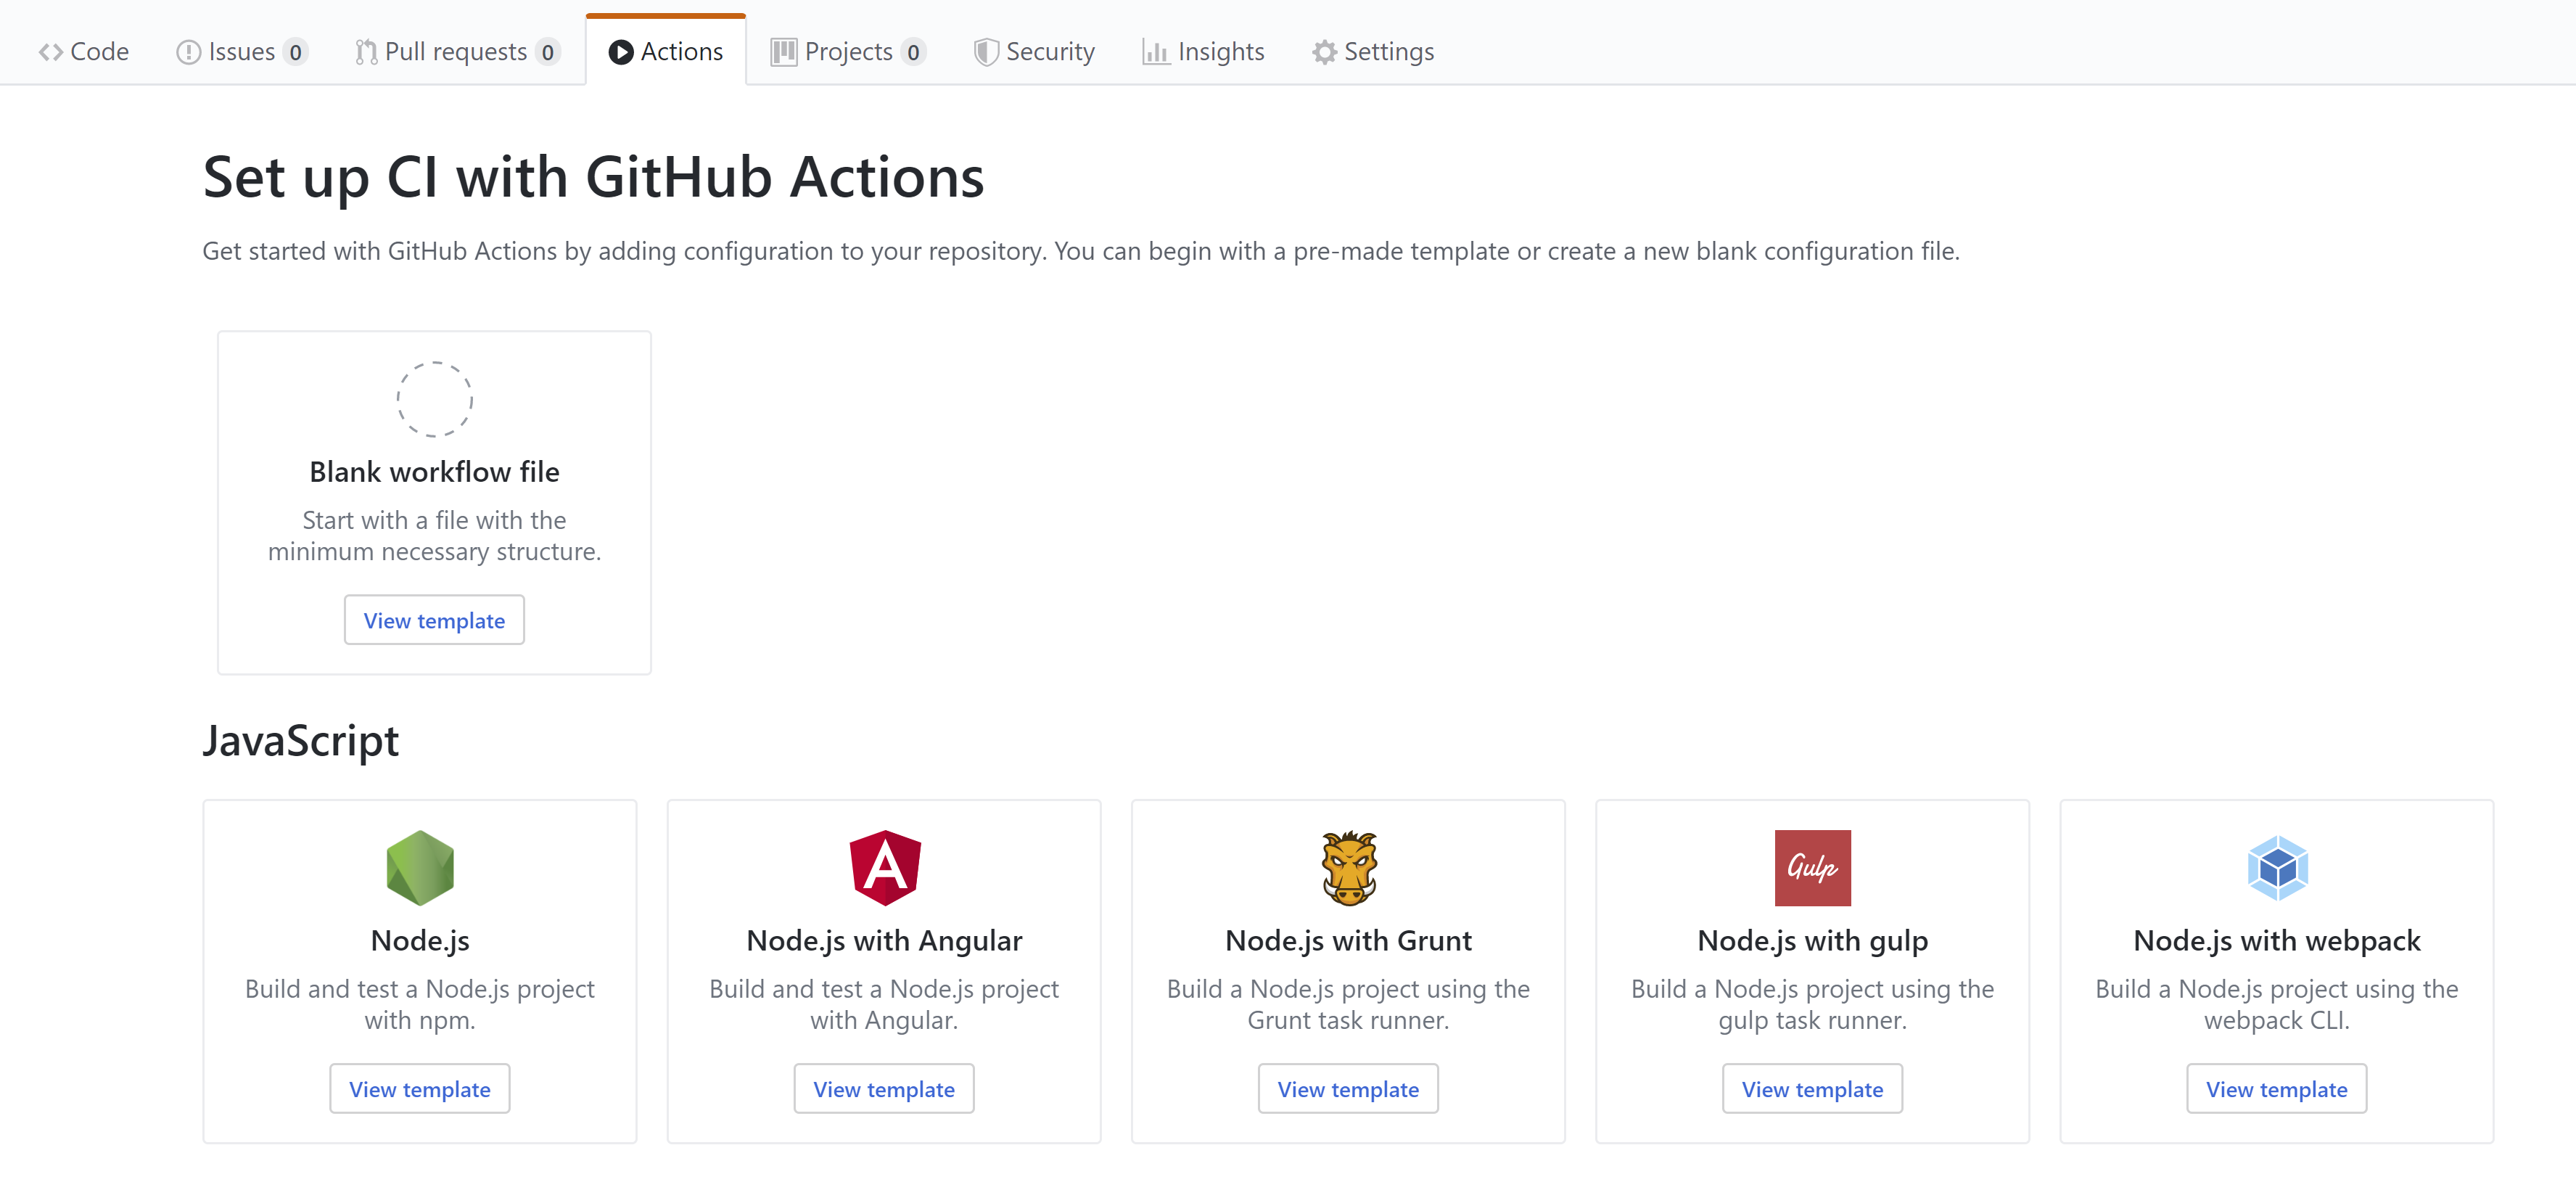
(GitHub Actions page)
As you could see on the GitHub Actions page, there are lots of predefined templates that you can use. These contain commonly used workflows and help you to get started quickly. We'll start with a blank template, because we want to create our own, custom workflow. GitHub Actions are defined in .yml files. In the YAML editor, you can type your complete workflow using the Workflow syntax for GitHub Actions. (opens new window) For our example, paste the following code into the editor:
name: Build code and deploy to Azure

on: [push]

jobs:
  build:
    name: Build Code
    runs-on: ubuntu-latest

    steps:
    - uses: actions/checkout@v1
    - name: Setup .NET Core
      uses: actions/setup-dotnet@v1
      with:
        dotnet-version: 2.2.108
    - name: Build with dotnet
      run: dotnet build --configuration Release

  deploy:
    needs: build
    name: Deploy App
    runs-on: ubuntu-latest

    steps:
    - name: deploy to azure web app
      uses: azure/appservice-actions/webapp@master
      with:
        app-name: mynewestwebapplication
        publish-profile: ${{ secrets.azureWebAppPublishProfile }}
2
3
4
5
6
7
8
9
10
11
12
13
14
15
16
17
18
19
20
21
22
23
24
25
26
27
28
29
Let me explain what the above YAML code does:
First, the name, defines the name of the GitHub Actions workflow. You can use this later to see that this workflow has run and what the result was
Next, this workflow is triggered on: [push]. This means that this workflow runs whenever code is pushed to this repository. There are also other triggers that you can use, like on: pull_request and on: schedule
The jobs section can contain one or more jobs that have one or more steps within them. In this case, we have two jobs: build and deploy. The build job compiles the code and the deploy job deploys the app to Azure. The deploy job will only run if the build job completes successfully, because of the needs: build parameter in the deploy job
GitHub Actions run in hosted virtual machines. You can define which operating system you want your job to run on with the runs-on: parameter, which in this case, is set to ubuntu-latest for both jobs, but can also be set to windows-latest, macOS-latest and other environments (opens new window)
Next are the steps in the jobs. The first step of the build job is to checkout the code from the repository using actions/checkout@v1. actions/checkout@v1 is one of the predefined GitHub Actions (opens new window) that you can use. There are many others and you can write your own, custom actions
The next step is to make sure that .NET Core is installed on the virtual environment by running actions/setup-dotnet@v1
Finally, we run dotnet build with the run parameter, to compile the code. This is really cool, because we can run commands on the virtual environment like dotnet commands, but also Azure CLI commands and others
In the deploy job, we only have one step, which is azure/appservice-actions/webapp@master. This action deploys the application to an Azure App Service Web App (opens new window). This step requires two arguments: the app-name, which is the name of the Web App in Azure to publish to, and the publish-profile, which contains the URLs and credentials to deploy the app
a. To deploy the app, you need the publish profile. You can get that from the Azure portal: 1. In the Azure portal, navigate to the Web App 2. Click on the Get publish profile button to download the publish profile file
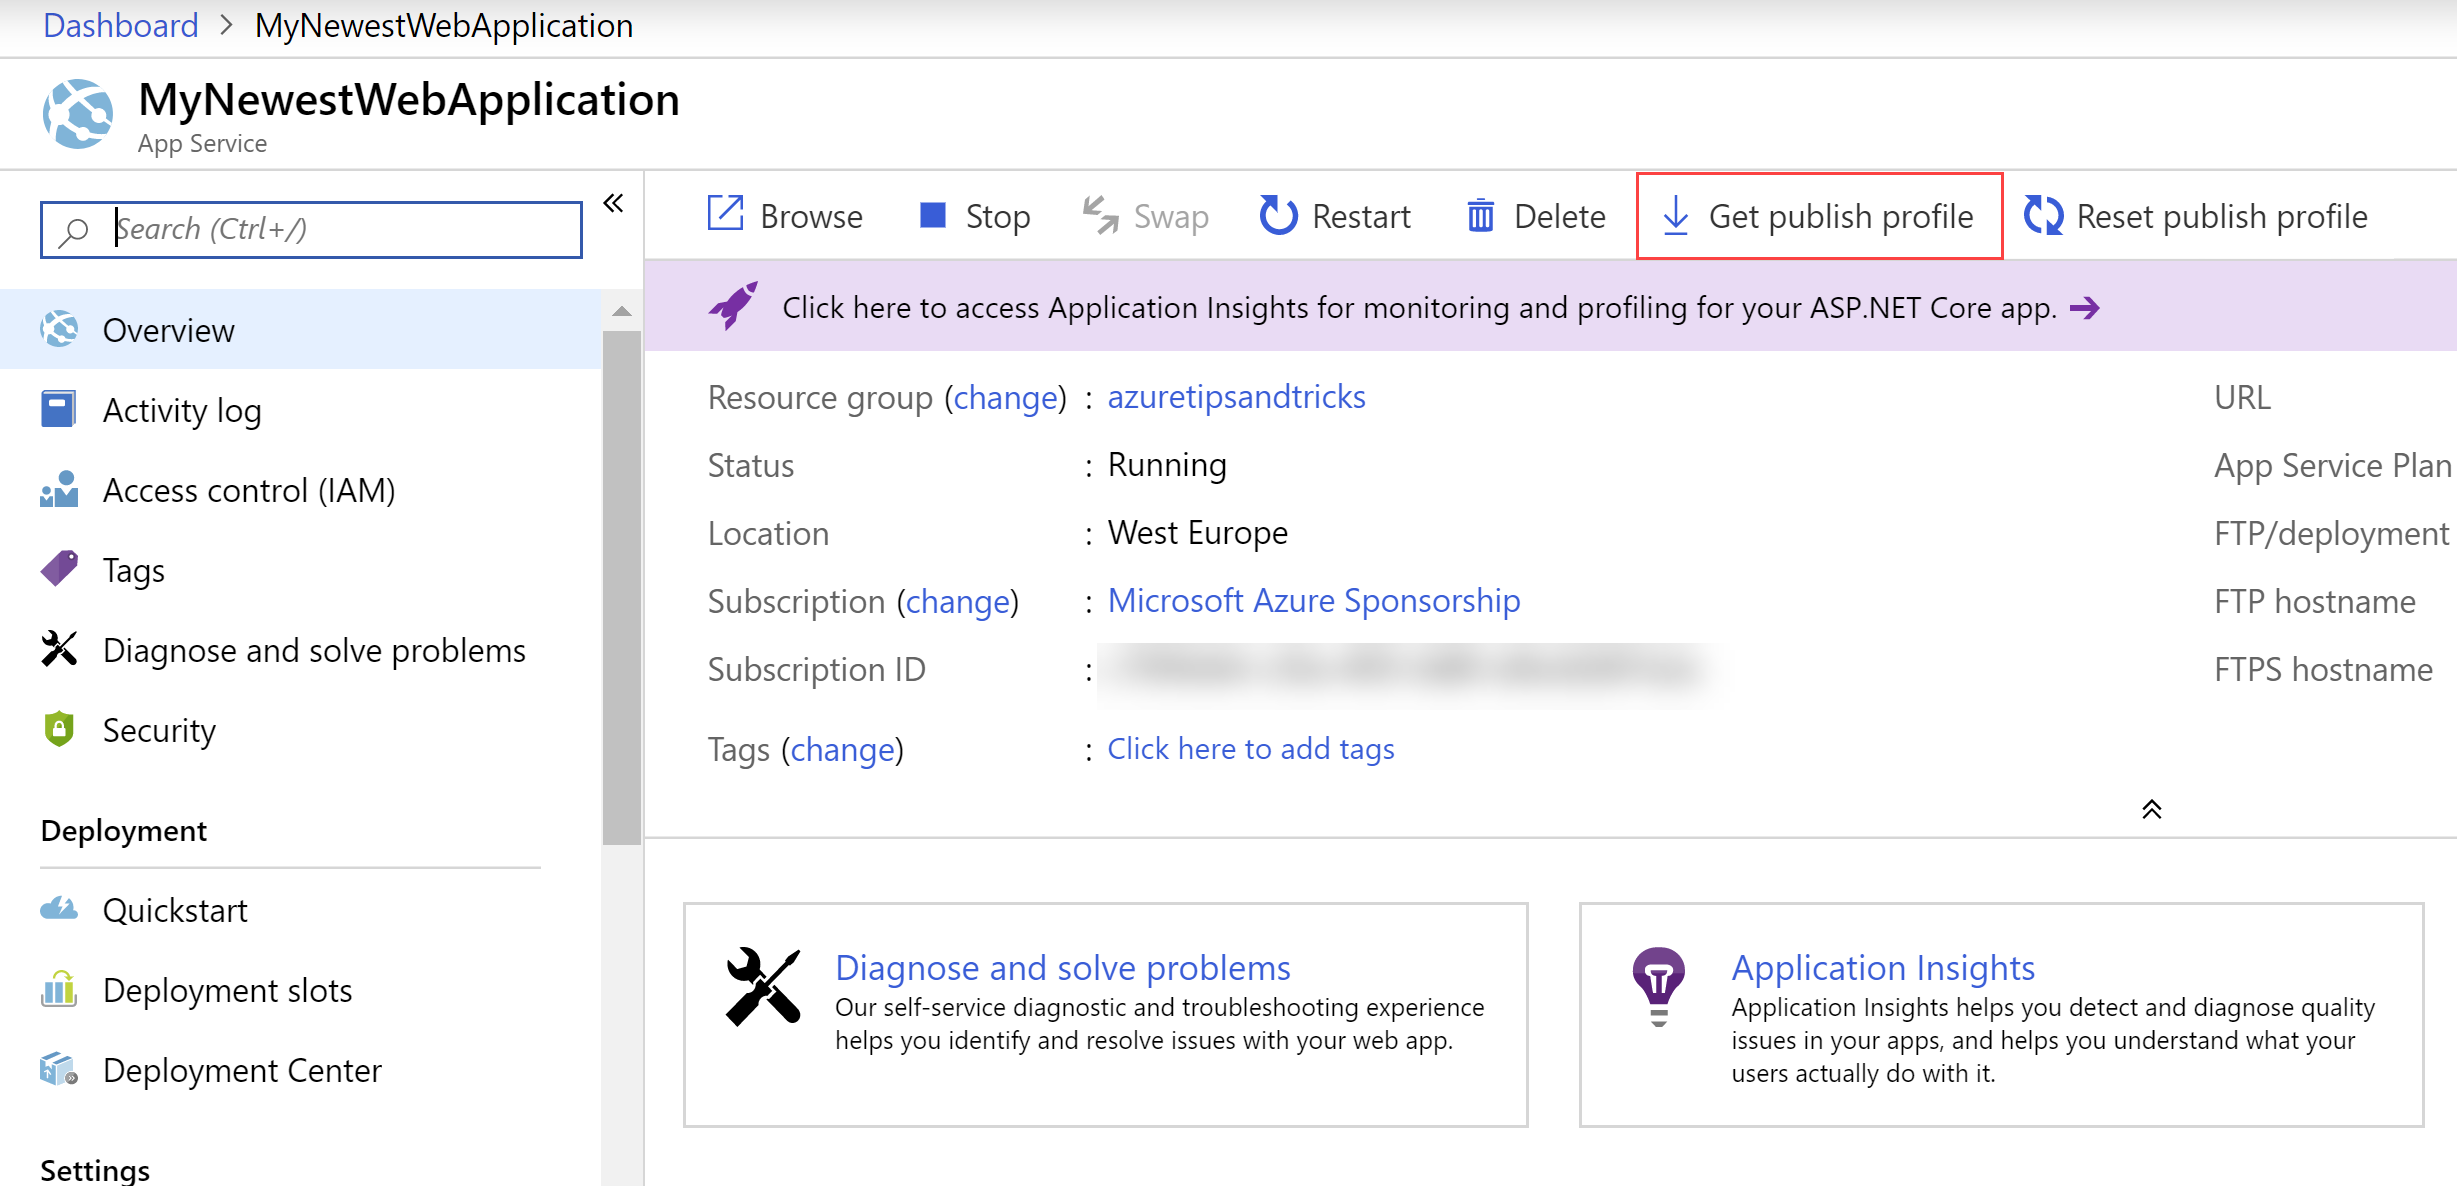
(Get Publish Profile in the Azure portal)
b. In our example code, we get the Web App Publish Profile from a GitHub secret. This is how you create the GitHub secret: 1. In the GitHub repository, click on the Settings tab 2. In Settings, click on the Secrets menu-item 3. Click Add a new secret 4. Put in the name azureWebAppPublishProfile, which is the same as we use in the yml code 5. Paste the contents of the publish profile file into the Value textbox 6. Click Add secret to save the secret
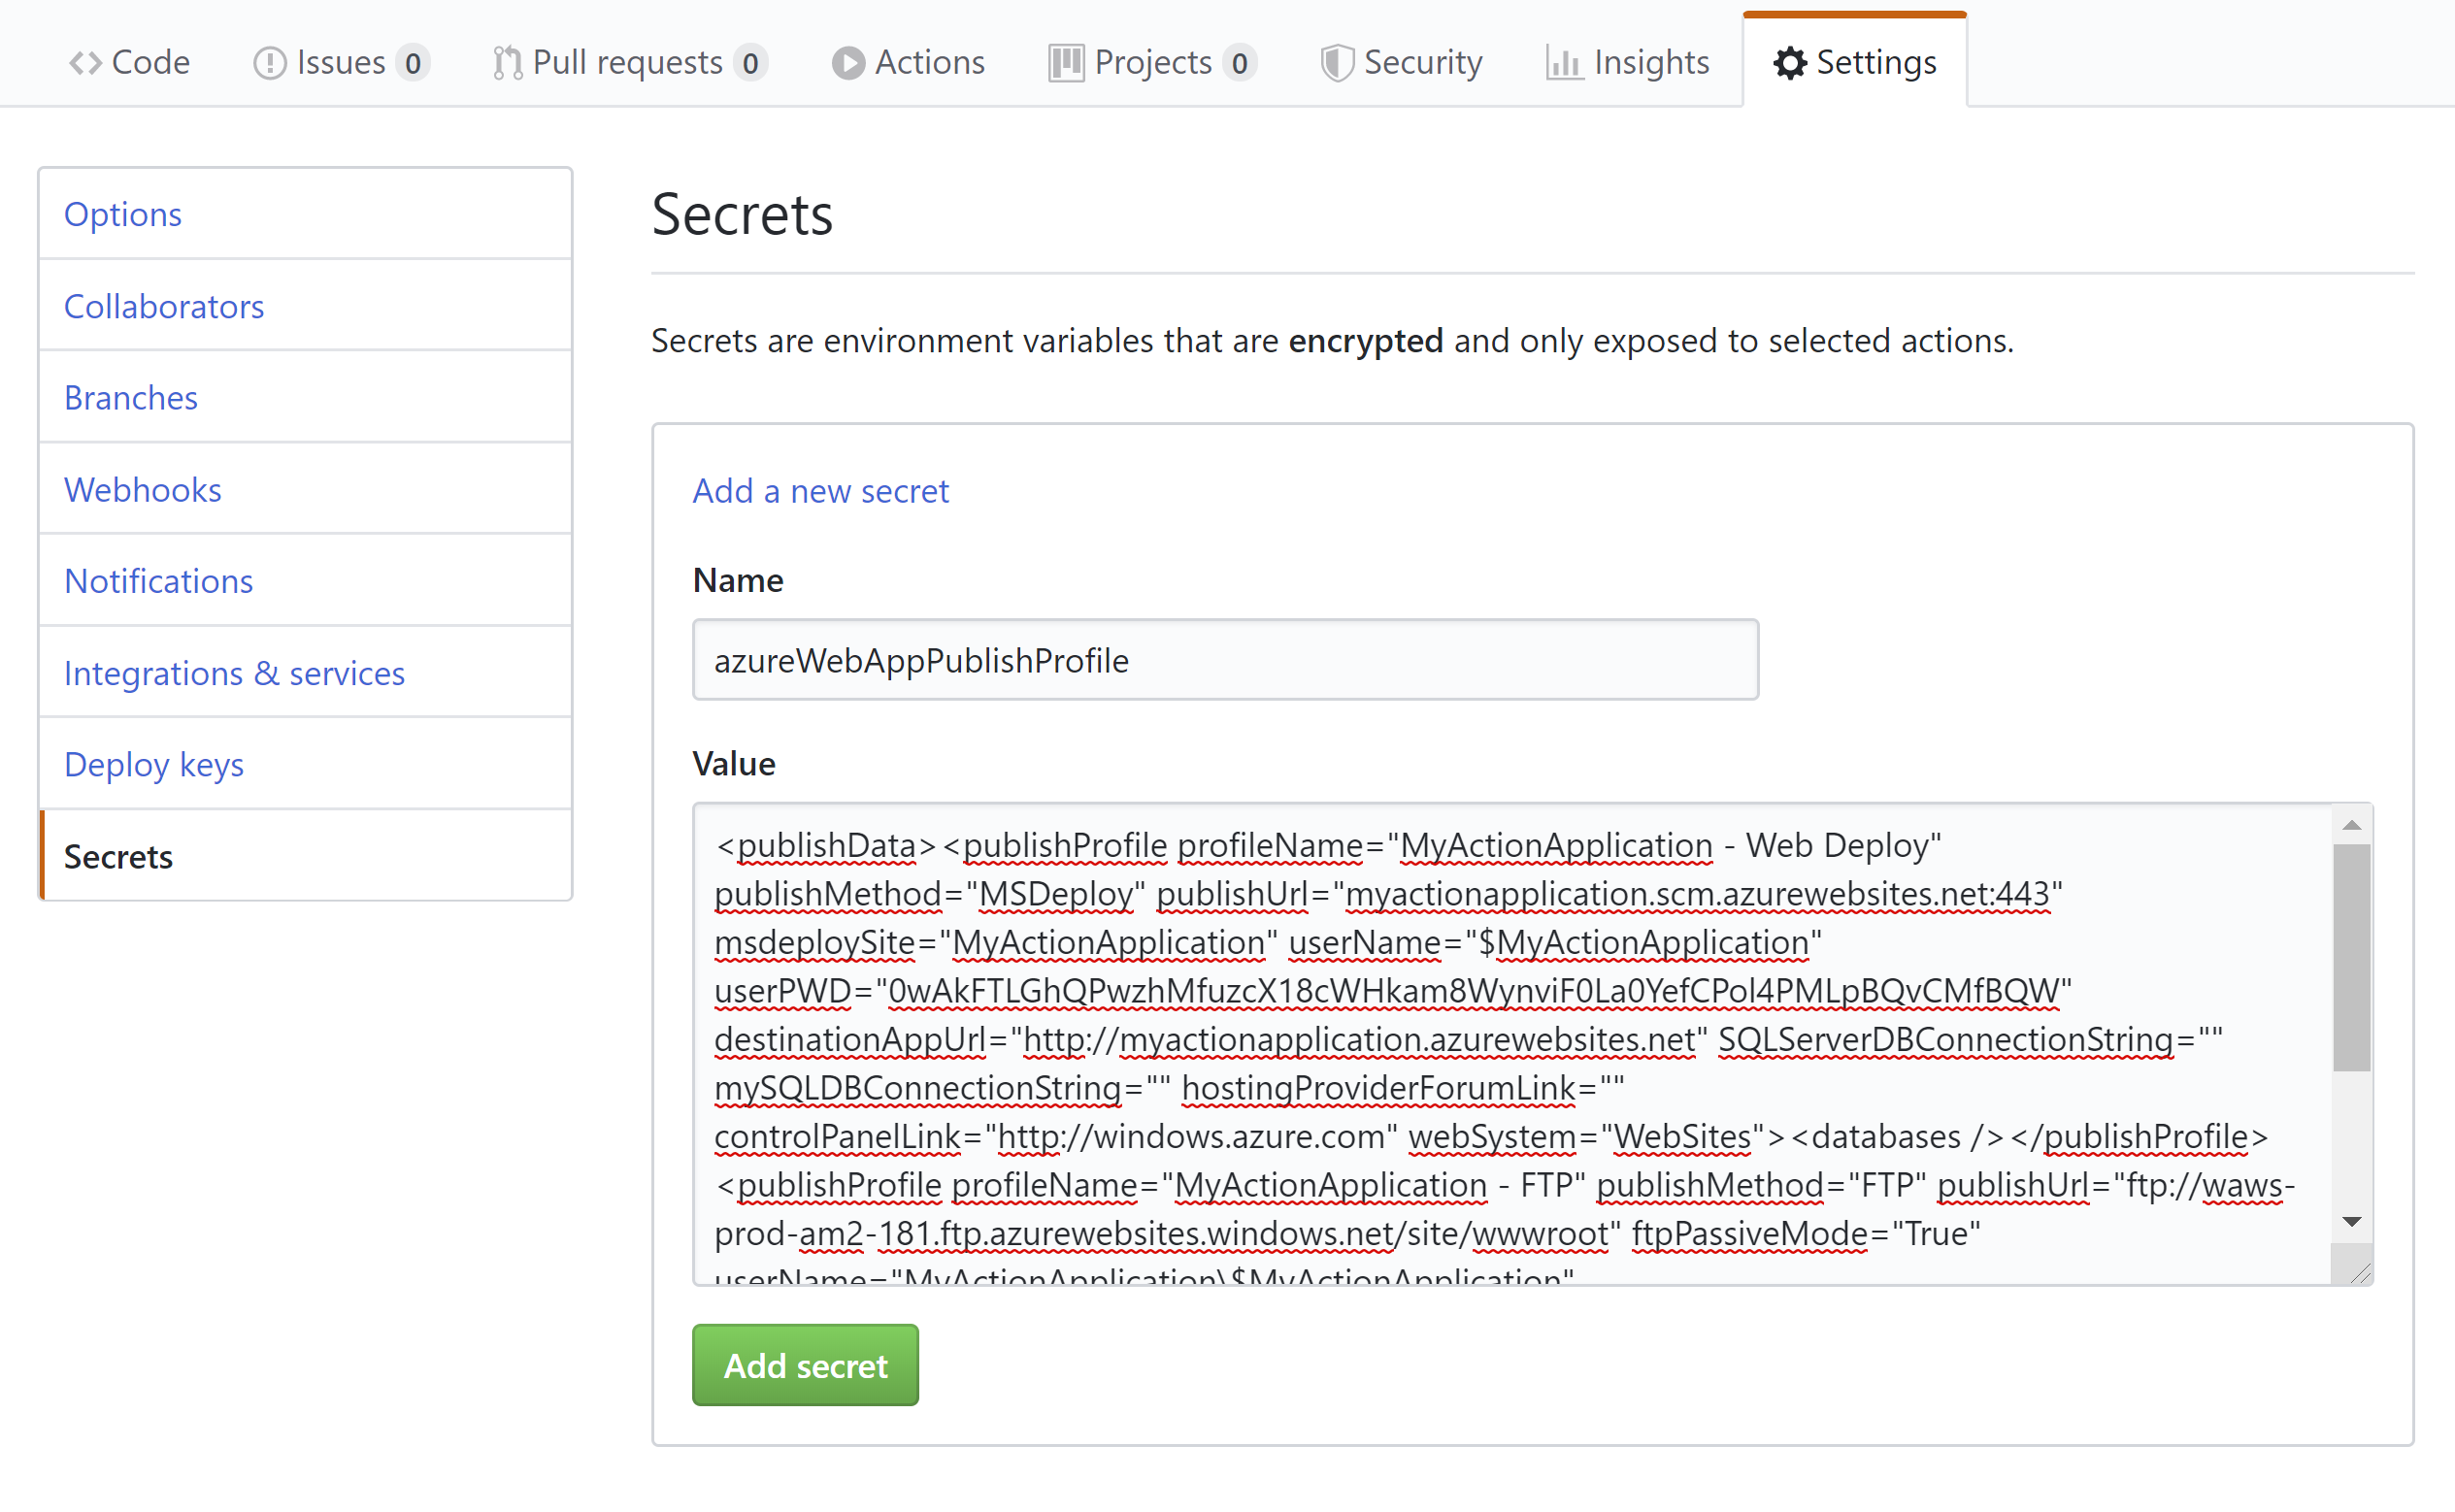
(Create a secret in GitHub)
Besides the azure/appservice-actions/webapp@master action, there are other GitHub Actions that interact with Azure, which you can find here (opens new window). These include:
- Azure login (opens new window)
- Azure login using Service Principal
- AppService actions (opens new window)
- Azure WebApp (Windows / Linux WebApps)
- Azure Web app for containers (Single / multi-container apps)
- Container actions (opens new window)
- Docker login/logout
- Kubernetes actions (opens new window)
- Kubectl tool installer
- Kubernetes set context
- AKS set context
- K8s create secret
- K8s deploy
That's it! Now that the YAML code is complete, you can create the workflow by clicking Start commit and committing the code to the repository. This will trigger the workflow to run, as it is triggered by any push to the repository. You can see the workflow(s) that are running in the Actions tab of the repository.
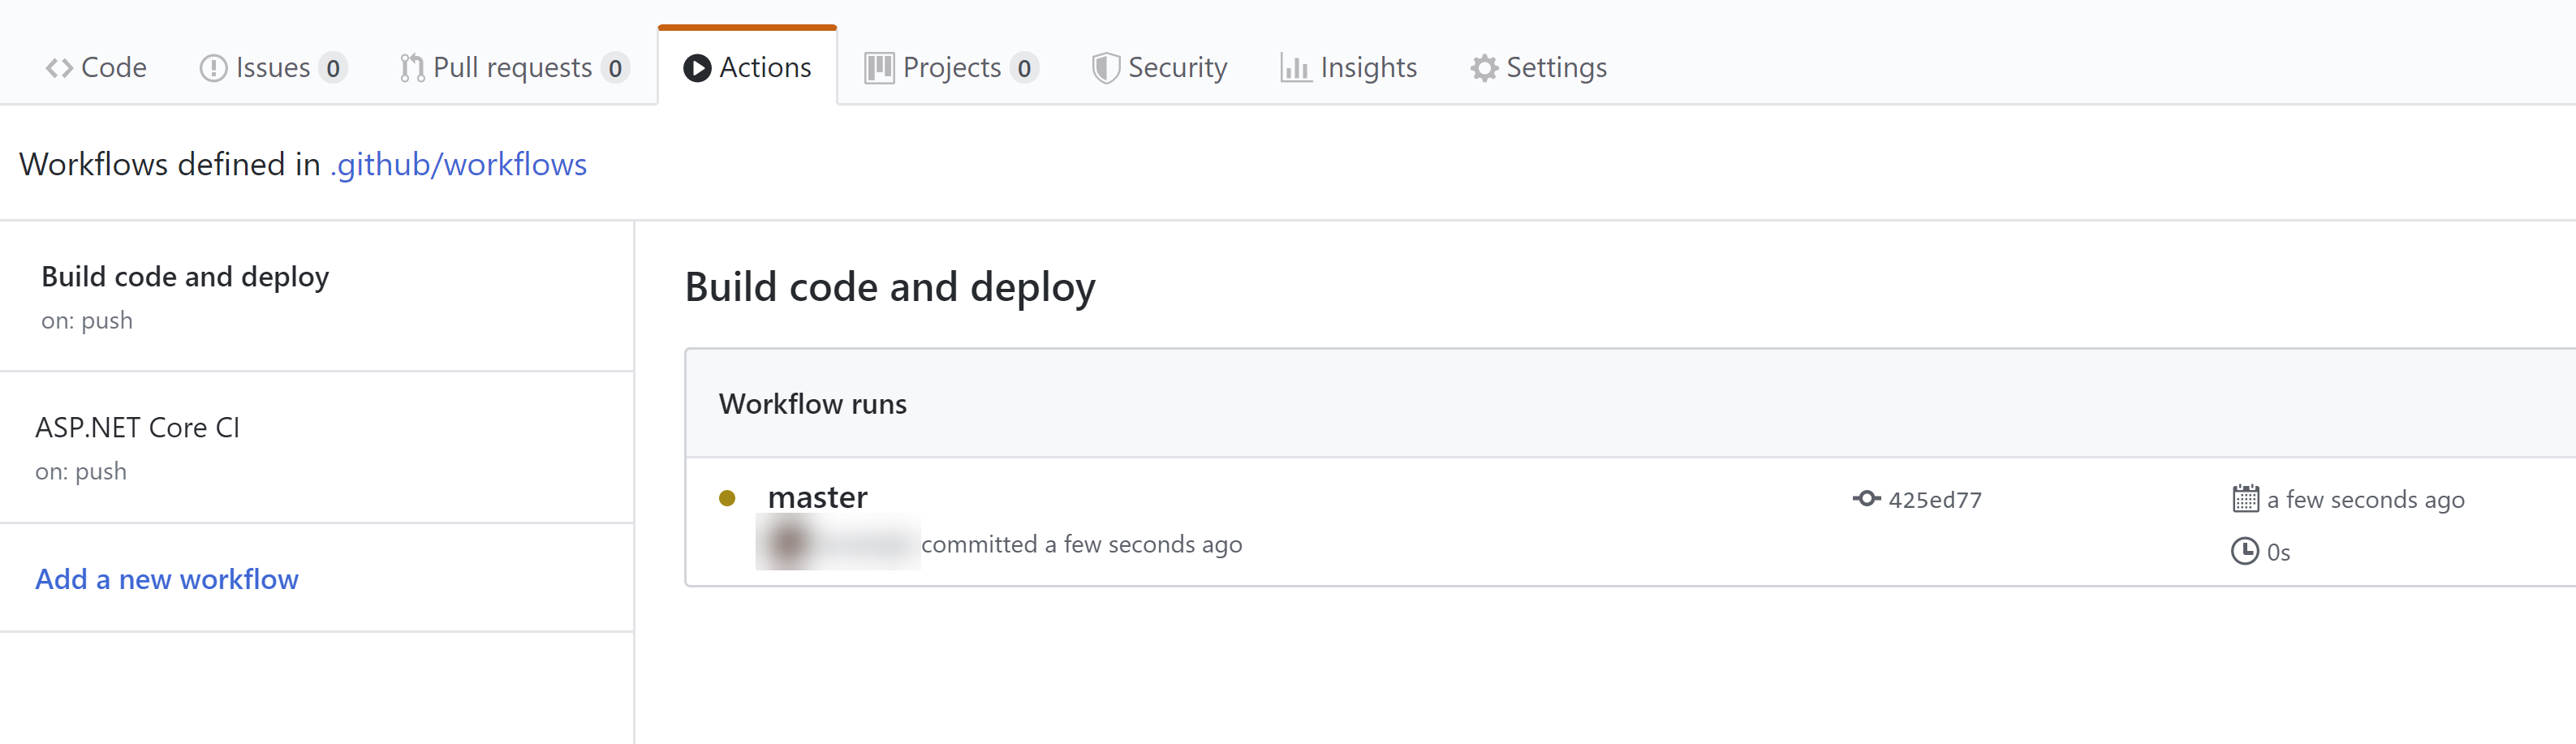
(Running workflows in GitHub)
And when you click on a workflow, you can see the detailed status of it.
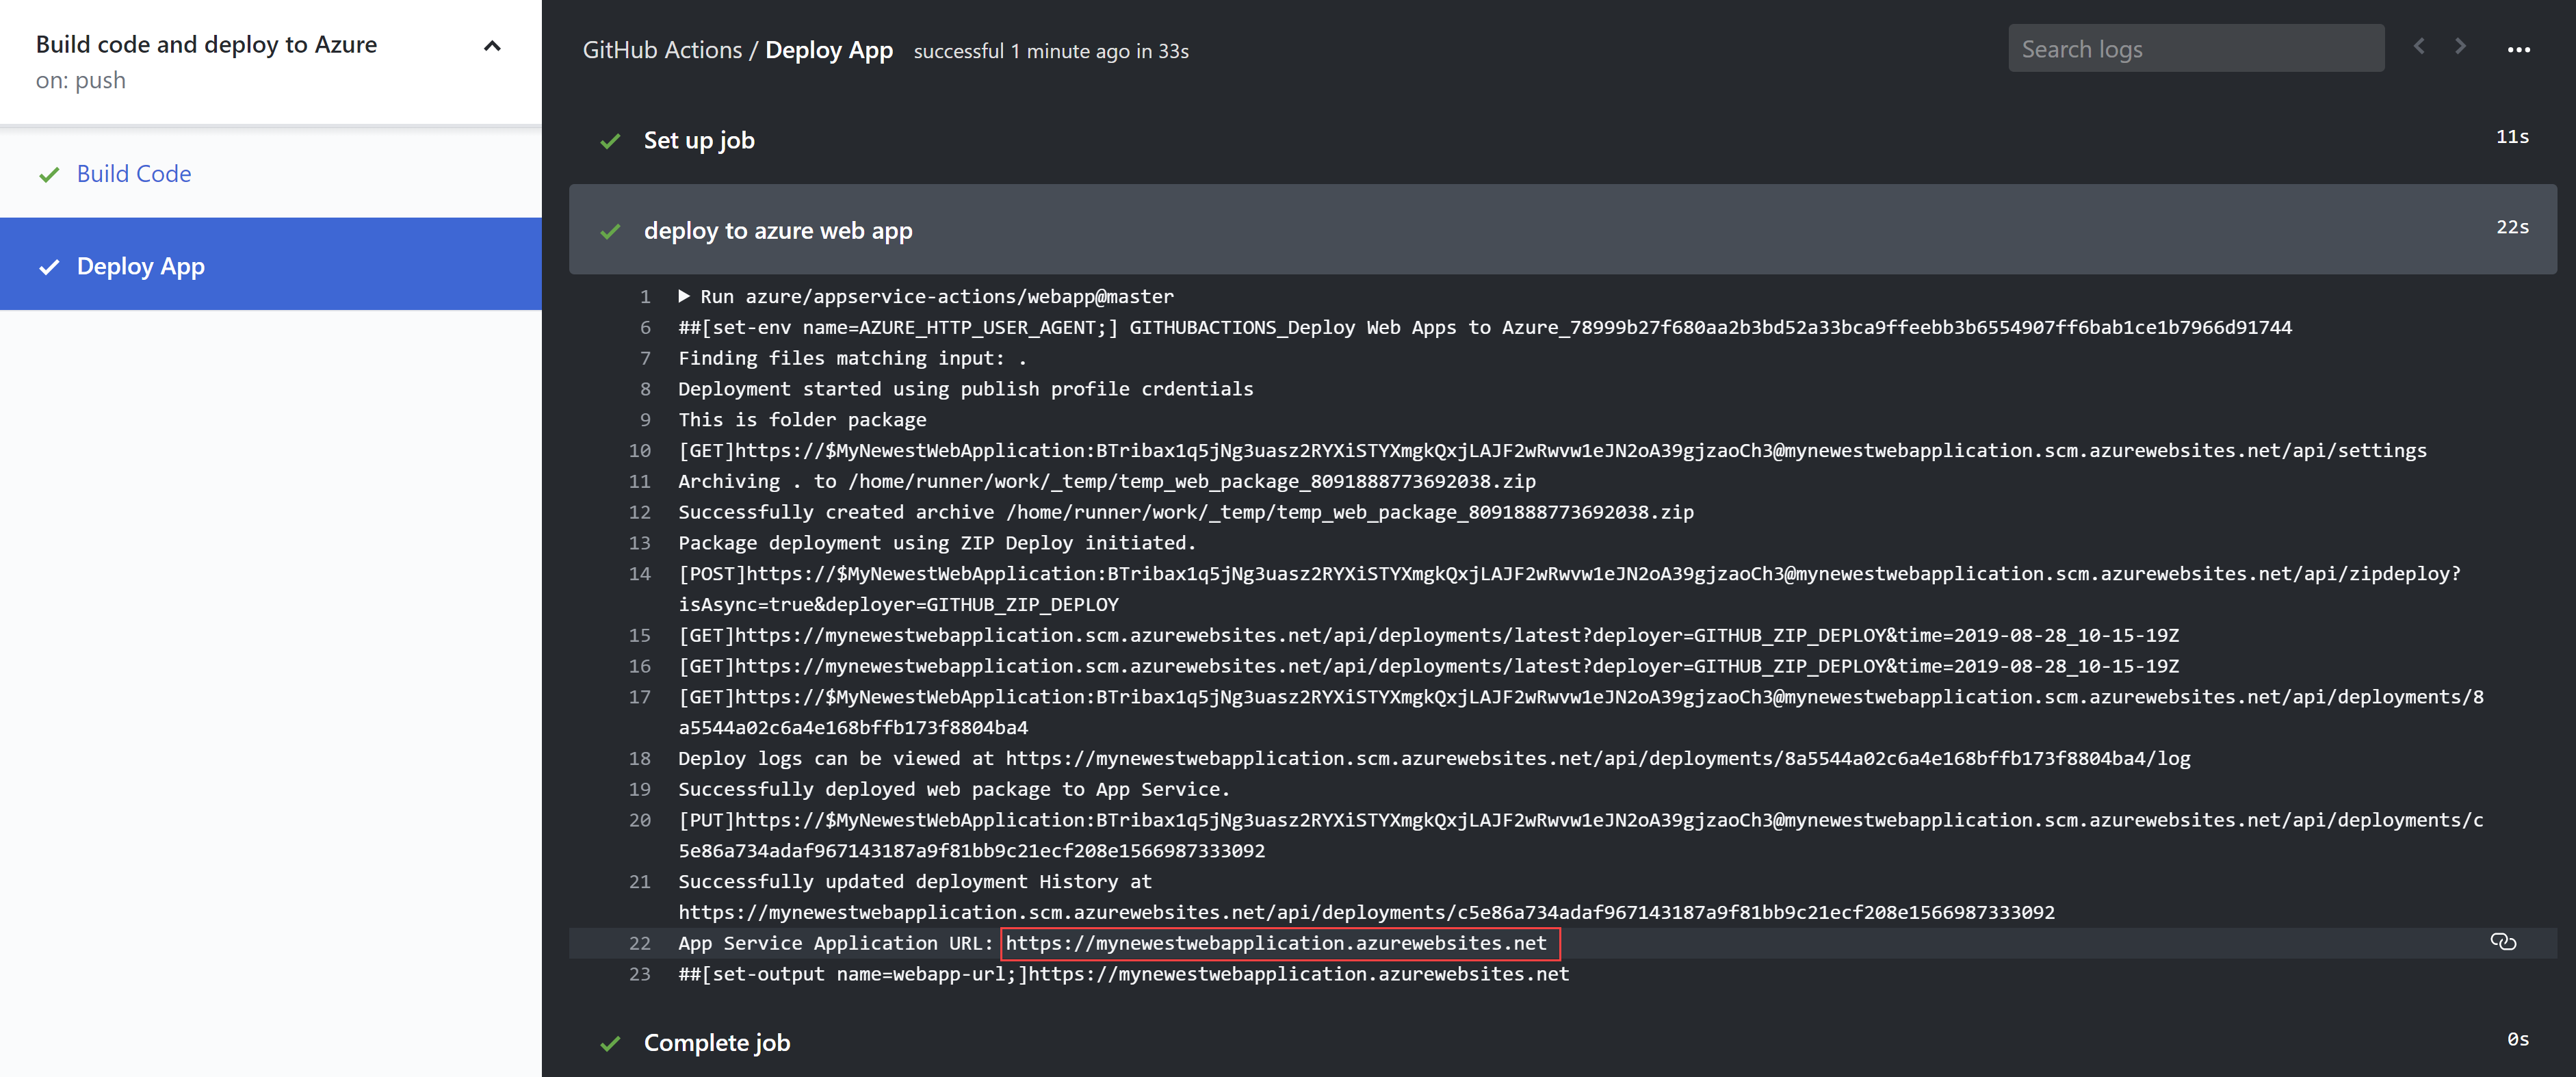
(Running workflow details in GitHub)
And when the workflow is done, you'll see the URL of the Web App that we've just deployed the app to. Navigate to that URL, and you should see the application running.
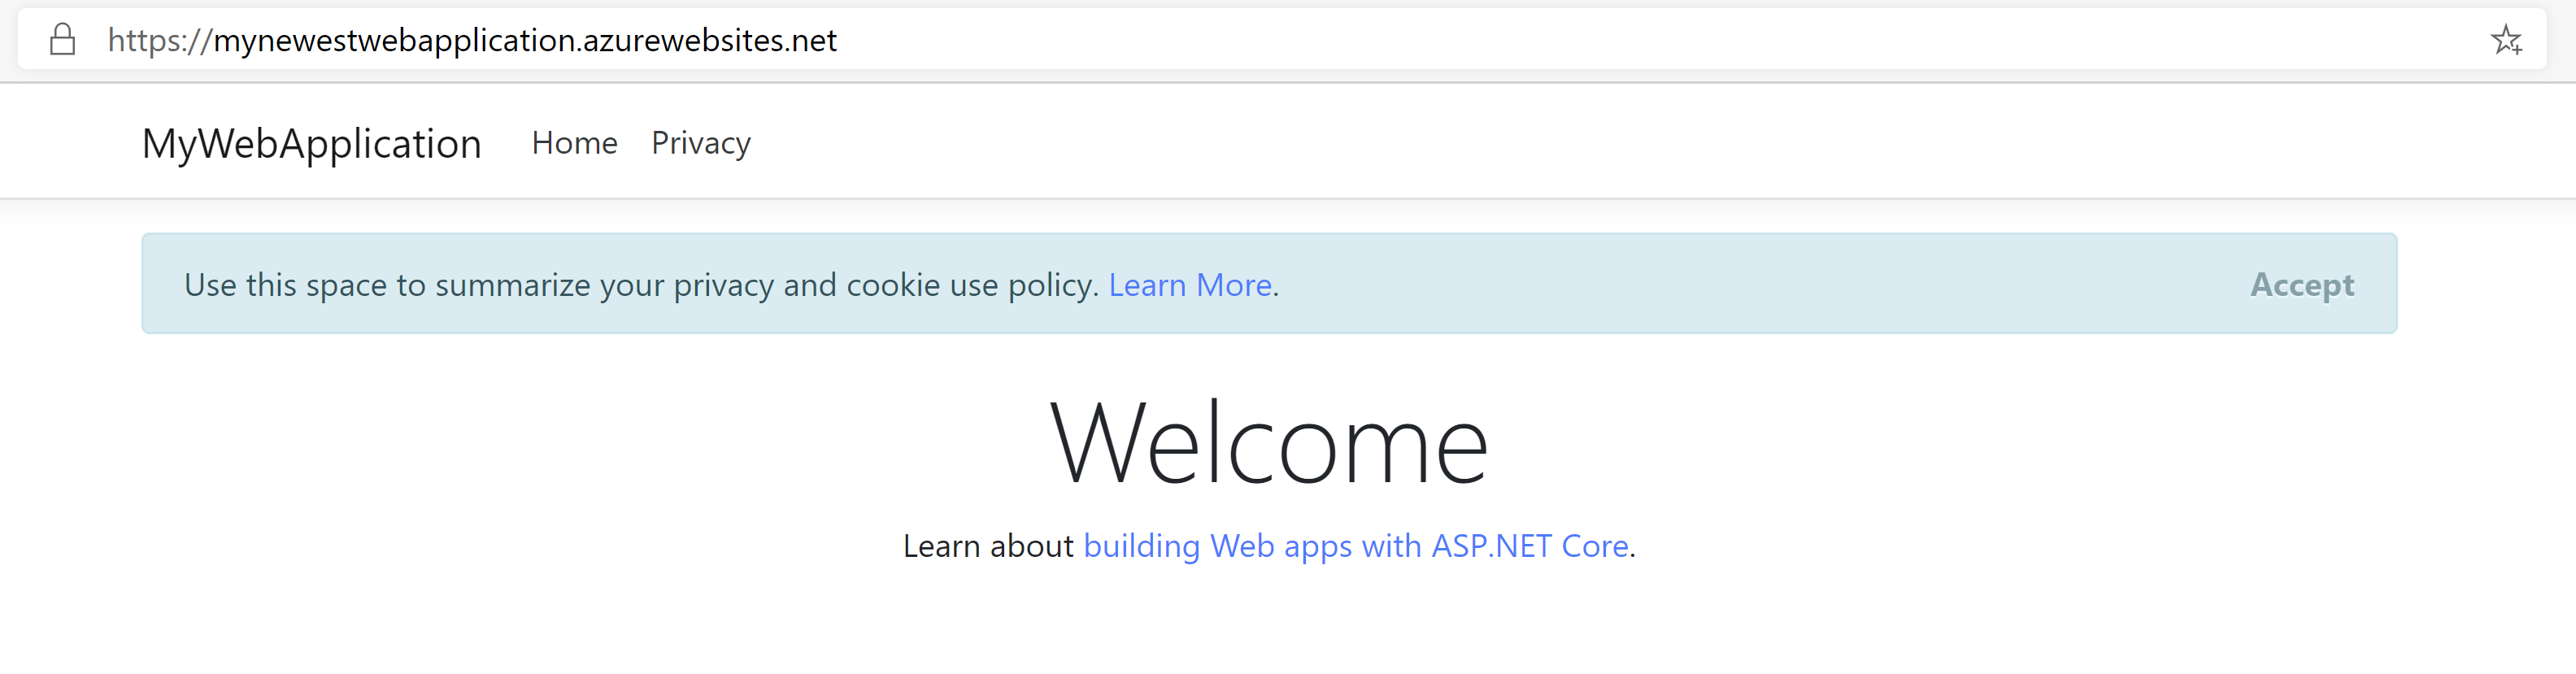
(Application running in Azure)
# Conclusion
GitHub Actions (opens new window) are a really powerful way to customize your GitHub workflow to whatever you need. This enables you to, for instance, create a continuous integration and continuous deployment pipeline that increases your application quality, without ever leaving GitHub. As we've seen, it is very easy to get started with GitHub Actions and there are a lot of predefined actions (opens new window) and templates that you can use, including actions that interact with Azure (opens new window). Go and check it out!