TIP
🔔 Follow us on Twitter (opens new window) for daily software updates
🔥 Checkout our Visual Studio Code page at code.visualstudio.com (opens new window)
💡 Learn more : Visual Studio Code Extensions (opens new window).
# Deploying a Node.js Web App using Visual Studio Code, GitHub Actions and Azure
# Overview
GitHub Actions gives you the flexibility to build an automated software development lifecycle workflow. You can write individual tasks ("Actions") and combine them to create a custom workflow. Workflows are configurable automated processes that you can set up in your repository to build, test, package, release, or deploy any project on GitHub.
With GitHub Actions you can build end-to-end continuous integration (CI) and continuous deployment (CD) capabilities directly in your repository.
# What’s covered in this lab
In this lab, you will:
- Create a web app on Azure using the App Service extension
- Create a workflow with GitHub Actions to add CI/CD to your app
# Prerequisites
Your Windows machine should have Node.js LTS and Visual Studio Code.
You are using a GitHub account and an Azure account made for the purposes of this lab. These have been already logged into from your machine and the account info is saved.
# Setting up the GitHub repo
Navigate to the example app repository (opens new window).
Click the "Fork" button in the upper-right hand corner of the repository. From there, click the green "Clone" button and copy the URL.

# Create an Azure App Service web app
Create the App Service web app that you'l deploy to from GitHub.
- Click on the Azure icon in the sidebar.

- Click on the
+icon to create a new app service under the VSCode GitHub Universe HOL subscription.

Give your webapp a unique name (we recommend calling it YOUR_NAME-jsinteractive )
Select Linux as your OS and Node.js LTS as your runtime.
It will take a minute or two to create the app. Once it's done, you'll get a prompt to browse to your new site. Click on "View output" and open the link to your site.
Note: If creation of the app is taking a bit longer than you expect, call one of the proctors and we'll switch you to an already created app
The page you browse to will be the default site you see, since you haven't yet deployed anything to the site.
# Set up CI/CD with GitHub Actions
Use GitHub actions to automate the deployment workflow for this web app.
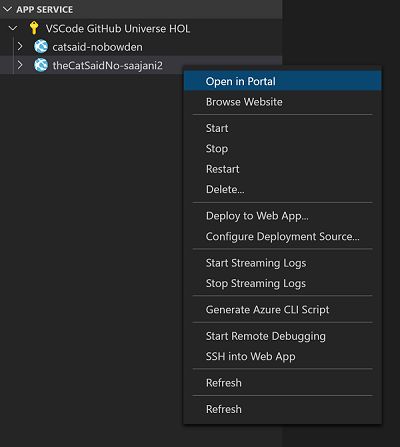
- Inside the App Service extension, right click on the name of your app service and choose "Open in Portal".
- From the Overview page, click on "Get publish profile". A publish profile is a kind of deployment credential, useful when you don't own the Azure subscription.

Open the settings file you just downloaded in VS Code and copy the contents of the file.
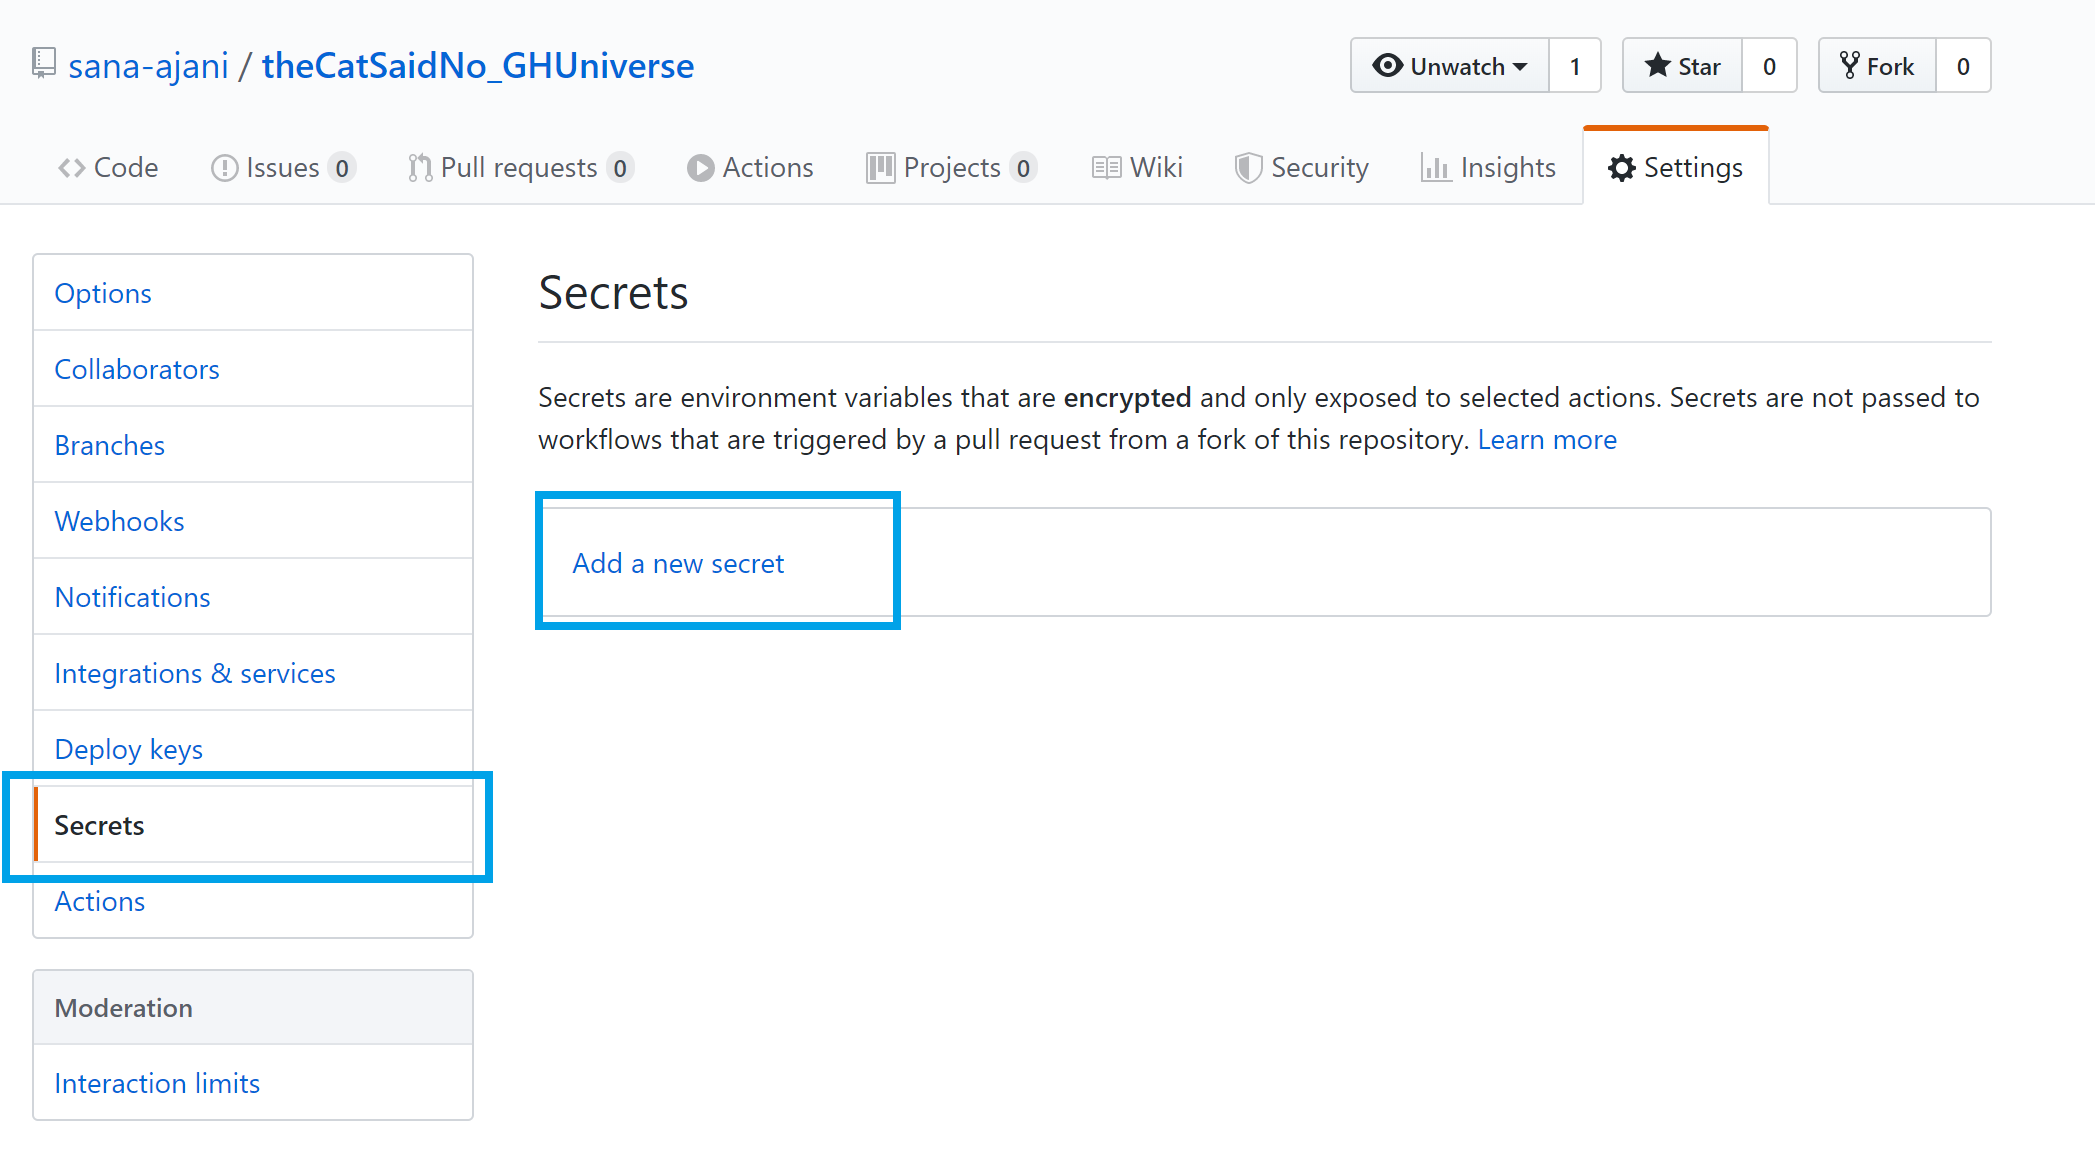
Add the publish profile as a secret associated with this repo. On the GitHub repository, click on the "Settings" tab.

- Go to "Secrets". Create a new secret and call it "AZURE_WEBAPP_PUBLISH_PROFILE". Paste the contents from the settings file.
- Navigate to the Actions tab in the repo to find the Deploy Node.js to Azure Web App template and select "Set up this workflow".

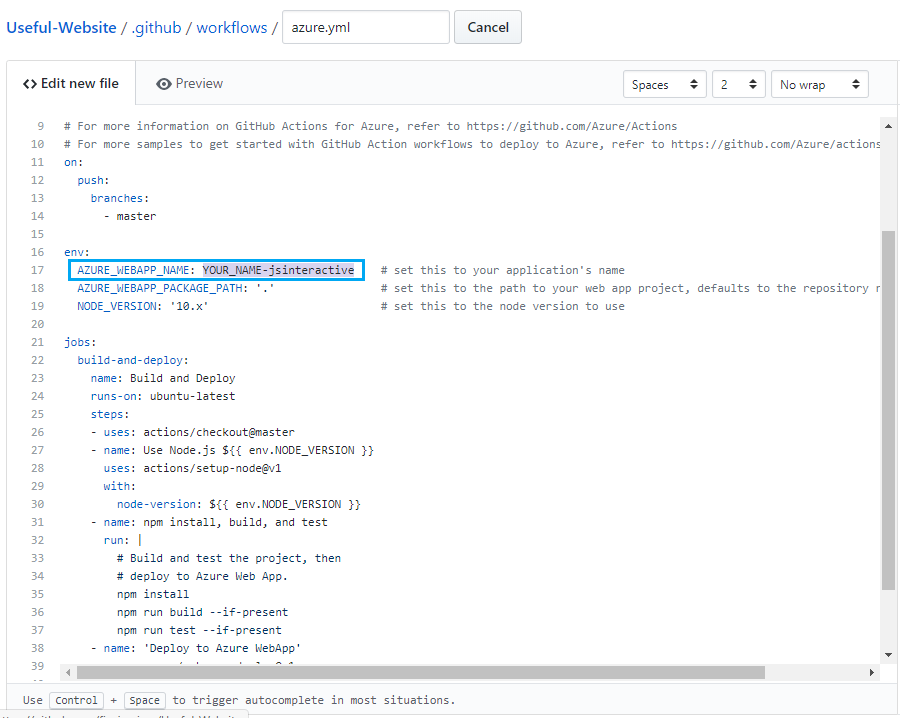
Update the
envobject, setAZURE_WEBAPP_NAMEto the name of your app.env: AZURE_WEBAPP_NAME: YOUR_NAME-jsinteractive1
2
Once you're done, click on "Start commit". Fill in the text box with a commit message, and then click the "Commit change" button, which will trigger the workflow.
While the Action is being queued, let's get into the details of what this workflow is actually doing. Go to the
.github/workflows/azure.ymlfile to follow along.- Workflow Triggers (line 11): Your workflow is set up to run on "push" events to the branch
on:
  push:
    branches:
      - master
1
2
3
4For more information, see Events that trigger workflows (opens new window).
- Running your jobs on hosted runners (line 21): GitHub Actions provides hosted runners for Linux, Windows, and macOS. We specify the hosted runner in our workflow as below.
jobs:
  build-and-deploy:
    name: Build and Deploy
    runs-on: ubuntu-latest
1
2
3
4- Using an action (line 26): Actions are reusable units of code that can be built and distributed by anyone on GitHub. To use an action, you must specify the repository that contains the action. We are also specifying the version of Node.js.
- uses: actions/checkout@master
    - name: Use Node.js ${{ env.NODE_VERSION }}
      uses: actions/setup-node@v1
      with:
        node-version: ${{ env.NODE_VERSION }}
1
2
3
4
5- Running a command (line 31): You can run commands on the job's virtual machine. This action is running the npm commands below to install the dependencies, build the application, and run the tests.
- name: npm install, build, and test
  run: |
  # Build and test the project, then
  # deploy to Azure Web App.
  npm install
  npm run build --if-present
  npm run test --if-present
1
2
3
4
5
6
7For workflow syntax for GitHub Actions see here (opens new window)
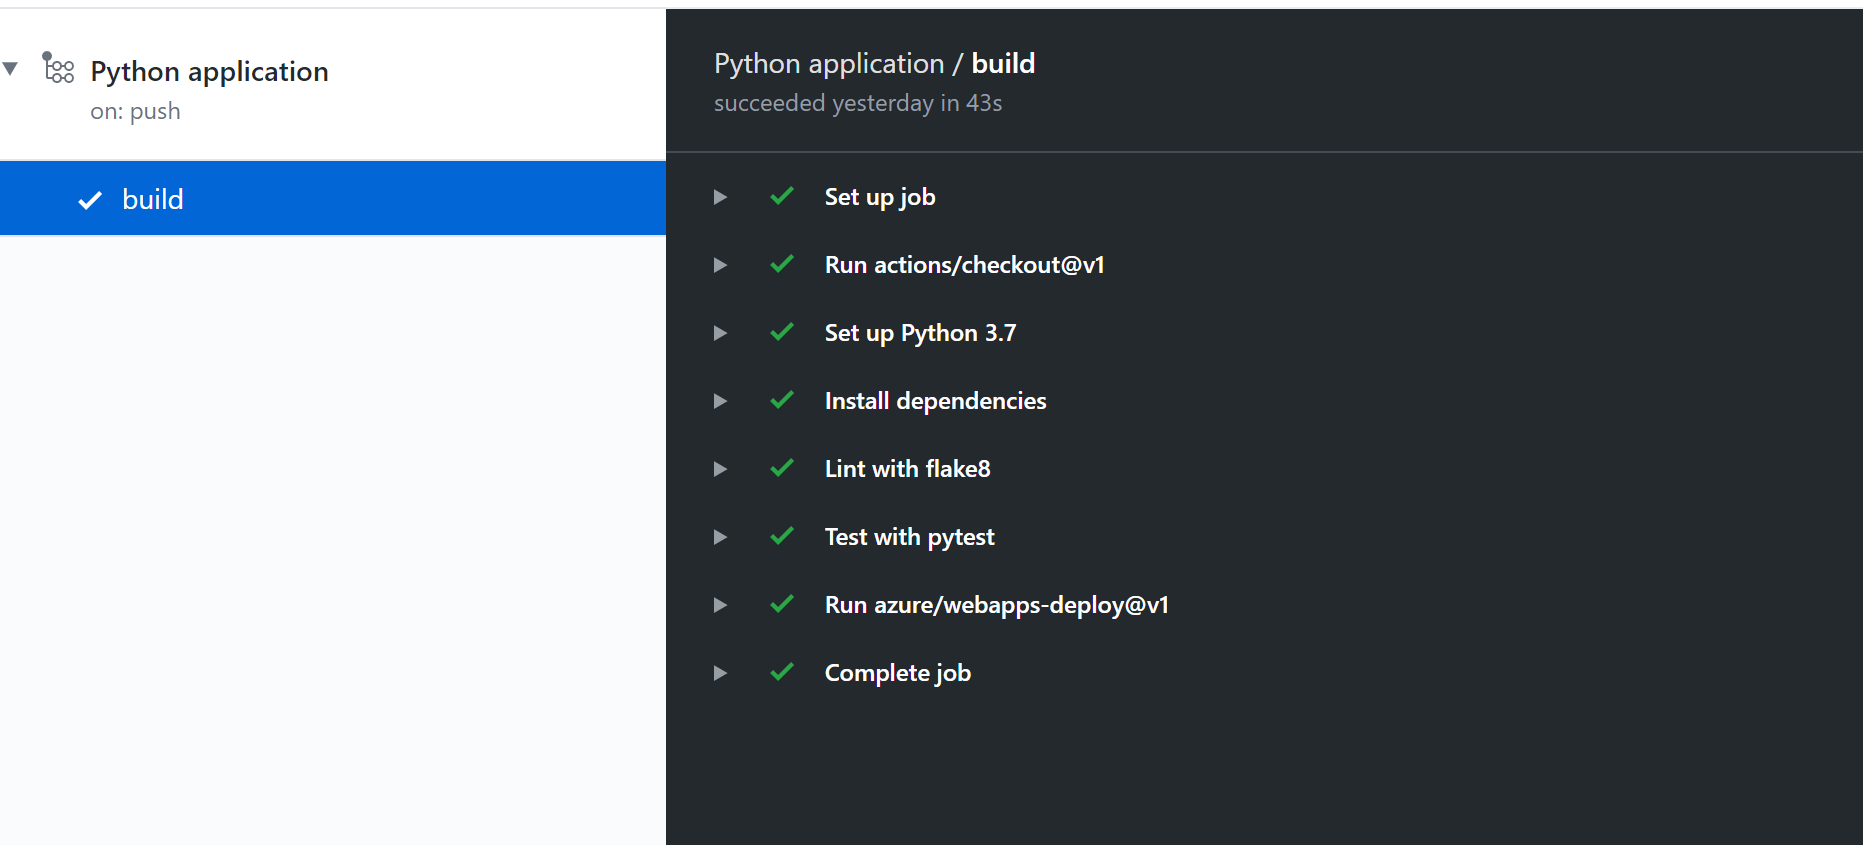
You can go back to the Actions tab, click on your workflow, and see that the workflow is queued or being deployed. Wait for the job to complete successfully before going back to your website.
# Test out your app!
Back in VS Code, go to the App Service extension, and right click on your app service and click on "Browse Website" to see your site running.
Switch back to GitHub to test the GitHub Actions workflow you just made. Edit
views/index.hbsusing the GitHub editor and add the following lines of code on line 11<div> <h1 style="text-align:center;"> Press the button!<h1> </div>1
2
3

- Go back to the Actions tab and you can watch the build finishing up. Once you see all the green check marks, go to Edge and reload your website!
# Live streaming software development
On a side note - If you like Azure Tips and Tricks, then you might enjoy another project that I'm working on for live streaming. Check out my channel below and hit the follow button to know when I'm live.
Watch live video from mbcrump on www.twitch.tv