
TIP
🔥 Help shape the future of Azure Tips and Tricks by telling what you'd like for us to write about here (opens new window).
💡 Learn more : GitHub Actions documentation (opens new window).
📺 Watch the video : How to use GitHub Actions from Azure App Service (opens new window).
# How to use GitHub Actions from Azure App Service
# Automated deployments create better software
When you need to manually build and deploy your app, each time that you make a change, you will make mistakes, which result in bugs and downtime for users. Automating your build and deployment processes makes them less error-prone and allows you to deploy as often as you want. GitHub Actions (opens new window) can help to automate your builds and deployments and integrates with Azure App Service (opens new window).
In this post, we'll automatically build and deploy code to an Azure App Service using GitHub Actions.
# Prerequisites
If you want to follow along, you'll need the following:
- An Azure subscription (If you don't have an Azure subscription, create a free account (opens new window) before you begin)
- An Azure App Service Web App. You can create one using this tutorial (opens new window)
- A GitHub account (opens new window) with a repository in it that contains code that can run on Azure App Service (like an ASP.NET Core website)
# Create a GitHub Action from an Azure App Service
We already have an Azure App Service Web App, and a GitHub repository that contains an ASP.NET Core application. Let's use GitHub Actions to deploy the code from the repository to the Web App.
- Go to the Azure portal (opens new window)
- Navigate to the Azure App Service Web App
- Select the Deployment Center menu
- In the deployment center, select GitHub as the source control location
- If you haven't used your GitHub account with your Azure account before, you need to click the Authorize button to authorize Azure to access GitHub
- Select Continue to go to the next step
- In the Build providers step, select GitHub Actions
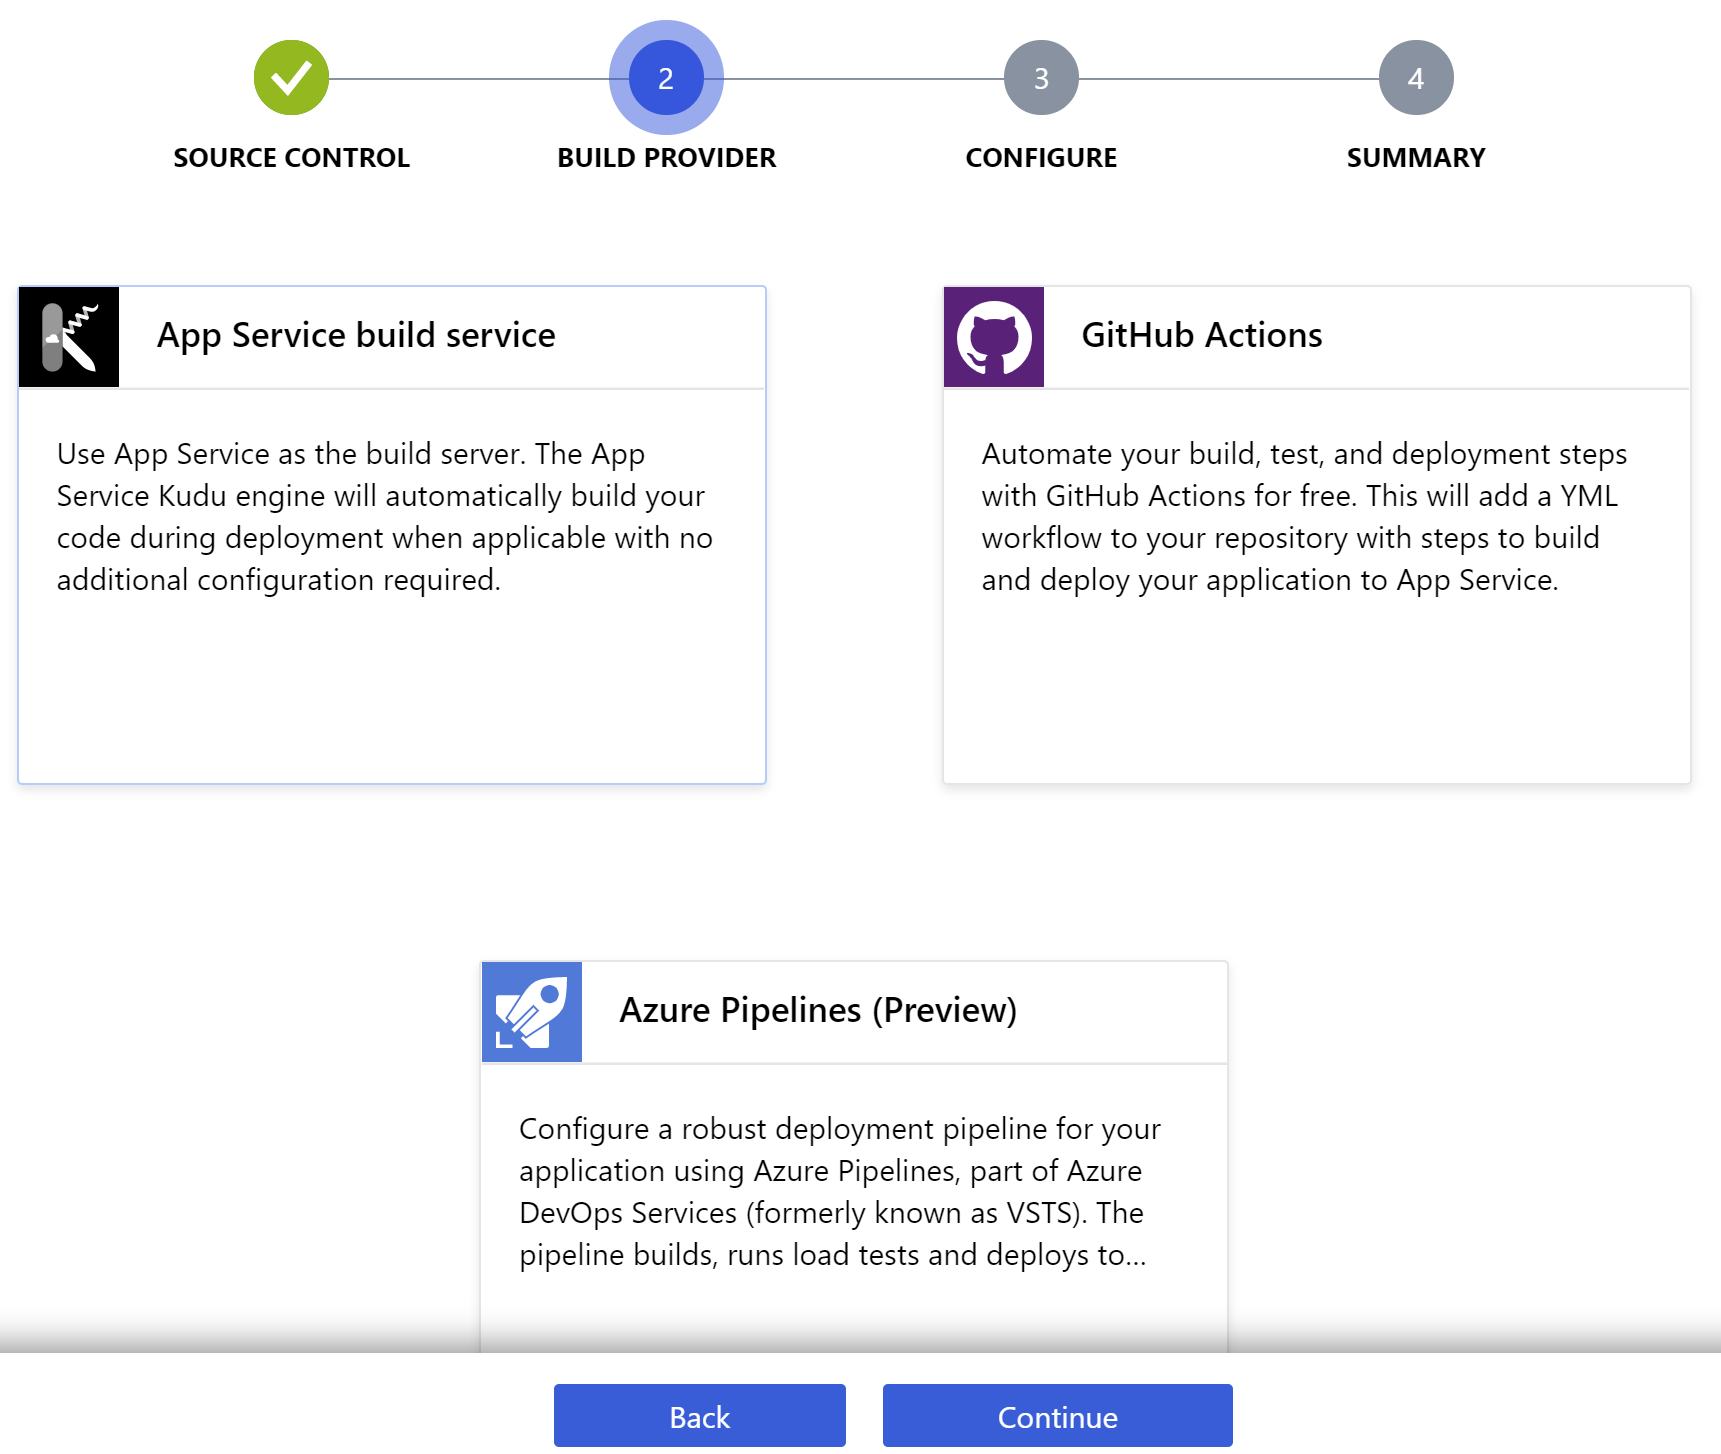
(Select GitHub Actions in the Deployment Center)
- Select Continue
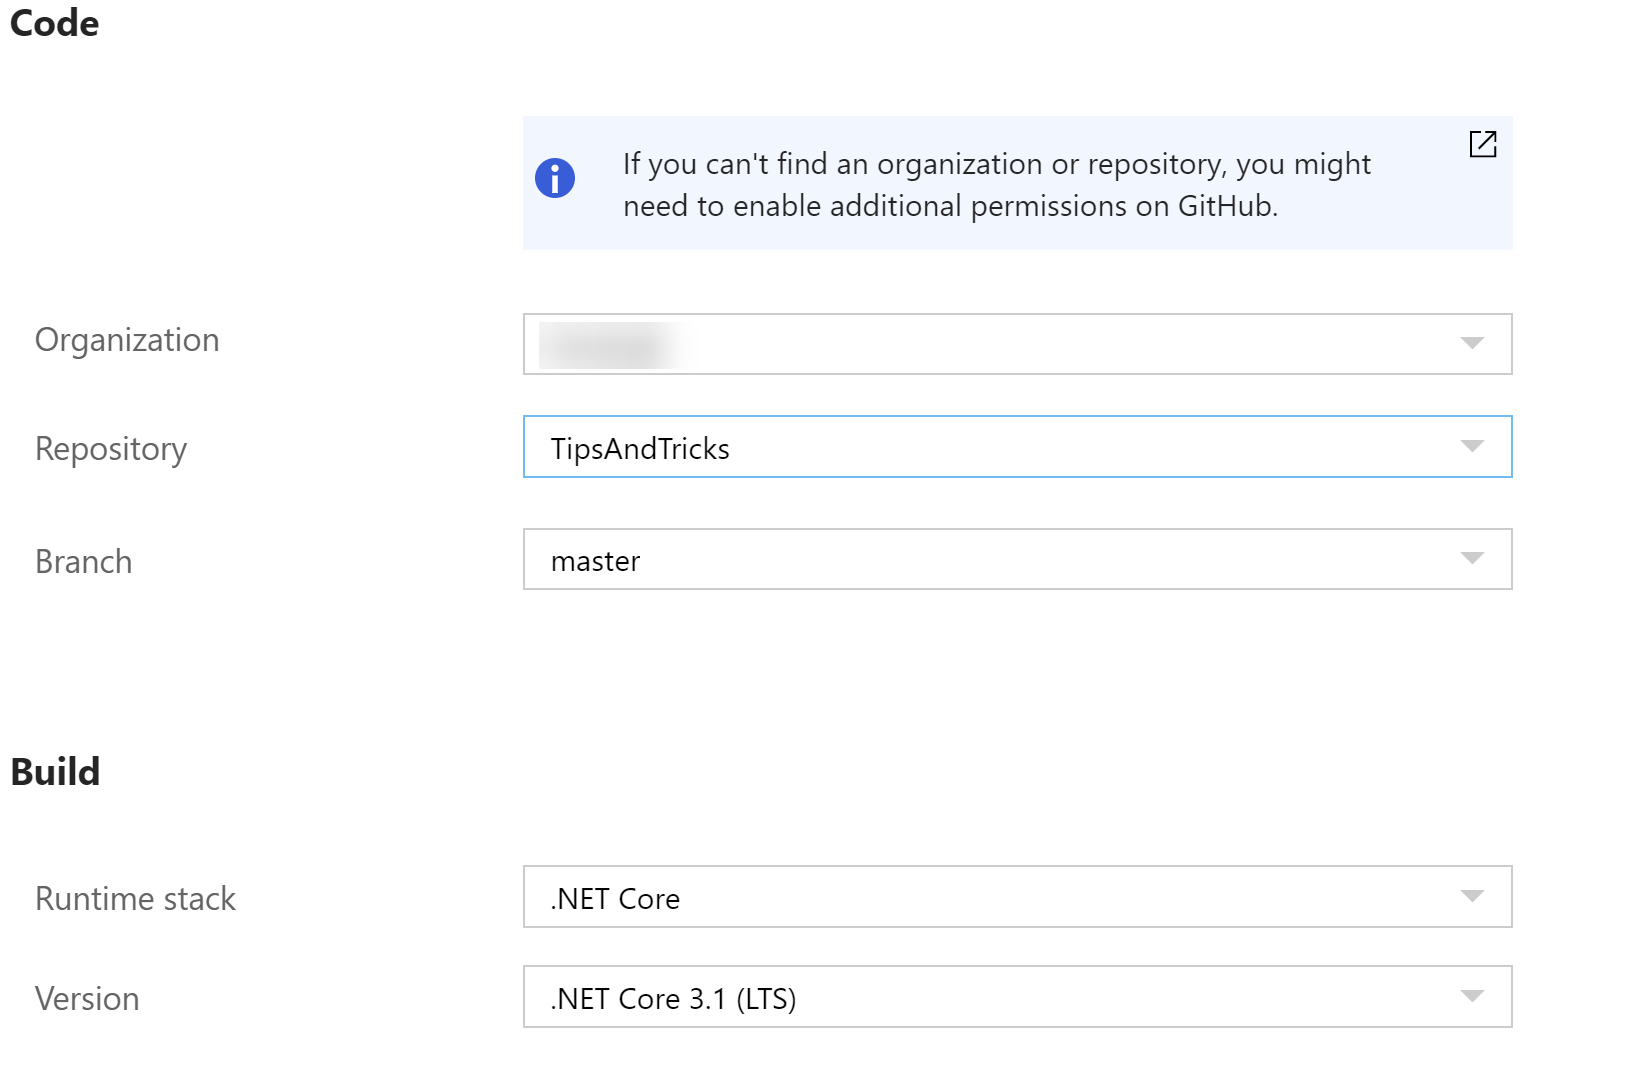
- In the Configure step:
- Select the Repository that you want to use
- Select the code Branch to build and deploy from
- Select the Runtime stack. In our case, this is .NET Core with the latest version
(Configure GitHub access in the Deployment Center)
- Select Continue to proceed
- You'll now see the GitHub Action workflow configuration file that describes the GitHub action. Select Finish to finalize the workflow
We have now successfully created a GitHub Action for the Azure Web App. After a few minutes, the workflow will be finished and the code from the repository should be deployed to the Web App. You should be able to see the deployed code run in the Web App when you click on the Browse button from the Deployment Center.

(Application running in Azure App Service Web App)
And from the Deployment Center, you can click on the GitHub Action link to go to the action in GitHub. Here, you can see all the GitHub Action workflows that are configured and their builds and deployments and drill down into the logs of already executed, or in-progress workflows.
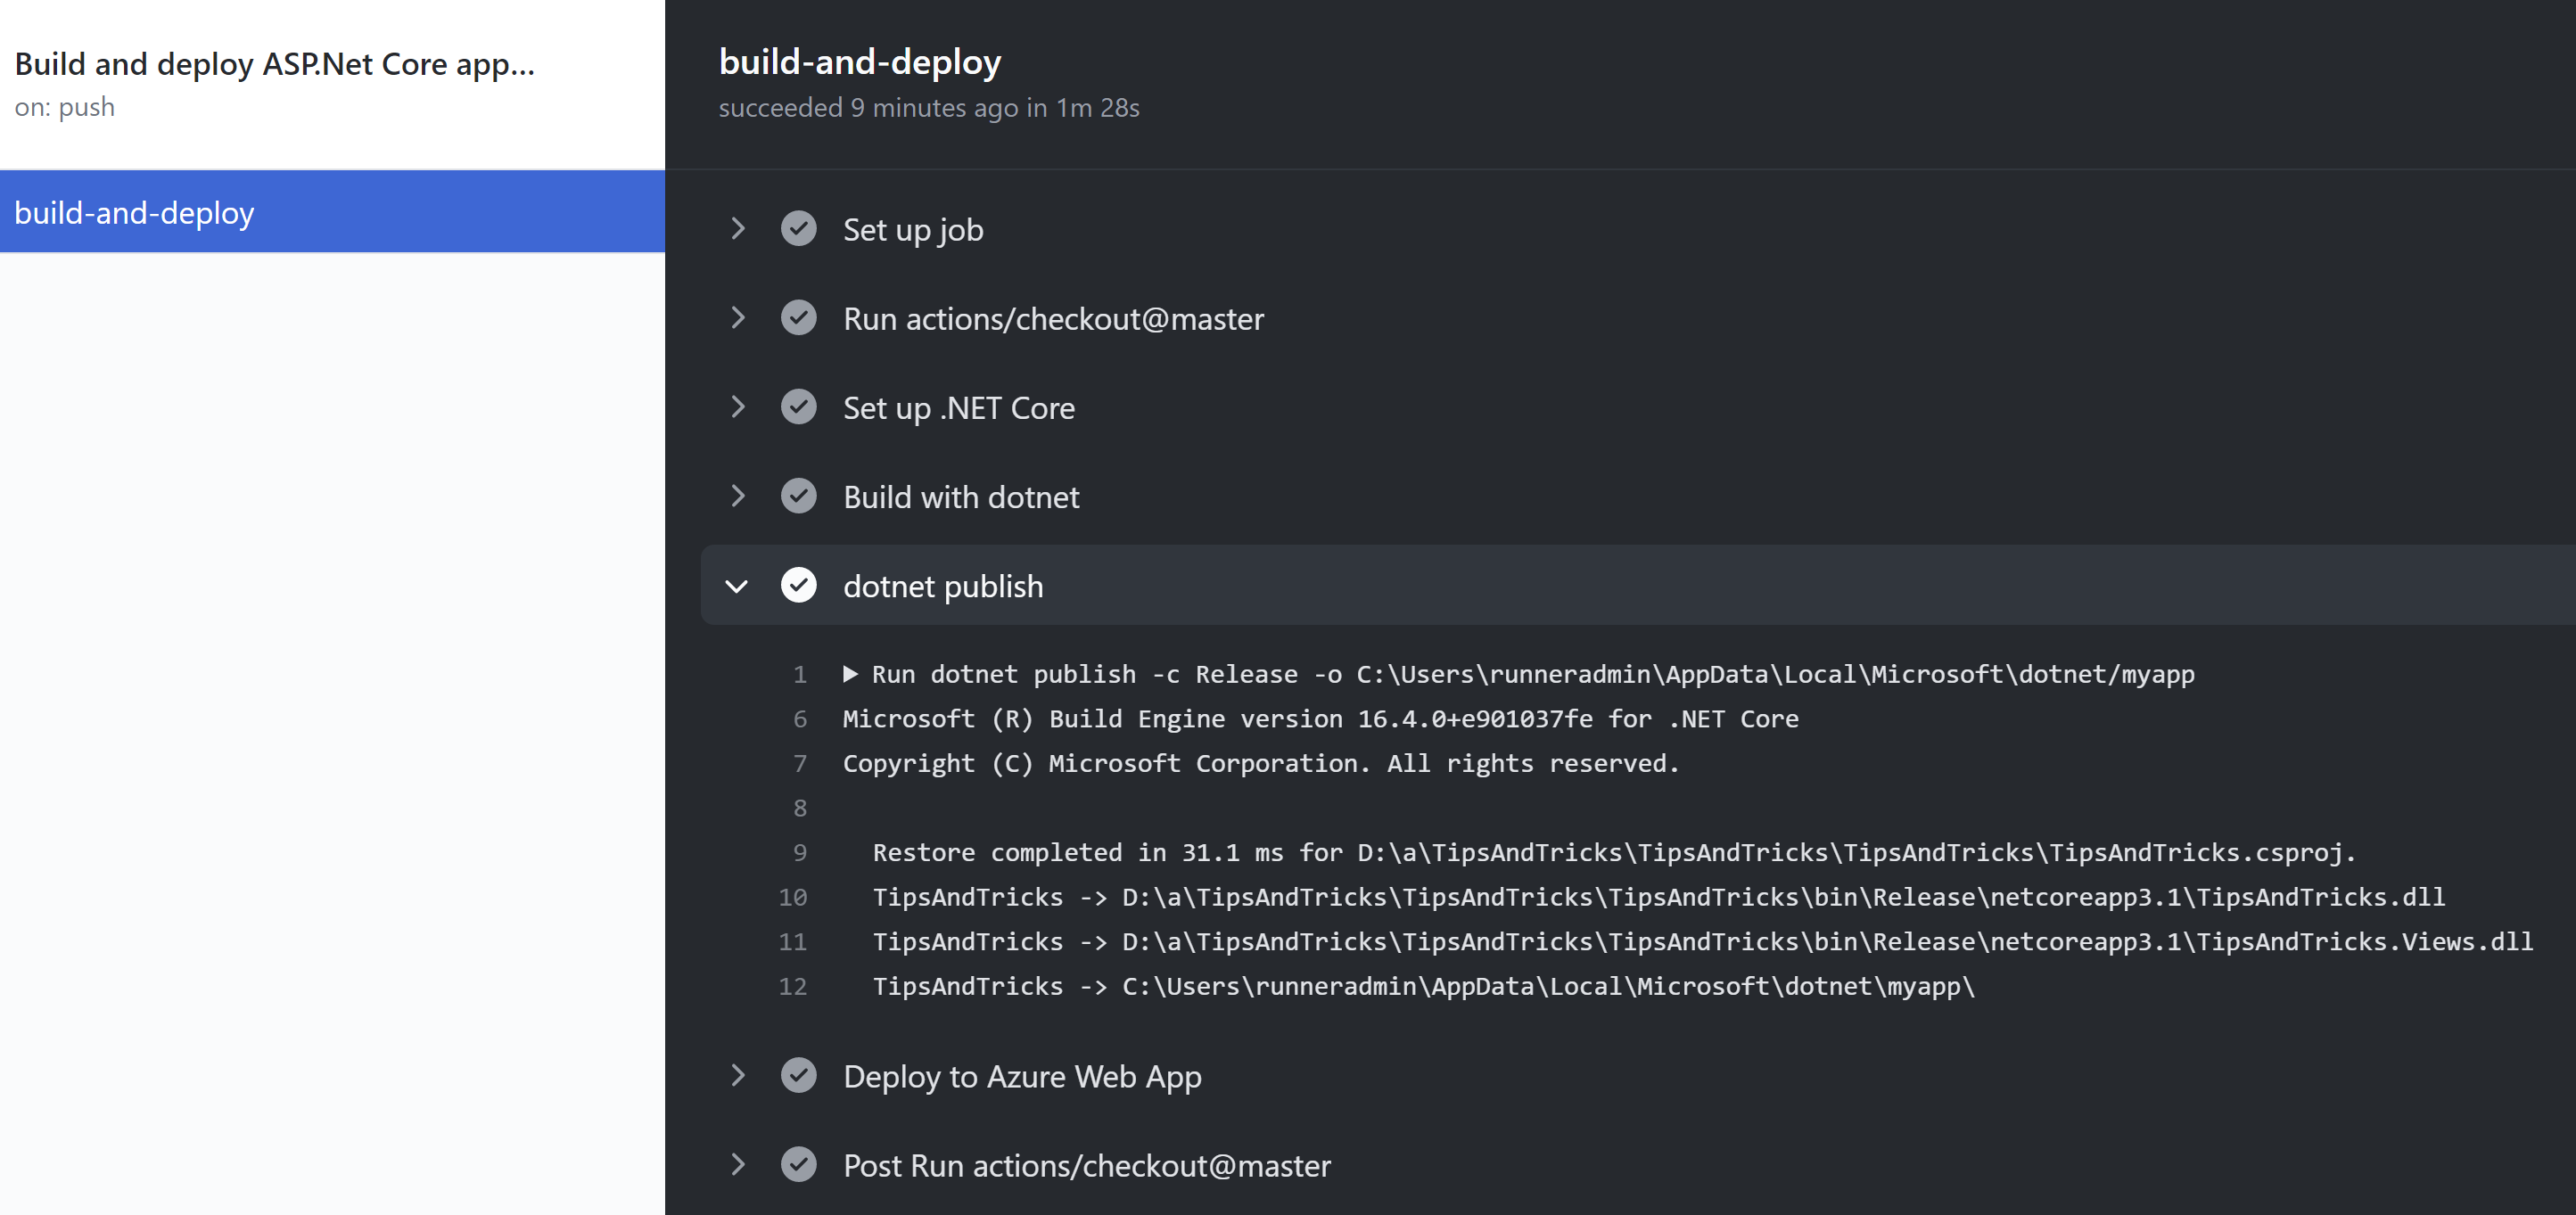
(Details of a GitHub Action workflow)
# Conclusion
Automating your build and deployment processes improves the quality of your software. GitHub Actions (opens new window) allow you to easily automate your builds and deployments and integrate with Azure App Service (opens new window). Go and check it out!