Adding a Marketplace Item to Azure Stack
Once your Ubuntu base image is in the platform image repository within your Azure Stack, you can deploy ARM templates that reference those images without any further prep work…however having choices in your marketplace is pretty cool, and it’s not that difficult. Especially seeing as I’ve packaged marketplace items for you to save you a job :-)
If you’ve stumbled upon this page and you’re not quite sure what a Marketplace item is, it’s one of these:
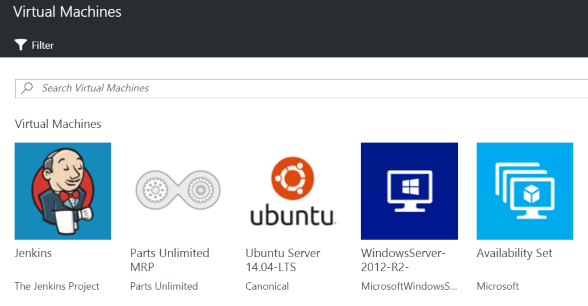
As you can see, I’ve created entries for the Ubuntu base image, along with images specific to Jenkins, and the Parts Unlimited MRP application. Creating a marketplace item requires a number of steps, which involve the following:
- Creation of a manifest.json file, which is a bit like a metadata document
- Creation of a resources.resjson file, which contains useful description information
- Creation of an ARM Template which actually configures the deployment from your image
- Creation of a UI Definition file, which determines the blades used during the portal deployment
Once you have those 3 items defined, you’re at a point where you can used the Azure Gallery Packager tool to package all of those respective files into a .azpkg file, that is then uploaded into your Azure Stack.
Download an Example Package for the Base Ubuntu Image
As mentioned earlier, it’s much easier if you start from an existing set of resources, and customize from there, so to help you understand the relationship between the core package files discussed above, you can download a set of files I’ve provided, already packaged as a .azpkg file. Download it onto your Azure Stack Development Kit host.
- Once downloaded, navigate to the folder containing your newly downloaded image, and create a copy of the file.
- Right click the new copy, and rename to .zip
- Unzip the files
What you’ll see inside are a number of files and folders.
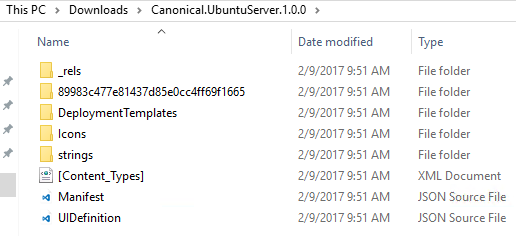
Some of these can be ignored, as they are created during the packaging process, such as the _rels folder, a GUID folder and a Content_Types XML document. Ignore all of these, and focus on the key files we’ll talk about now.
At the root of this folder are 2 files. The manifest.json file provides key information about the marketplace item, such as the name, publisher, summary, description and much more. By no means is my manifest file a complete manifest file – more can be done within the manifest file, but for our needs, what we have here is plenty. You’ll see it also makes links to artifacts such as the actual ARM template (in this case, DeploymentTemplates\UbuntuServer1404.json), and icons (all stored within the Icons folder), categories, which determines where in the Azure Stack Portal UI, this marketplace item appears, and a UIDefinition.json reference, which, at a high level, determines the blade wizard experience that a user would have when selecting this marketplace item. Within the strings folder, there’s also a resources.resjson file that links closely with the manifest. You use this file to provide more detailed information about the marketplace item, such as a detailed description, long and short summaries etc. Take a look and see where the links between the two files are.
Feel free to explore the files within the folder structure, and if you wish to customize. Be careful though – changing certain parameters and variables may result in your ARM template not utilizing the UbuntuServer image we uploaded earlier, so be careful.
A good way to look through all the files quickly, is to download and install the excellent Visual Studio Code. Once downloaded and installed, open the containing folder (be sure to keep the existing naming convention of the folder) and you’ll see all the files within the folder, and can quickly navigate between them.
If you want a quick way to download and install Visual Studio Code on your host, here’s a useful PowerShell script, to be run within an administrator PowerShell console:
Invoke-Webrequest https://go.microsoft.com/fwlink/?LinkID=623230 -OutFile C:\VSCode.exe
Start-Process -FilePath C:\VSCode.exe -ArgumentList '/VerySilent /mergetasks="addcontextmenufiles,addcontextmenufolders,associatewithfiles,addtopath,!runcode"'
Start-Sleep -S 240
Restart-Computer -Force -Confirm:$false
Ben Gelens has a great write up on his blog on adding marketplace items, and in addition, there is some very useful information on marketplace items on the official Azure Stack documentation site, especially the explanation of the key manifest.json components that are very useful to understand.
The key question is, how do you take those files and folders, and get them into Azure Stack?
Uploading a Package to Azure Stack
Normally, once you’ve finished creating your respective files within your package folder, you would download and install the Azure Gallery Packager Tool and follow the guidance here.
To save you time however, we’ll just use the package we orginally downloaded earlier.
- Navigate to your Canonical.UbuntuServer.1.0.0.azpkg file, you downloaded earlier
-
Move it to a newly created folder C:\MyMarketplaceItems.
It’s important to note that if you are going to use the package I have provided, you need to have used the following info when you uploaded your Ubuntu VHD image to the platform image repository earlier. Any differences, and the package I’m providing will not reference your uploaded image. If you used an exact copy of my PowerShell upload script, you’re all set.
- Publisher “Canonical”
- Offer “UbuntuServer”
- SKU “16.04.3-LTS”
Now that we have the package ready to upload, we need somewhere in Azure Stack to upload it to. For that, we’ll create a storage account that will be used to hold this package, and any others we upload in the future.
- Connect to your Azure Stack via an administrative PowerShell console. If you’re not still connected from the earlier steps, run the following:
  cd\
  cd C:\AzureStack-Tools-master\connect
  Import-Module .\AzureStack.Connect.psm1
  Add-AzureStackAzureRmEnvironment -Name "AzureStackAdmin" -ArmEndpoint "https://adminmanagement.local.azurestack.external"
  $TenantID = Get-DirectoryTenantID -AADTenantName "<myaadtenant>.onmicrosoft.com or customdomain.com" -EnvironmentName AzureStackAdmin
  $UserName='<username@myaadtenant.onmicrosoft.com or username@customdomain.com>'
  $Password='<administrator or user password>'| `
  ConvertTo-SecureString -Force -AsPlainText
  $Credential= New-Object PSCredential($UserName,$Password)
  Login-AzureRmAccount -EnvironmentName "AzureStackAdmin" -TenantId $TenantID -Credential $Credential
- Now, let’s create the storage account to hold these packages. We’ll call this tenantartifacts and store it in a dedicated resource group of the same name:
  $RG = New-AzureRmResourceGroup -Name tenantartifacts -Location local
  $StorageAccount = $RG | New-AzureRmStorageAccount -Name tenantartifacts -Type Standard_LRS
- With the resource group, and storage account created, we can now push our marketplace package into Azure Stack, by first creating a new Azure Storage Container within the storage account, and then uploading:
$GalleryContainer = New-AzureStorageContainer -Name gallery -Permission Blob -Context $StorageAccount.Context
$GalleryContainer | Set-AzureStorageBlobContent -File "C:\MyMarketplaceItems\Canonical.UbuntuServer.1.0.0.azpkg"
$GalleryItemURI = (Get-AzureStorageBlob -Context $StorageAccount.Context -Blob 'Canonical.UbuntuServer.1.0.0.azpkg' -Container 'gallery').ICloudBlob.uri.AbsoluteUri
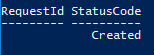
Add-AzureRMGalleryItem -GalleryItemUri $GalleryItemURI -Verbose
When successful, you should see a StatusCode of Created
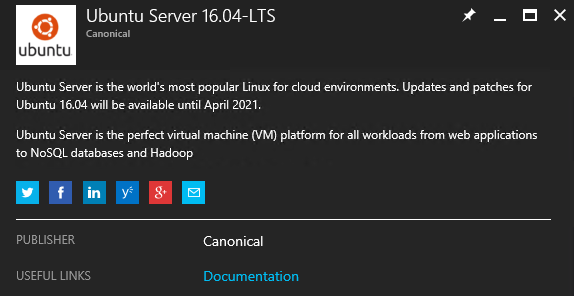
Go back and refresh the portal, and under New -> Virtual Machines -> See All, you should see your newly added Ubuntu marketplace item
Test Deployment of your Ubuntu Base Image
You’ve successfully added a new marketplace item, but it’s important to check that it works as expected. To do so, we’ll walk through a UI deployment:
- From the Azure Stack Admin Portal Dashboard, click on New, then Virtual Machines, then Ubuntu Server 16.04-LTS
- Enter the basic details required - username, password and a resource group name.
- Optionally, select Pin to Dashboard, then click Create.
- The process should take around ~20 minutes, depending on your hardware.
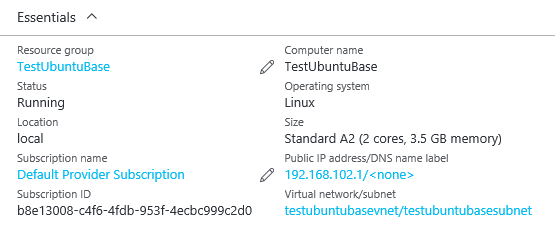
- Once completed, from the Azure Stack Portal, click Virtual Machines on the left hand side.
- Click on your newly deployed Ubuntu VM, then click on Overview
- You should see your Public IP defined as a property in the Overview blade - make a note of this Public IP
Once successfully deployed, you can log into your Ubuntu base image via Putty. If you haven’t installed Putty, here’s a PowerShell script you can run to quickly grab it. Run the following from an administrative PowerShell console.
Invoke-Webrequest https://the.earth.li/~sgtatham/putty/latest/x86/putty.exe -OutFile C:\putty.exe
Start-Process -FilePath C:\putty.exe
When Putty opens, you’ll need the Public IP address of the Ubuntu VM you deployed earlier. Once you have it, enter it into the appropriate window in Putty, and click Open. Note - Port 22 is open on this VM, as our ARM template that deployed the image opened it automatically.
Next Step
Once successfully connected to your Ubuntu VM, you’re now ready to move on to get started with Parts Unlimited MRP and exploring the DevOps scenarios.