
TIP
🦄 Follow me on Twitter for daily software updates and a chance to get FREE Azure sticker set shipped anywhere!
🔥 Make sure you star the repo (opens new window) to keep up to date with new tips and tricks.
💡 Learn more : PowerShell in Azure Data Studio (opens new window).
# How to use PowerShell in Azure Data Studio
# Azure Data Studio
Managing data in Azure is a very frequent task for most Azure developers. Azure Data Studio (opens new window) is a great, free, cross-platform tool to do just that. Azure Data Studio offers a modern editor experience for managing data across multiple sources with fast intellisense, code snippets, source control integration, and an integrated terminal.
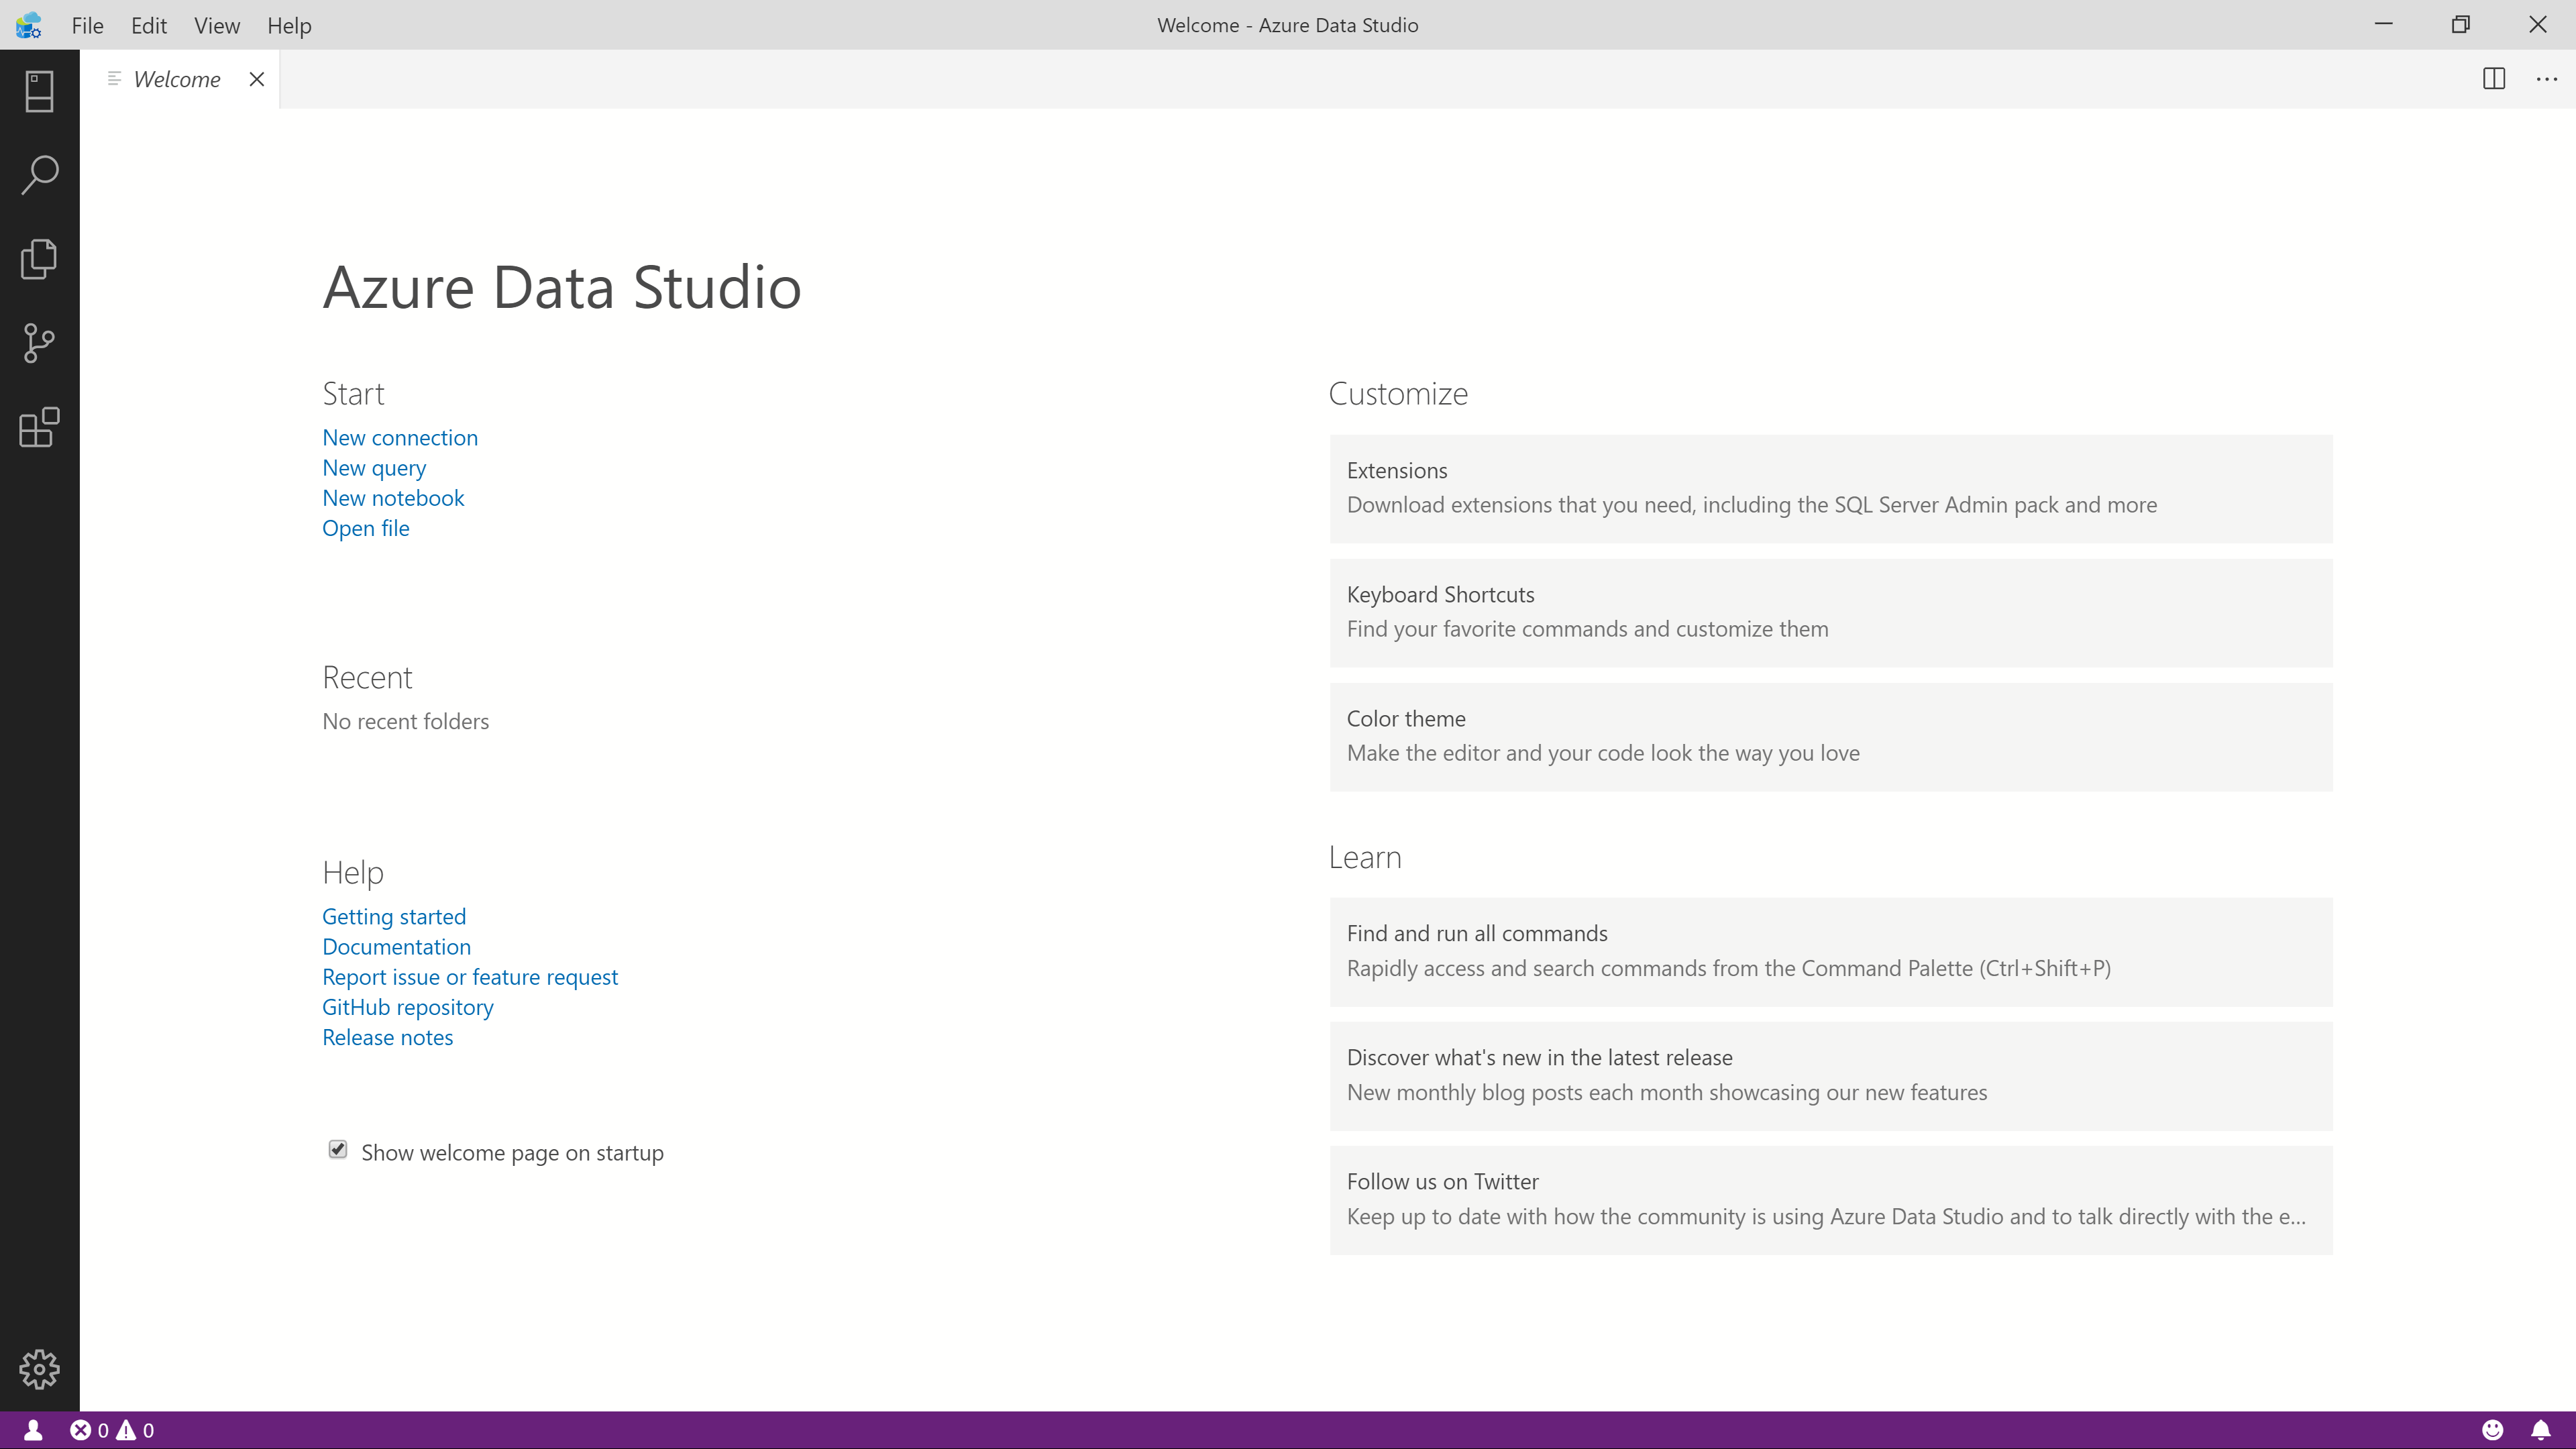
(Azure Data Studio)
And now, you can use PowerShell in Azure Data Studio (opens new window). This means that you can reuse your PowerShell skills and that you can execute your favorite scripts.
In this post, we'll explore how to get started with using PowerShell in Azure Data Studio.
# Prerequisites
If you want to follow along, you'll need the following:
- An Azure subscription (If you don't have an Azure subscription, create a free account (opens new window) before you begin)
- Azure Data Studio. You can download a free copy here (opens new window)
- Make sure that you have the latest version of PowerShell Core installed on your machine. You can download it here (opens new window)
# Use PowerShell with Azure Data Studio
To get started with PowerShell in Azure Data Studio, we need to install the PowerShell extension.
- Open Azure Data Studio as an administrator and click on the extensions menu
- In "extensions", search for PowerShell
- Click on the PowerShell extension result
- Click on install to install the extension

(Install the PowerShell extension in Azure Data Studio)
Now that we have the PowerShell extension installed, let's use it. We'll create a new file that will create an Azure SQL Server and Database.
- In Azure Data Studio, open the terminal (View > Terminal)

(Terminal in Azure Data Studio)
- We are going to run some PowerShell commands to interact with Azure. Before we can do that, we need to make sure that we have the Azure PowerShell modules installed. Run the following commands in the terminal:
Install-Module Az
Import-Module Az
2
- Next, create a new PowerShell file and open it in the editor. You can do that by running the following command in the terminal:
New-EditorFile CreateNewSQL.ps1
- Paste the script below into the newly created .ps1 file. This script logs into Azure, creates a resource group and creates an Azure SQL Server and a database in it.
# login to Azure
Connect-AzAccount

# Set the resource group name and location for your server
$resourceGroupName = "myResourceGroup-$(Get-Random)"
$location = "westeurope"
# Set an admin login and password for your server
$adminSqlLogin = "SqlAdmin"
$password = "ChangeYourAdminPassword1"
# Set server name - the logical server name has to be unique in the system
$serverName = "server-$(Get-Random)"
# The sample database name
$databaseName = "mySampleDatabase"
# The ip address range that you want to allow to access your server
$startIp = "0.0.0.0"
$endIp = "255.255.255.255"

# Create a resource group
$resourceGroup = New-AzResourceGroup -Name $resourceGroupName -Location $location

# Create a server with a system wide unique server name
$server = New-AzSqlServer -ResourceGroupName $resourceGroupName `
    -ServerName $serverName `
    -Location $location `
    -SqlAdministratorCredentials $(New-Object -TypeName System.Management.Automation.PSCredential -ArgumentList $adminSqlLogin, $(ConvertTo-SecureString -String $password -AsPlainText -Force))

# Create a server firewall rule that allows access from the specified IP range
$serverFirewallRule = New-AzSqlServerFirewallRule -ResourceGroupName $resourceGroupName `
    -ServerName $serverName `
    -FirewallRuleName "AllowedIPs" -StartIpAddress $startIp -EndIpAddress $endIp

# Create a blank database with an S0 performance level
$database = New-AzSqlDatabase  -ResourceGroupName $resourceGroupName `
    -ServerName $serverName `
    -DatabaseName $databaseName `
    -RequestedServiceObjectiveName "S0" `
    -SampleName "AdventureWorksLT"

# Clean up deployment
# Remove-AzResourceGroup -ResourceGroupName $resourceGroupName
2
3
4
5
6
7
8
9
10
11
12
13
14
15
16
17
18
19
20
21
22
23
24
25
26
27
28
29
30
31
32
33
34
35
36
37
38
39
40
- The PowerShell extension adds functionality to better work with PowerShell in Azure Data Studio. For instance, when you hover over a PowerShell commandlet, you can see its definition. Try it out by hovering over the first line of the script (Connect-AzAccount)

(Define PowerShell functions in Azure Data Studio)
- The PowerShell extension also analyzes PowerShell in the editor and tells you if there are any problems with it. Take a look in the terminal window, under the PROBLEMS tab. In the image below, there are 4 problems in the PROBLEMS tab.
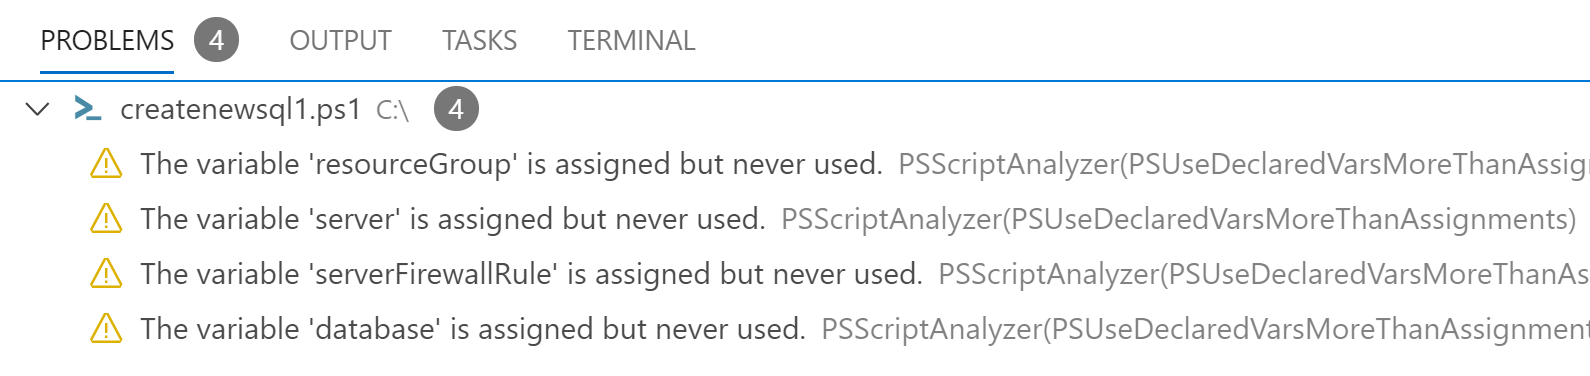
(PowerShell script problem detection in Azure Data Studio)
In Azure Data Studio, you can run a line of a script in the editor by pressing F8. Let's run the complete script. Select all the text of the script and press F8 to execute it
The first line of the script (Connect-AzAccount) will log into your Azure account. Click on the link in the output of the terminal and follow the instructions to log in. Once logged in, the script will continue to run
After a while, the script is done. To use the database from Azure Data Studio, you need to add your Azure account to it. The login that you just performed, was only for the PowerShell process, not for the Azure Data Studio itself.
- Click on the connections menu
- In the Azure tab, click on Sign into Azure...
- Click on the Add an Account button
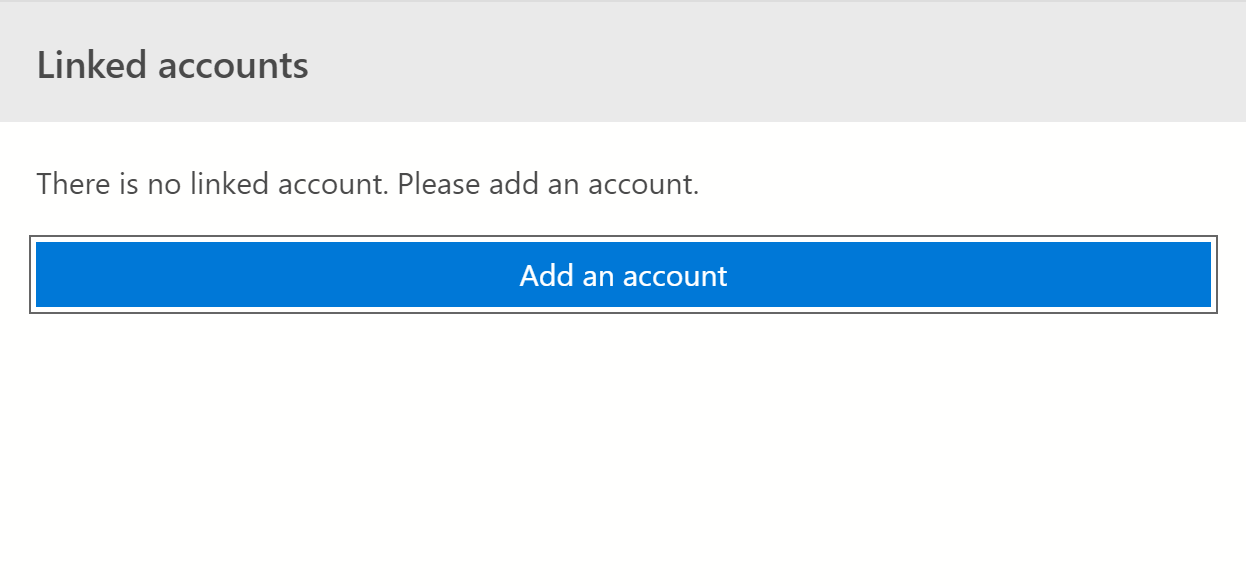
(Add Azure account to Azure Data Studio)
- Follow the instructions by opening the link and pasting in the user code and authenticating to the same Azure account that you used earlier
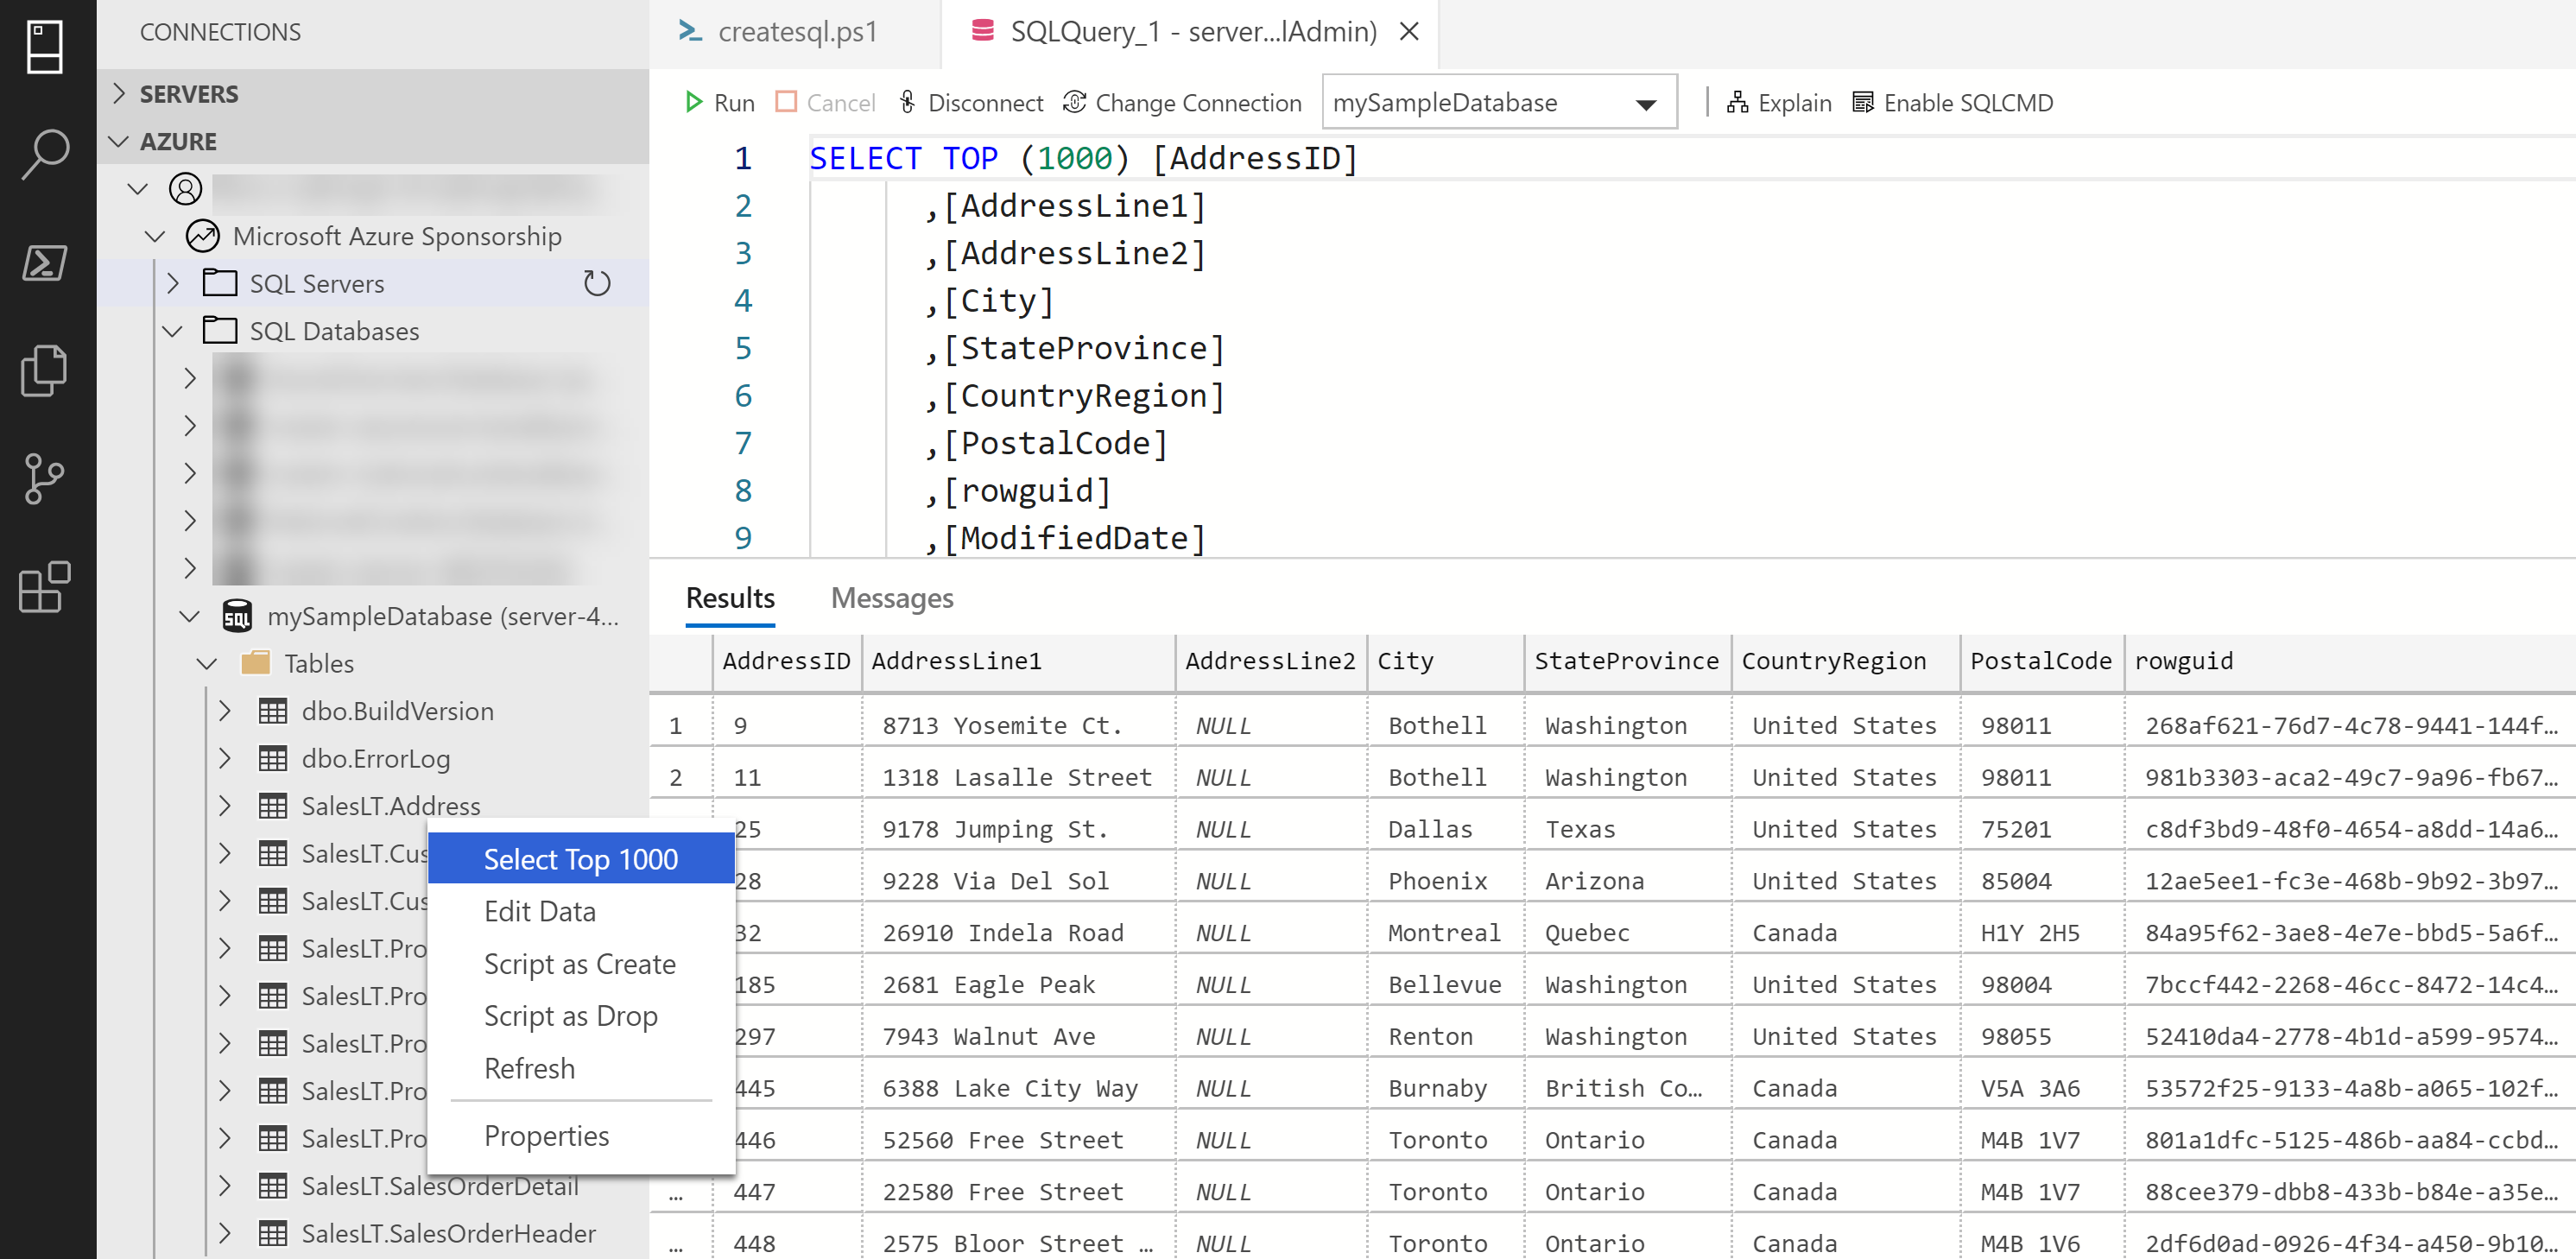
After logging into Azure, you can drill into your subscription to find the newly created SQL Database. Click on it to connect with it
You are now asked to provide credentials to log in. By default, the script uses the username SqlAdmin with the password ChangeYourAdminPassword1. Fill these in and connect to the database. You'll be able to connect to the database without adding your client IP address to the SQL Server firewall. This is because the script adds a firewall rule that allows all IP addresses to access the server. If you intend to use this script for production purposes, you need to remove this and change the server credentials
Now that you are connected to the database, you can drill down into its tables and perform typical SQL tasks, like querying data, like in the image below:
Query data in the newly created database in Azure Data Studio)
# Conclusion
Azure Data Studio (opens new window) is a really powerful tool for working with data. The PowerShell extension for Azure Data Studio (opens new window) gives you the power to use your PowerShell skills in the world of data. It helps you by adding debug support, auto-complete, script problem analytics, function definition and more. Go and check it out!
TIP
🦄 Follow me on Twitter for daily software updates and a chance to get FREE Azure sticker set shipped anywhere!
🔥 Hit the Twitter button below to share this post and spread the Azure love.