TIP
🔥 Checkout the Azure Developer page at azure.com/developer (opens new window).
💡 Learn more : Azure Application Insights overview (opens new window).
📺 Watch the video : How to configure Azure Application Insights for a Web App in Visual Studio (opens new window).
# How to configure Azure Application Insights for a Web App in Visual Studio
# Monitor your application with Application Insights
Azure Application insights (opens new window) is part of Azure Monitor (opens new window). You can use it to monitor individual applications, e.g., web applications, and track data including users, page events, errors and calls to dependencies, e.g., databases and APIs.
In this post, we'll use Visual Studio (opens new window) to enable Azure Application Insights (opens new window) for an application.
# Prerequisites
If you want to follow along, you'll need the following:
- An Azure subscription (If you don't have an Azure subscription, create a free account (opens new window) before you begin)
- The latest version of Visual Studio (opens new window) with the "ASP NET and web development" and "Azure Development" workloads enabled
# Use Visual Studio for Application Insights
We can use Visual Studio to configure Application Insights to work with a web application. Let's try it out.
- Open Visual Studio
- Choose Create a new project on the splash screen, or through the menu (File > New > Project)
- Select ASP NET Core Web App and click Next
- Enter a Name for the project
- Pick a Location
- Click Next
- Leave the rest of the settings as they are and click Create
- In the Solution Explorer, right-click the project and select "Configure Application Insights..."
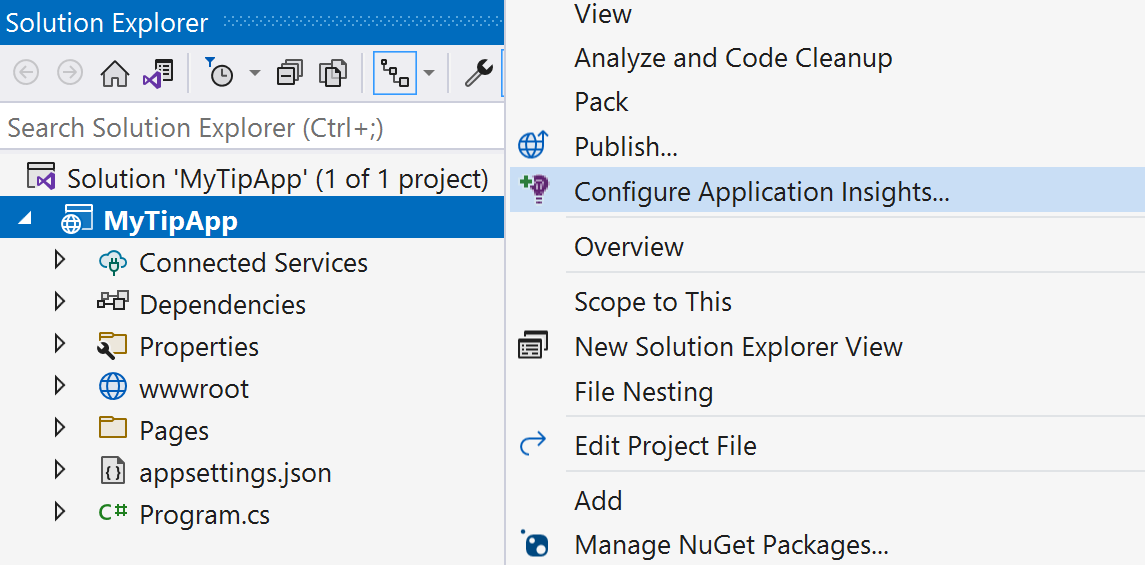
(Configure Application Insights in Visual Studio)
- You can use the Application Insights SDK without connecting to an Azure instance of Application Insights. We are not going to do that, so select Azure Application Insights and click Next
- In the next screen, click the + button to create a new Application Insights resource in Azure
- Enter a Name
- Select a Resource Group
- Pick a Location
- Click Create to create the Application Insights resource
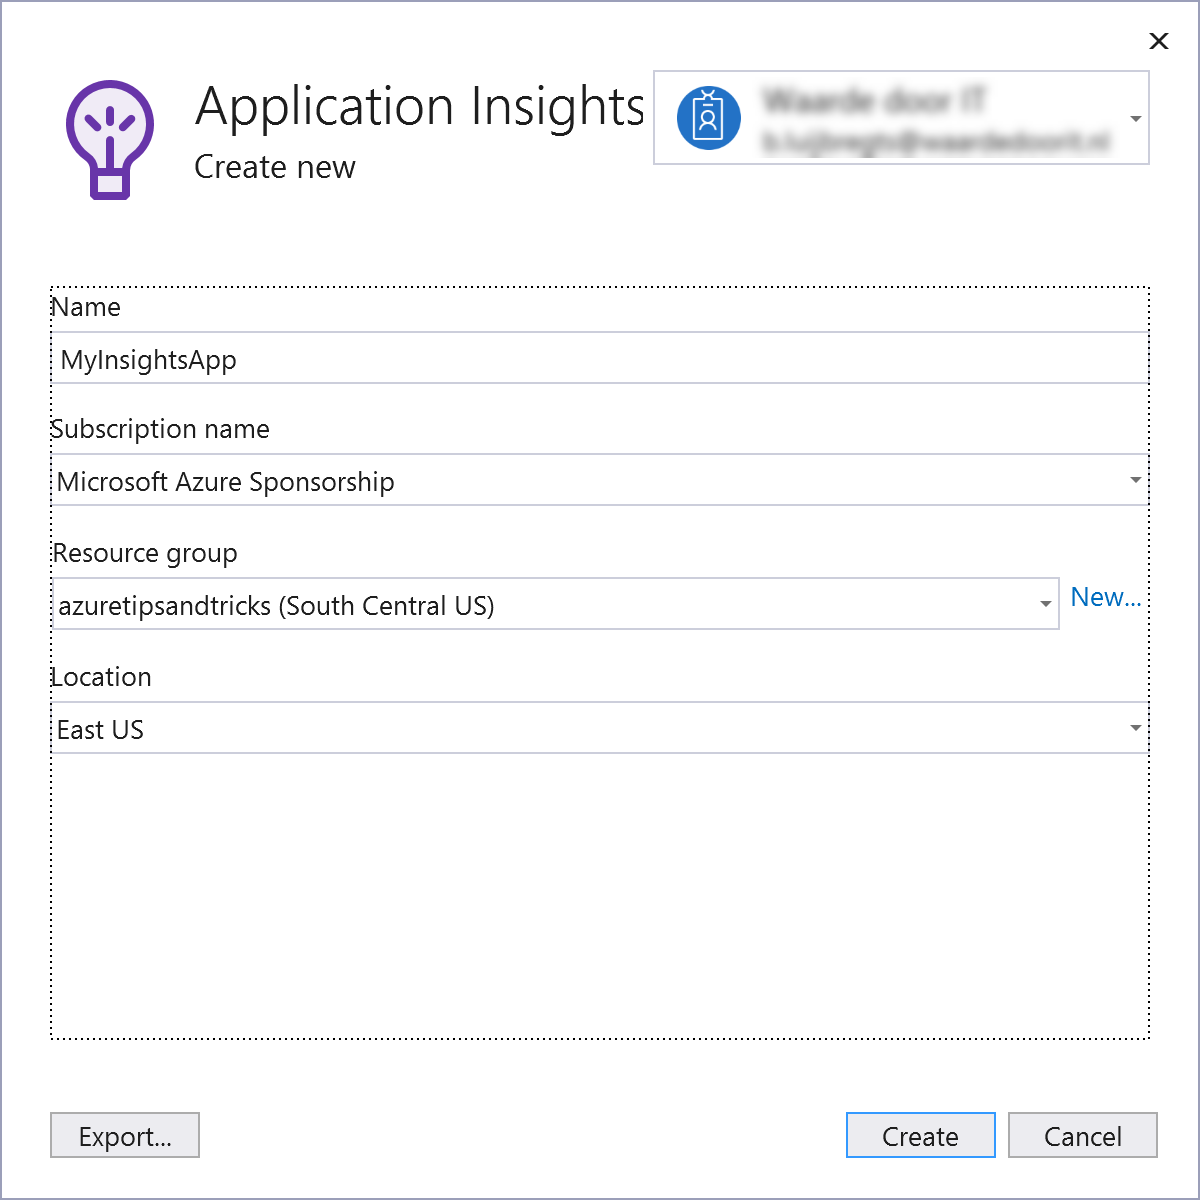
(Create Azure Application Insights from Visual Studio)
- Click Next to use the Application Insights resource that we've just created
- Leave the connection string settings as they are and click Next
- In the Summary screen, you can see what Visual Studio will do to configure Application Insights. Click Finish to let Visual Studio configure it
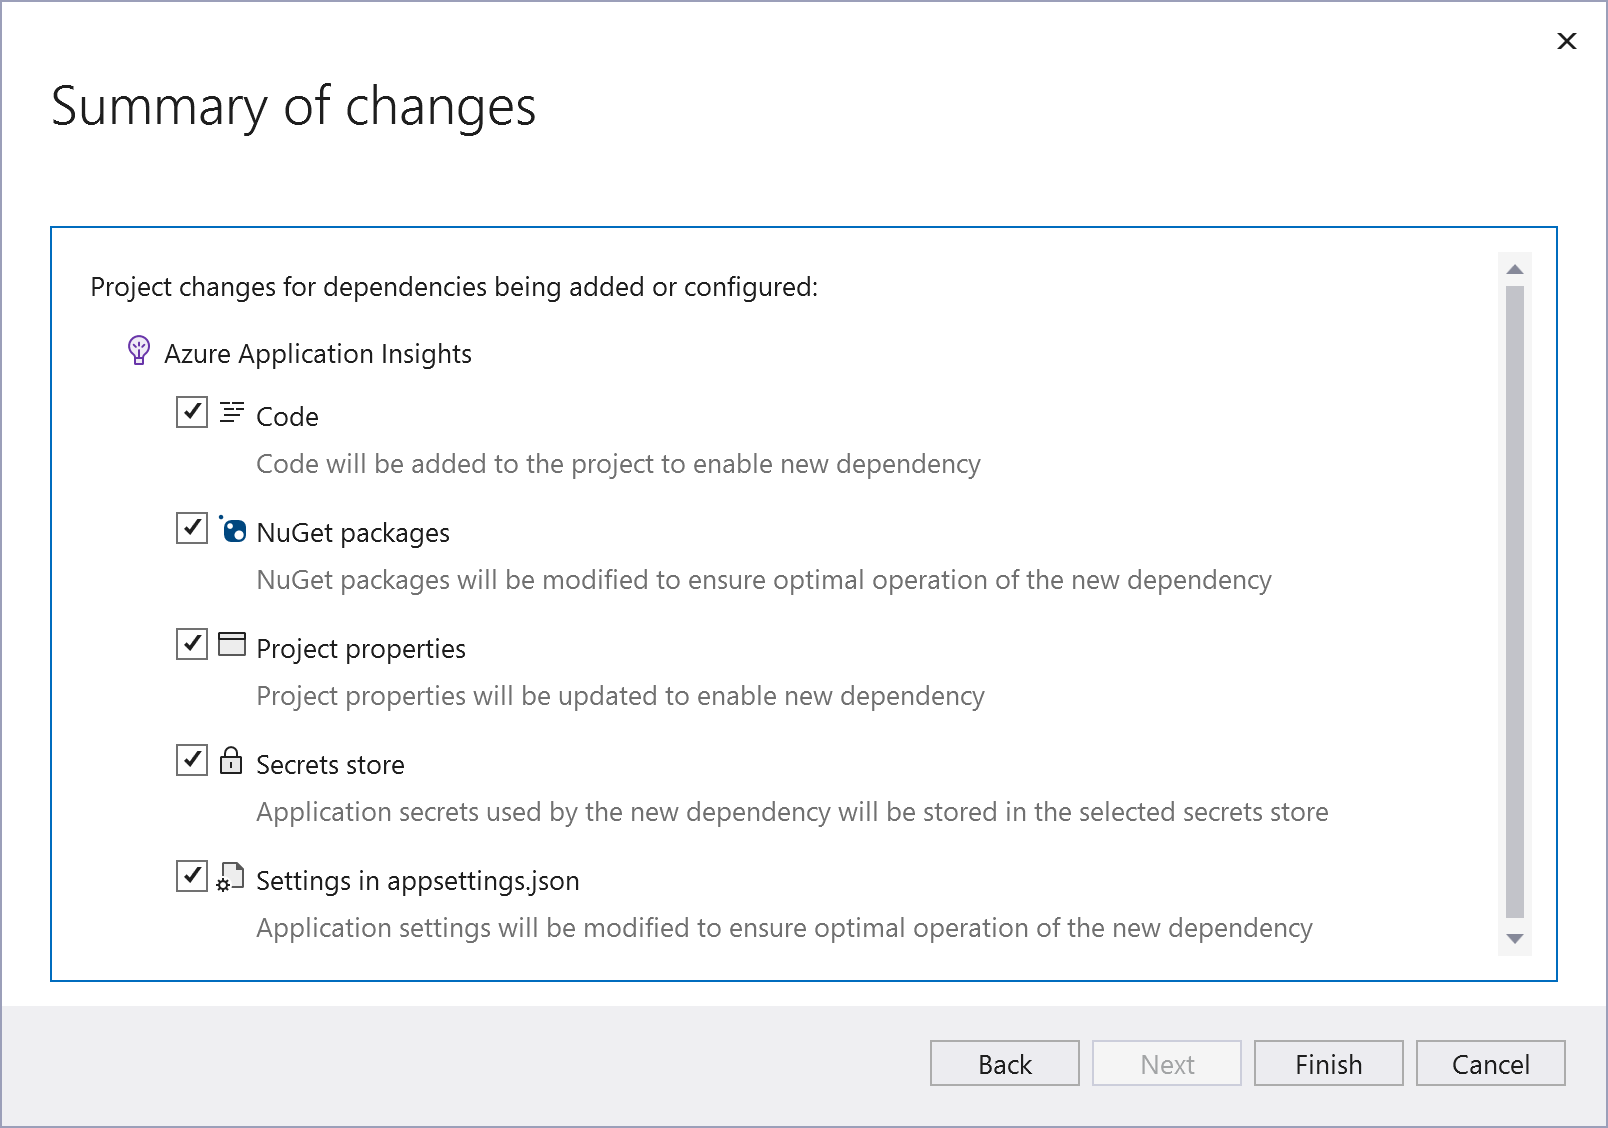
(Application Insights configuration summary)
When the configuration is complete, we can test it. Press F5 to start debugging the application and click on the links in the web app. In the Projects menu of Visual Studio, you can now select Application Insights, which will show all the data that it collected.
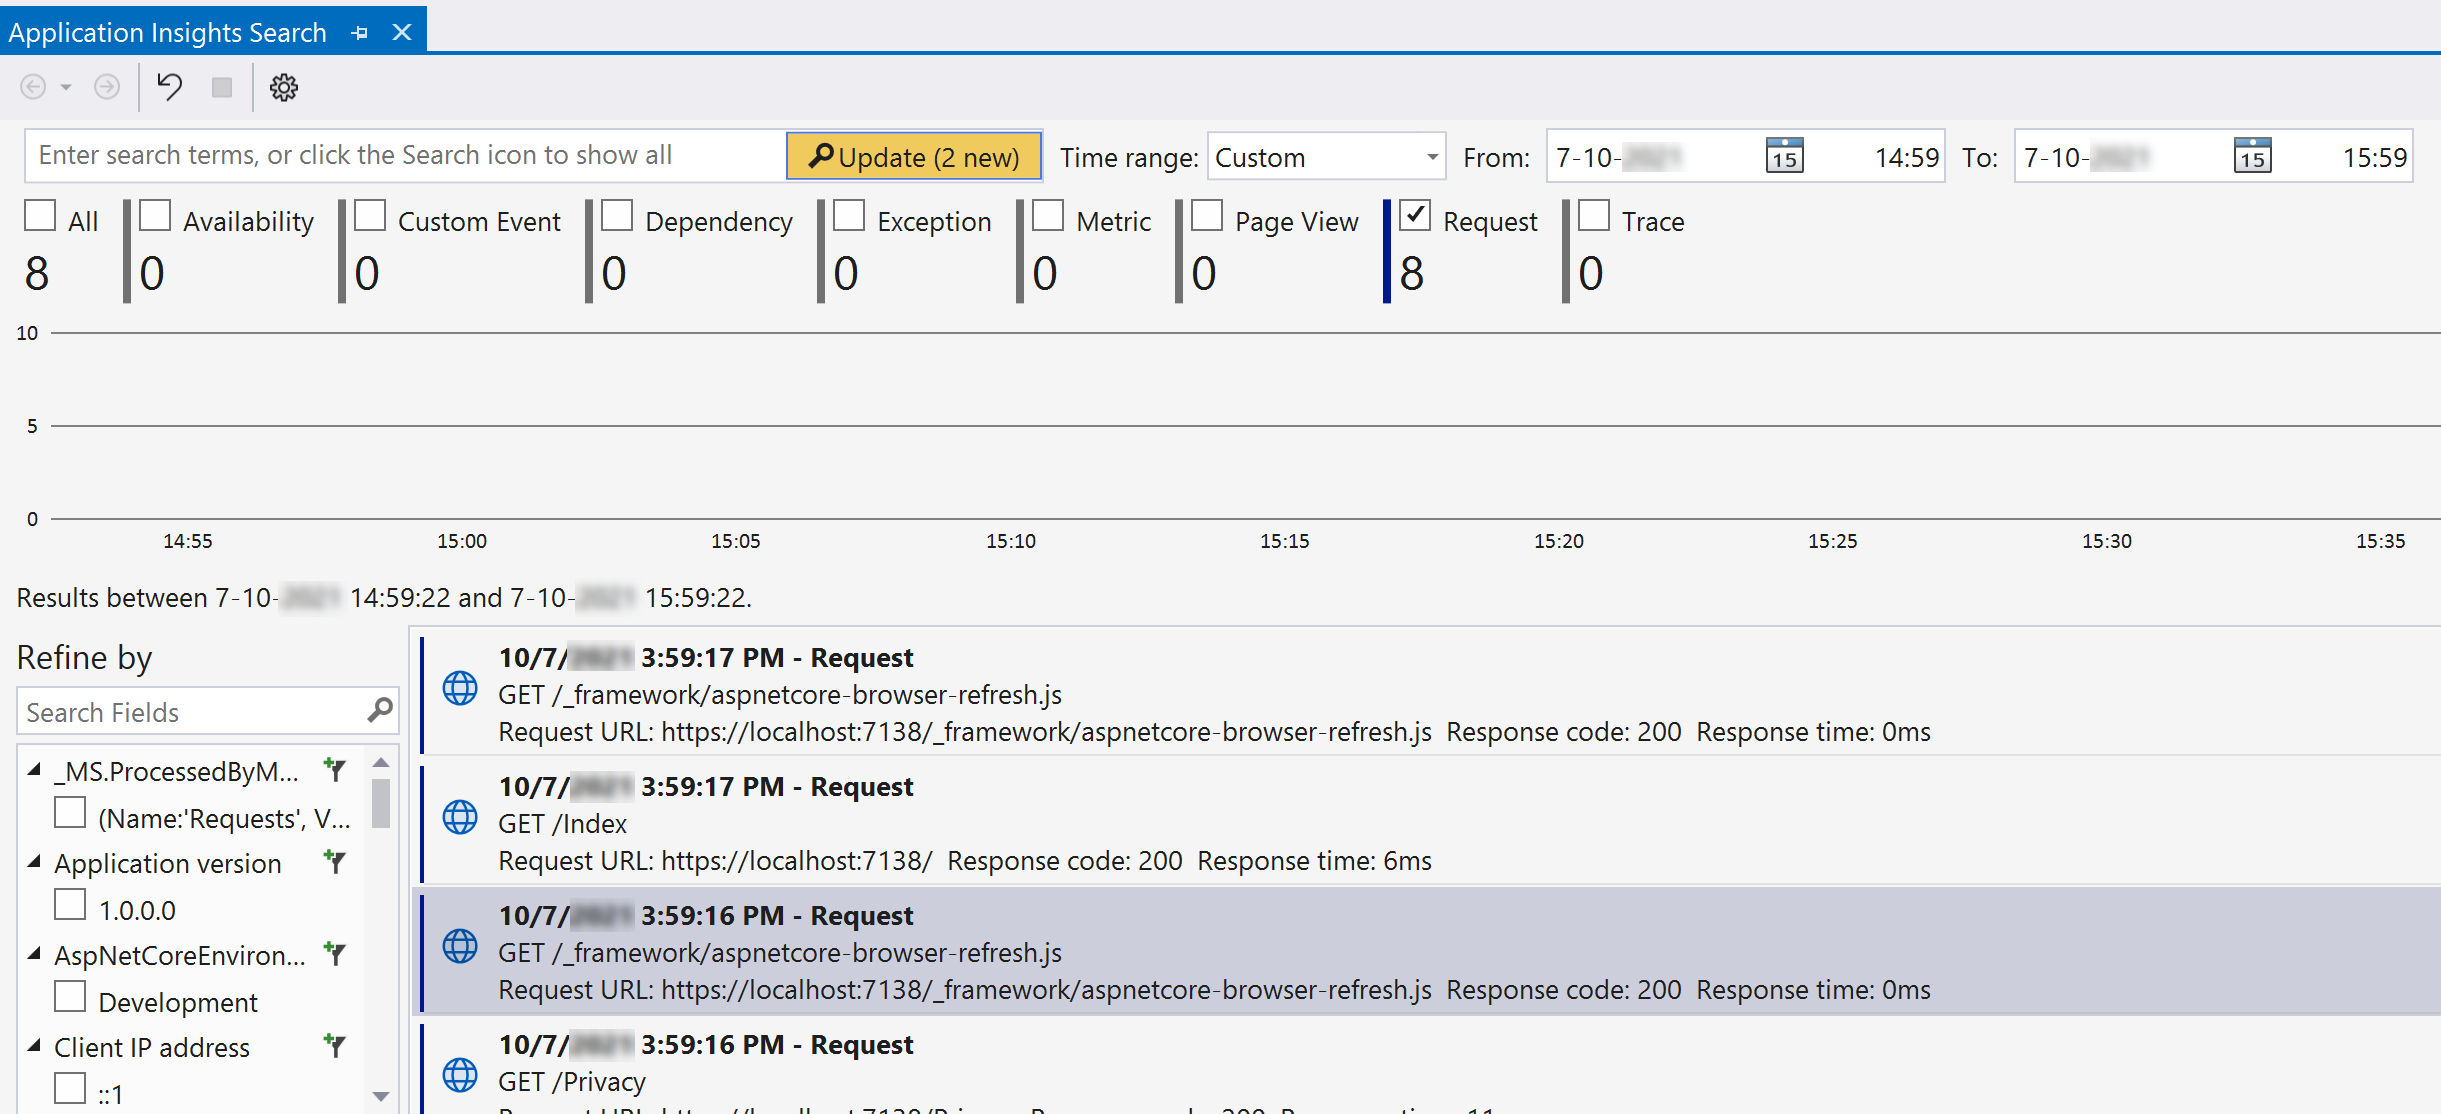
(Application Insights telemetry in Visual Studio)
And when you navigate to the Application Insights instance in the Azure portal, you can drill down into all the data, e.g. the page events.
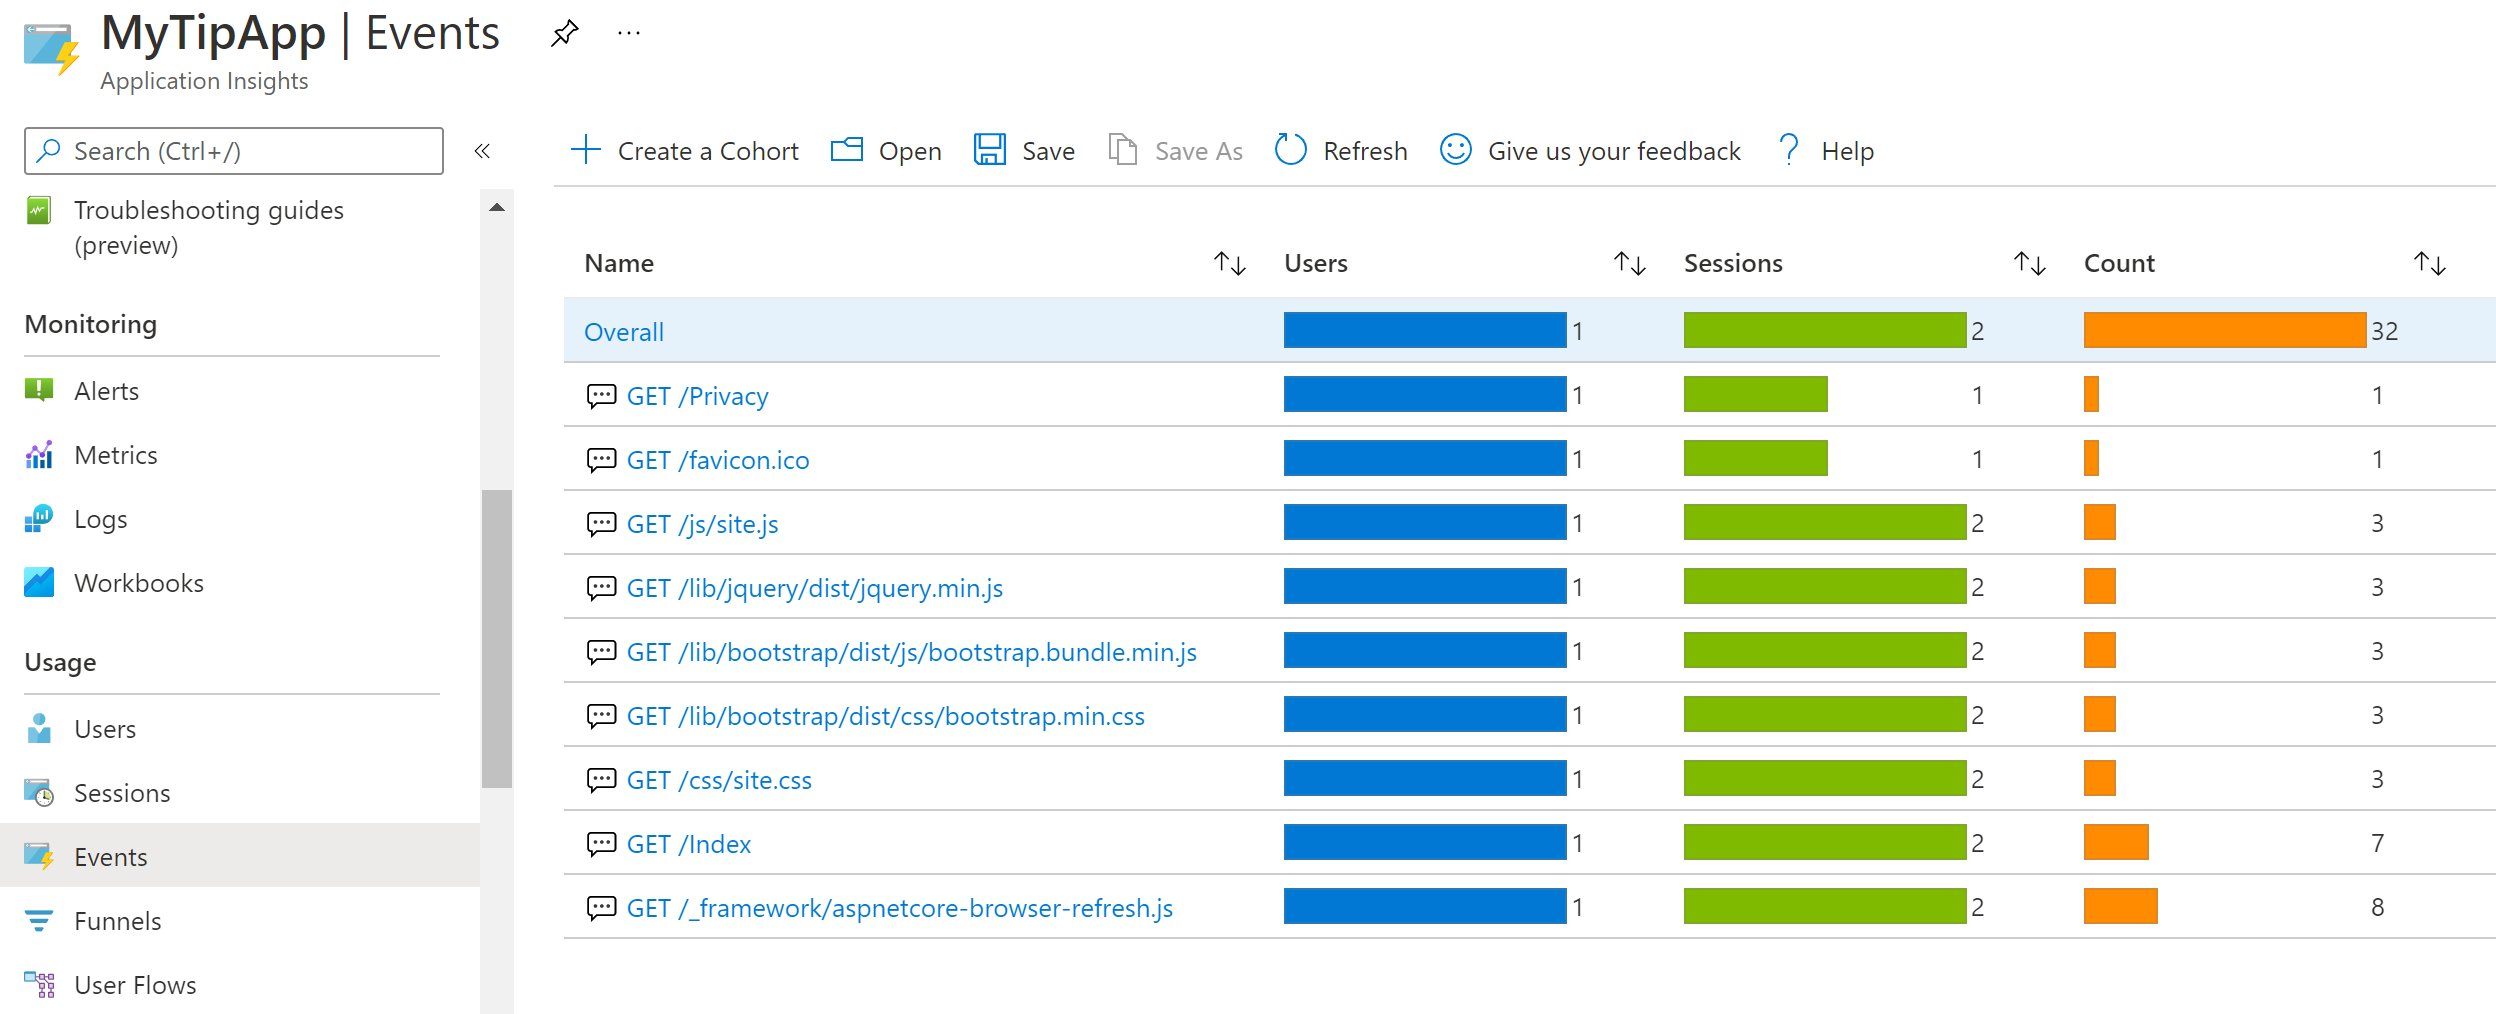
(Application Insights data in the Azure portal)
# Conclusion
Azure Application Insights (opens new window) is a powerful monitoring service for applications. Visual Studio (opens new window) makes it very easy to enable and configure, so that you can start using it instantly. Go and check it out!
