Task 02: Create a new declarative agent project
Description
You’ll use the Microsoft 365 Agents Toolkit to scaffold a new declarative agent project, connect it to Zava’s MCP server, and select the tools the agent will have access to. By the end of this task you’ll have a working project structure with an action manifest pre-populated from the live MCP server.
Success criteria
- You created a new Declarative Agent project named
Zava Claims Assistantusing the Microsoft 365 Agents Toolkit. - You connected the project to the hosted MCP server URL and fetched its tools.
- You selected all 15 available tools and confirmed that
appPackage/ai-plugin.jsonwas populated with the correct functions and server URL.
Key steps
01: Create new agent using Microsoft 365 Agents Toolkit
-
Go back to Visual Studio Code.
-
In the leftmost pane, select the Microsoft 365 Agents Toolkit (
) icon.
-
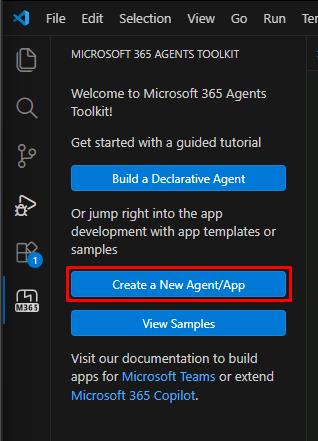
In the Agents Toolkit pane, select Create a New Agent/App.
-
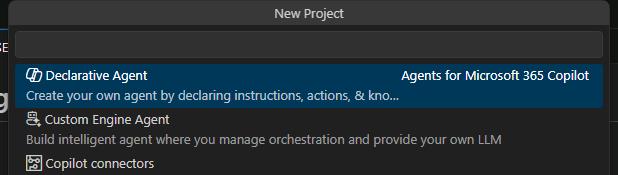
Select Declarative Agent from the template options.
-
Select Add an Action.
-
Select Start with an MCP server (preview).
-
Enter the following publicly accessible MCP Server URL:
https://claims-mcp-app.yellowcliff-c66c6908.eastus.azurecontainerapps.io/mcp/messages -
Choose the Default folder to scaffold the agent.
-
Enter the following application name:
Zava Claims AssistantYou’ll be directed to the newly created project which should have the file
.vscode/mcp.jsonopen. If the file does not open automatically, you can open it manually. This is the MCP server configuration file for VS Code to use. -
Select the checkbox for Trust the authors…, then select Yes, I trust the authors.
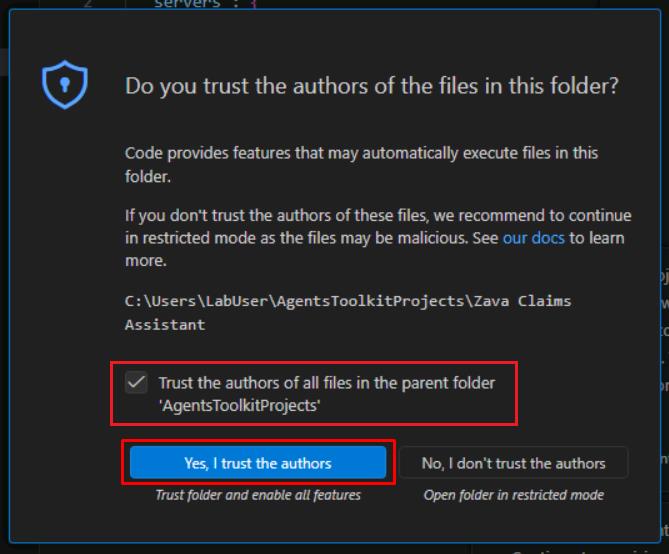
After a few moments, it should load .vscode\mcp.json.
-
In mcp.json, below “servers”, select the Start button to fetch tools from your server.
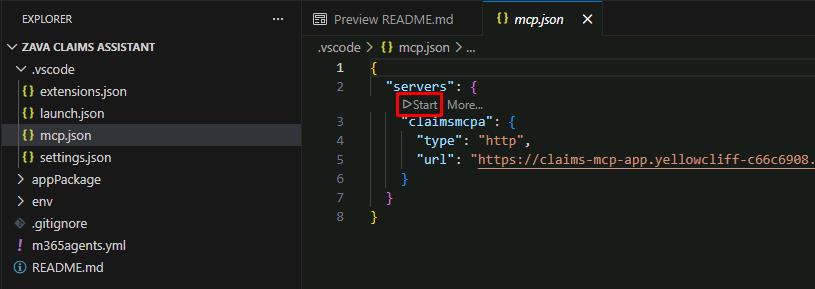
Once started, you’ll see the number of tools and prompts available.
-
Select ATK:Fetch action from MCP in the code, to select tools you want to add to the agent.
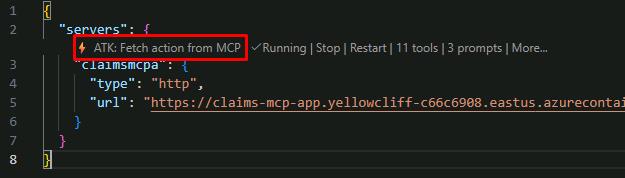
If you do not see the option ATK:Fetch action from MCP:
-
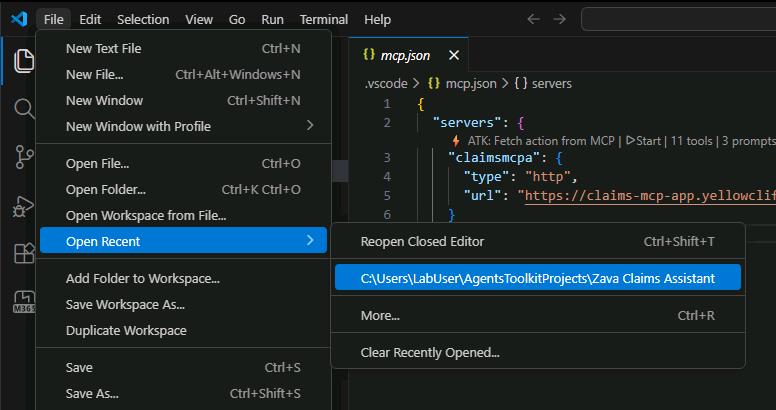
Close the VS Code window.
-
Relaunch the app by selecting File, then Open recent, and then C:\Users\LabUser\AgentsToolkitProjects\Zava Claims Assistant.
-
Select Start again.
-
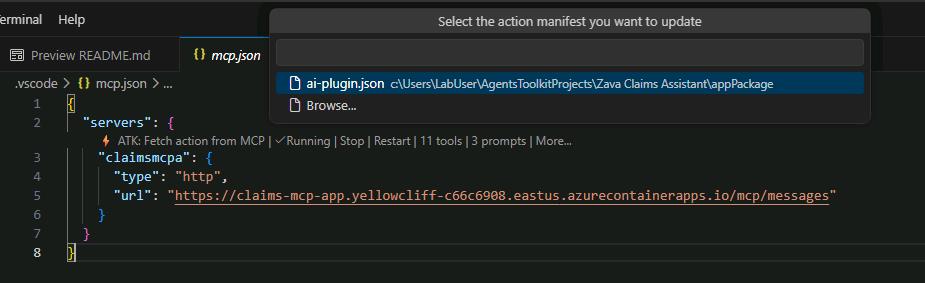
Select ATK:Fetch action from MCP.
-
-
Select ai-plugin.json.
-
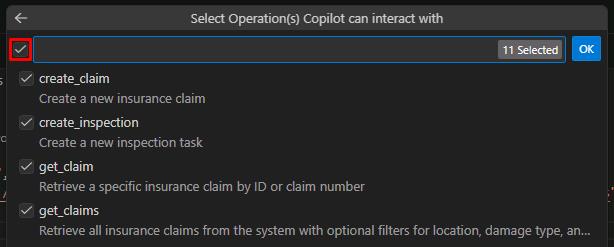
Select all the available tools.
-
Select OK.
This step will populate the action manifest ai-plugin.json with the required functions, MCP server URL, etc., which are needed for actions in an agent.
02: Understand the action manifest update from previous step
-
In appPackage/ai-plugin.json, examine the structure with your chosen tools and MCP server url pre-populated:
  {
      "$schema": "https://aka.ms/json-schemas/copilot-extensions/v2.1/plugin.schema.json",
      "schema_version": "v2.4",
      "name_for_human": "Zava Claims Assistant",
      "description_for_human": "Zava Claims Assistant$",
      "contact_email": "publisher-email@example.com",
      "namespace": "zavaclaimsassistant",
      "functions": [
          {
              "name": "create_claim",
              "description": "Create a new insurance claim",
              "parameters": {
                  ...
  }
You now have a basic declarative agent that is connected to your MCP Server with tools ready for use.