Task 05: Configure connected agent capabilities
Description
To enable orchestration, you need to link Zava Care to its two worker agents using their Microsoft 365 Title IDs. You’ll retrieve these IDs from each agent’s environment file and add a worker_agents block to the Zava Care declarative agent manifest.
Success criteria
- You retrieved the
M365_TITLE_IDvalues from theenv/.env.devfiles for both the Zava Claims Assistant and Zava Procurement projects. - You added a correctly formatted
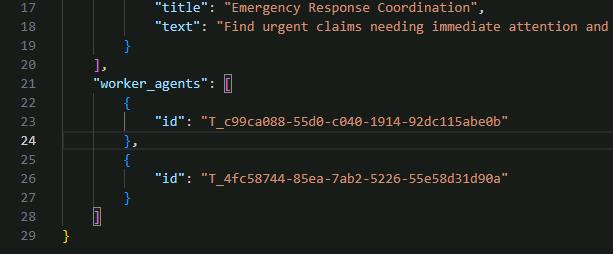
worker_agentsblock toappPackage/declarativeAgent.jsonin the Zava Care project referencing both IDs. - The file is valid JSON with no formatting errors after running Format Document.
Key steps
01: Get the Zava Claims agent ID
-
Swap to your Zava Claims Assistant VS Code project window.
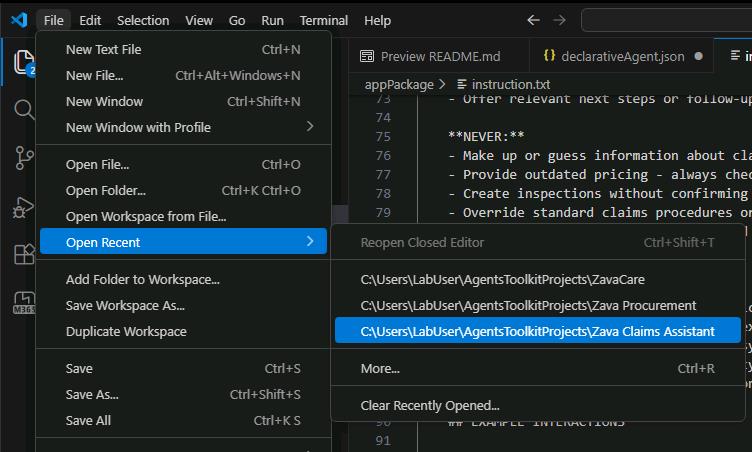
Or reopen by selecting File > Open Recent > …\Zava Claims Assistant
-
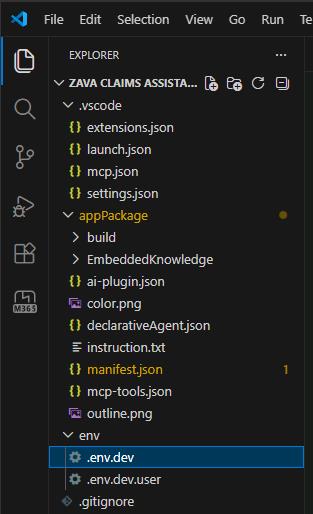
Open the env/.env.dev file.
-
Copy the value of M365_TITLE_ID and paste it in the text box below.
Claims Agent ID
@lab.TextBox(ClaimsAgentID)
The pasted value will be used for reference in a future step.
02: Get the Zava Procurement agent ID
-
Swap to your Zava Procurement VS Code window.
Or reopen by selecting File > Open Recent > …\Zava Procurement
-
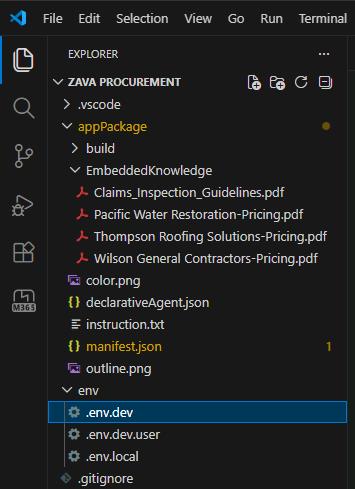
Open the env/.env.dev file.
-
Copy the value of M365_TITLE_ID and paste it in the text box below.
Procurement Agent ID
@lab.TextBox(ProcurementAgentID)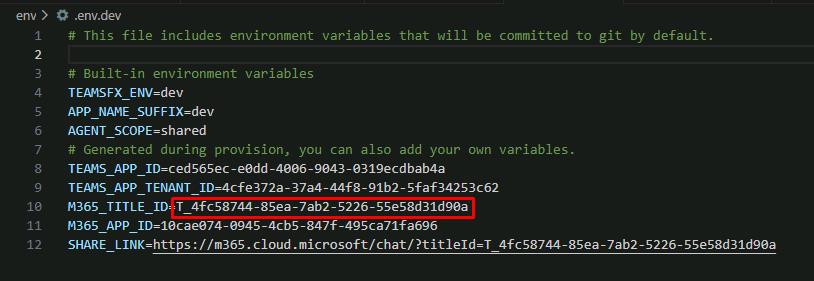
03: Connect the agents
-
Swap to your Zava Care orchestrator’s VS Code project window.
-
Open file appPackage/declarativeAgent.json
-
Locate the end of the conversation_starters array on line 20.
-
Add a comma (
,) after the closing bracket of conversation_starters, then create a new line.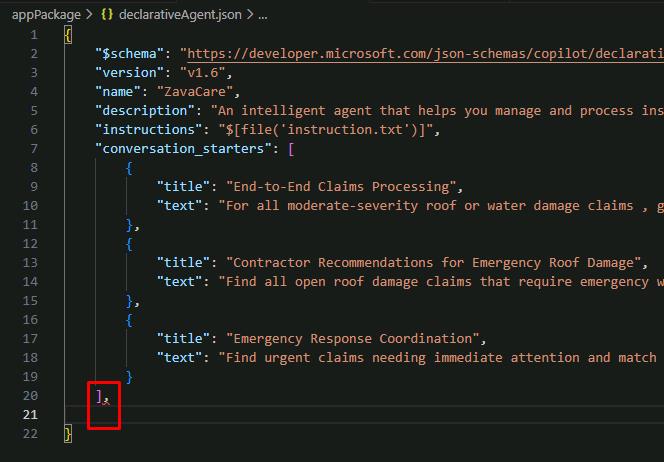
-
Paste the following code in the new line:
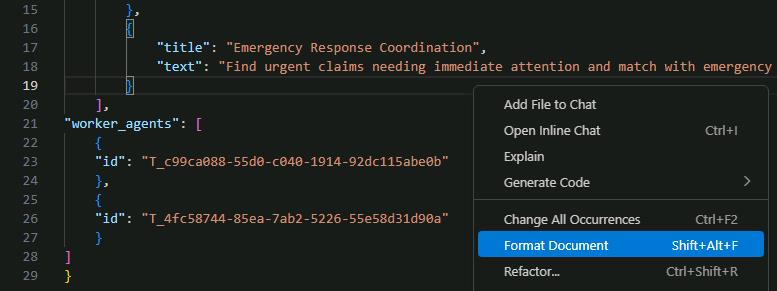
 "worker_agents": [
     {
     "id": "@lab.Variable(ClaimsAgentID)"
     },
     {
     "id": "@lab.Variable(ProcurementAgentID)"
     }
 ]
{: .warning } This uses the values for M365_TITLE_ID pasted in the text boxes in the previous steps.
-
Right-click anywhere in the file, then select Format Document to fix the spacing.
-
Save your file changes by selecting File, then Save All.
Your orchestrator agent is now connected to both specialized agents!